Marco Sebastiano Alessi
Nov 19th, 2022There are endless tools you can rely on when using video editing software like Adobe Premiere Pro: from changing the length of a video, adding visual effects and texts, or even enhancing audio.
Unfortunately, sometimes you might end up with footage that’s not as high-quality as you hoped, and you’ll need to cut off scenes you don’t want in our video frame or that were not supposed to be filmed, such as people passing by, signs of brands you can’t show, or something above or below the frame.
Just like learning how to remove background noise in Premiere Pro, the crop tool in Premiere Pro is one of those “Swiss-knife” editing tools that can help you get rid of unwanted parts and crop a specific area to create professional results.
With this guide, you’ll learn to crop videos professionally in Premiere Pro.
Let’s dive in!
Cropping a video means cutting a region of the frame of your visual content.
The section you erase will show black bars that you can fill with other elements such as an image, a background color, or different videos, then stretch the image to zoom the part of the video you decided to keep.
Many video editors use the crop effect to create a split-screen effect, add a background to videos recorded vertically on a mobile phone, focus the attention on a specific detail in the scene, create transitions, and many other creative effects.
Follow this guide to crop a video in Adobe Premiere Pro and learn how to adjust your content afterward. Let’s do this step by step.
There are different ways to import a clip to Adobe Premiere Pro, and I’m going to show you all of them so you can use the one that better fits your workflow.
1. Go to File on the upper menu and select Import File. In the pop-up window, you can search for a video clip on any folder on your computer or external storage devices connected to your computer. Once you find the folder and video you want, click open to import it.
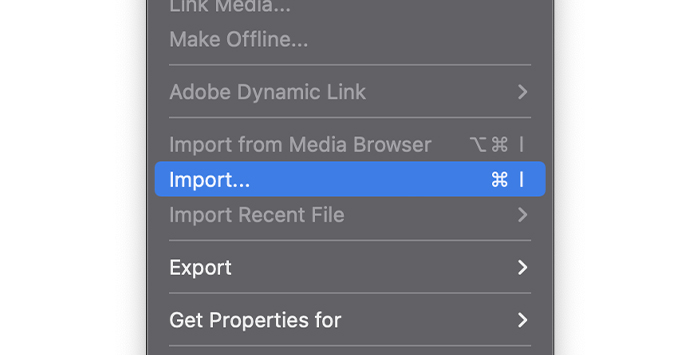
2. You can access the Import menu if you right-click on the project area. A drop-down menu will appear; click on Import to open the Import window and search for the video.
3. If you use the shortcuts, try pressing CTRL+I or CMD+I on your keyboard to open the import window.
4. Another way to do it is by dragging and dropping the files from the Explorer Window or Finder into Premiere Pro.
Now you have the video clip on our project, but you can’t edit it from there. The next step is to add the video clip to the Timeline so you can edit it from there.
1. Drag and drop the video clip to the Timeline area to get everything ready for your editing process.
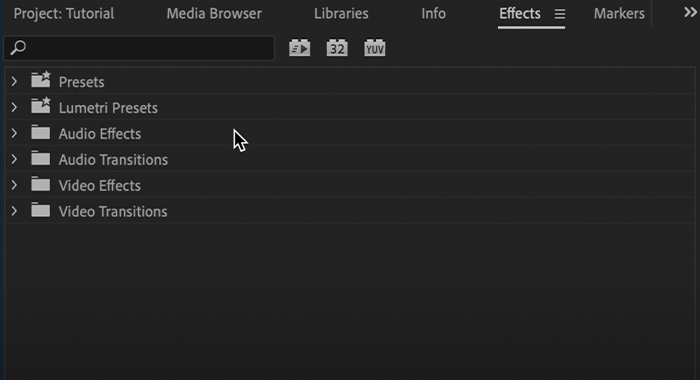
With your footage on the Timeline, you can start adding the effect you need from the Effects menu. If you can’t see the effect menu, go to Window on the main menu and ensure Effects is marked to have the Effects tab visible.
You need to search for the crop tool, which you can find in the project panel.
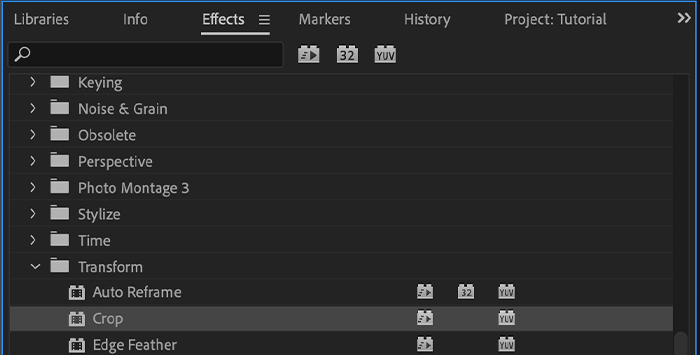
1. You can use the search toolbox and type Crop to find it, or you can find it under Video Effects > Transform > Crop.
2. To add the crop effect to the video track, select it on the Timeline and double-click on Crop to add it. You can also drag and drop the crop effect to the desired video track.
As soon as you add the new effect to the video on the Timeline, a new section will appear on the Effects Control called Crop.
1. Go to the Effects Control panel and scroll down until you see Crop.
2. Select the arrow on the left to display more controls for that effect.
We can do the crop with three different methods, using the handles on the preview, typing the percentages, and using the sliders. I’ll provide you with the steps for each one.
1. From the Effects Control panel, click on Crop.
2. Go over the preview and select the handles around the video.
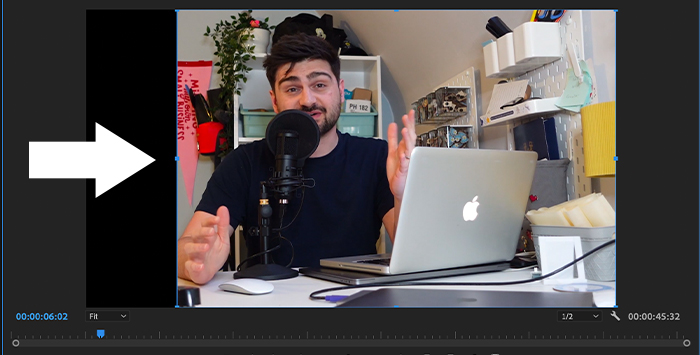
3. Drag the handles around the video to move the margins and do the crop. You’ll see black bars replacing the video image.
This method works like cropping an image and can be a quick and straightforward solution.
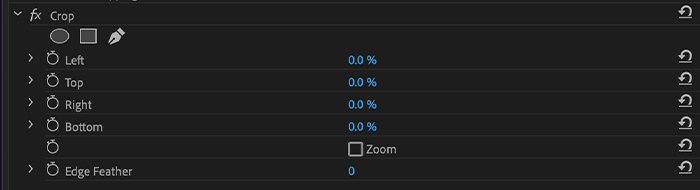
1. In the Effects Control panel, scroll to Crop.

2. Click on the arrow to display the Left, Top, Right, and Bottom controls.
3. Click on the arrows to the left of each section to display the slider for each side.
4. Use the slider to crop the video’s left, Top, Right, and Bottom sides and add the black bars around it.
If you want more control over your crop effect, you can type in the percentages for each side to create a more accurate crop for your video.
1. In the project panel, go to the video Effects Control and search for the Crop controls.
2. Display the Top, Left, Right, and Bottom percentages control by clicking on the arrow to the left.
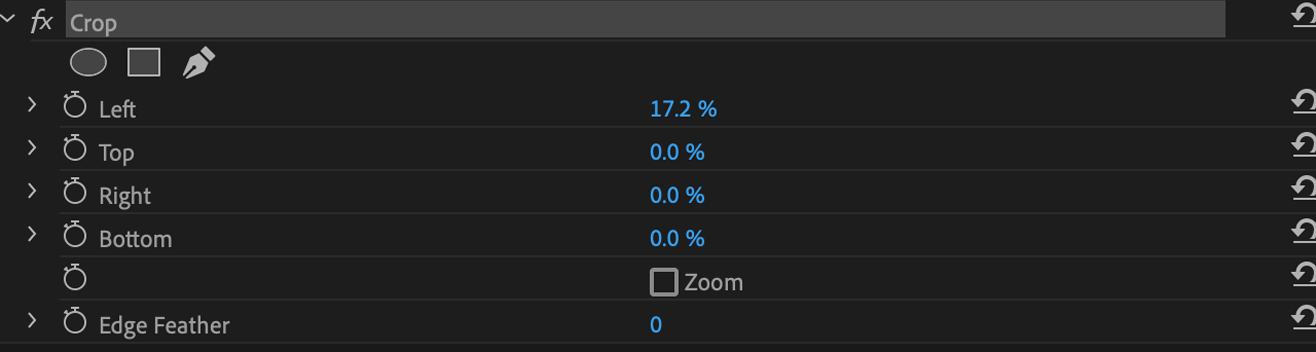
3. Hover the cursor over the percentages and drag it to increase or decrease the number. You’ll notice in the preview the edges on that side will begin to crop the video.

4. If you prefer, you can double-click the percentage and type in the exact number you want.
5. Preview the video.
With this method, you can crop clips if you’re creating a split-screen video, so all your videos will have the same size.
You can also adjust the edges of the new crop video, zoom it, or change the position of the video.

The Edge Feather option allows us to smooth the edges of the crop video. It can be helpful when you add a background color or create a split screen, so the video looks like it’s floating over the background or to create a transition effect.
1. To change the values, hover the cursor over 0 until two arrows appear, and click and drag to increase or decrease the effect.
2. Increasing the number will give the edges a gradient and a softer look.
3. Decreasing the value will sharpen the edges.
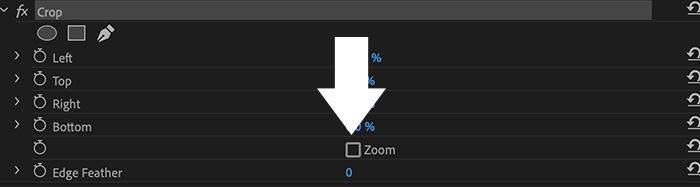
Under Crop, there’s also a Zoom checkbox. If you click on Zoom, the video clips will stretch to fill the frame, removing the black spaces left by the crop. Be aware that this stretch might affect the video quality and proportions of the image.
We can adjust the position of the video clips to fit a multi-screen video where you want different scenes to be played simultaneously in the same frame.
1. Select the clip you want to move.

2. In the project panel, go to Effects Control and search for Motion > Position.
3. Use the position values to move the video. The first value moves the video clips horizontally, and the second vertically.
4. Under Motion, you can also scale the video size to fit the project.
Here’s a list of tips to make you crop a video in Premiere Pro like a professional filmmaker.
Make sure the cropped video is compatible with your project’s output aspect ratio. The aspect ratio is the relationship between the video’s width and height.
The aspect ratio most commonly used on movies and YouTube is 16:9; for YouTube shorts, Instagram reels, and TikTok is 9:16; and for Facebook or Instagram’s feed, the aspect ratio used is either 1:1 or 4:5.
If you crop videos with a higher resolution than your project, you’ll avoid low video resolution when zooming and scaling the video. Take this into consideration before setting up your project. If the videos you’ll crop are low quality, lower the resolution of the project to mitigate the quality loss.
Cropping a video in Premiere Pro can result in a loss of image and will affect your final product. Crop a video only if necessary, use the tool wisely, and remember that sometimes less is more.
With the crop tool, you can create many variations of professional intros, transitions, and scenes for your video in Premiere Pro. Play around with every control in the crop effect library and use your unique creativity to discover its full potential.