Marco Sebastiano Alessi
Nov 24th, 2022With Adobe Premiere Pro, we can make incredible videos and professional audio editing. Applying effects to your videos will make them look and sound professional, something you can do easily, thanks to the vast array of Premiere Pro effects.
If you just started using Premiere Pro, you have a lot of tools to discover and experiment with. From audio enhancements to tools that let you choose How to Remove Background noise in Premiere Pro, the list of plugins available to make your audio sound professional will satisfy the needs of professionals and beginners alike.
One effect, in particular, will help you make your audio transitions much smoother. I’m sure you’ve seen this effect in videos and movies: at the end of a sequence, the image blends and vanishes into the following clip. However, the sounds blend as well as the image: this effect is called fade-out audio transition.
So let’s find out how to fade out audio in premiere pro.
With sounds, audio fade is a gradual reduction in the volume of an audio track, usually used at the end of a clip or as a transition between two different audio clips. Audio transition effects are common in music and video for commercials, TV, or movies.
When it comes to video, audio fade is a transition between different takes or scenes. They help make the audio transition smoother so the scene doesn’t end abruptly.
Adobe Premiere Pro is a great software when it comes to fade-out audio and is the favorite of many professional filmmakers. Let’s find out how to make the most of this audio fade effect.
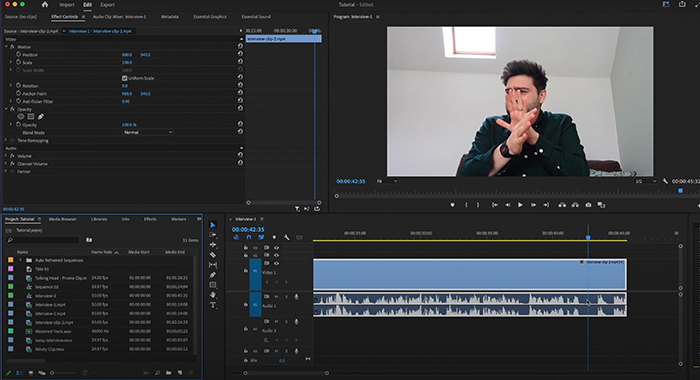
Open your project or import the audio to your timeline panel and select the audio track you want to add a fade-out transition. If you have different clips you wish to edit, choose one to follow these steps, and I’ll show you how to repeat the process faster at a later step.
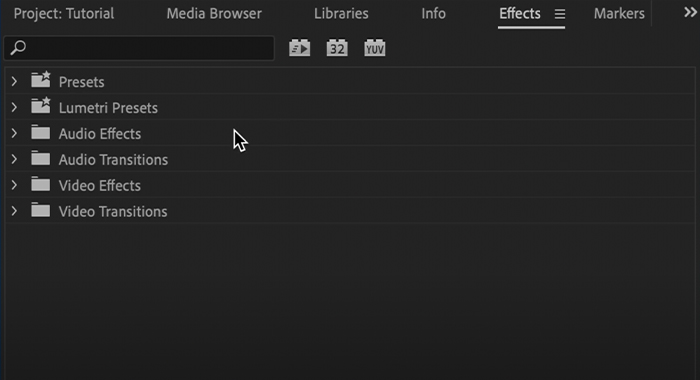
If you don’t see your effects panel on your left side, go to your menu bar, click on Windows, scroll down until you find Effects, and mark it by clicking on it. Now you should see your Effects panel.
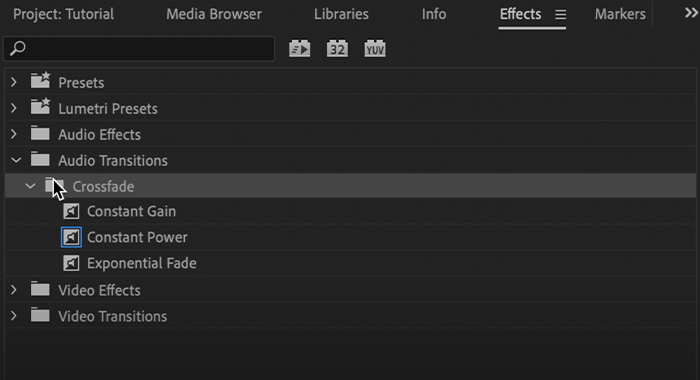
With your Effects panel open, click on Audio Transitions, then Crossfades. In this section, you’ll find three types of fades (we’ll analyze each one later on.)
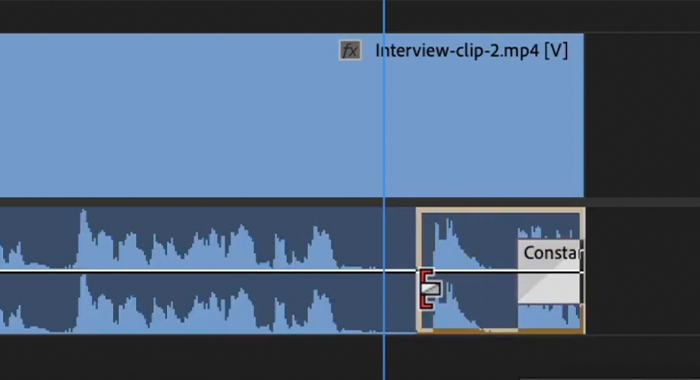
Click and drag the transitions you want to use to the end of your audio track in the timeline. Preview to hear the fade out. You can try the different types of fades until you find the one you like.
If you want to change the duration of the audio transition, there are two ways of doing it.
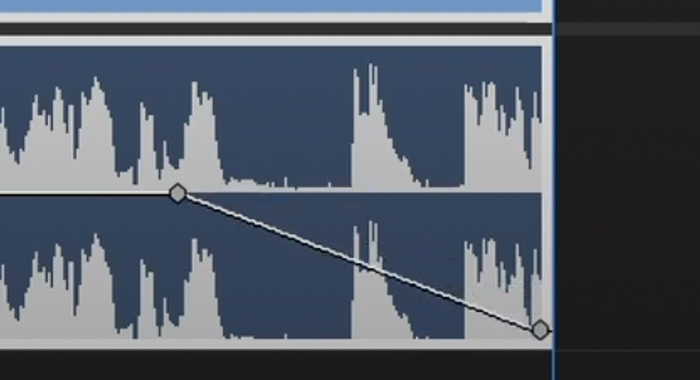
1. Select the fade on your timeline. Hover on the beginning of the effect (not the audio clip) and click and drag it to change the duration of the effect (you’ll see your cursor change when you can click and drag the effect.) It won’t change your audio speed, just the volume.
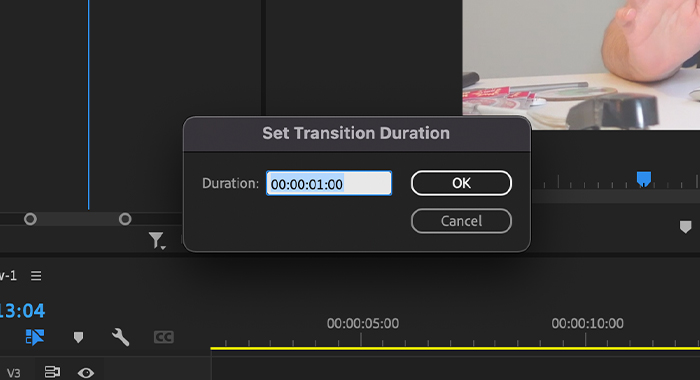
2. Another way to do it is to double-click on the effect on your timeline. A little pop-up window will show where you can set the transition duration. Input the time and click OK.
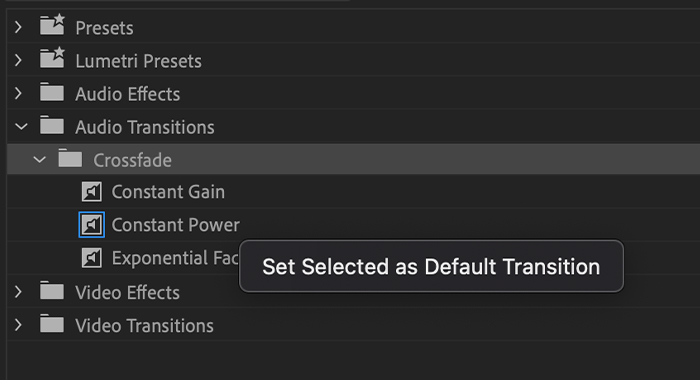
If you constantly work with transitions, you probably want to customize your settings to make things faster in the future. By default, the Constant Power transition is selected. If you prefer other transitions, you can change it to default.
You can also set a default transition duration.
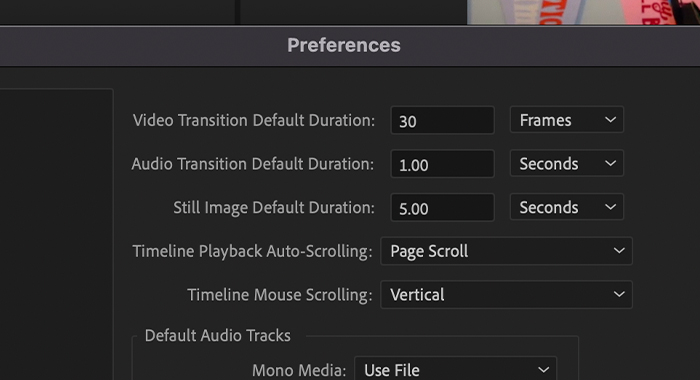
1. Go to Premiere Pro Preferences and choose Timeline.
2. In the Preferences window, find the second option Audio Transition Default Duration. Change the time and set it by frame or seconds and click OK.
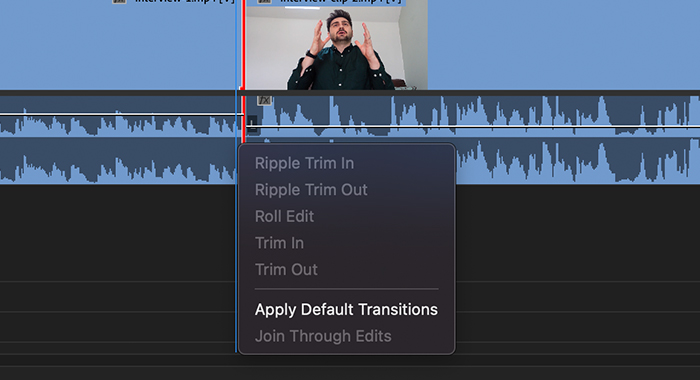
Now that you have saved your preferences adding fades to your audio will be faster than ever. On your timeline panel, go to the end of the audio and right-click on it.
Choose Apply Default Transitions, and our saved configuration will apply. You can still make changes as every project is different, but this will save you a lot of time if you have a preferred crossfade.
Learning the keyboard shortcuts of our software allows us to have a smoother workflow. To fade out audio on your selected clips, you can use one of the following shortcuts:
Using the keyboard shortcuts will automatically add the default fade and duration to the audio clip. If you have a sequence with separate clips, select all clips and use the shortcut, it will add a fade-out to all adjacent audio clips in the timeline panel.
Premiere Pro offers three different fades to use. They can be either fade in, fade out, or crossfade between clips.
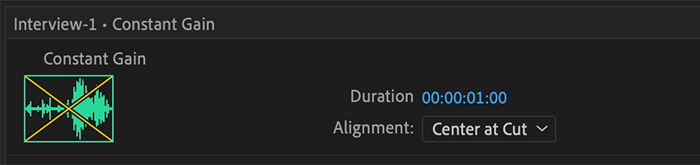
The Constant Gain crossfade will decrease your clips’ volume evenly. In some situations, the constant gain transition may sound hasty compared to the other options, as it cuts the end of the audio very quickly.
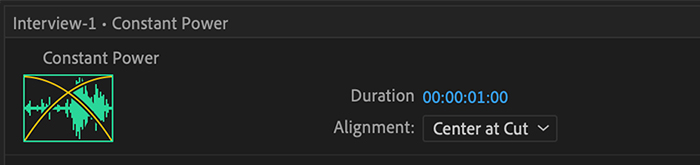
The Constant Power crossfade will give a smooth transition between clips. In the first clip, it will decrease the audio slowly and faster at the end. The opposite will happen with the second clip, which will increase the audio quickly at first and slower at the end.
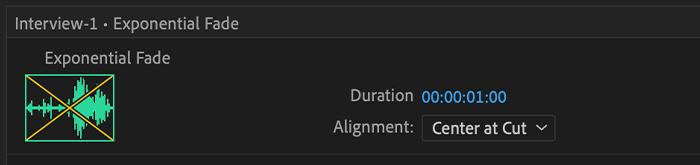
The exponential fade transition works in a similar way to the Constant Power transition, but here the transition is more gradual. It decreases the volume in a constant curve to deliver a seamless fading effect. The exponential fade is the most used fade-out effect in Premiere Pro.
That’s it! You just learned the easiest ways to create fade audio in Adobe Premiere Pro. This is suitable software for all kinds of audio editing purposes, so as you experiment with transitions, I’m sure you’ll figure out how to blend two adjacent audio clips professionally and create your own unique way to fade out audio.
Additional reading:


