Graham Efurhievwe
Mar 24th, 2022Anyone that works with sound or in music production knows how frustrating it is to find your audio distorted after a long day of tracking. Technically, distortion is the change of the original audio signal to something undesired. When a sound is distorted, there’s a change in the shape or waveform of the sound.
Distortion is tricky. Once an audio file is distorted, you can’t just yank the distorted sounds out. You can do things to soften the blow, but once the signal is distorted, parts of the audio waveform are lost, never to be recovered.
Distortion occurs when you start to notice the sound is glitching and losing quality. It can occur at almost any point in the audio pathway, from the microphone to the speaker. The first step is to find out where exactly the distortion is coming from.

The problem may be from simple human errors, such as improper level settings, misaligning microphones, recording too loud, and more. Even if you keep your setup relatively error-free, noise, RF interference, rumbles, and faulty equipment can distort your sound.
Making audio sound immaculate after distortion isn’t easy. It’s like repairing a broken mug. You can see how distortion caused the cracks. You can try to put the pieces together again but you’re not getting an unbroken mug.
Even after repair, subtle sound problems with audio may linger. So, even the best software or techniques risk creating an artifact. An artifact is a sonic material that is accidental or unwanted, caused by the overzealous editing or manipulation of a sound.
But don’t worry, with time, patience, and careful listening, distorted audio can be fixed to a fairly satisfactory level. In this article, we’ll discuss the common forms of distortion and how to fix them when you encounter them in your audio.
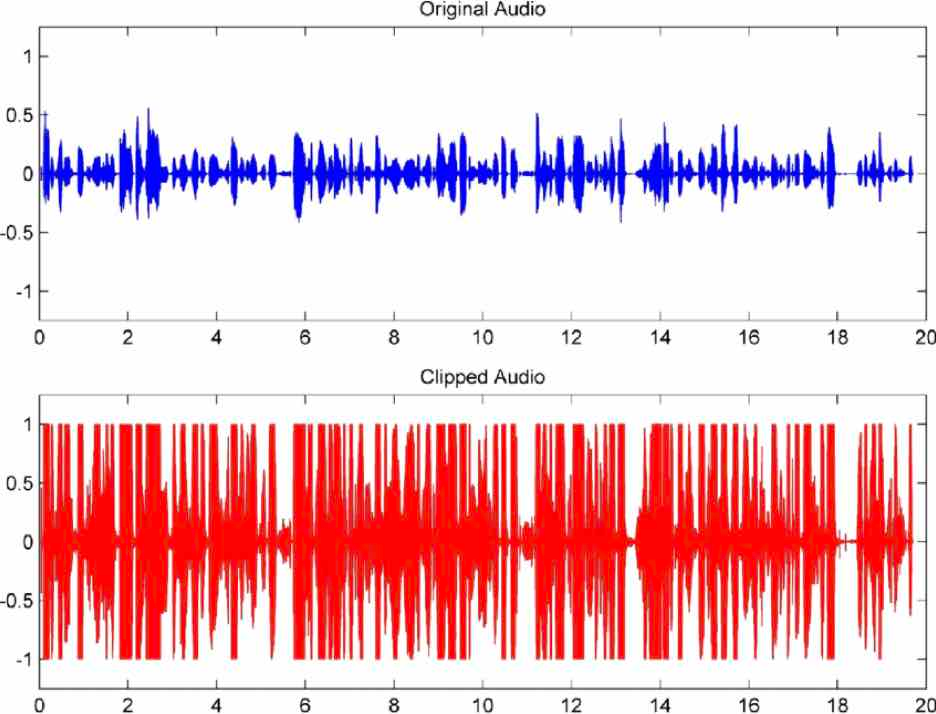
In most cases, clipping is the source of distortion in audio. It can be identified by a flattened or clipped-off waveform. While this smushed waveform is easy to spot, you’ll probably hear the damaged audio first.
Audio clipping occurs when you push the loudness of your audio signal past the threshold your system can handle. It’s called “clipping” because your system actually “clips” off the top of the waveform after reaching the limit. This is what causes distortion.
It is caused by overload and does not have one specific sound. It can sound like a skip, an empty gap in your audio, or it can present with completely unintended sounds like hisses, clicks, pops, and other annoying distortions that aren’t in the original sound.
Clipping sounds very bad to the trained ear and amateurish to the untrained. It’s easily heard. One small clip can make for an unpleasant listening experience. If it happens in a file meant for public sharing, the bad audio quality may bring your professionalism into question.
Clipping can harm your equipment too. When there’s a signal overload, the components of your equipment go into overdrive and that can cause damage. An overdriven signal will push a speaker or amplifier to produce at a higher output level than it’s built to.
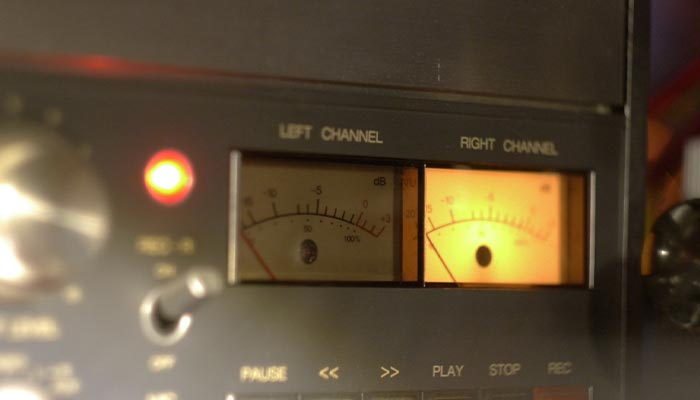
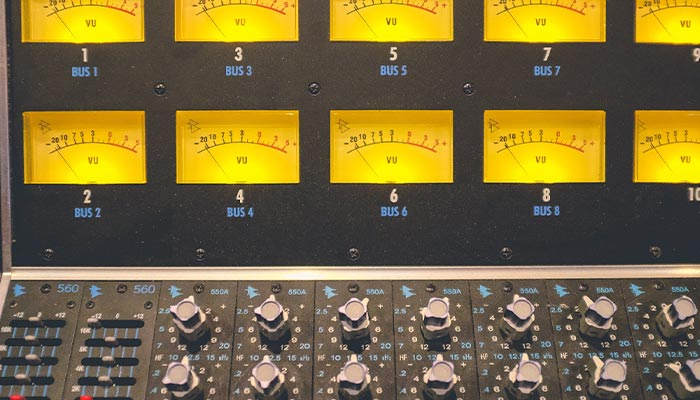
How can you tell when your audio is clipped or clipping? It is usually visible on the level meters. If it’s in the green, you’re safe. Yellow means you’re entering headroom (headroom is the amount of wiggle space you have before the audio clips). Red means it’s starting to clip.
Clipping can be caused by many things at every step of your tracking process, from the mic all the way to your speakers.
In the past, the only solution to fix clipped audio was to re-record the audio that had clipped in the first place. Now we have more options than that. Depending on how badly distorted it is and what the end purpose of the audio is, you may be able to save your sound with these tools.
Plug-ins are the most popular solution to fix clipped audio today. The most advanced plug-ins work by looking at the audio on either side of the clipped section and using that to re-create the damaged audio. This method involves selecting the damaged area and specifying how much the level should be reduced.
Clippers are plug-ins that prevent your audio from going overboard. They do this by smoothing the peaks with soft clipping starting from the threshold. The faster and higher the peaks, the more you need to bring down the threshold to get good sound. They’re also very light on CPU and RAM, so it’s pretty easy to integrate them into your process.
If the distortion is coming from occasional peaking, consider using a compressor. Compressors are software that reduces the dynamic range of the audio, which is the range between the softest and loudest recorded parts. This results in a cleaner sound with less clips. Professional studio engineers use both a compressor and a limiter to be safe.
To use a compressor, you have to set a threshold level at which the compression is activated. By turning the threshold down, you reduce the chances of getting clipped audio. For example, If you set the threshold to -16dB, for example, the signals that go above that level will be compressed. But turn it down too much and the resulting sound will be muffled and squashed.
Limiters allow users to set the peak loudness in a way that your peak loudness does not make your audio clip. With limiters, you can set the peak volume of the whole mix while still increasing the volume of the separate instruments. It puts a preventative stop to peaking by compressing the dynamic range of your output.
Limiters are used mainly in the mastering as a final effect in the production chain. It enables you to boost the loudness of your recordings without damaging the way it sounds. This method is done by capturing the loudest signals in a track and lowering them down to a level that prevents distortion and preserves the overall quality of the mix.
Avoid saturation plug-ins as much as possible and be careful with using them. Indiscriminate use of saturation tools is a common cause of clipping.
Sometimes your sound isn’t distorted in the traditional sense of the word and only sounds that way due to the presence of noise. Often clipping leaves behind noise that remains even after the clipping is fixed. Noise is one of the biggest problems experienced when recording audio and can be present in many ways.
Most of it is likely to be from your environment. Even though you may not hear your fans and air conditioners, background noise from them can easily be picked up in your recording. Large rooms are usually noisier than smaller ones, and if you’re recording outside, subtle wind can add a troublesome hiss to tracks.
Every microphone, preamp, and recorder adds a tiny bit of noise, and low-quality gear makes it worse. This is referred to as the noise floor. Often this appears as constant noise and competes with the other sounds in recordings.
Noise that is not constant is even more troublesome as attempts at removing them can end up taking the good audio with the bad. It may be a rumble from heavy breathing into the mic or from wind interference. Sometimes it’s a low hum from a nearby microwave or fluorescent light. Other times it’s just a bad audio quality format or outdated drivers. It doesn’t matter what the source is, it’s annoying and enough to ruin your sound quality.
Plug-ins are really easy to use. For these audio enhancements, you just have to get the sound profile and play a part of the track where there is only that noise. Then, when noise reduction is applied, the highlighted sound is reduced.
With all de-noising, it’s important to be careful. Removing too much can strip the life from recordings and add subtle robotic glitches. A few popular noise removal plug-ins:
The quality of your equipment is an important variable in audio production. Low-quality microphones with poor signal-to-noise ratios are a lot more likely to cause distortion. This is the same for amplifiers and speakers and other equipment in your production chain. Dynamic microphones are less likely to distort than condenser microphones, so you may want to invest in those.
Finally, try to always record in 24-bit 44kHz studio-quality or better, and to have your audio drivers updated. Make sure you have protection against electric surges and there are no refrigerators or similar around. Shut off all mobile phones, wi-fi, and other similar equipment.
To fix low and distorted mic voice recording on Windows 10:
Try to listen to your recordings on a different device to ensure the problem is from the microphone. Some microphones come with distortion-reducing foam shields that help reduce the impact of moving air.
Any vibration or movement when recording or using a mic will contribute to some distortion, especially with very sensitive microphones. The higher the vibrations or movements, the more the distortions will be. Some professional-grade microphones come with internal shock mounts to deal with this, investing in an external shock mount will help provide mechanical isolation and further reduce the chances of distorting your recording.
When your sound is distorted, parts of the waveform are lost. The resulting overages can lead to tonal chaos. You’re bound to experience distortion and other sound woes at some point during your project or career. With time, patience, and a good ear, you can save your audio from getting distorted and fix it when it accidentally comes up.