JG McQuarrie
Sep 16th, 2022Adobe Audition is a powerful digital audio workstation (DAW) and has many capabilities to produce slick, professional results. Whether working in a fully-professional studio environment or on projects at home, the range and breadth of what Adobe Audition is capable of can help turn almost any audio into something really special.
There are many different ways to improve the way your voice sounds. Some of them are practical, like addressing your physical environment, and some are technological – you could, for example, use Adobe Audition Autotune that matter.
In this article, we are going to address – How to make your voice sound better in Audition.
There are plenty of tips, tricks, and skills that can be used in conjunction with Adobe Audition to get the best-sounding voice possible. Whether you’re looking to hit the high notes on vocals or editing a podcast so your posts sound rich and resonant, Adobe Audition is there to help.

When it comes to recording, it’s important to get the basics right. While software can do a great deal to improve the quality of your voice, the better the original recording, the easier it will be to work with.
The quality of your equipment is also important. Not all microphones are equal, so invest in one which is suitable for what you’re going to record. Some will be better for singing, some will be better for the spoken voice. Choose the right one for your project.
Before you start applying effects to your vocal, it’s good practice to edit everything into its finished form.
There is a good reason for doing this step first. Moving audio around after you have started applying effects can result in changes. That can mean a lot of extra work — getting something right, then moving it, then having to get it right again and again.
It’s better to get everything into its final form, then apply the effects. Editing first, production second.
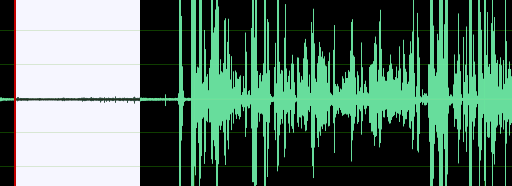
Unless you have an extremely professional set-up, there can always be unwanted noise when you record. It could be hiss from equipment, someone moving around your house, or even just a car driving past.
It’s a good idea to leave a little “silence” at the beginning or the end of your track when you record. This can give Adobe Audition a noise profile which is then used to eliminate background noise that’s been accidentally picked up.
To use Noise Reduction, highlight a few seconds which contain potential noise, but not the whole track.
Go to the Effects menu, then choose Noise Reduction / Restoration and then Capture Noise Print.
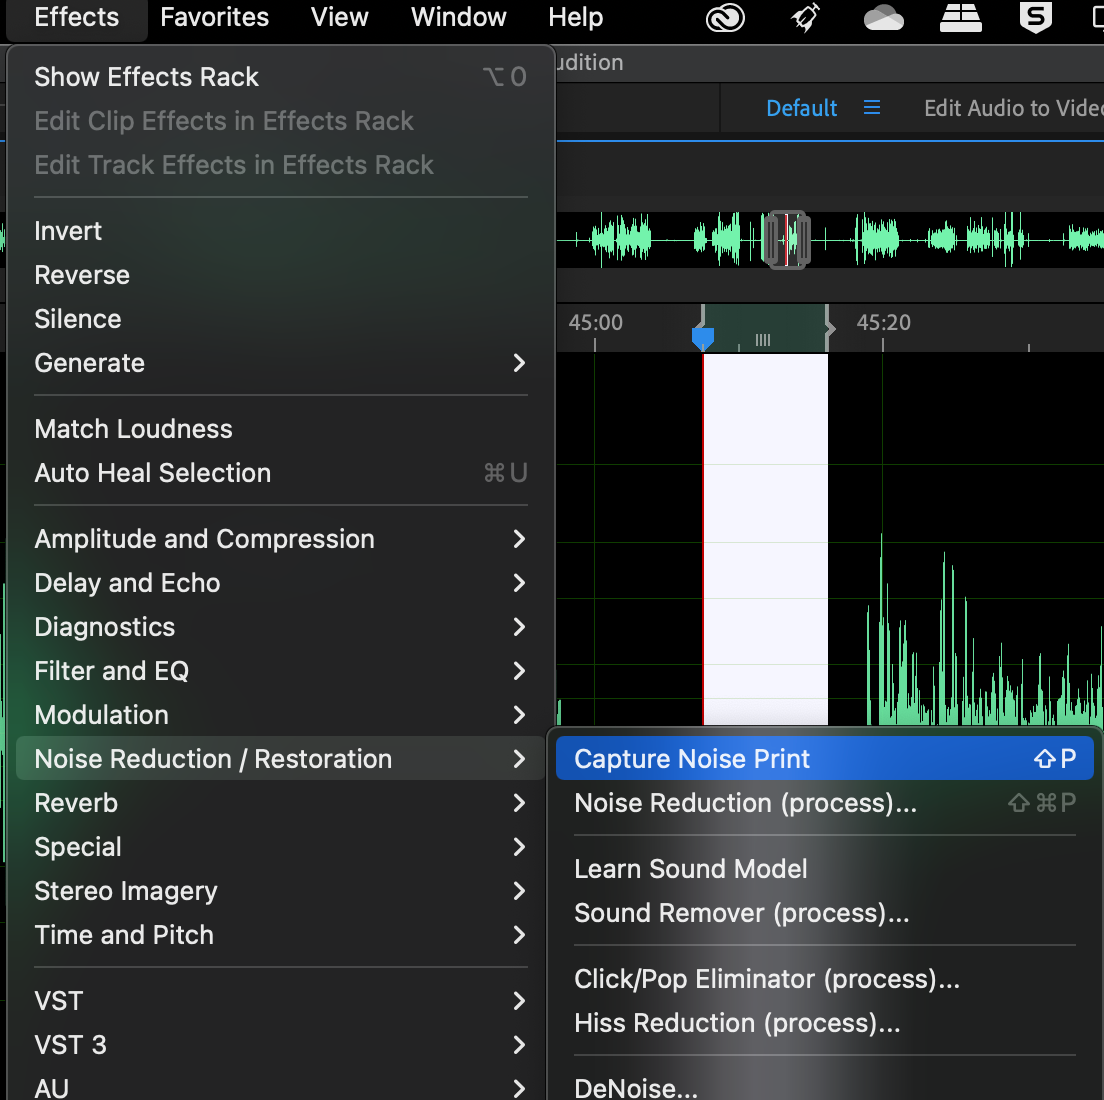
Once done, select the entire audio track.
Go to the Effects menu and select Noise Reduction / Restoration then Noise Reduction (process). This will open the Noise Reduction dialogue box.
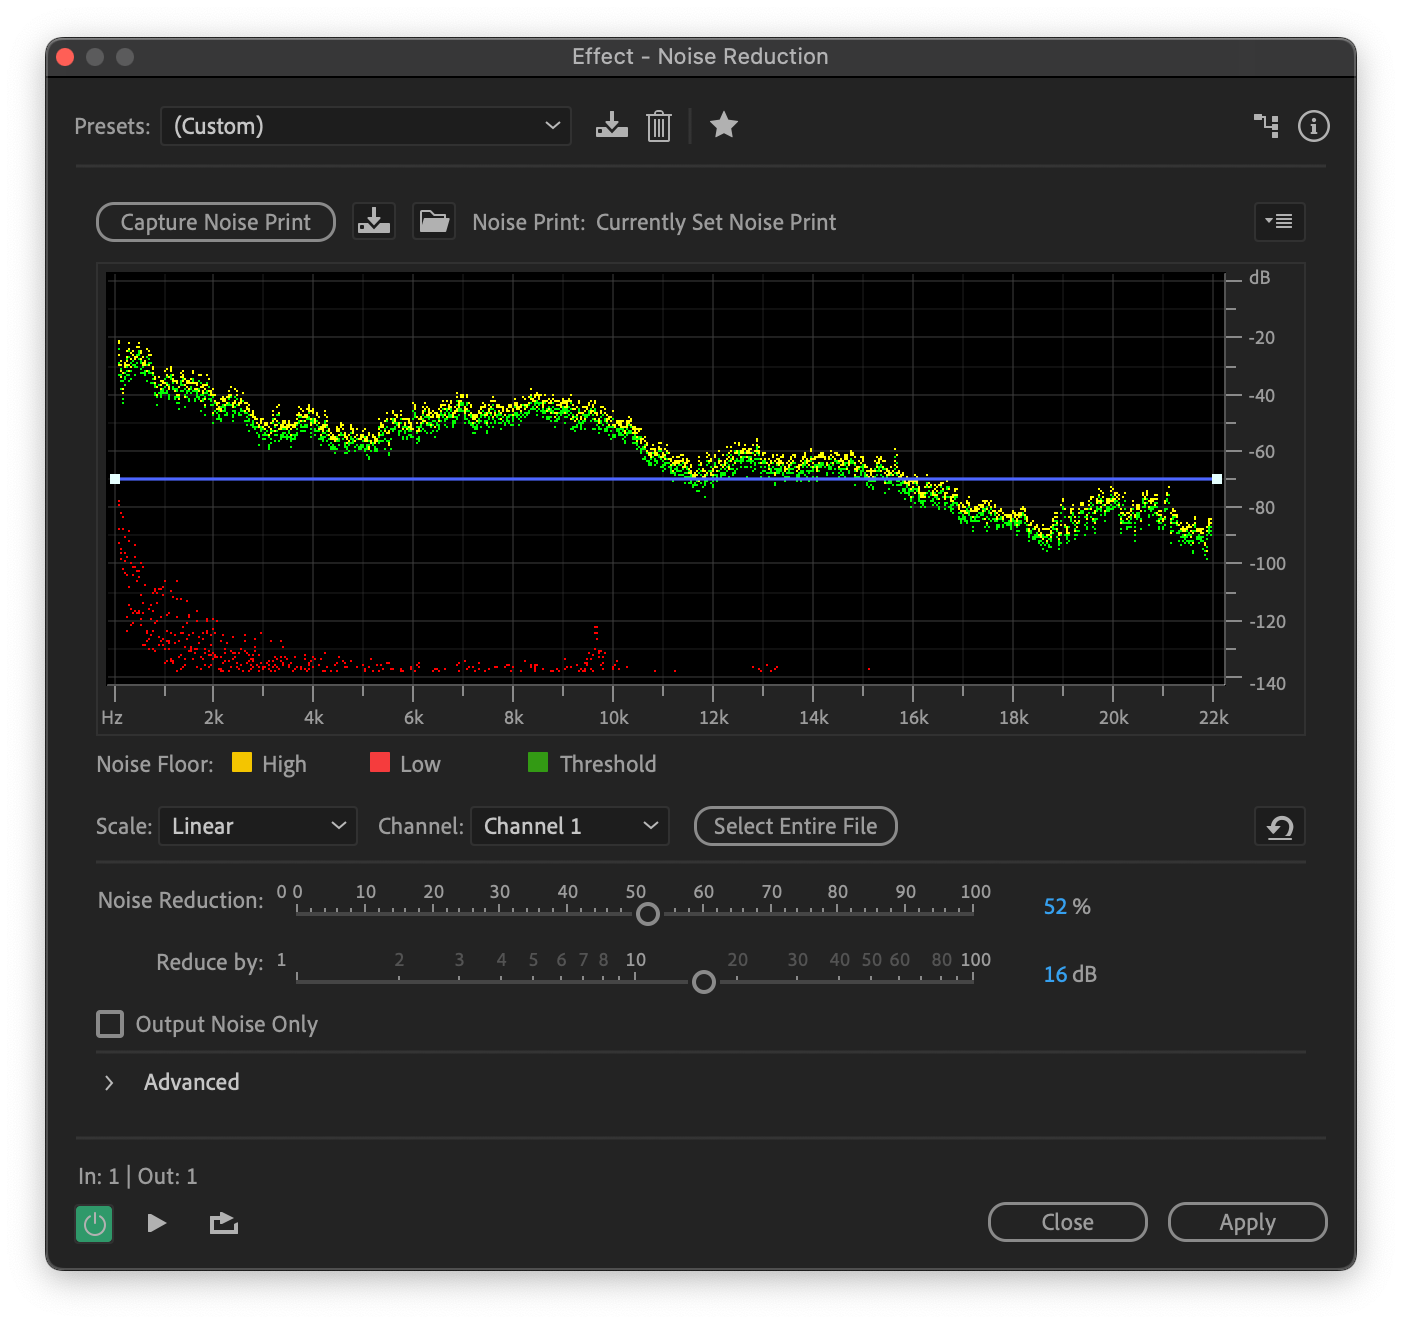
You can adjust the Noise Reduction and Reduce by sliders to adjust the amount of noise reduction you require. It can take a little practice to get right, but you will hear a difference even with the default settings.
Click on the Preview button to check you have the correct levels.
When you are happy with the results, click Apply.
Normalizing is the process of making different recordings have the same volume.
If you record two podcast hosts, with one speaking quietly and one speaking loudly, you want them to be at the same volume. This is so there isn’t a big change in levels every time a different host speaks.
Go to the Effects Menu, select Amplitude And Compression, then select Normalize (process) to bring up the Normalize dialogue box.
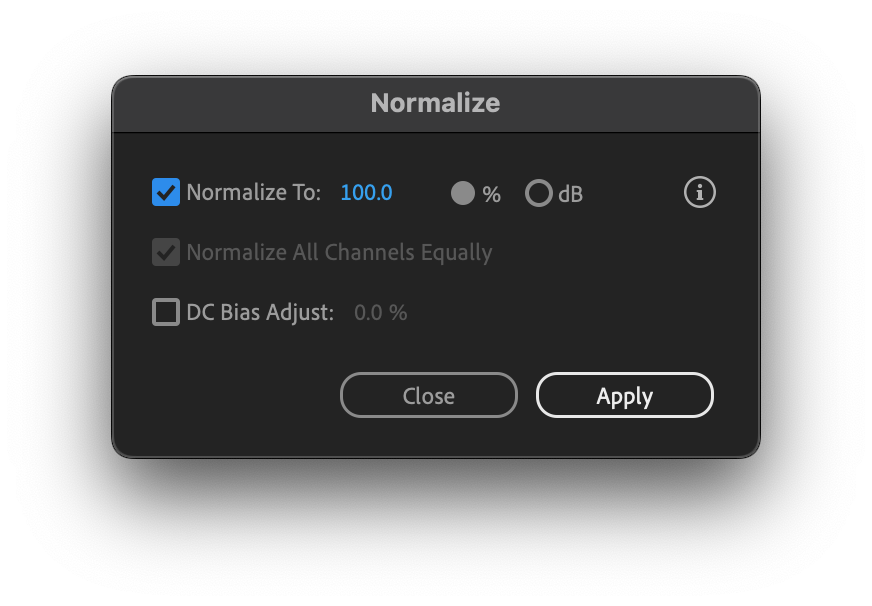
The Normalize To setting lets you set the loudest part of your track. This can be done either by percentage or by decibels (dB). It’s usually a good idea to set this a little under the maximum so there’s space left for any other effects you might want to apply. Anything between -1 and -7 for the loudest part should be fine.
The Normalize All Channels Equally uses all channels of a stereo recording to work out how much amplification to apply.
If the option is not selected, the amount of effect applied to each of the stereo channels can result in one being changed a lot more than the other. If the option is selected, each stereo channel will be adjusted by the same amount. This results in both channels being the same volume.
The DC Bias adjust simply sets the middle of your waveform to zero. You can almost always leave this option selected and set to 0.0%.
Once you have made your selections, hit Apply and your tracks will be normalized.
Once the tracks have been normalized, it’s a good idea to use the parametric EQ. This can add depth and range to how a vocal sounds, as well as additional noise elimination.
EQing allows the adjustment of specific frequencies within the vocal track. For example, by increasing the bass in a voice you might make it more resonant.
Go to the Effects menu, then Filter and EQ, and select the Parametric Equalizer option. This will open the Parametric EQ dialogue box.
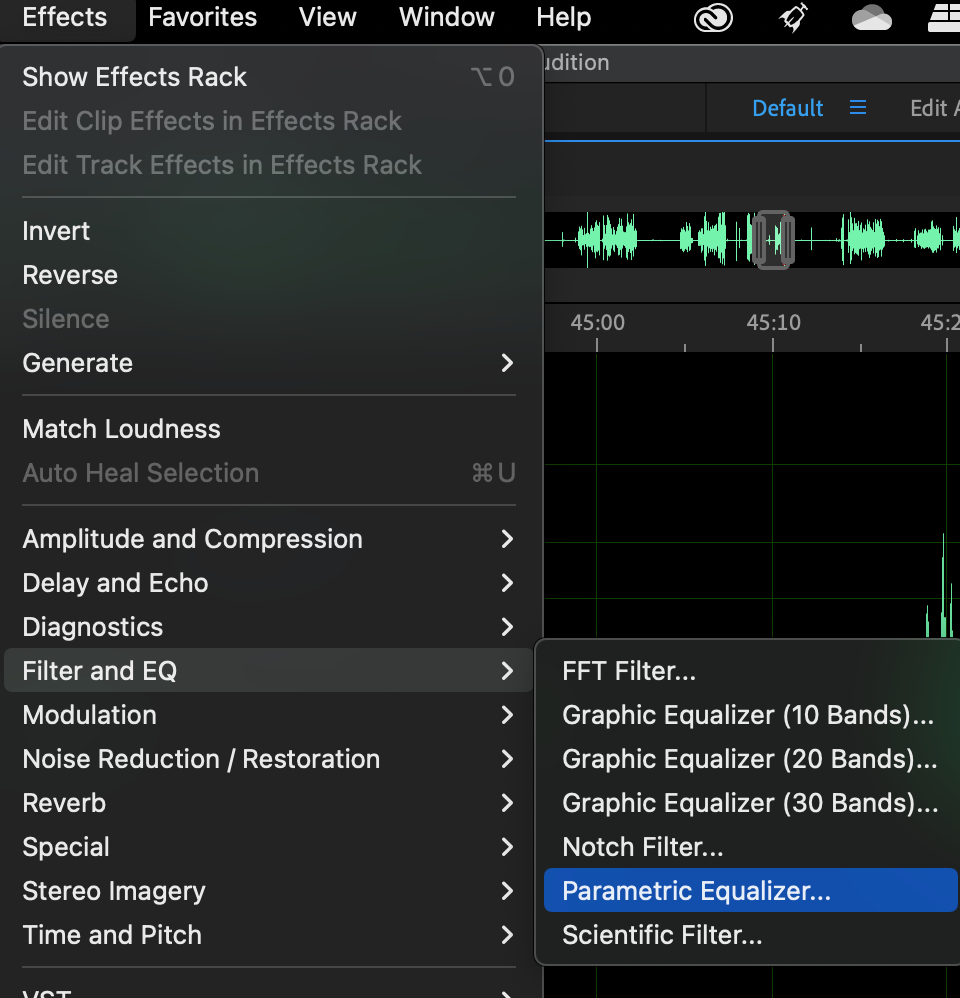
Each white dot on the frequency represents a point that can be adjusted. Not every part of the frequency will necessarily need to be adjusted. You can decide what to change based on the voice recording that you have.
There are some points to consider:
There is no “correct” way to EQ a voice because every voice is different.
Even when you record the same voice, it can be different depending on when the voice was recorded, how the person sounded at the time, whether they were recorded in the same environment, and so on. The best thing to do is simply experiment until you hit the exact settings you need.
However, it is a good technique to adjust by no more than five decibels (dB) so the effects are noticeable but do not overwhelm the original recording.
Adobe Audition has a single band compressor which can help to balance and even out your sound.
Go to the Effects menu, select Amplitude and Compression, then Single-band Compressor. This will open the single band compressor dialogue box.
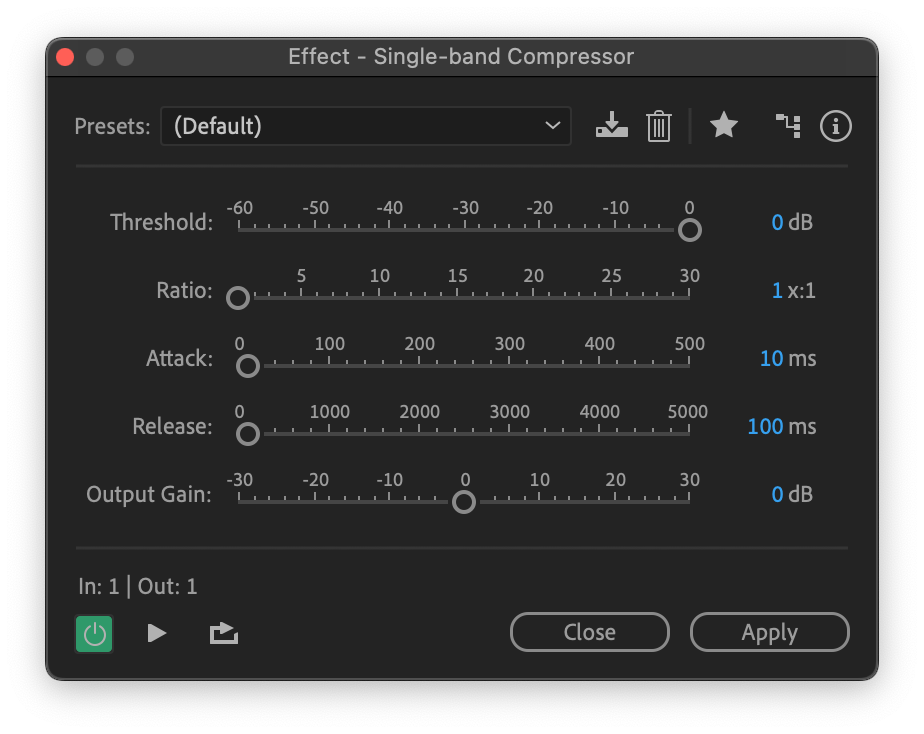
The exact parameters for each will depend on the track. The aim is to try and get the audio waveform as consistent as possible so there are fewer peaks and troughs.
If you record dialogue, there can always be pauses between people speaking. Maybe a host needs to gather their thoughts, or perhaps there’s simply a lag in the recording. While you can remove these manually by cutting them out, this can be laborious and time-consuming. Fortunately, Adobe Audition can do this for you automatically.
Go to the Effects menu, then Diagnostics, and choose Delete Silence (process).
Click on the Diagnostics tab, then Settings, then choose Fix Settings, and select Shortening Silence.
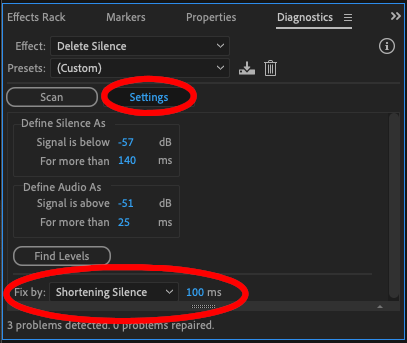
The default setting here is 100ms (100 milliseconds, or one-thousandth of a second) and that’s good for most spoken audio.
Be aware that if the time is too short it might seem like your hosts are talking over each other, or if the time is too long there will be awkward gaps.
There is even a preset called “Cleanup Podcast Interview” to help out.
As with EQing, the best approach is to play around until you get the exact settings you need.
Click the Scan button, then click Settings, and Adobe Audition will show you where it thinks there are problems. You can Delete All, or choose the ones that you think need adjusting.
After all these changes, you should have a voice that sounds just how you want it. However, it’s a good idea to run through the Normalization process one more time. Sometimes when adjusting frequencies or eliminating noises, it can affect the overall volume of your tracks.
Running everything through the Normalizer again ensures that the volume is consistent across all your tracks, even after your changes.
Just follow the same procedure as above. Select the whole track, go to the Effects menu, then select Amplitude And Compression, then select Normalize (process). You can leave these as they were from the first time you ran the Normalize effect. Click Apply and your track will be normalized again.
Adobe Audition contains all the tools necessary for making your vocals better. The whole process is simple but makes a big difference.
Of course, using Adobe Audition’s own tools is only one way to improve the quality of a voice. Check out our guide to the very best available Adobe Audition plugins for even more options to improve the way a voice sounds.
We also have our own range of CrumplePop plugins which can make a substantial difference to how good a voice sounds.
But whether you use the built-in options, or opt to go for some of the many plugins available, with Adobe Audition you can be absolutely sure you will transform your voice and vocals into something truly special.


