It can happen to the best of us. You can record something you think will sound pristine and clear, only to discover there’s background noise you weren’t expecting.
Maybe there’s a fan in the room that was accidentally picked up. Or perhaps there are constant background sounds, such as equipment hum or hiss that you didn’t detect at the time but which you can now hear on your audio recording when you listen back.
Whatever the cause, it’s a problem.
Fortunately, Audacity can help with that. Audacity has a range of great tools for improving the quality of any audio.

This article will cover how to remove background noise in Audacity, and we will go through a step-by-step guide to the Noise Reduction tool. Audacity is free to download, so if you don't have it yet, make sure you download Audacity here.
However, before we start with the noise reduction tool, there are a couple of good-practice suggestions it is worth covering to ensure you can get the very best results from Audacity, starting with the noise profile, perhaps the most important tool when you want to achieve high-quality vocal recordings.
-
Record a Noise Profile
One of the simplest but most important things to do is record audio with just a little “silence” before speaking. A few seconds is normally enough for this, which will allow you to identify the correct noise profile for your project.
This will give a region that allows Audacity to analyze only the noise that you want to eliminate. You can do this either at the start or end of your track, it doesn’t matter which, as long as the noise is captured. This will help Audacity build a “noise profile”.
You should analyze your noise profile for every podcast host that is being recorded, especially if the other hosts are being recorded in different locations. Every location will have its own audio characteristics (its own "room tone") and its own set of background noises to contend with.
By recording a few seconds for a noise sample with each host, Audacity can analyze each individually and remove the identified noise profile. That way, you will get the best results from the noise removal.
-
Check Your Equipment
It’s also worth mentioning that, when you want to remove noise, prevention is better than the cure.
It’s worth taking a little time to check your equipment and connections to ensure there is as little stray hum as possible. Try to position anything which might be picked up as background noise as far away from the microphone as possible.
These may seem like simple points, but they can make a world of difference to the final recorded audio. Noise profile, while a powerful tool, might end up mitigating certain frequencies that you wanted to preserve, reducing the audio quality of your content.
-
Use Noise Reduction and Audio Restoration Plugins
If you want to step beyond the bounds of the tools that Audacity has available, the CrumplePop range of audio restoration plugins can help with removing distracting sounds in Audacity.
The AudioDenoise plugin uses sophisticated AI technology to remove even the most stubborn of background noises on any audio recording. This can be a wide variety of background noises, from hiss and hum to other, more persistent sounds.
A simple central control knob allows you to apply as much or as little of the audio denoise effect as you require. You can preview the results by clicking on the play button. If you are happy with them, apply them to your whole track or just select a part of the track that you need the denoise applied to.
If you really want industry-best noise removal from your tracks, you can't go wrong with a CrumplePop plugin. And now CrumplePop also feature a standalone SoundApp. This allows you to have all CrumplePop's plugins in one simple, easy-to-use application that lets you have ultimate control over your audio restoration.
Hear It For Yourself
Advanced audio AI removes noise and boosts your vocal quality.
Toggle it on/off to hear the difference.
Remove Wind
Remove Noise
Remove Pops & Plosives
Level Audio
Remove Rustle
Remove Echo
Remove Wind
How to Use Noise Reduction in Audacity
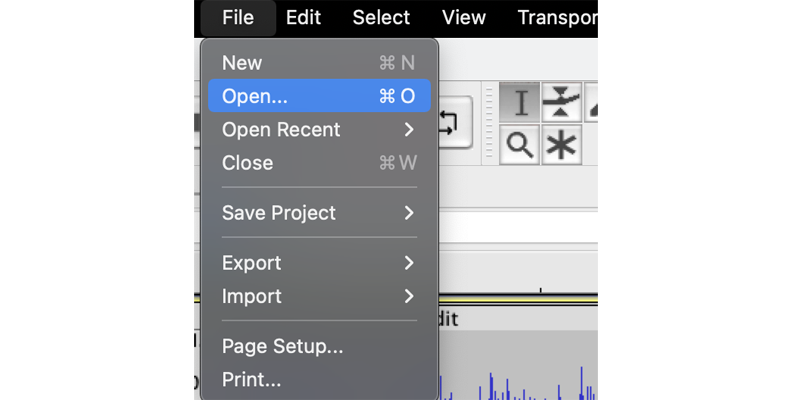
To remove background noise, launch Audacity and load your audio file. Go to the File menu, choose Open, and browse your computer for the audio file.
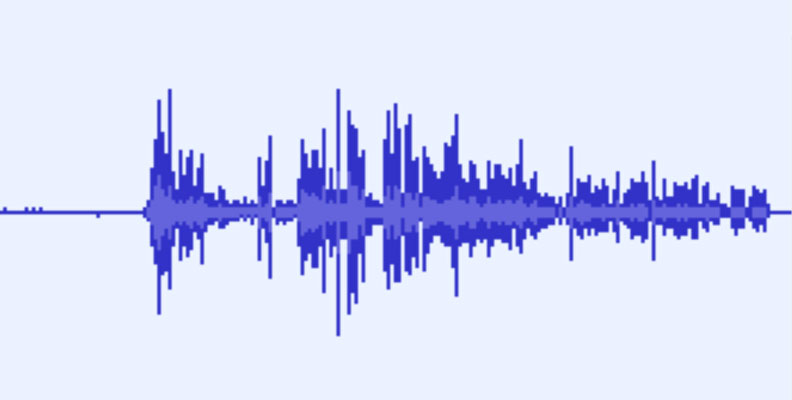
Once you have loaded your audio, select a few seconds of silence by left-clicking your mouse and dragging it. Ideally, you will have recorded some at the start or end of your recording.
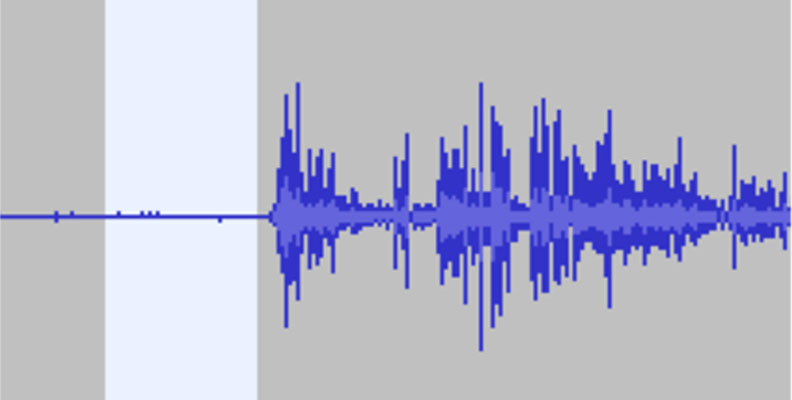
It all starts with an accurate noise profile and identifying the right noise you wish to remove: those few moments that capture the ambient sound in the room for the noise profile. Selecting in this way will allow Audacity to differentiate between the ambient sound and the recorded voice.
Go to the Effects menu, then choose Noise Reduction.
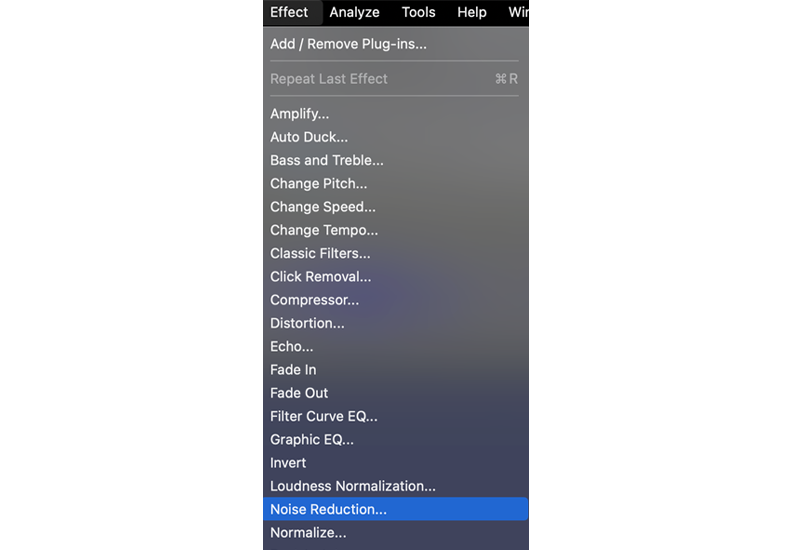
This will bring up the Noise Reduction dialogue box.
Click on the Get Noise Profile button in the Step 1 box.
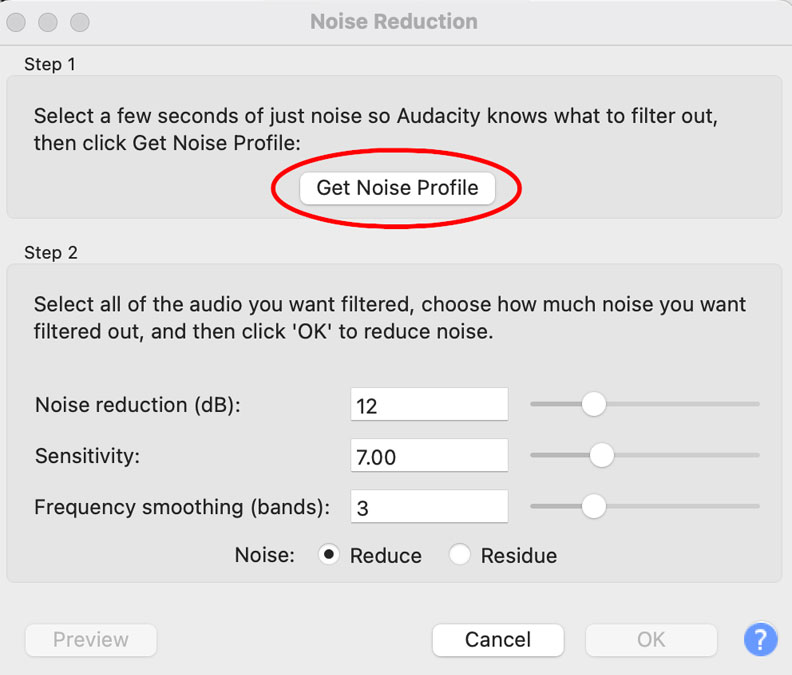
The Noise Profile dialogue box will then close, and Audacity will create a noise profile from the part of the track you selected.
In its default settings, the noise profile it has generated will be used so it only removes the ambient noise from your recording.
You can now select either your entire file or part of the track that you want to apply the noise reduction to.
Once you have selected this, re-open the Noise Reduction dialogue box by going to the Effects Menu, then choosing Noise Reduction.
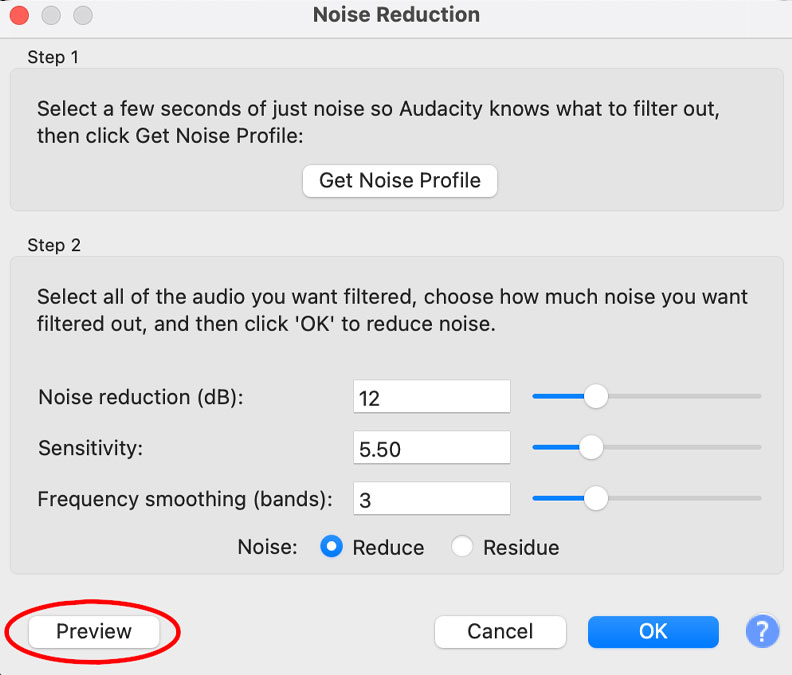
Noise Reduction Options
In the Step 2 box, you will see three options with sliders and two Noise options.
- Noise Reduction (dB)
- Sensitivity
- Frequency Smoothing (bands)
- Noise: Reduce
- Noise: Reside
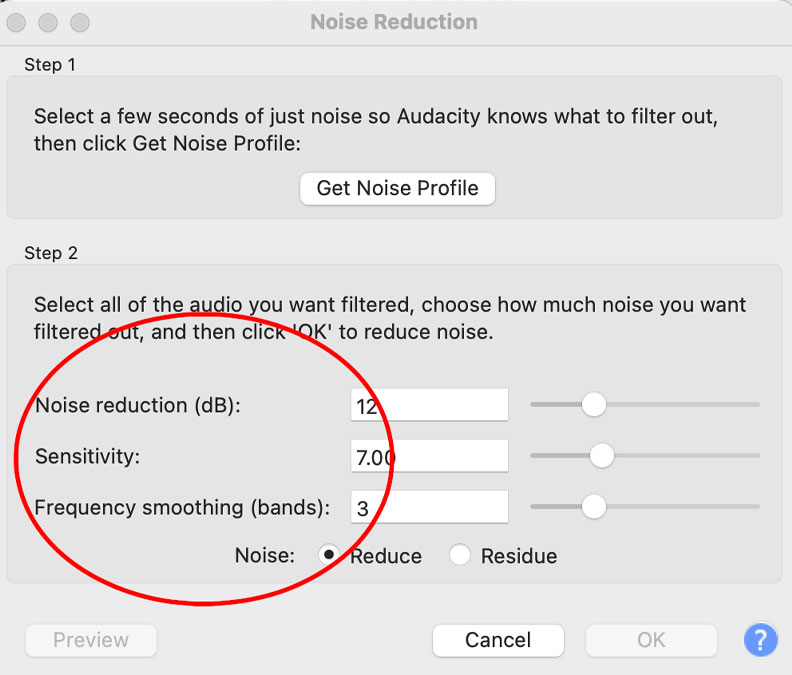
Noise Reduction changes the amount of volume reduction that is applied to the recording. This will need to be adjusted for each recording. The default setting is six, which is often a good middle ground. Adjust and determine as required for the recording so it removes only the noise.
Sensitivity changes how much of the recording is seen as noise and how much is the original track. A value of zero means that it is off, and the maximum it can be set to is 24. The aim here is to have the value as low as possible to effectively remove noise but without removing any of the audio signals you want to be preserved (i.e. the recorded voice). An important thing to remember is that too much sensitivity with the higher settings might reduce the amount of background noise but leave audio artifacts such as distortion on the original track. Too little might not have enough of an impact.
Frequency Smoothing (bands) will spread the noise reduction into neighboring bands as specified by the numerical value. This can help deal with any noise artifacts which may have been generated by the Sensitivity settings. Sometimes no frequency smoothing is required at all — especially if you have a very strong original signal and only a very little background noise that needs to be eliminated — in which case the setting can be left at zero, which is off.
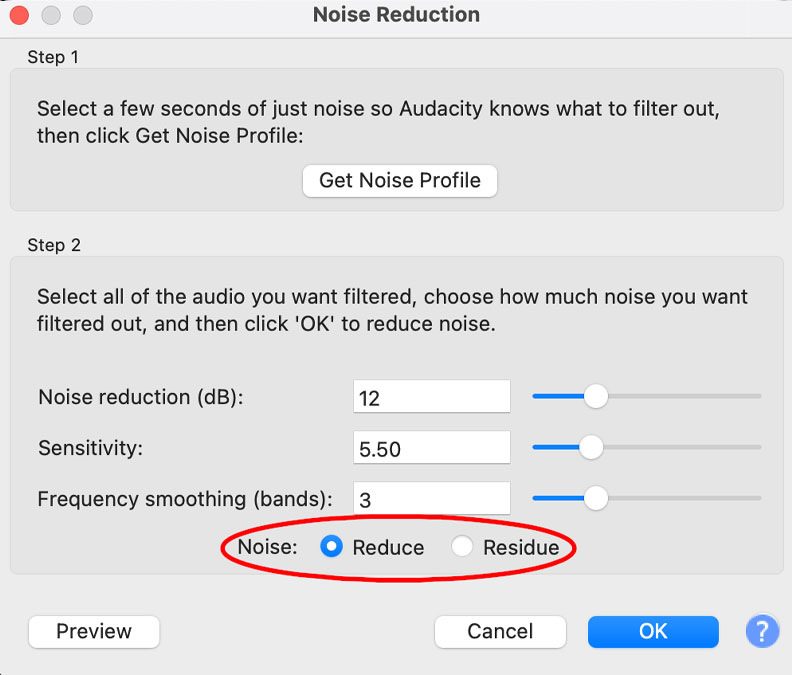
Noise: Reduce will remove the noise from the audio you have selected. This is usually the option that is required and is the default setting.
Noise: Residue can be selected to hear what will be filtered out, so you can ascertain what will be eliminated. If you choose this option and you can still hear parts of the audio you want to preserve along with the background noise that needs to be eliminated, you probably need to adjust the Noise Reduction or Sensitivity settings to get a better balance.
Once you have made your selections, click the Preview button to hear what the changes will do to your entire file.
If you are happy with the results, click OK to apply the changes, then save your audio file.
What to Do if Audacity Noise Reduction is Not Working
There are many variables that have the potential to affect results.
It will take a little playing around with settings to ensure you get the best results from Audacity. Different environments and recording sessions will require different levels of background noise removal.
However, if you are not getting the results you want from Audacity, there are a few points to keep in mind.
Tips and Tricks
-
Run the Noise Reduction Effect More Than Once
You can repeat Noise Reduction more than once if you find the first time didn't quite get everything. The more you use it to remove background noise, the more the noise reduction effect will work. Be careful not to create artifacts and distortion though.
-
Make Sure it's Background Noise in Audacity
Audacity’s noise reduction effect is designed to remove background noise. Adjusting the settings in the Noise Reduction dialogue box can have dramatic effects but, to emphasize, it is for background noise. If you have a lot of noise in the foreground — a crowd making a lot of noise or loud vehicles driving past if you are outside — then noise reduction will have limited or no effect.
-
Works Best With Constant Background Sounds
Audacity’s noise reduction tool works best on constant background noise rather than sound which is varying. Irregular or changing noise is far harder for the software to filter out and the results are much less likely to be successful.
-
Clicks and Pops
Clicks and pops are generally not eliminated with Audacity background noise reduction. If these occur in the spoken part of the audio, you will need a dedicated tool to remove them. A DeEsser will help clear up those kinds of noise problems or CrumplePop's PopRemover can deliver excellent click and pop removal.
-
Distortion on Your Track
Running noise reduction can lead to distortion on your track. Adjusting the settings will reduce this, but there’s always a chance that audible artifacts and distortion will occur. The more you use the tool, the more adept you will become and judging the correct settings and getting the noise reduction effect to an acceptable level. It is worth remembering there is no “correct” setting. Every track is different and every track will require different adjustments to be made.
-
Sensitivity
Pay particular attention to the Sensitivity setting in Audacity. Reducing the amount of Sensitivity will reduce the chances of you affecting the audio that you want to keep, though it may mean more background noise remains. It’s a balancing act between how much background noise you lose and how much you want to keep without affecting the original recording.
Conclusion
Removing background noise in Audacity is not simply a case of pressing one button and having all the ambient sound on your audio files disappear. If you want to remove background noise, it takes practice.
However, the noise reduction tool is nevertheless both powerful and fairly easy to use. Just a few tries with it can result in noticeably improved audio, especially with the spoken word. Even the default settings will make a difference to your audio files.
It’s easy to assume that, because Audacity is free software, somehow its tools won’t measure up against commercial rivals, but with the Noise Reduction tool we can see (or rather hear) that this simply isn’t the case. The Noise Reduction tool makes a case for the software itself, and with just a little practice you can have quality, professional-sounding audio in no time at all.