JG McQuarrie
Jan 30th, 2024
Few things cause listeners to turn off more than background noise. Whether you’re laying down your latest track or podcasting to the world, background noise is a perennial issue.
Thankfully, most digital audio workstations (DAWs) have ways of dealing with this unwanted noise. FL Studio is no exception.
The first way to eliminate background noise is equalization (EQ). This is especially helpful with sibilance — long S, Z and SH sounds — but helps with the noise suppression of any frequency which is causing issues.
Firstly, load your audio into FL Studio. Then you can use the Fruity Parametric EQ2 plug-in to eliminate background noise. You can find this by clicking on the Plugins section on the left-hand side of FL Studio, then expanding the Installed option and scrolling down until you find it.

Once you have opened the Parametric EQ2 you can then adjust the frequency bands to remove unwanted background noise.
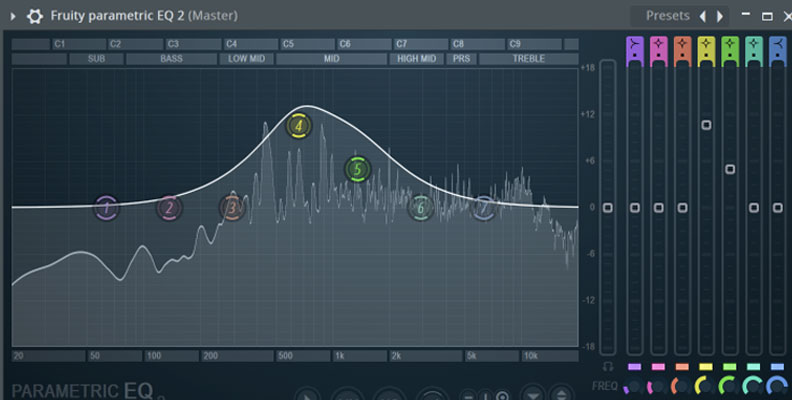
You can do this either by dragging the numerical circles on the frequency or by adjusting the sliders on the right-hand side.
Reducing the sliders below zero will help eliminate any unwanted frequencies. It’s best to use a light touch when EQing. Sibilance generally occurs at 5-8 kHz so focus on these frequencies but if you’re adjusting for other background noise then other frequencies may be more effective.
There is no one “correct” setting as each instance will vary depending on the type of recording you are dealing with and the type of background sound you want to eliminate.
The DeNoiser can be used to eliminate steady background noise, such as hiss or hum from electrical equipment.
First, open the Edison plug-in.
You can do this either by clicking on the Scissors icon or by CTRL+E (Windows) or COMMAND+E (Mac). Then load your audio sample into FL Studio.
You can then select a sample of your audio that has the background noise in it.
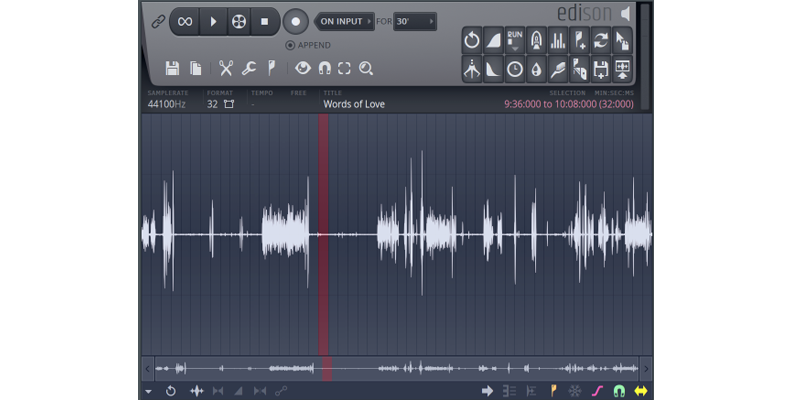
Left-click and drag to choose it. Ideally, you want to do this when nothing else is audible (so when nobody is speaking, singing etc) so that only the background noise is audible.
Right-click the Noise Reduction tool, which is the icon that looks like a brush.
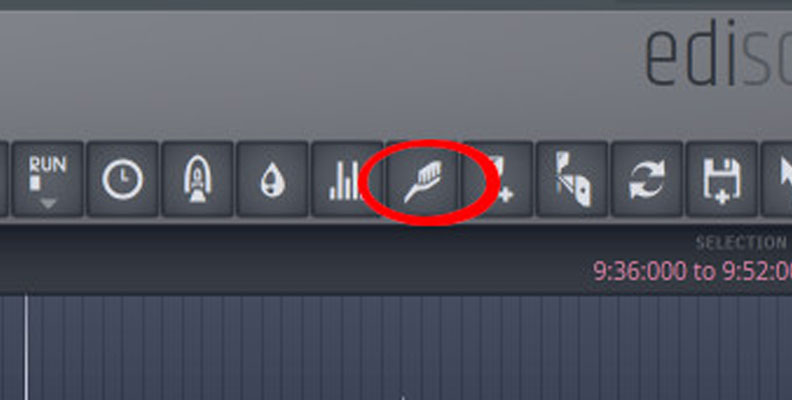
You will see that FL Studio produces the message “Noise Profile Acquired”. FL Studio will then acquire noise profile to analyze the background noise and eliminate it.
Once the noise profile has been acquired, left-click the Brush icon again. This will open the Clean Up (denoise) window.
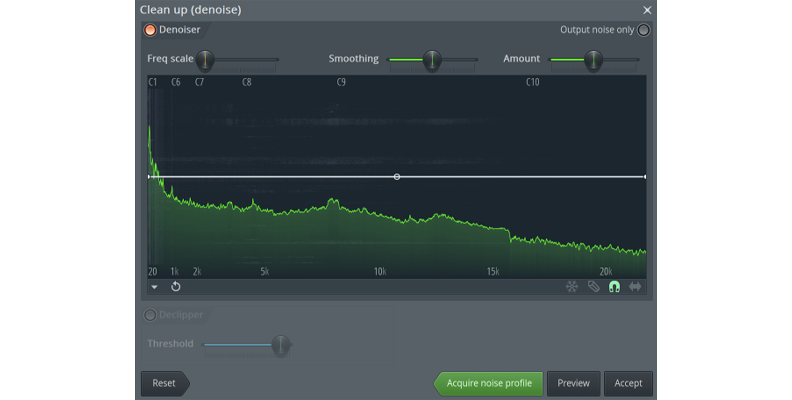
You can adjust the Smoothing and Amount by moving the sliders at the top right. Adjust these until you are satisfied with the amount of denoise that is going to be applied. You can preview the effect by clicking on the Preview button at the bottom right of the plug-in.
You also have the option to select Output Noise Only, which is at the top right-hand side. This allows you to hear the noise that will be removed, rather than the audio after the noise has been removed. This can be useful to gauge the amount of change being applied.
Once you are happy with the results, click the Accept button and FL Studio will apply the denoise to your audio.
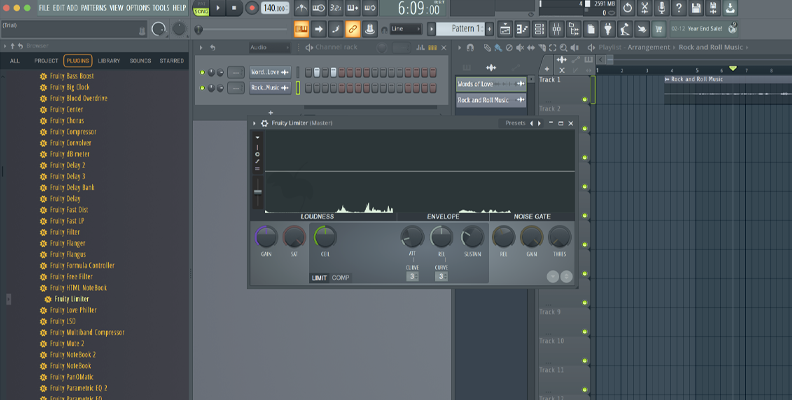
FL Studio comes with a limiter, which can also be a useful tool for dealing with unwanted background noise. It’s called the Fruity Limiter and you can find it in the plug-ins list on the left of the screen.
First, import your audio clip into FL Studio. You then need to select a mixer channel using the mixers in the top left-hand corner of the window. Simply drag and drop the Fruity Limiter onto one of the mixers to add it to your track.
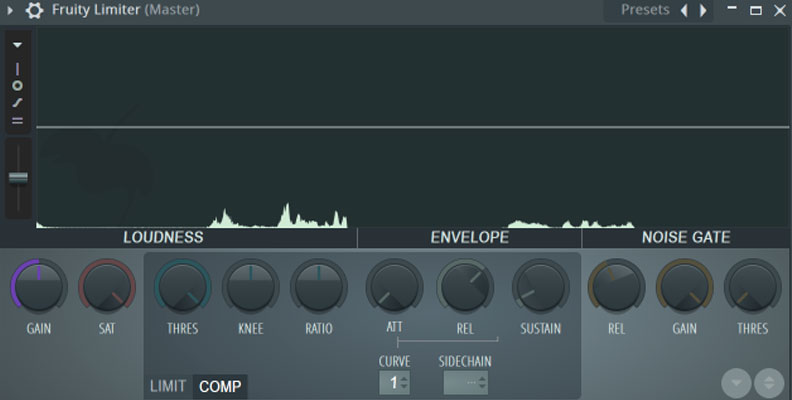
Once the Fruity Limiter is open, several different settings can be adjusted. Focus on the Noise Gate, which is to the right-hand side of the limiter.
This changes the time it takes for the noise gate to close and stop the sound. If you turn the release too low, the cutoff will be too abrupt and will sound choppy, whereas too high and it might sustain for too long. You need to experiment a bit to find the correct level for your background noise so that the transition sounds natural.
Gain controls how much the noise gate allows through or blocks. A high percentage will allow all sound to pass through and a setting of 0% allows none of the sound through so it is all blocked. If you set it too high the effect might be barely noticeable, if you set it too low it may be too much. A little testing will find the right balance for you.
This is the threshold, and it is probably the most important setting. It changes the volume the noise gate kicks in at to allow sound to pass. Only noise below the threshold will not be let through by the noise gate and so won’t be audible on your track.
As you adjust the threshold, you will see a vertical line in the plug-in. When you hit play, you will see the waveform which will give you some clue as to how loud the background noise is. You can adjust the threshold until you are satisfied that you’re cutting out the background sound without affecting the audio you want to preserve.
When you have finished adjusting the settings in the Fruity Limiter, simply start playing back your audio and the limiter will be applied in real time.
As with all DAWs, although FL Studio has tools to remove background noise, there are plenty of third-party plug-ins available which can also help you clean up your recordings and eliminate background noise.

CrumplePop’s suite of audio restoration plug-ins is second to none and fully compatible with FL Studio. Whatever the nature of your background noise, you will find something to help deal with it.
As well as a general AudioDenoise plug-in for removing noise at a professional level, there are several plugins for specific types of background noise. WindRemover can eliminate any wind sound from outdoor recordings, a frequent problem when recording outside of a studio.
TrafficRemover can remove traffic noise more effectively than the DAW built-in tools and easily cope with the sometimes inconsistent amount of background noise. There’s more even more to discover if your audio needs clean up, as there’s no better suit of plug-ins than CrumplePop.
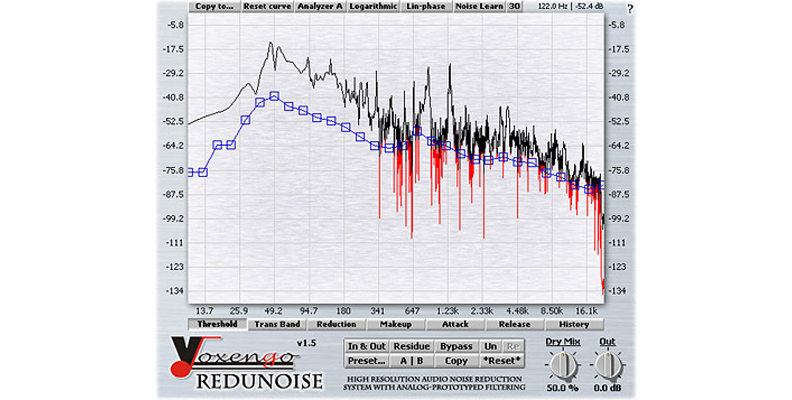
The Voxengo Redunoise plug-in is a powerful noise removal tool which has one major advantage — it’s completely free!
The plug-in has a wide range of functionality that goes above and beyond what standard DAW tools can offer. The real-time spectrum display is clear and easy to understand, and scales can be changed between logarithmic and linear.
Each parameter change has multi-level undo, so you can be confident of being able to roll back any changes you may have made. The Noise Learn function takes a lot of the hard work out of judging threshold levels and is a real boon.
While not necessarily the prettiest-looking denoiser tool ever seen, the power of Voxengu makes it a great tool for any audio editor to have.
FL Studio is a powerful DAW and its integrated tools allow many ways to deal with background noise. Whether you’re recording a podcast, producing a classic music track, or simply playing around, there’s more than enough to ensure that every recording can now be delivered with crystal-clear audio. Now you can sound even more professional than ever!
There can be a number of factors responsible if you are picking up a buzzing sound. If you are using a wired microphone, check the cable between the microphone itself and the computer of the audio interface you are using.
Electrical noise can also be picked up by the microphone cable if it’s not adequately shielded. It’s good practice to have any electrical devices as far away from the mic as possible to reduce any stray hum being picked up.
Finally, it’s worth checking your audio interface or sound card to ensure there’s no fault there. Like any piece of computing equipment, these can wear and break over time so regular checks to ensure everything is working properly will help.