Marco Sebastiano Alessi
Apr 19th, 2023Often, audio is overlooked in video editing because we’re naturally more focused on the visuals. However, there’s no doubt sound is one of the most crucial aspects of video editing!
Sound effects can evoke your audience’s memories, bringing up experiences and feelings beyond what moving images can accomplish alone. That’s why a video can be more engaging if you take the time to fine-tune your audio and why you should know how to remove background noise in Premiere Pro.
Adobe Premiere Pro is a video editor that provides excellent video effects and comes packed with essential audio tools to help you in your job as an editor.
In this article, I’ll talk about the main audio effects in Adobe Premiere Pro to optimize and bring a new dimension to your audio for videos. I’ll go through how to apply and remove sound effects on your clips in Premiere Pro and how to add external audio editing effects.
Let’s dive in!
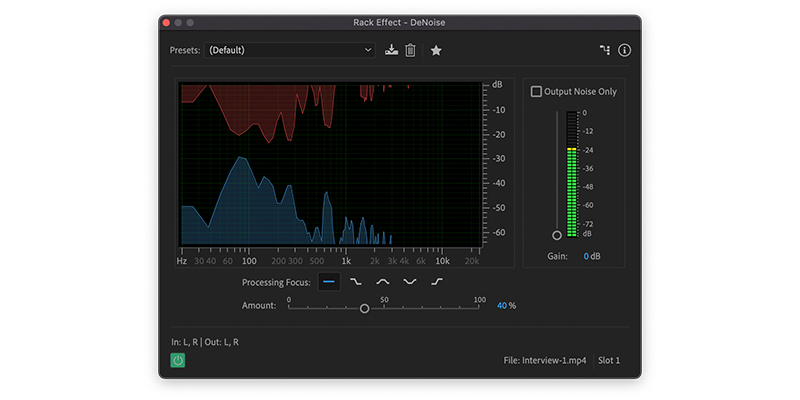
Background noise might be one of the most omnipresent issues when working with audio: frequently occurring and always hard to remove. Premiere Pro’s built-in DeNoiser is easy to set up, as you only need to decide how much noise reduction you want to apply with a slider. Raise the slider to reduce noise, but be careful because your voice will also be affected.
DeNoise allows you to remove sustained noises like air conditioners, fans, and hums from your electronics. However, when the unwanted noise is complex (comprising multiple sources) and particularly audible, I’d recommend using professional third-party plug-ins like Crumplepop’s AudioDenoise.
With AudioDenoise’s AI, you can reduce complex background noise that other plug-ins cannot remove, thanks to a cutting-edge algorithm that can identify and mitigate even the most subtle noises while leaving voices untouched. Just by adjusting the simple controls, you’ll obtain a high-quality sound.
A sound effect that you will constantly use for speech tracks is a DeEsser, which will help you reduce sibilance caused by words with “s”, “sh”, “ch”, or “t” sounds. It’s mainly used for voice, but can help with other high frequencies and harsh sounds from your audio clips.
DeEsser allows you to choose either a multiband mode to compress the sibilance range or a broadband mode to compress all frequencies evenly. You can specify the frequency range where the sibilance is more intense, output the sibilance only to fine-tune your audio, and adjust when the compressor kicks in.
You can produce many sound effects with a Delay effect: a repetition of an audio signal that takes place milliseconds apart from one another. Perfect to create echo sounds for ambiance, the delay is often used for layering audio to create more complex sound effects in your videos by adjusting the delay time between the left and right channels.
With the Analog Delay effect in Premiere Pro, you can emulate a vintage delay with tape and tube warmth distortion and adjust delay time, feedback, and the delay spread.
The Flanger effect adds a short delay (under 20 milliseconds) to the audio signal and changes the speed of the original audio source. It’s used to create a characteristic psychedelic sound, also called jet-plane or sweeping effect.
The Flanger effect is used in music production for distorted rock guitars, but it can be a powerful effect to alter audio for sound design. Use it sparingly, as it might make your audio sound unnatural.
The Chorus effect replicates a sound in a similar pitch and time to make it sound like being played multiple times simultaneously by adding short delays and little feedback.
You can use the Chorus audio effect for vocal tracks and to create a stereo space in mono audio or to produce crowded sounds from a single audio track.
Often confused with Flanger, the Phaser effect phase-shifts an audio source and mixes it with the original source. It takes one of the signals and passes it through filters that alter the audio signal’s amplitude. When these signals are mixed, you can hear the sound moving away and closer to you.
The Reverb effect adds an echo that enhances the realistic effect of the audio. Premiere Pro offers three types of Reverb effects: Convolution Reverb, Studio Reverb, and Surround Reverb.
The Pitch Shifter effect is used to create deep or high-pitch voices. You can have one person recording different dialogues and use the Pitch Shifter to make it look like other persons are speaking.
A trick you can do is use a pitch shifter for sounds other than vocals. Experimenting is part of a sound designer’s life!
Distortion can be applied in sound design to improve or entirely transform an audio source. Add saturation to your audio file to simulate muffled microphones and overdriven amps or create a growling sound. In small doses, distortion is great for adding warmth and depth to an audio track.
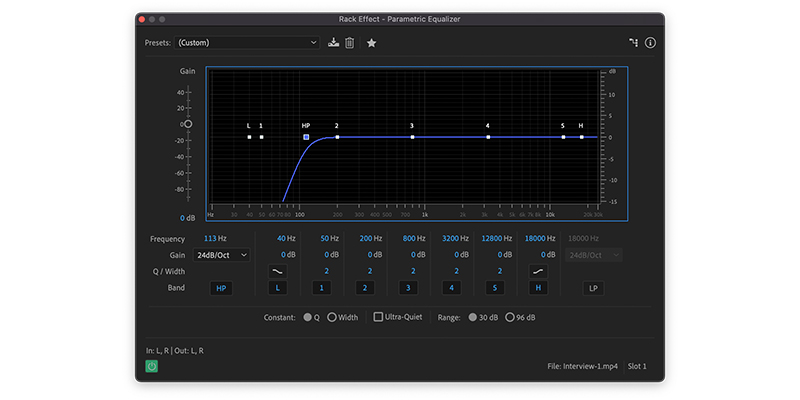
With Parametric EQ, you can fine-tune frequencies to produce different tones from an audio clip. You can clean vocal recordings or create cinematic effects. Often you can find interesting presets to simulate someone speaking through an old radio or a telephone.
Using Highpass and Lowpass filters, you can eliminate frequencies above or below a specific cutoff frequency. A lowpass filter will enhance low frequencies, while the highpass filter will prioritize high frequencies and decrease lower frequencies. Use these effects to create a more balanced sound and priorities the essential audio frequencies in your track.
You can combine these filters with reverb and create interesting layers and achieve professional results, especially when mixing audio.
Premiere Pro has a Mastering effect to optimize your audio tracks based on their destination: web streaming, DVD, or movie theatre. After you’ve done all the layering and audio editing with your tracks and clips, use this effect for last.
The Mastering effect will optimize the output volume to keep it under 0db and avoid clipping. It will allow your video to be heard well on most audio devices.
It’s important to remember to apply it to the Master track only in the Track Mixer. Do not apply it to single tracks or clips.
Premiere Pro allows you to add external audio tools such as VST plug-ins. If you have several plug-ins installed on your computer and wish to use them in Premiere Pro, follow these steps to enable them.
1. Go to Premiere Pro Preferences. To open the preferences dialogue box in Windows, follow the path Edit > Preferences. If you are in Mac OS, go to Premiere Pro > Preferences.
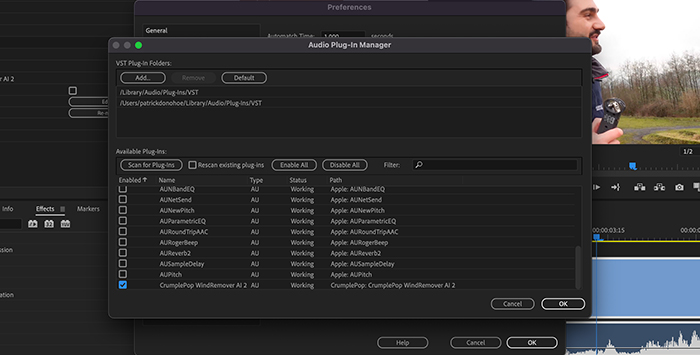
2. In the dialogue box, scroll to the bottom and select Plug-in Manager.
3. Click Add to search for the folder where your VST plug-ins are.
4. Select Scan for plug-ins to import all the plug-ins in your selected folder into Premiere Pro. Once the scan it’s finished, all the plug-ins will appear listed.
5. Next to each plug-in on the list, you can see its status. It should read “working.”
6. Click OK to close the Plug-ins Manager window.
All your VST audio effects will be available from the Effects Control panel.
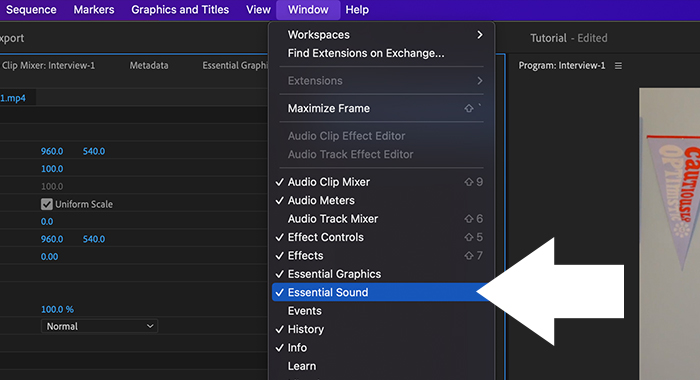
You can find your sound effects in the Effect Controls, your essential sound panel on Adobe Premiere Pro
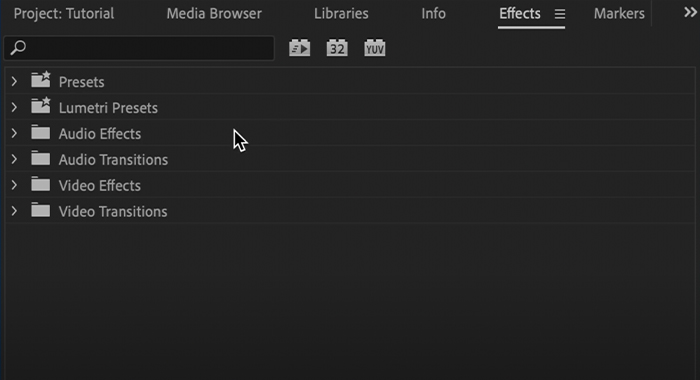
1. Scroll to find audio tools in the Effects panel or type in the search box for a specific sound effect.
2. Select the effect’s icon and drag it to the audio clip in the Timeline panel. Or select the clip and double-click the sound effect in the Effect Controls panel to apply.
3. You can adjust the audio settings in the Effect Controls panel.
Here’s how to apply multiple effects to a single clip:
To remove one or more effects from a clip:
1. In the Timeline, select the audio clip from which you want to remove audio effects.
2. Select the effects to remove in the Effects Controls panel and choose the Remove Selected Effect option. You can alternatively use the Delete or Backspace key.
To remove all effects from a clip:
Now you know the main audio editing effects in Adobe Premiere Pro that can help you with sound design and improving audio quality. As a video editor, knowing how and when to use these audio effects will make you stand out among other content creators.
Good luck, and stay creative!


