JG McQuarrie
Sep 15th, 2022Everyone is familiar with autotune in music these days.
It’s become a conspicuous feature of voice recordings, not just for its original purpose, which was to tune errant vocals automatically, as you might expect from the name.
It’s now also used on what seems like every hip-hop song and video — it has become its own aesthetic.
But how do you achieve that distinctive autotune effect?
Fortunately, Adobe Audition has everything you need to get your voice sounding like every chart-topper, and this tutorial answers just that question.
The correct term for Autotune in Audition is Automatic Pitch Correction.
You can find this effect by going to the Effects menu, then Time and Pitch, and choosing Automatic Pitch Correction.
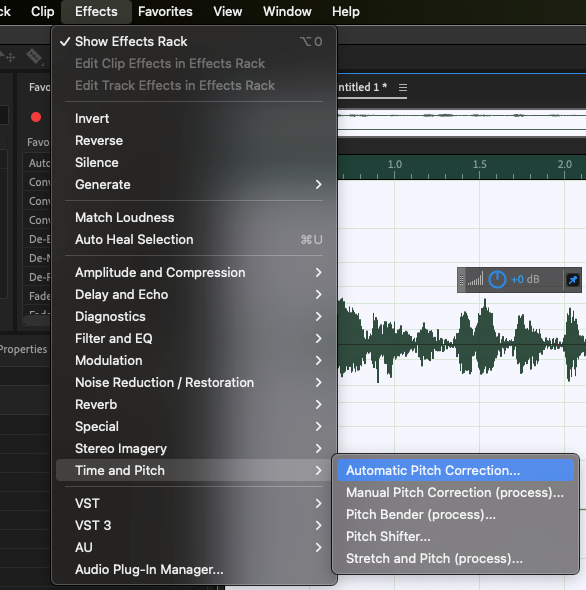
This will bring up the Automatic Pitch Correction dialogue box.
The pitch correction effect will also be added to Audition’s Effects Rack on the left-hand side.
Autotune can be used in two ways.
A light touch on the settings will help to correct any vocal imperfections on your audio and help keep the voice in tune. Extreme settings will give a distinctive autotune sound.
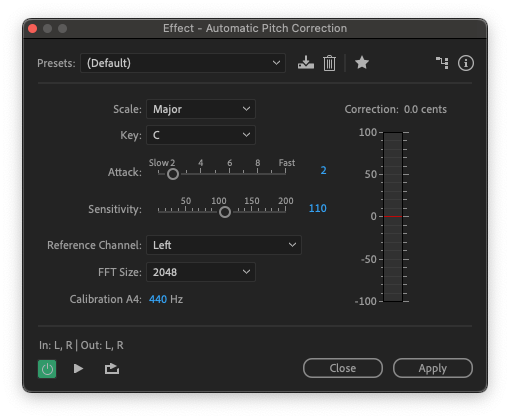
The settings in autotune are as follows:
The Correction Meter simply provides a visual representation of how much effect is being applied to the vocal track.
You can select the whole of your track by double-clicking the waveform.
To select a section of vocal by left-clicking and dragging to choose the part of your track you want to apply the effect to.
The effect can be used in either Multitrack or Waveform mode, so, however, if you are editing your audio you will be able to apply autotune.
Attack and Sensitivity tend to work best when in fairly close conjunction with each other.
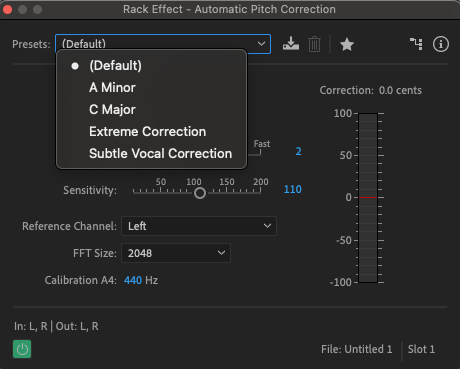
Audition comes with several presets for the effect. The default allows light sensitivity which will help tune a voice but which won’t leave it sounding robotic and flat.
There is also A Minor and C Major scale presets, as well as presets for Extreme Correction — which will result in a major change and that classic, autotune effect — and Subtle Vocal Correction, which will allow for a more nuanced approach to correcting the vocal track.
As with any plug-in or effect, the best thing to do is simply play around with the settings until you find one you are happy with. The key to getting the right settings for your audio is to experiment and learn.
And because Audition supports non-destructive editing, you don’t need to worry about making any permanent changes to your track.
However, the Adobe Audition autotune is fairly average in terms of its quality, and there are other plug-ins available that can do more. For a comprehensive list of the best plug-ins available for Adobe Audition, please see our Adobe Audition Plugins article.
So, whether you’re looking to become the next T-Pain and star in your own hip-hop video, or simply trying to smooth out the occasional vocal warble, automatic pitch correction is there to help you.


