JG McQuarrie
Jun 20th, 2023
Audio production is fraught with problems for any producer and sometimes even the most careful recording can produce unwanted results.
Audio clipping is a common issue that needs to be dealt with. It can make a recording sound distorted and difficult to listen to. Fortunately, an audio editor like Audacity has ways to be able to deal with audio clipping.
Audio clipping (occasionally referred to as audio peaking) is immediately apparent when you hear it. It’s a form of distorted sound and it ruins audio quality by making it an unpleasant listening experience.
It is caused when a recorder or microphone is pushed beyond its ability to cope. The device is overloaded with input and the result is clipping distortion on your audio clips.
You can normally tell when clipping is happening if you have VU or level meters. The meters will go into the red, indicating there is too much signal being received. This is when clipping occurs.
When you record audio using software such as Audacity, you will also be able to see this in the recorded audio waveform. The waveform will be visibly “clipped”, showing a straight line at the top and bottom instead of a rounded wave.
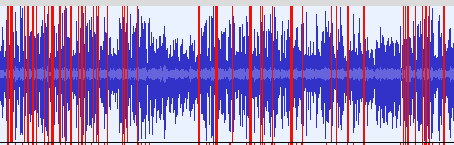
Audacity also has a feature that allows you to see the clipping more clearly. Go to the View menu, then select Show Clipping.
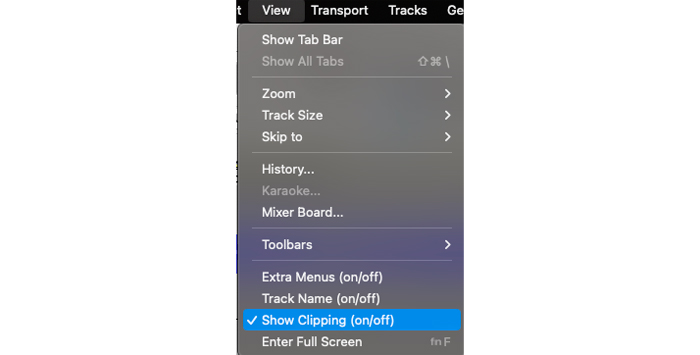
Audacity will highlight anywhere it thinks clipping is occurring in red. Clipping is a problem but luckily there are several ways to deal with it.
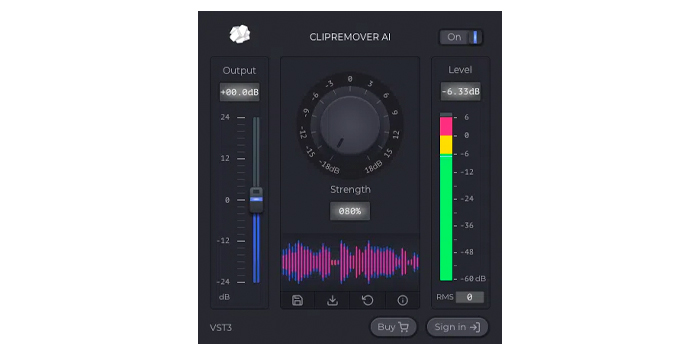
Using a third-party tool is a great way to help fix clipping issues in your audio files when working with Audacity, and CrumplePop’s ClipRemover is an ideal candidate for repairing your audio.
When audio is clipped, that part of the recording is actually lost, so it requires some advanced AI to restore the missing parts. That’s exactly what the ClipRemover does – reduces the distortion and restores the missing parts of the audio.
A central control knob let’s you select where the clipping is occurring (usually 0db) and a level meter let’s you choose how loud you would like your audio to be. Simply select the portion of your audio which is suffering from clipping by left-clicking your mouse and dragging. Then launch the plug-in and apply the effect. It’s as simple as that!
Even the worst distorted and clipped audio can be brought back into usable form with ClipRemover from CrumplePop.
Audio clipping is caused by equipment being overloaded — too much signal means you will be getting distortion on your recording.
If you’re recording an audio clip, the simplest, best solution to fix the problem is to simply turn down the incoming signal. You can do this by turning down the input from your audio interface. Once you’ve done that, the problem will magically disappear!
If you are not using an audio interface because you are using something like a USB microphone, you can also reduce the gain in Audacity.
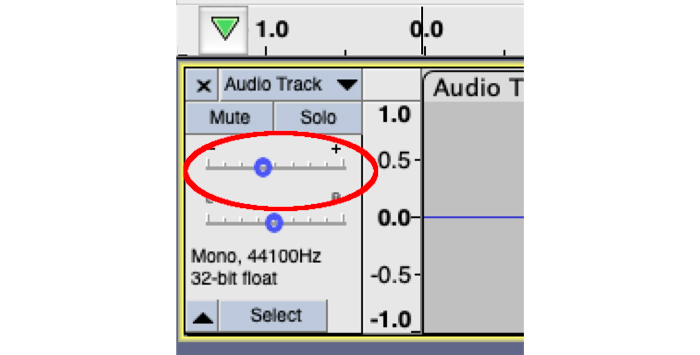
Slide the gain control to the left to reduce the gain. As you record you will see the signal strength is lower. Keep reducing until you have enough signal so that it is near the peak, but not so much that clipping is occurring.
Finally, the other solution is to simply move your talent further away from the microphone. This will reduce the amount of signal reaching the microphone so it will become quieter.
When it comes to clipping, prevention is better than cure!
EQing means adjusting part of the audio spectrum in order to help either increase the clarity of your sound or help resolve issues with something you have recorded.
Audacity has a built-in graphic equalizer. First, select the part of the audio you want to work on. Then go to the Effects menu and choose Graphics EQ.
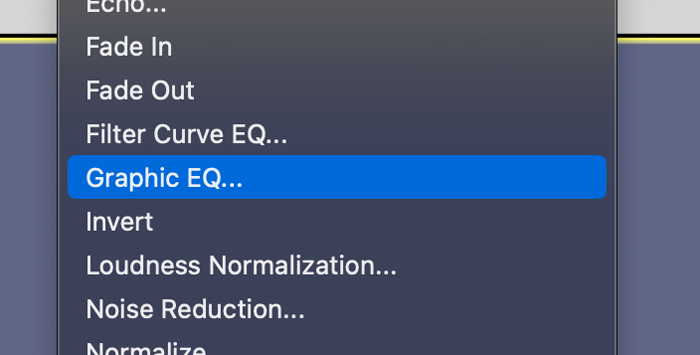
This will open the graphic equalizer.
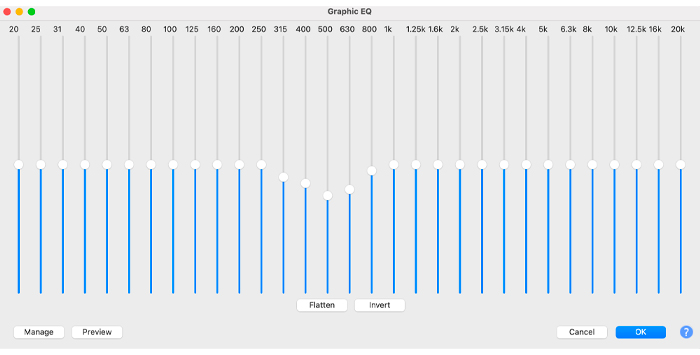
Now you are in a position to affect specific frequency ranges, rather than reducing them all.
There is no one “correct” setting for the EQ. The frequencies you want to adjust will be different for every recording because every recording is different. That means it can take a little practice until you can isolate the correct frequencies.
However, with a little patience and practice, adjusting the EQ of your audio file can really make a big difference to the clipping you are experiencing.
Compression is another effective way to deal with clipping in Audacity.
Compressors fulfill one specific function — they reduce the dynamic range of the sound you are listening to. This is the range between the quietest and the loudest parts of the audio. By reducing the difference between the loudest and quietest parts you also reduce the chance of clipping occurring when you are recording.
To open Audacity’s compressor, first choose the selected audio you want to work on or select the entire track CTRL + A on Windows or COMMAND + A on Mac. Then go to the Effects menu and choose Compressor.

This will open Audacity’s compressor. You will see a number of settings.
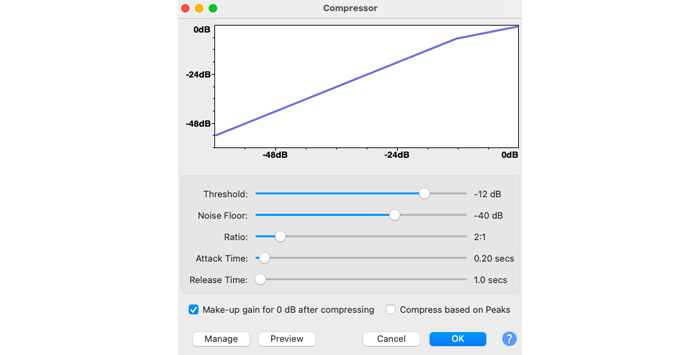
All these settings may look quite daunting to a beginner. However, with a little practice and experimentation, you will soon have them mastered.
If you are just beginning to work with a compressor, it’s best to focus on the Threshold setting. This is the one that will make the biggest difference to your audio. The other settings can be left as default until you feel comfortable playing around with them.
But whether you just adjust the Threshold or whether you dive into the deeper settings, compression can make a big difference when it comes to clipped audio. A little trial and error are all it will take to tame your audio track.
Audio clipping is a frustrating problem to deal with. It will mess up your recordings and leave them difficult to listen to.
Audacity has all the tools you need to get rid of clipping for good, so with a little practice and a little patience you can fix audio clipping forever. And, since Audacity is free, it won’t cost you a single cent!


