Marco Sebastiano Alessi
Jan 07th, 2024
Cubase features an impressive array of native plug-ins for noise reduction. Today, I’ll show three methods you can use to clean up your audio tracks, and then I’ll teach you how to do it even more efficiently using the AudioDenoise plug-in.
The noise level in your audio file will determine how well these techniques will work. You also can use a combination of the following noise reduction plug-ins for best results.
When noise is present at a specific frequency, EQ can help eliminate it without compromising your audio’s overall quality. Cubase includes different EQ plugins you can experiment with depending on your version of Cubase. CurveEQ works magnificently, but it’s only available with Cubase Pro. You can try StudioEQ if you have Cubase Element or Cubase Artists.
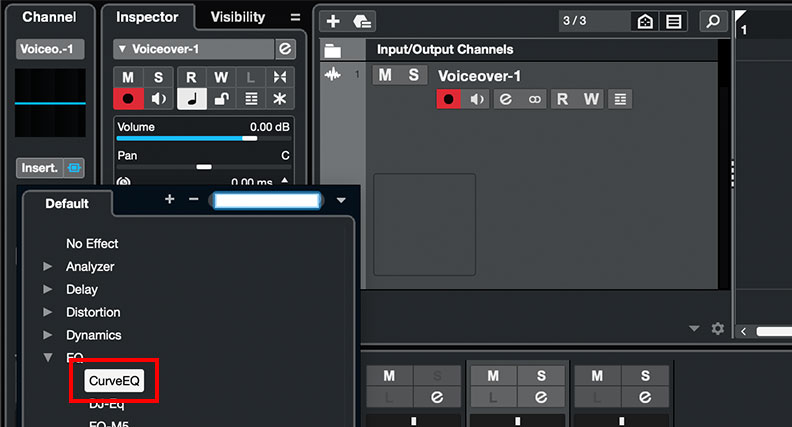
Step 1: Add CurveEQ to your inserts and open the plug-in.

Step 2: You can use the presets to add a High-Pass Filter to cut out rumble and hum sounds and low frequencies or a Low-Pass Filter to cut hiss sounds and other high frequencies. To add a High-Pass and Low-Pass Filter using StudioEQ, set the Filter Type to Cut and the Frequency where you want the filter to kick in.
Step 3: You can also manually set a point in the curve by clicking and dragging the point up or down to boost or reduce that frequency. In the StudioEQ, you can only work with four bands.
Step 4: Playback your audio and make further adjustments if necessary.
A noise gate works by reducing the audio signal below a set threshold, and such threshold determines the level at which the gate closes and opens to let the audio signal through. The Gate plug-in is only available in Cubase Artists and Cubase Pro versions. This method works great when background noises throughout your audio track are more audible and distracting during moments of silence.

Step 1: Search on effects for the plug-in Gate. You can type ‘Gate’ to find it or browse in Dynamics > Gate. Apply it and click it to open the plug-in interface. You will see a couple of controls: Input and Output levels, the Attack, Hold, and Release knobs on top, Analysis, Threshold, and Range on the bottom. You can use the Analysis knob to set the Gate to detect peaks or RMS.
Step 2: Set how you want Gate to analyze your audio signal in terms of Peak (0%), RMS values (100%), or a combination of the two. RMS can work best for you if your recording is speech or vocals. For audio recordings with many transient peaks, it’s better to use Peak.
Step 3: Set the threshold to a level where you want to activate the Gate. You can set it between 60 and 0 dB.
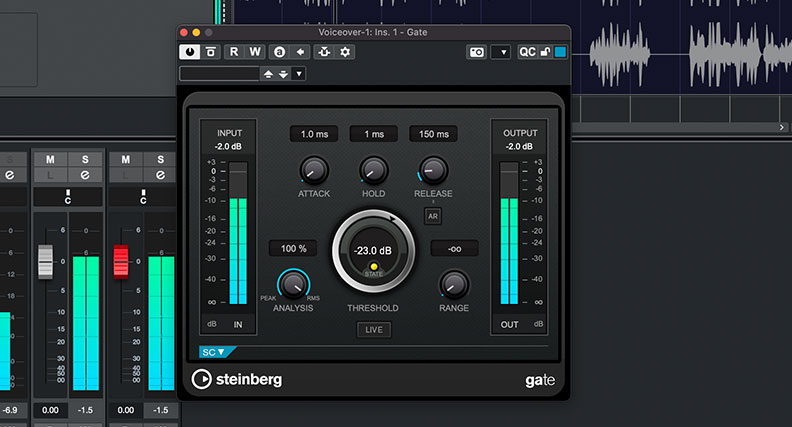
Step 4: Set the Attack, Hold, and Release levels. The attack determines how quickly the gate opens when the signal reaches the threshold. Hold is for how long the gate will stay open once the audio signal goes below the threshold, and Release defines how fast the gate closes after the Hold time. You can enable Auto Release to let Gate automatically spot the best release setting for your audio signal.
Step 5: Play with the settings to find a balance where the cut does not sound too abrupt but is not too soft to keep the noise audible.
When you have an audio recording with unwanted background noise at the beginning, the end, or in the middle, but it doesn’t overlap with the dialogue or instruments in the recording, it might be easier to just bring the audio down. This method will only work with audio recording with “simple” noises. If your audio recording has a noise present during the whole audio track, this method will not help you, and it’d be best to address it with EQ or Gate.
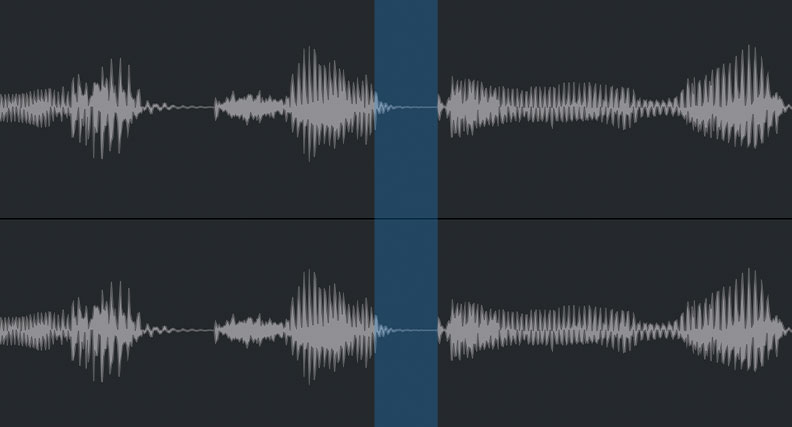
Step 1: Play the audio track and observe the waveform to find the sections with the unwanted noise. You can zoom in on the waveform to see the exact spot.
Step 2: Using the selection tool, select the noise section and press Shift + X to cut the selection and divide it into a new event.
Step 3: Bring down the gain from that specific part to eliminate the noise.
This method is probably the most time-consuming, and I don’t recommend using it if there are a lot of parts with background noise because it will take forever to clean your audio. However, I added it here because it can help you with small sounds you can easily cut from the waveform.
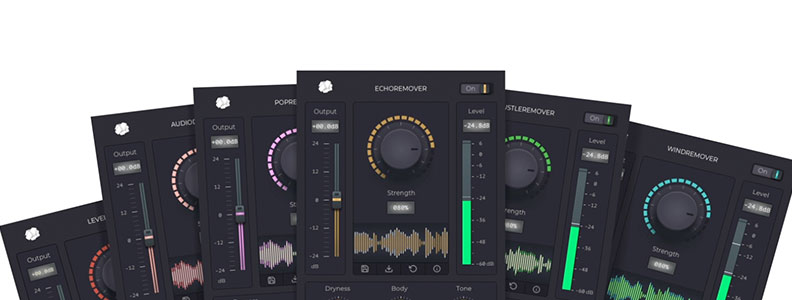
All the above methods can help you clean your audio, but when an audio recording seems irreparable, you need a tool to identify and remove noises professionally. CrumplePop is a suite of plug-ins that uses AI technology to clean up your audio recordings with absolute precision.
CrumplePop features various tools for audio-related issues such as room noise, mic bumps, clipping, wind noise, traffic, audio level repair, and more. Each plug-in offers excellent results with the default settings but allows you to adjust them with straightforward controls and a friendly user interface.
Let’s jump to the Cubase noise reduction tutorial using CrumplePop tools.
Go to the product page, click download, and select your operating system. Type in your email to receive the code to access the installer. Write the code you receive in the email and start your download. Install CrumplePop on your computer.
From the CrumplePop app, you can select which plug-ins you want to install, including the SoundApp standalone application. Select Install AudioDenoise and wait for it to complete. Once you finish installing the plug-ins, you can close the app and run Cubase.

Your CrumplePop plug-ins will be under the Restoration category. Let’s use AudioDenoise for this tutorial, but you can choose the dedicated noise reduction tool if you have a specific noise like traffic, wind, pops, or rustles. Launch AudioDenoise Complete to automatically apply AI noise reduction to your audio track.

AudioDenoise settings are easy to use. The strength knob controls the amount of noise reduction that is applied. The Output slider allows you to adjust the output levels after noise reduction, and at the bottom, you have a multi-band section to target specific points in the frequency spectrum.
The best part of AudioDenoise and CrumplePop plug-ins is that you can listen as you adjust the settings, thanks to their real-time processing feature.
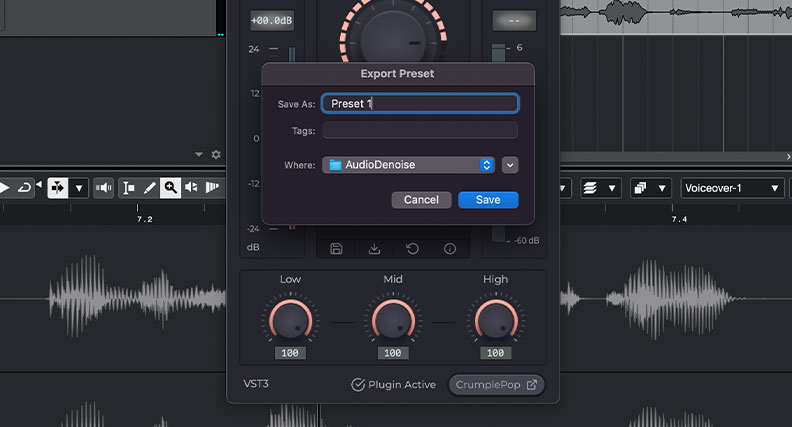
You will often find that the same settings can be applied to similar tracks. To streamline your post-production sessions, you can create presets. Once you have a setting you like, save it by clicking the disk icon. You can load it in other audio clips with similar noise.
CrumplePop offers tools for a quicker, more straightforward solution for podcasters, video editors, and musicians to remove background noises, improve audio quality in their post-production process, and repair seemingly irreparable live recordings.
You can download a free trial of CrumplePop to try AudioDenoise and get PopRemover, RustleRemover, and the SoundApp Basic application for free with the Starter plan.
Good luck!


