Marco Sebastiano Alessi
Mar 21st, 2023
Have you ever tried to use a song in a video only to find that the music is too loud and you can’t hear what the person is saying? And when you try lowering the track’s volume, the music becomes so quiet you can’t listen to it in some parts. That’s probably the moment when you discovered audio ducking. But what is audio ducking, exactly?
DaVinci Resolve, a popular video editing software, offers an audio ducking feature using a sidechain compressor to help you balance volume to keep music tracks and speech at reasonable levels.
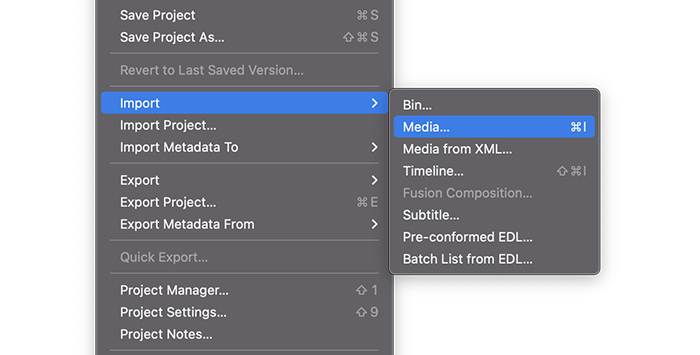
Here’s a step-by-step tutorial for audio ducking using DaVinci Resolve’s built-in features.
Ducking means reducing an audio track’s volume level when another audio track is playing. It’s a technique used in video or audio projects when you want the background music tracks to automatically lower when a person starts talking and then raise the volume back when there is no speech. You can hear this effect in many videos online, in the news, and in ads.
DaVinci Resolve has an easy way for audio ducking. Bear in mind that although you can simply lower the volume of the music tracks, this will reduce the volume of all the channels even when there’s no speech.
You can also add keyframes to the music tracks to create an automation to lower and raise the volume at a specific section of the music tracks. However, especially in larger projects, this process will be time-consuming.
Luckily, DaVinci Resolve offers an automatic audio ducking feature using a sidechain compressor that works perfectly and saves time, unlike using keyframes.
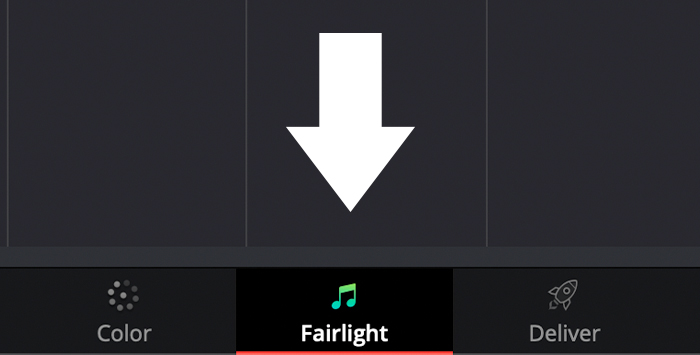
First, ensure you have all your files organized in the timeline and identify which ones feature speech and which ones are music tracks, as you’ll be working with both. Once you have everything ready, switch to the Fairlight page by selecting it from the bottom menu.
You’ll notice you have only the audio tracks on the Fairlight page because this is the post-production side of DaVinci Resolve. Make sure you can see the mixer by clicking on Mixer in the top right corner of the screen if it’s not visible.
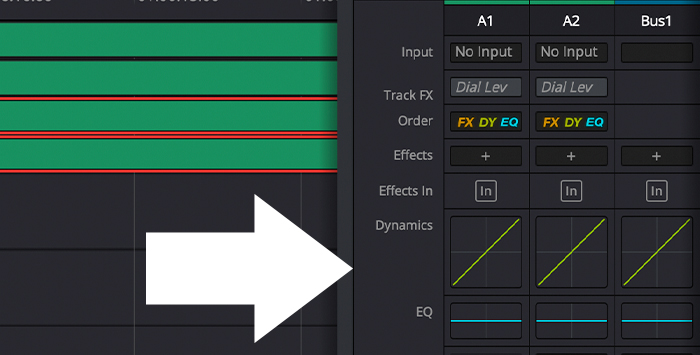
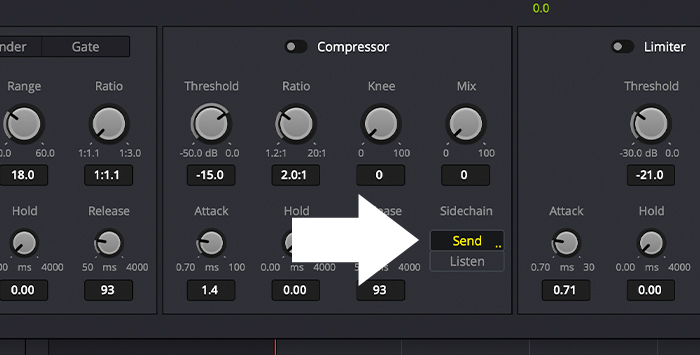
On the mixer, locate the speech track and double-click on the Dynamics area to open the Dynamics window. Locate the compressor options and enable Send by clicking on it. You don’t need to activate the compressor since you don’t want to compress this track.
What you’re doing right now is telling DaVinci Resolve that whenever this track is playing, the music tracks will duck. Close the windows and move forward to set up the music tracks.
You’ll need to enable Send on each one if you have multiple speech tracks.
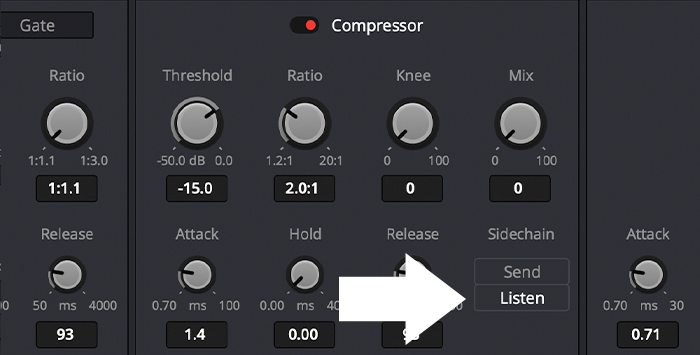
Find the music tracks in the mixer and double-click on Dynamics to open the Dynamics settings. This time you will switch on the compressor and then click on Listen to let DaVinci Resolve know that this track will follow the speech track.
What it does is that when the speech tracks start playing, the music tracks will automatically lower its volume. To achieve this, you need to adjust the threshold and ratio knob. The threshold knob controls when the compressor will start reducing the volume once it reaches the value, and the ratio knob will define how much you want to reduce the music tracks’ volume.
Find a balance between the two. You can preview the audio and adjust your settings if necessary.
There might be situations when your speech track has pauses and silences in between, causing the music tracks to rise or get quieter during your speech. To avoid these ups and downs, you’ll need to adjust the attack, hold and release controls for the compressor in the dynamic window for the music tracks.
The attack knob will control how quickly the compressor kicks in. It means how quickly the volume from the music tracks will go down. It needs to be quick but not so fast that it causes ups and downs in the volume levels. Raise it to make the attack slower, or turn it down to make it quicker.
The hold knob controls how long the music will be held at a lower level when there is silence in the speech tracks. Raise the knob, so the music volume stays down longer and does not go up too fast between long pauses. It’s on level zero by default, so increase the time if you want to keep a lower volume for longer.
The release knob will control how long the effect will wait to bring back the volume of the music tracks to its original volume once there is no more audio coming from the speech track. If it’s too quick, the music will rise as soon as the speech ends, causing the volume to go up and down between speech tracks. Raise the release knob, so it takes a little longer to return the music tracks to their original volume.
Before closing the Dynamics window, preview the sequence and adjust the Release knob if required. Adjust the Hold and Attack knobs to find a good balance for audio ducking. Close the windows when you’re done, and switch to the Edit page to continue editing your project. You can go back to the Fairlight page whenever you need to.
DaVinci Resolve’s audio ducking feature is excellent for working with a few tracks but shines with multiple music tracks and speech tracks in larger projects where each speaker has their own voice track.
The process of linking the sender and listener tracks is straightforward. You might struggle to adjust the compressor the first time around, but once you figure out what each knob does and understand how the settings work, audio ducking on DaVinci Resolve will simplify your workflow immensely.
Audio ducking is an effect that all video editors should be familiar with. The best thing about DaVinci Resolve is that you don’t need to edit the audio on a separate software or DAW, therefore reducing the amount of time required to make the necessary audio adjustments to your projects.
Keep experimenting and learning with DaVinci Resolve features and audio ducking. Good luck!


