T Mango
Aug 08th, 2022Crossfading is a useful technique in sound production. It consists of a fade-out and a fade-in that are combined to offer seamless transitions between regions of an audio recording.
You may need to crossfade:
Crossfading is very easy to do in digital audio workstations (DAWs) like Logic Pro but is a bit more involved in GarageBand. In this post, we’ll take you through step-by-step, how to set up crossfades in GarageBand.
GarageBand is Apple’s free DAW that’s available to anyone who owns a computer running Mac OS (i.e., Macs, iMacs, or Macbooks).
GarageBand is an incredibly powerful DAW that offers audio tracking and editing functionality, MIDI recording and editing, and a range of other audio production tools. But its capabilities go far beyond basic recording and editing; as a stripped-back version of Logic Pro, Apple’s flagship professional-standard DAW, it offers comparable functionality to many paid DAWs available today.
One downside of GarageBand, however, is that it’s a Mac-exclusive product, so it’s not available for computers running Windows.
If you own a Mac, GarageBand may already be pre-installed, but if not, it’s easy to download from the Apple store.
A crossfade is simply a combination of a fade-in and a fade-out to create a seamless transition between regions of an audio file. It’s a useful technique to use when:
In these cases, the crossover from one region of the track to another can result in a clicking sound, stray pops, or other sonic artifacts that detract from the final production. Crossfades can help to alleviate these by creating a smoother transition between the connecting regions.
In this post, we’ll assume you’re familiar with how to fade in and fade out in GarageBand—if you’re not, it’s easy to learn how by reading How to Fade Out in GarageBand: Step-by-Step Tutorial.
Keep in mind that fading in and out in GarageBand can be applied either to individual tracks or to a whole song (i.e., using the Master Track). When working with crossfades, however, you’ll usually be working with individual tracks in your song or production.
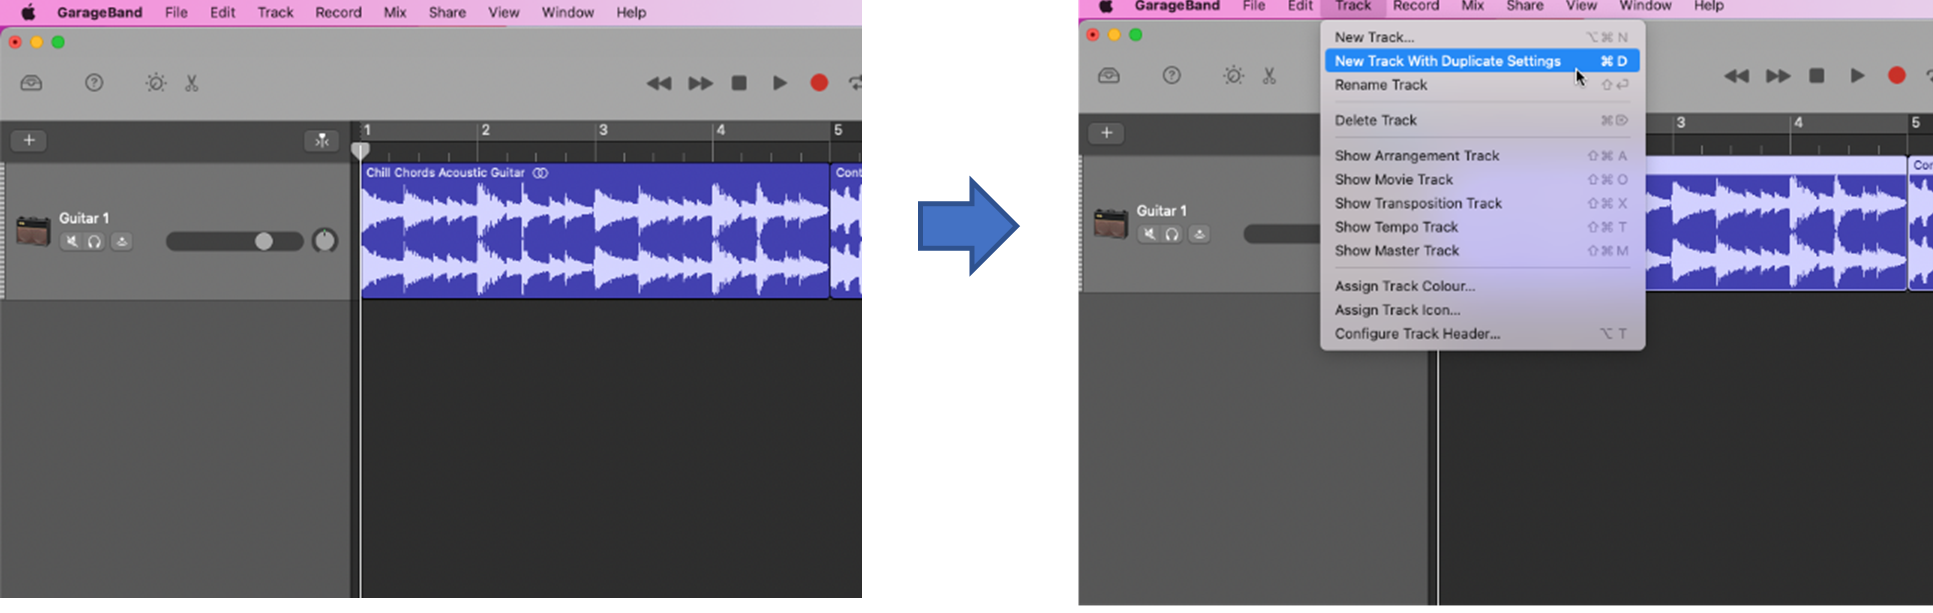
As mentioned, tracks consisting of different regions that have been joined together can benefit from crossfades. For these types of tracks, you’ll need to duplicate the track before you can apply crossfades:
Step 1: Select the track that you want to duplicate
Step 2: Make a duplicate copy of the track
Sometimes, your song or audio files may consist of tracks that need to be cut into different regions and joined in various ways.
Step 1: Select the point at which you want to cut your track
Step 2: Apply the cut

Now that we’ve seen how to duplicate and cut tracks, let’s look at how to crossfade in both cases.
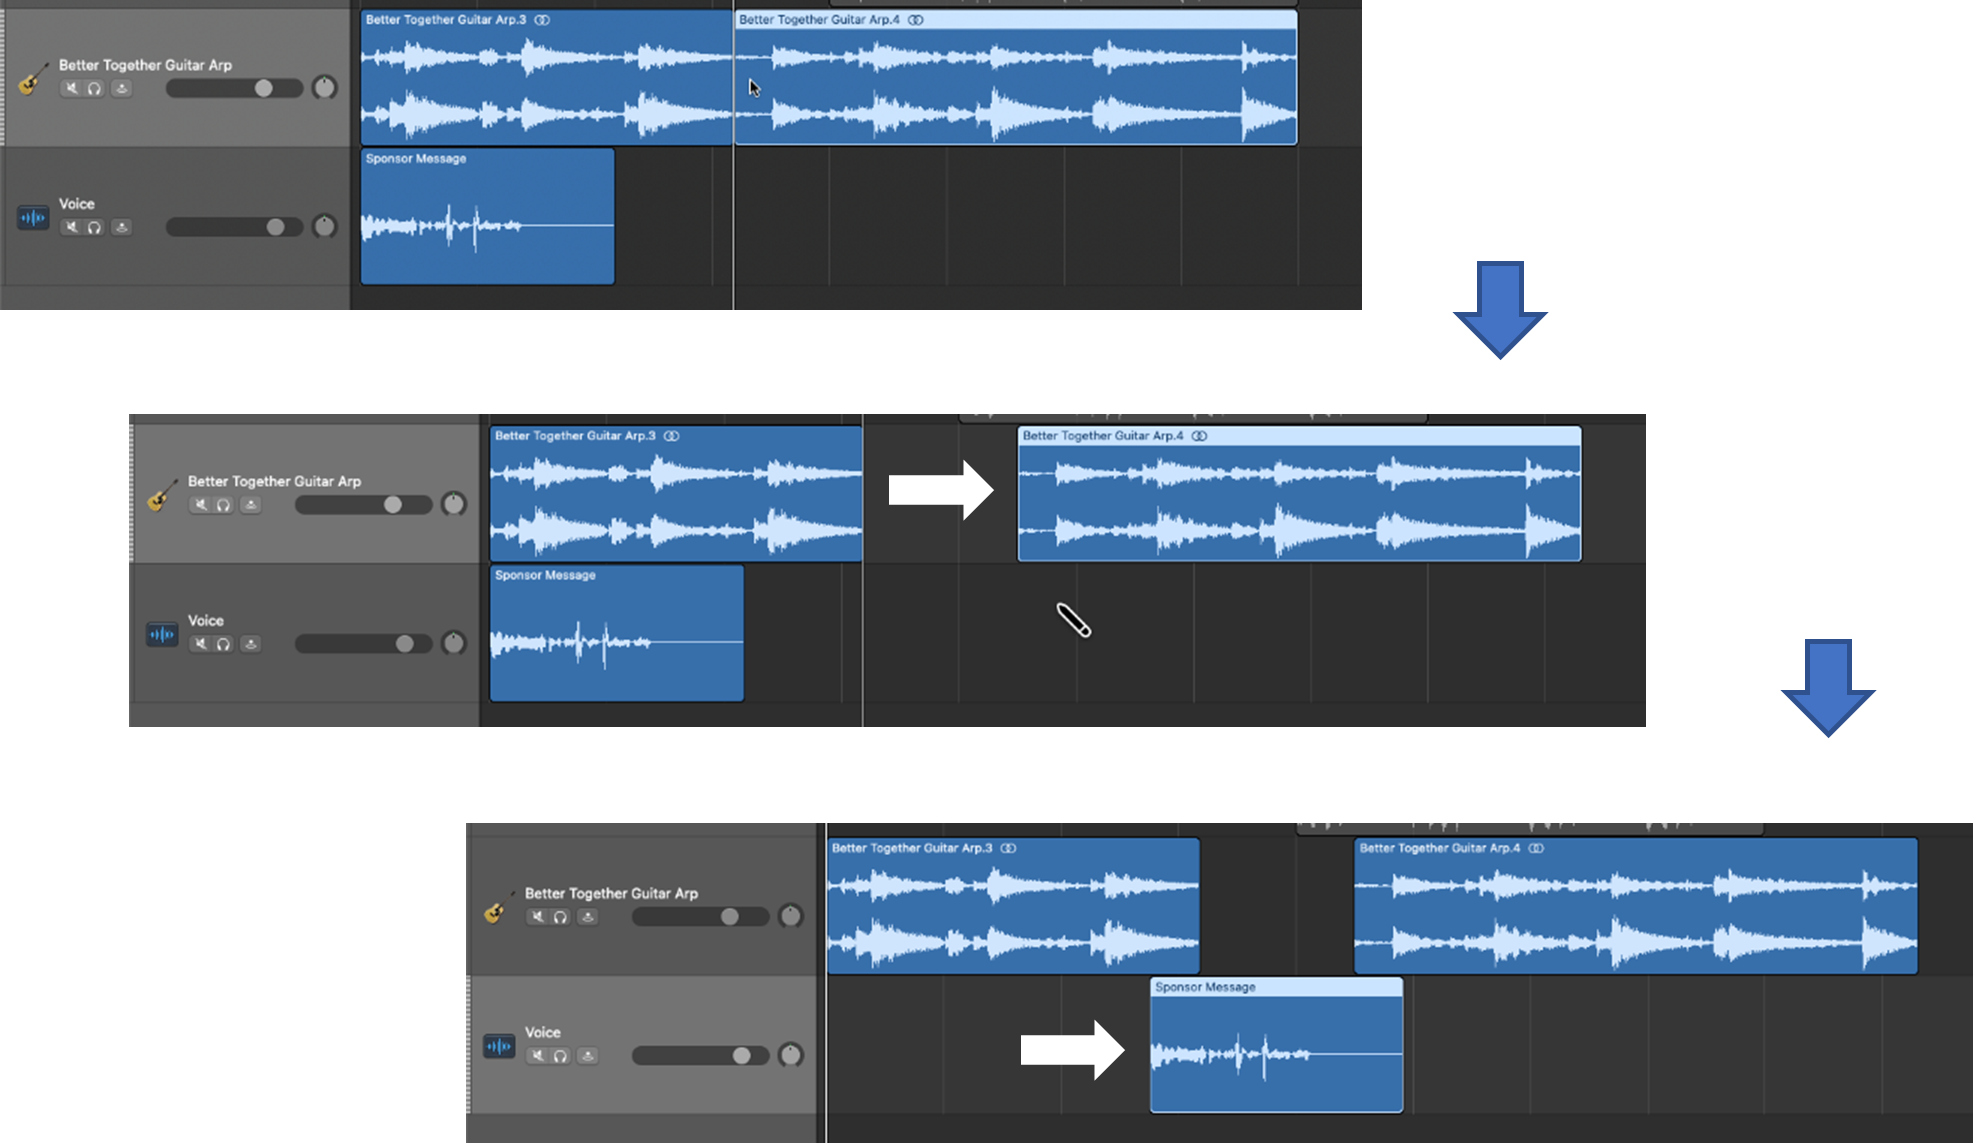
When you duplicate a track in Garageband, the duplicate copy will be empty and ready to take on regions, or audio clips, of your original track.
Step 1: Drag down the region to be crossfaded
Step 2: Create an overlap between regions in the original and duplicate tracks

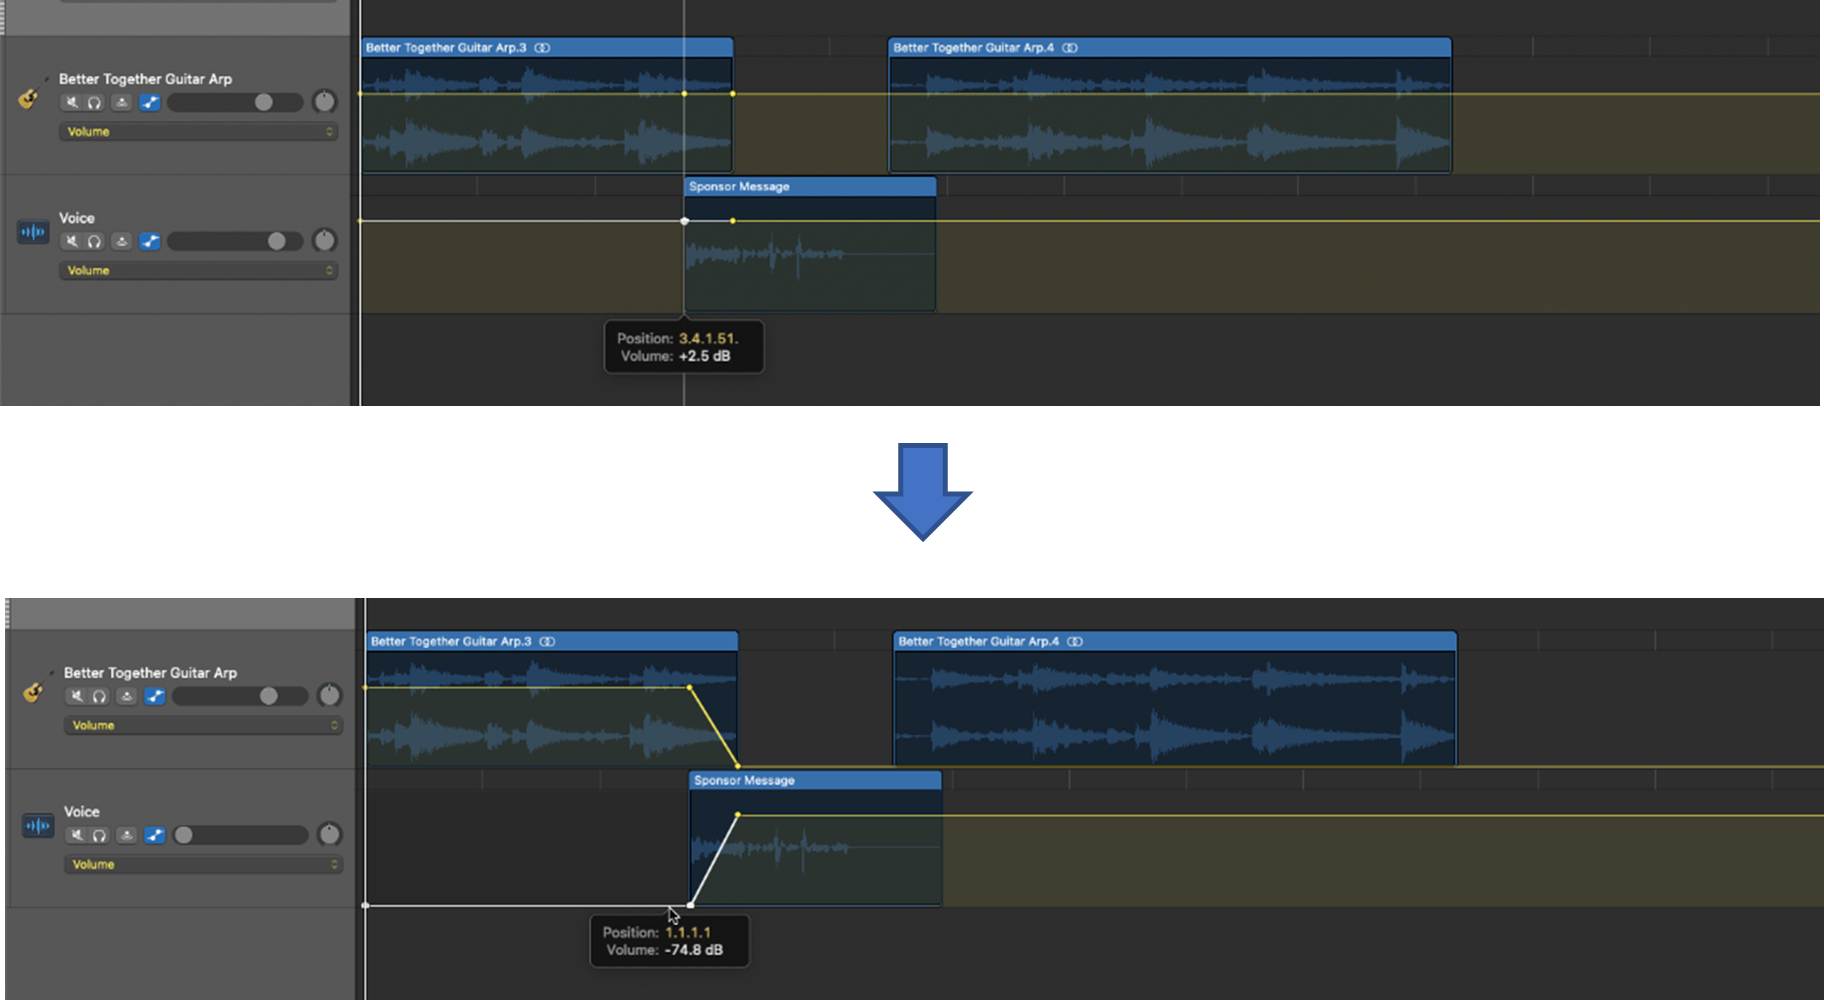
Step 3: Activate automation
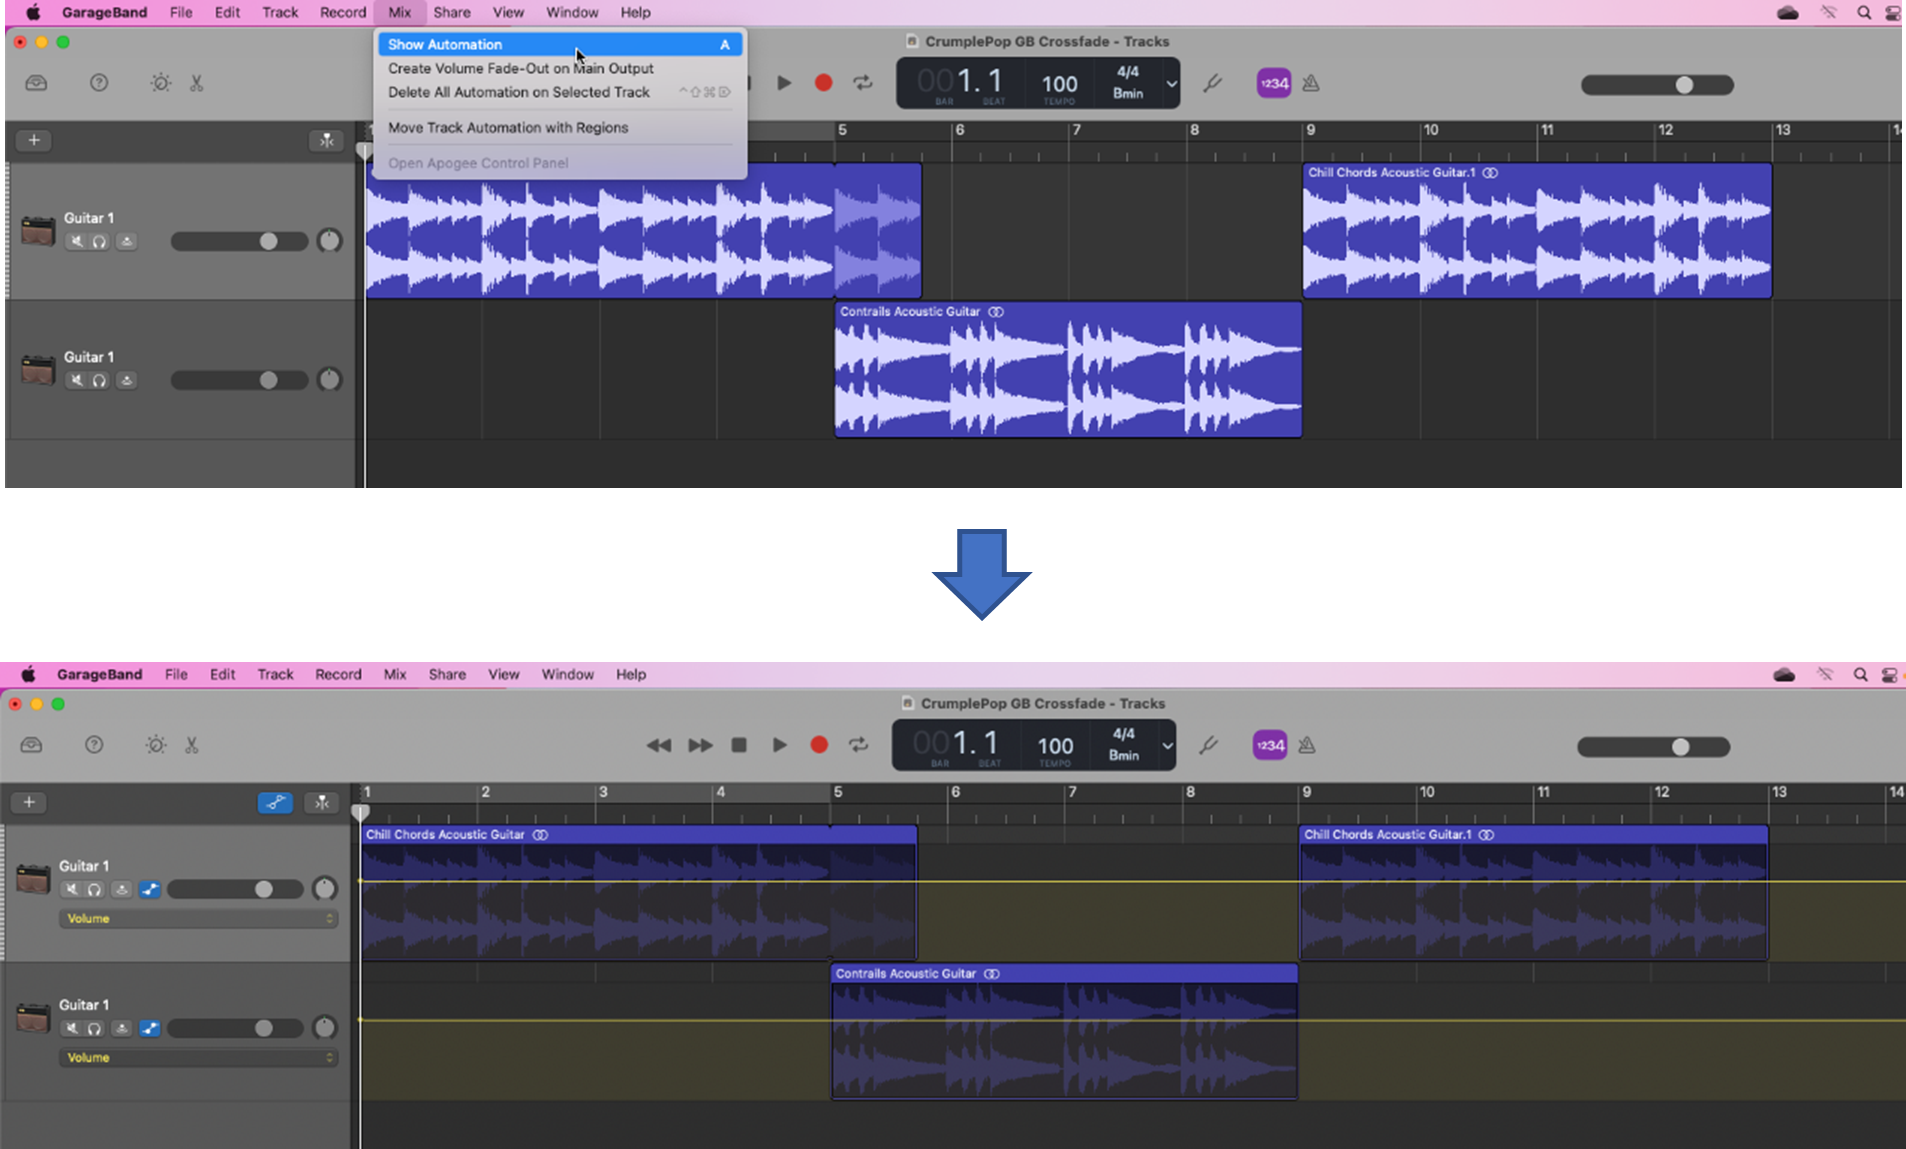
Step 4: Create volume points
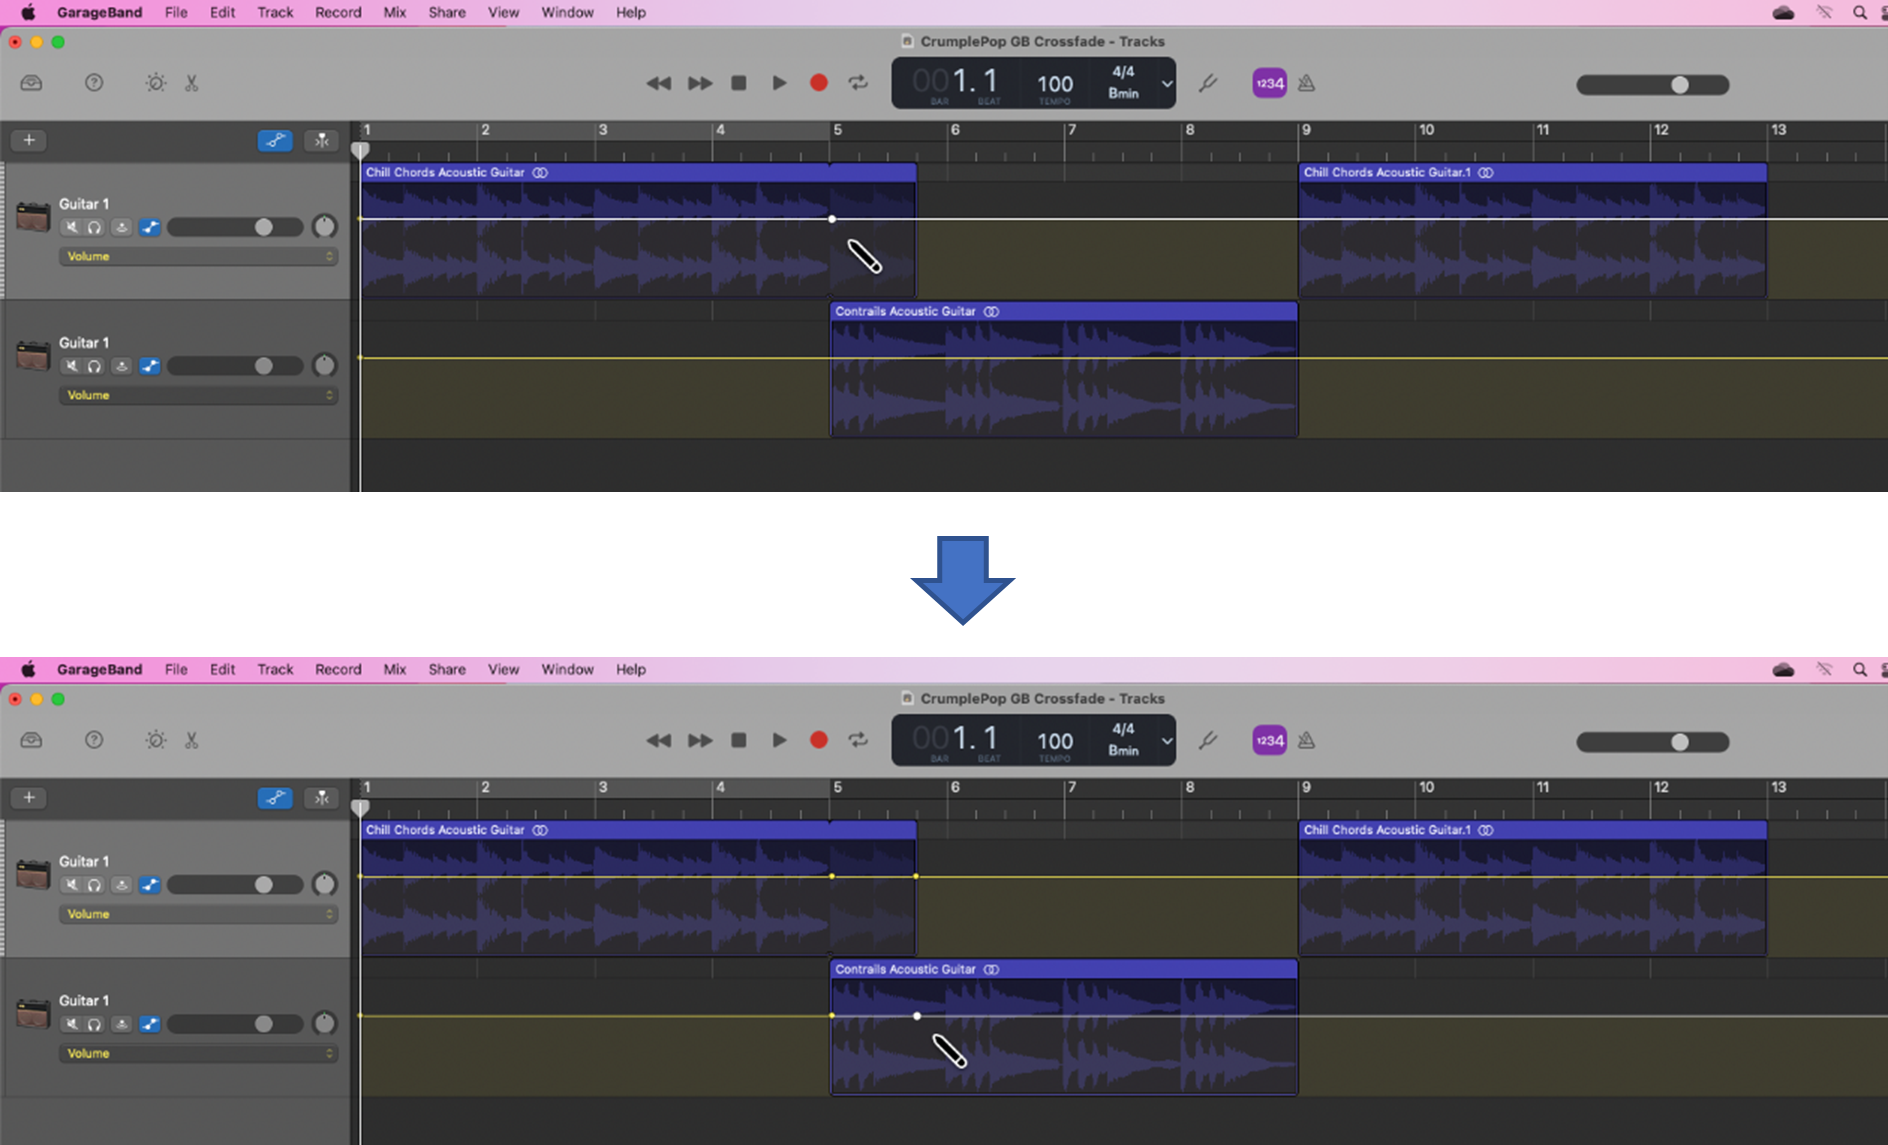
Step 5: Set up the crossfade
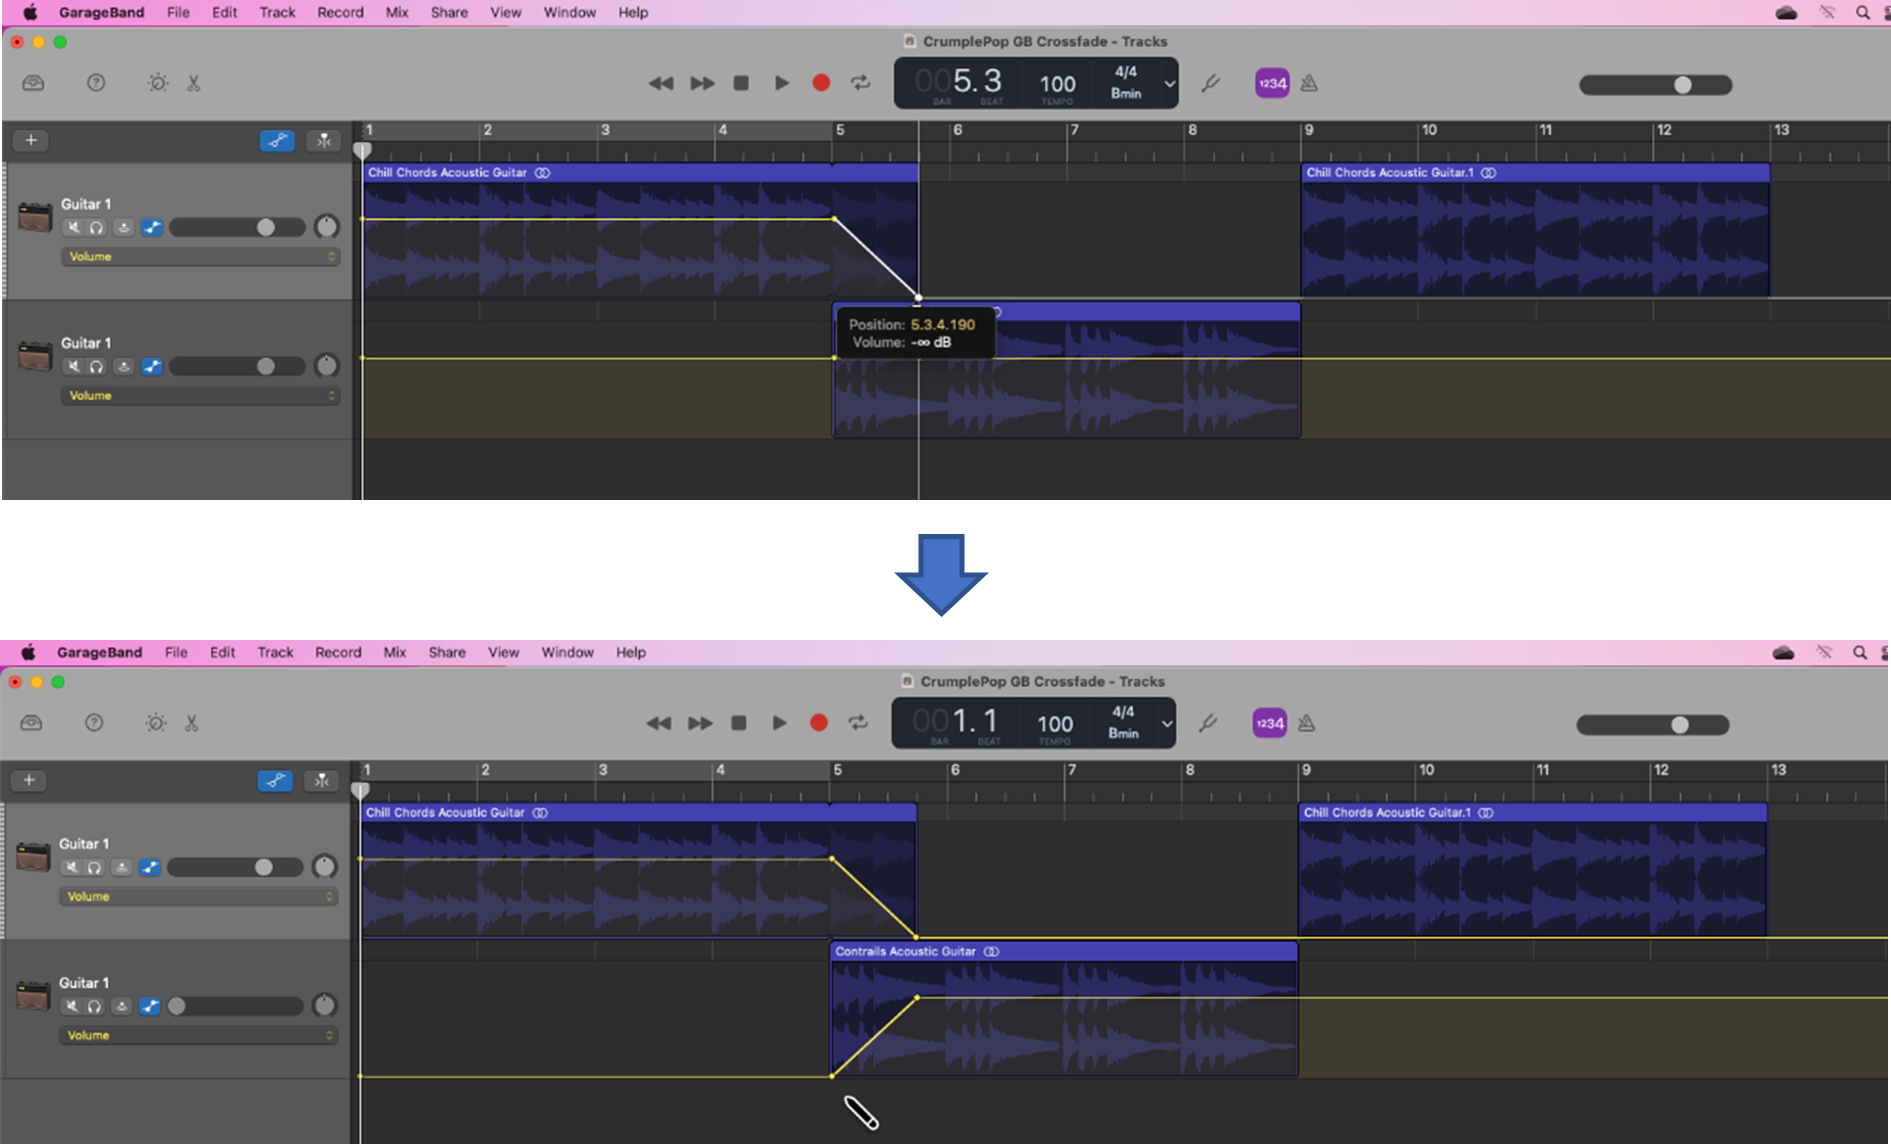
You’ve now created your first crossfade!
Listen to the newly crossfaded tracks—you may need to adjust the time of the crossfade (i.e., the slope of the volume lines) to improve pacing and produce a better result if it doesn’t sound quite right.
You’ll also need to repeat the process at the other end of the crossfade region to complete the crossfade (see step 4 in the next section).
To crossfade cut tracks in GarageBand, the process is similar to crossfading duplicate tracks, you’ll just need to move your regions around depending on where you’ve made your cuts and where you want to crossfade.
Step 1: Separate the cut regions
Step 2: Move the crossfade region into position
Step 3: Activate automation and set up the crossfade using volume points
Step 4: Repeat step 3 at the other end of the crossfade region
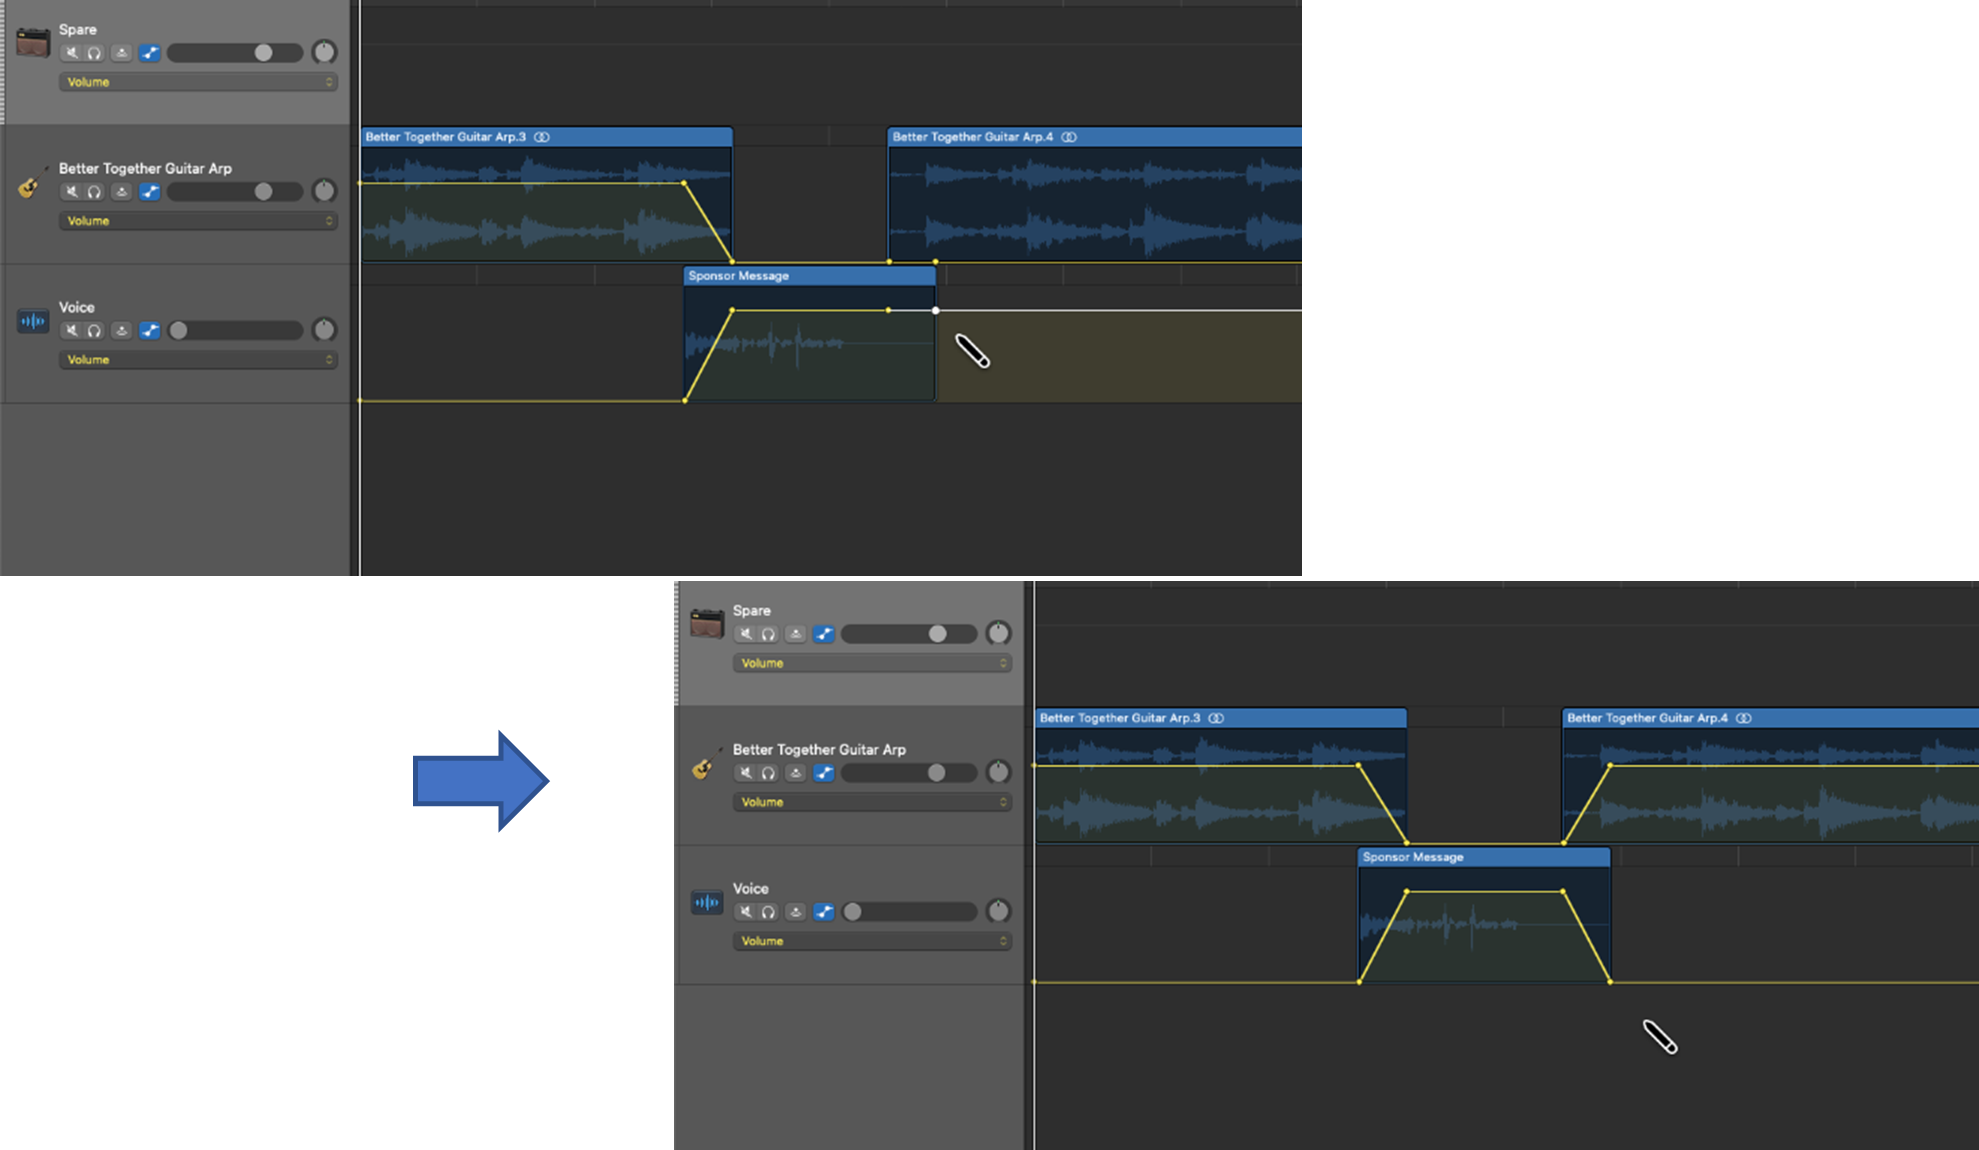
You’ve now completed a fully crossfaded region! Notice how the shape of the completed crossfade looks a bit like an X, i.e., a cross, which is what gives the cross-fade its name.
Crossfading is a great technique for combining regions of audio tracks into one audio file seamlessly. It helps to eliminate the stray sounds that can creep in when these regions are joined.
And while crossfading isn’t as straightforward in GarageBand as it is in DAWs like Logic Pro, it can be done quite easily using the steps outlined in this post.


