Graham Efurhievwe
Sep 18th, 2022After starting a podcast, there are a few hurdles that podcasters must overcome. One of them is editing their podcast audio.
Podcasts are so popular nowadays because the barrier to entry is rather low. Most of the steps involved from recording audio to publishing can be done from the comfort of your home without any special expertise in audio production.
Editing podcast audio, however, is one of the most tasking barriers for both new and old podcast creators.
There is a variety of software you can use to edit audio during podcast making, as well as all the other steps of podcast making. The right podcast recording software and Podcast Equipment Bundle make a huge difference in the quality of your work. However, this article focuses on audio editing alone.
It can be difficult to find software that is both effective and easy to use. If you ask your favorite podcasters what they edit their podcast with, you’ll get a handful of answers.
However, one name that keeps coming up among professional podcasters is Adobe Audition.
Adobe Audition and Adobe Audition Plugins are part of the Adobe Creative Suite which includes classics like Adobe Illustrator and Adobe Photoshop. Like these programs, Adobe Audition is very high-quality and ranks top of the line in the podcast editing niche.
Adobe Audition is one of the most established software programs for audio mixing. It is also well adjusted for adjacent projects like podcast editing.
You can record, mix, edit, and publish your podcast with Adobe Audition using the custom-built templates and presets in Adobe Audition.
It has a friendly UI that appeals to beginners, but after using it for a while, you’ll find that navigating this tool is not so friendly.
Even if you’ve used another audio mixer before, your first look at a new tool can be overwhelming. There are countless tools, options, and windows, and you can’t work through them without some knowledge.
That being said, you don’t need to know all those to make a significant improvement to the quality of your podcast with Adobe Audition.
You don’t even need to know a lot of them to improve your process. In this article, we’ll discuss the features you need, and how to edit a podcast in Adobe Audition.
Before we begin, there are a few things you need to pay attention to when you first open the Adobe Audition app.
In the top left corner, you’ll find windows titled “Files” and “Favorites”. This is where your files go after you record or if you import an audio file. To edit a file, all you need to do is drag and drop from this window to the editor window.
Also at the top left corner, there’s the option of “Waveform Editor” or “Multitrack Editor”. The waveform view is used to edit a single audio file at a time, while the multitrack view is used for mixing together multiple audio tracks.
Note the Editor panel (which may be a multitrack or waveform editor, depending on what you select) right in the middle where you can drag and drop imported audio files.
You’re not going to need most of the options and windows besides these for routine podcast editing.
To launch Adobe Audition, open Adobe Creative Cloud and click on Adobe Audition. Importing audio into Adobe Audition is very straightforward. There are two ways to do this:
Adobe Audition supports almost any file format, so compatibility issues are unlikely. However, if you’re having problems with compatibility, the easiest way to fix this is to convert your audio files to a supported one.
A podcast is rarely a solo recording. They’re mostly a combination of one or multiple voices, ambient sounds, special effects, and background music. However, you can record directly from your recording device if you’re so inclined.
After recording audio but before bringing all the aforementioned elements together, each one is edited in a multitrack session. To create a new Multitrack session, go to File, New, and Multitrack session.
After you import audio, arrange your clips on different tracks in the sequence they are to be heard. For example:

Once you’ve put your audio clips in the multitrack sequence, you can start editing properly. An easy shortcut to this is a window called the Essential Sound panel.
This allows you to assign a certain sound type to your audio track and apply edits relevant to that type, with many presets to choose from.
If you choose Dialogue as the sound type, as most podcasters do, you’ll be presented with a tab of several parameter groups optimized for vocal, conversational editing.
You can only use one type at a time, and choosing another type can undo the effects of your chosen type. Click the Essential Sound window in the top left corner to open the Essential Sound Panel.
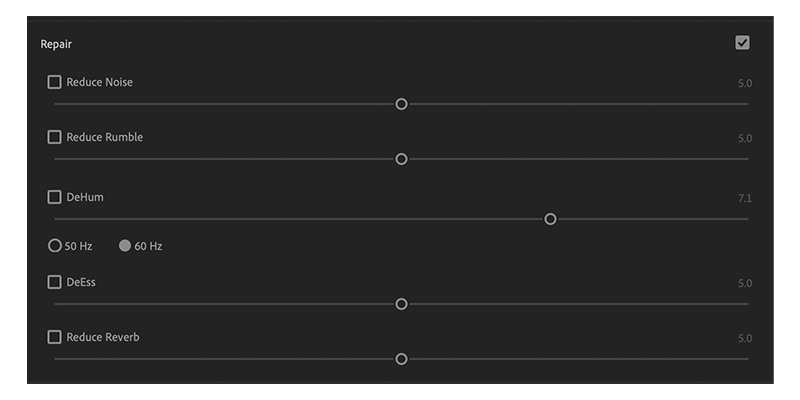
There are many ways to manipulate and repair audio with Audition. One way is with the Essential Sound panel we just discussed. Since we’re working with the dialogue here, click on the Dialogue tab.
Select the Repair Sound checkbox and select the checkboxes for the settings you want to adjust. Then you can use the slider tool to adjust each of them according to your taste. Common settings relevant to podcasting include:
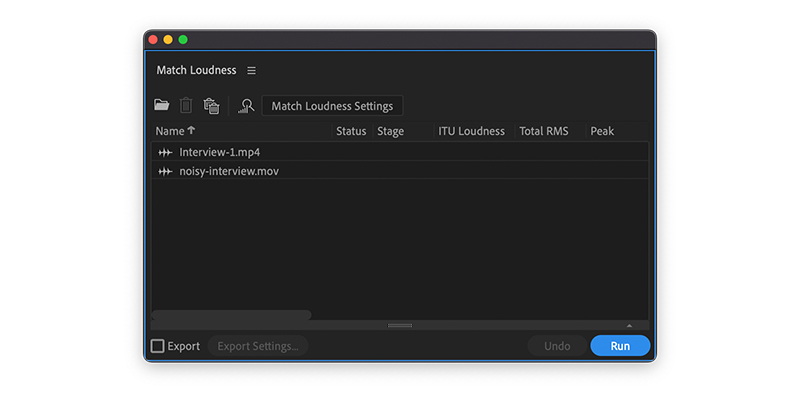
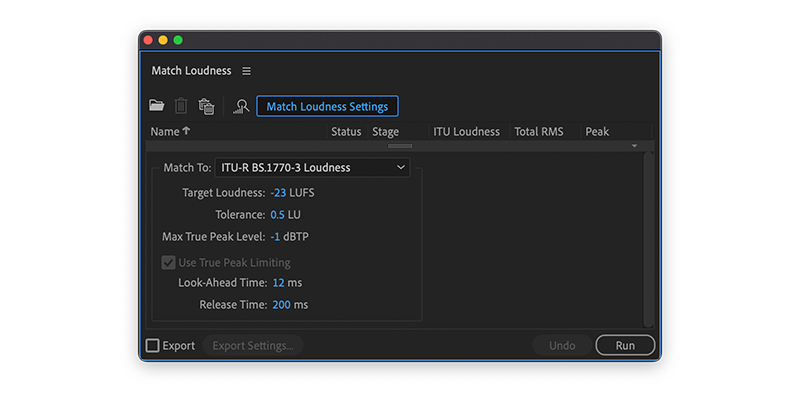
One of the most common problems podcasters encounter is differential loudness on various tracks. With Audition, you can measure overall volume in audio clips, give them a boost if you feel it’s not loud enough, and align the loudness on every audio track to around the same levels.
The ITU broadcast standard for target loudness is -18 LUFS, so setting yours anywhere between -20 LUFS and -16 LUFS should be fine.
There are tons of effects you can utilize in the Multitrack Editor, and you can always adjust them on the go. There are 3 ways to add effects to imported files:
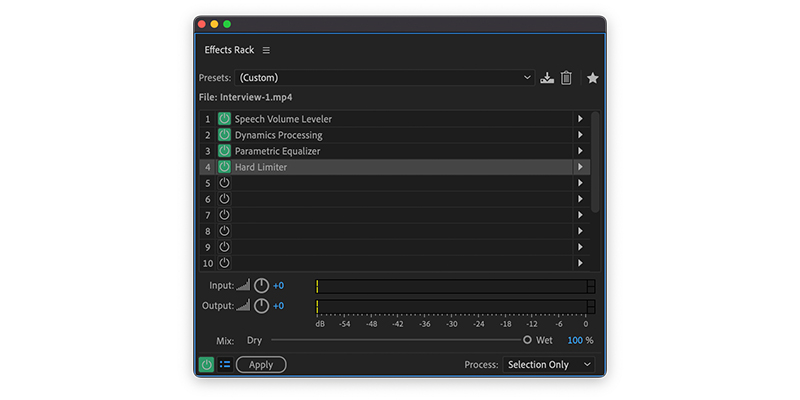
Audition offers a few preset effects for podcasts. To use these, select Podcast Voice in the Presets dropdown box. This adds the following:
To remove background noise, you first need to highlight the section of an audio track you want to clean up. Using the Parametric Equalizer, you can reduce all noise below a set frequency. This is useful for removing more aggressive noise.

Click “Effects” on the menu tab, then click “Filter and EQ”, then “Parametric Equalizer”.
At the bottom of the Parametric Equalizer window, there’s an HP button that represents High Pass. Clicking this button allows you to set a “high pass” filter, which filters out unwanted frequencies below it.
Slide the blue square with the “HP” label on it to set the frequency level. Listen to your audio clip and adjust the slider to find at what level you sound best.
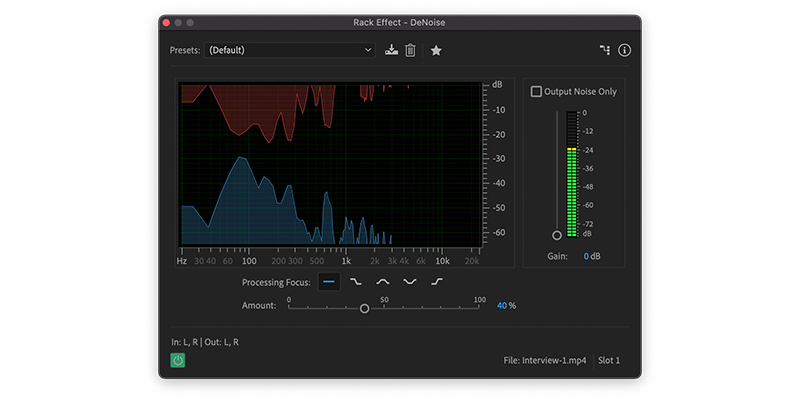
Another way to reduce noise is the “DeNoise” function, which will reduce smaller, less aggressive background noises
Click Effects on the menu bar, click “Effects”, then click “Noise Reduction/Restoration”, and then “DeNoise”.
Move the slider up and down to determine how much ambient noise you want to get rid of. Listen to your audio clip and adjust the slider to find out what level you sound best at.
Often, it is better to reduce the more significant background noise first, so we suggest using the parametric equalizer before the denoise function. The combination of these two functions should clean up your audio nicely.
Cutting is one of the most important things a podcaster can have in their arsenal. While recording, there may be slips, stutters, accidental utterances, and weird pauses. Cutting can eliminate all of those and ensure your audio has great pacing.
Place your cursor over the time bar at the top of your screen and scroll to zoom in or out on a section of audio. Right-click for the time selection tool and use it to highlight the desired segment of audio.
Click delete once the unfavorable parts of your audio have been highlighted. If you cut out something important, you can always undo it with Ctrl + Z.
Having smooth background soundtracks and sound effects can make a good podcast episode a great one. They keep listeners engaged and can accentuate the important parts of your episode.
Drag and drop audio files into separate tracks to begin editing. It’s easier to edit if you split individual files for easy customization. Slide the blue time indicator where you would like to split the track and hit Ctrl + K.
There’s a yellow line that goes through each track. A yellow diamond appears if you click anywhere along this yellow line that signifies a breakpoint.
You can create as many of these “breakpoints” as you want, and use them to edit your tracks. If you drag a breakpoint up or down, the overall volume of the track changes until it gets to the next breakpoint.
Fade-in and fade-out are popular audio effects in with podcasting because they give a sense of progression. This can be good for soundtracks and transitions.
At the edge of each audio clip, there is a small white and grey square that you can slide to create a fade effect. The distance you move the square determines the duration of the fade.
After you are done editing, cutting, and mixing your audio file, all you have to do is save and export. This is the last step. To do this, click “Mixdown Session to New File” on the multitrack window of the menu bar, then “Entire Session”.
After this, click “File” and “Save As”. Name your file and change the file format from WAV (which is Audition’s default) to MP3 (we recommend exporting in this format).
Whether you’re recording your first episode or trying to improve a previous one, Adobe Audition podcast editing can make your process a whole lot better. Proper mastery of Audition can save you time and smoothen your process from the first step to the last. It is difficult to grasp at first, but it gets much easier when you know what to look for.
We’ve discussed here the Audition features that are most useful to edit a podcast episode and how to use them.


