JG McQuarrie
Jun 30th, 2023
If you own a Mac then you already have a great digital audio workstation (DAW) available for free.
That means you can start getting creative with your music straight away, without having to invest major money.
GarageBand is simple to use and easy to get to grips with. Editing audio you have already recorded is important to make your work the best it can possibly sound.
Fortunately, editing is just as easy in GarageBand as it is to record.
There are plenty of easy ways to get your audio sounding just right.
There are many simple ways to begin the editing process on your song in GarageBand.
Starting the recording process for an audio file in GarageBand is easy. You just need to hit record and away you go. To add an additional, separate track, right-click over the track menu area.
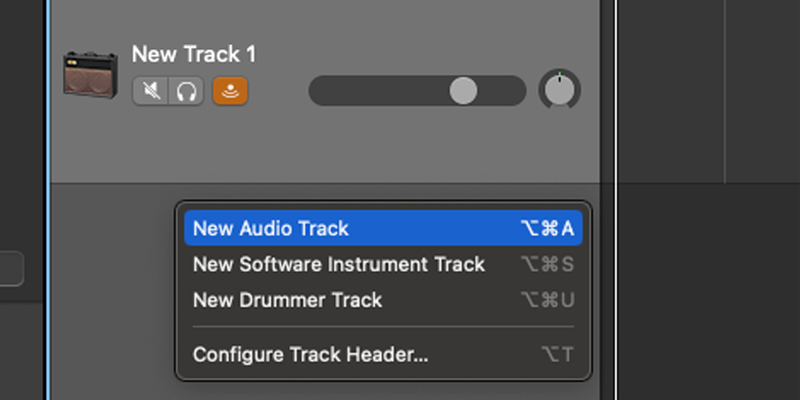
You can then choose whether you want to add an audio track, a MIDI track, or a new drummer track. Whichever you choose, GarageBand will then create that new track.
The last of these utilizes GarageBand’s built-in repertoire of different drummers and styles.
These are useful if you need percussion but don’t have a drummer or the time to learn how to use a dedicated piece of software for drumming.
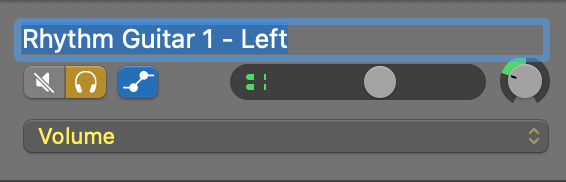
To rename a track, double-click the track’s name on the left-hand side. It will turn blue and you can rename it to whatever is most useful for you.
If your track is more than a few seconds long, you will want to be able to zoom in so that you can get accurate placement for editing.
To zoom in, drag the zoom control at the top-right of the screen left to zoom in or right to zoom out.
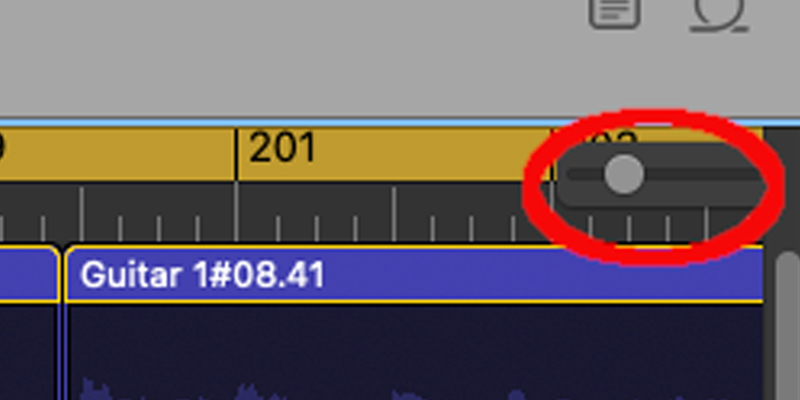
You can also use the keyboard shortcut COMMAND + LEFT CURSOR ARROW to zoom out and COMMAND + RIGHT CURSOR ARROW to zoom out.
If you need to cut your entire track down into sections so you can move part of it somewhere else or simply to delete it you will need to split your track.
To do this, first, select the track you want to split, then drag the playhead to the point where you want to split it.
Once it’s in place, go to the Edit menu, then choose Split Regions At Playhead. Your track will then be split in two.

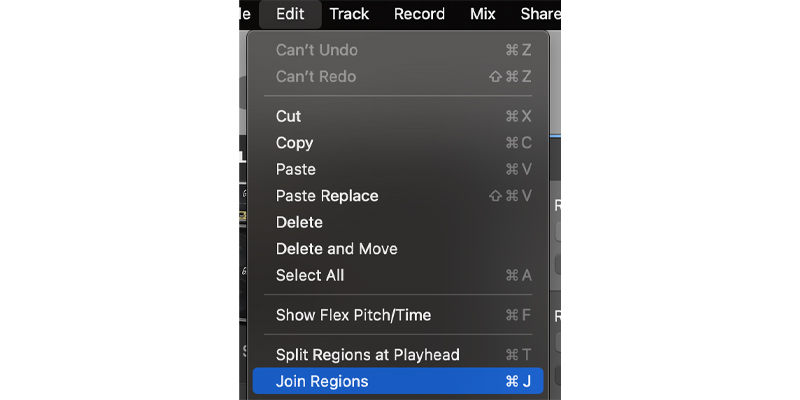
Merging a track is the opposite of splitting it — getting two separate tracks to come together so they become one rather than dividing one into two.
Firstly, select the two (or more) regions you want to join by holding down SHIFT and left-clicking each of them.
Once they have been selected, go to the Edit Menu and choose Join Regions. The regions will then be merged together into one.
If you find a track has gone on a little too long or has started a little too early you can trim it back.
Place your cursor in the title bar of the track and you will see the Trim icon appear on the right and left-hand side. Simply left-click on it and drag it to trim your track.

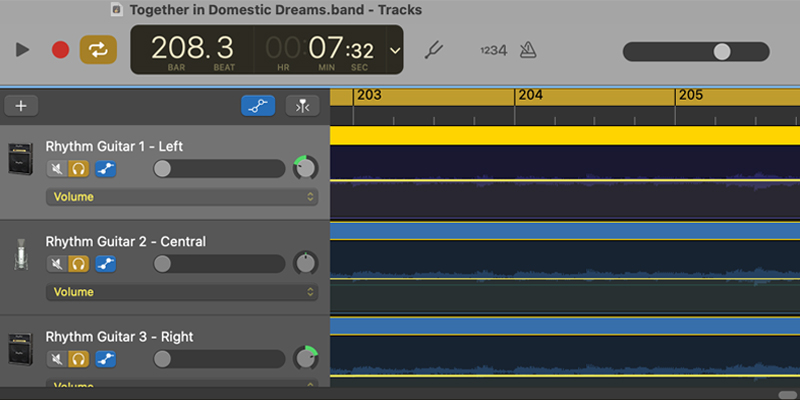
If you add a lot of tracks to your song, you may wish to have all of your instruments or vocals grouped together.
Recording tracks when you have a burst of creativity is great but it can be easier to keep certain types of sounds together, such as having all your guitar lines next to each other.
Ordering tracks is simple. Just left-click the track you want to move then drag it up or down until it’s in the place you want it to be.
To open the Region Editor, double-click the title bar of your track. This will open the editor in the lower third of the screen.
The Region Editor allows you to focus on one particular track, as well as giving access to other effects and ways of processing your sound on the left-hand side of the screen.
If you have a particularly killer bass riff or maybe just the perfect drum pattern, you may want to loop it.
To loop a track, CTRL + LEFT MOUSE CLICK in the title bar of the sound you want to loop and chose the Loop ON/OFF option.
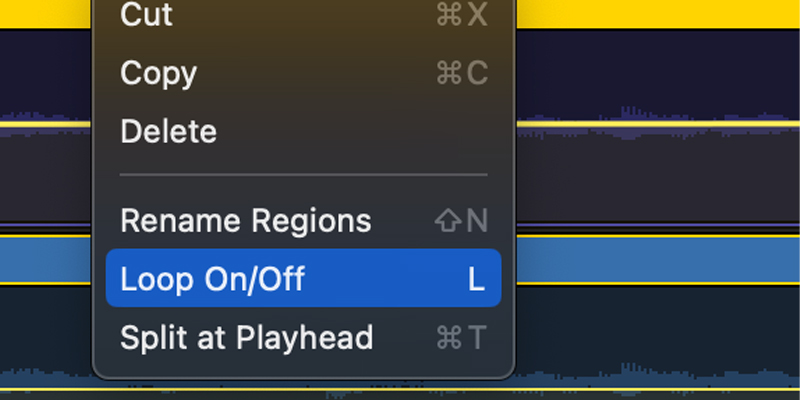
Your audio region will then automatically become a loop.
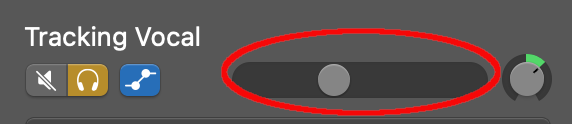
To change the volume of a track, there are two methods.
Firstly, you can adjust the slider to the left-hand side of the track. This will increase or decrease the volume.
The second method is to use Automation. As the name suggests, this means making changes to aspects of the song, such as the volume, automatically.
You will need to make the automation on your track visible. To do this, either go to the Mix menu and choose Show Automation, or simply press A on your keyboard.
The automation will then appear as a yellow line. Drag this line up to increase volume and down to decrease volume.
To mute an individual track, click on the speaker icon to the left of the track. This will turn blue and have a line through it so you know it is muted.
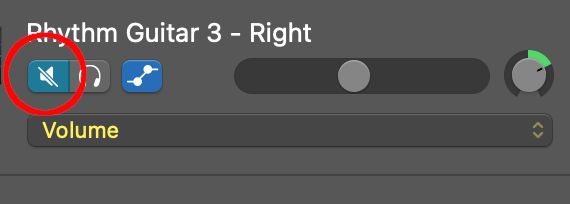
To affect all the mute buttons, hold down COMMAND and then click the speaker icon. All the mute buttons will then take on the same state as the one you clicked on.
So for example, if you wanted to unmute all tracks, you would hold down COMMAND and then click on a track that was unmuted. All tracks will then be unmuted.
If you want to pan your track to the left or the right so it sounds like it’s coming from one side of the speakers or the other, GarageBand has simple pan controls to the left of your track.

This can be useful for producers to do to help with clarity and separation in a song that has lots of different elements to it.
Simply click the pan control then drag up or down to pan from the left or right.
GarageBand also assigns a number to the pan, so you can ensure that if you pan one track left and one track right they can be the same “distance” apart.
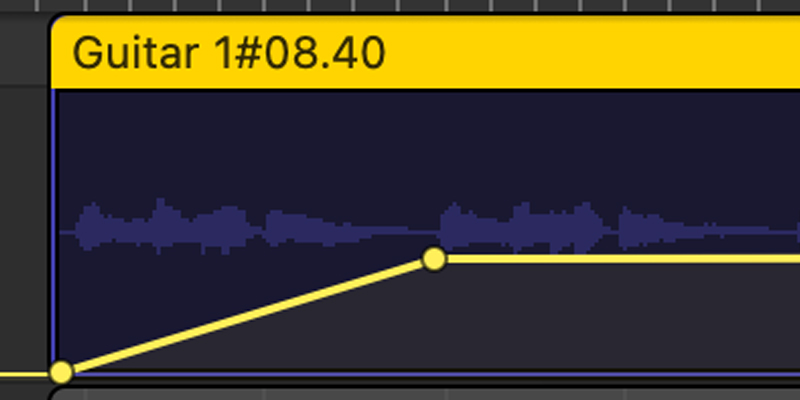
Automation can be used for much more than just simple volume changes and it makes being able to fade in or fade out a song really easy to achieve.
Firstly, ensure Automation is visible. Then, to create a fade-in, go to the start of the track and drag the yellow Volume automation line down to the lowest point.
Once this has been done, click the yellow Volume line where you want the sound to be at its normal volume — that is, faded up. GarageBand will create a point. You can then drag this point up and it will create a smooth fade-in.
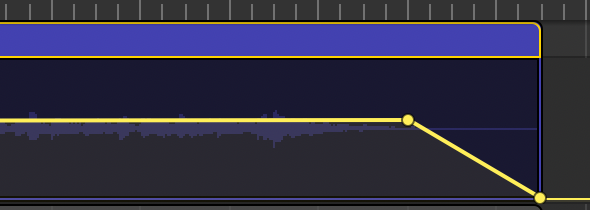
To create a fade out, go to the point on your track where you want the fade to begin and again click on the yellow Volume line to create a point.
Then click the yellow Volume line again at the point you want the fade to be complete. GarageBand will place a second point there.
Drag that point down to the lowest part and it will create a fade out.
Automation is a very powerful tool within GarageBand and it can control a lot more than just volume for fading in and out.
On the left-hand side of your track, click where it says Volume. This will open up the Automation menu and lets you select a variety of aspects within your track.
For example, if you wanted to create a pan from all the way from the left to the right, you would select Pan from the menu.
GarageBand will then bring up a green line, which represents the pan control. You can click points on the pan, as with the volume control.
Drag one point to the bottom and the other all the way to the top. You will now have an automatic pan!
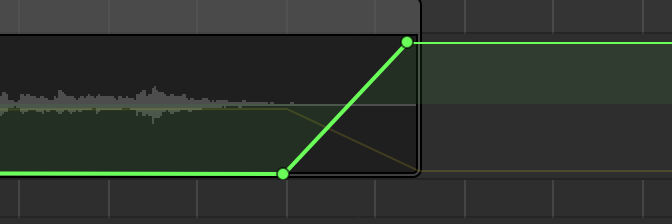
The further apart the points are the longer the pan will take. These can be dragged left and right as well as up and down so you can have complete control over how long the pan takes.
Automation allows plenty of other aspects of your track to be controlled automatically by the software.
Automation is a really powerful tool, and with it you can get amazing results.
To export a new GarageBand project, go to the File menu, then choose Save As. GarageBand will open the Save dialog box where you can name your file and save the new project to your hard drive.
Saving it as a GarageBand project preserves all your tracks, automation and so forth. However, if you want to save the file as an MP3 or other music industry standard format so you can use it in applications like Apple Music, you need to go to the Share menu, then choose Export To Disk
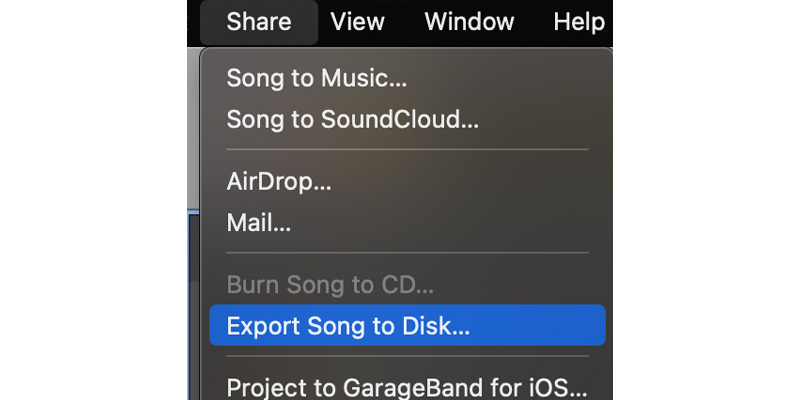
You can then choose the quality of the exported file and the type of file you want to export it as. Click OK and GarageBand will export your song.
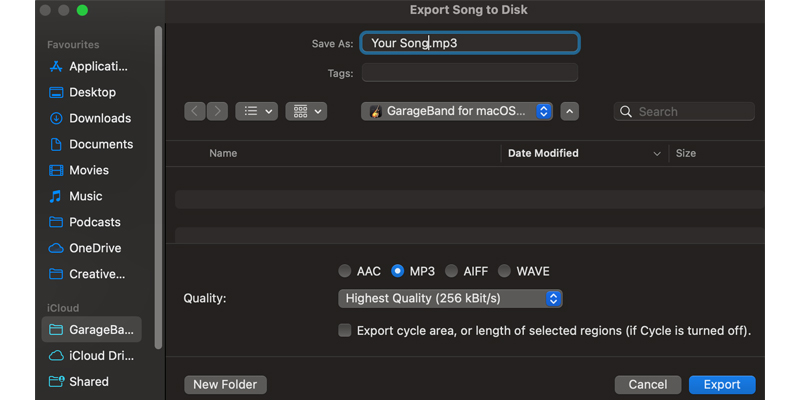
Once you export it you won’t be able to make further edits to it, so make sure you save it as a GarageBand project first so you can go back and make more changes if you decide you want to.
GarageBand may be a free piece of software but don’t let that fool you into thinking that it’s not powerful — it very much is!
Whether you are a beginner just starting the editing music journey for the first time or a more experienced hand who is used to producing music, there’s plenty to get to grips with.
And with a few good editing tips and tricks, you can really get stuck in and create your masterpiece!


