JG McQuarrie
May 15th, 2023
Logic Pro X is Apple’s professional digital audio workstation (DAW) designed to work with Macs and it’s become a powerful and flexible tool for all forms of music production.
Creating fades for your tracks is an important tool in any producer’s bag. You might want to gradually fade out a song or fade in at the start. Or maybe you want to crossfade between tracks, bringing the volume down on one track and increasing it on another.
Whatever the reason, Logic Pro X is a great tool to create fades with.
There are a few different methods to create a fade in Logic Pro X.
The first way to fade out in Logic Pro X is the Fade Tool method. This is a dedicated fade tool designed to create fades in an straightforward way.
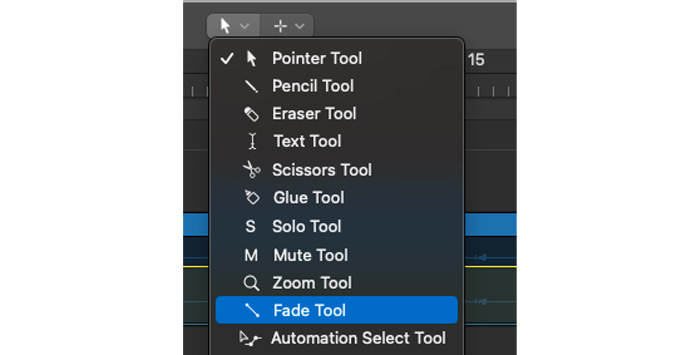
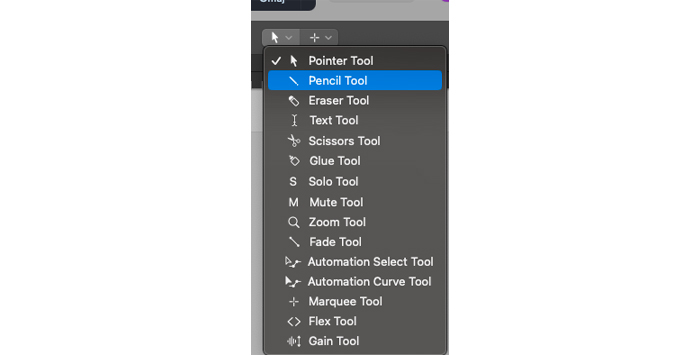
Firstly, go to Logic Pro X’s Tool Selector. You’ll find this at the top of the Region View. Select the fade tool.
Once you have done this, select the part of your track you want to apply a fade to. Do this by left-clicking the mouse while holding down the Command key and dragging it until the portion of the track you want to fade is highlighted.
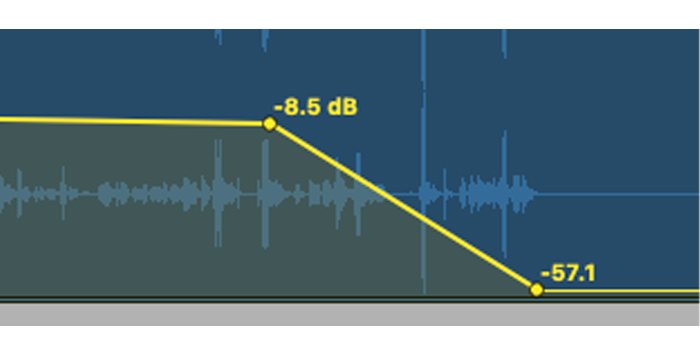
This will create a straight line through the highlighted part of your track that represents the fade out. This is a linear fade out — that is to say, the volume is decreased at the same rate throughout the whole of the fade.
It’s worth bearing in mind that using the fade tool method will only work on audio files. If you want to fade out MIDI data you need to use automation.
Another way to create a fade in Logic Pro X is using the Region Inspector.
Firstly, select the audio region you want to apply the fade to by left-clicking the mouse and dragging it.
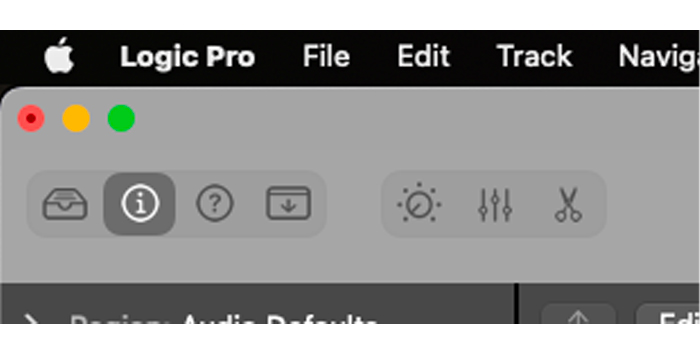
Then go to the Inspector window, either by clicking I or typing I on your keyboard.
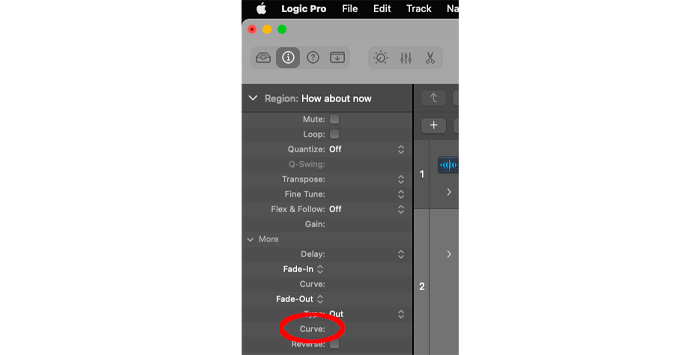
Select the More option to show additional settings. You will then see the Fade In and Fade Out options.
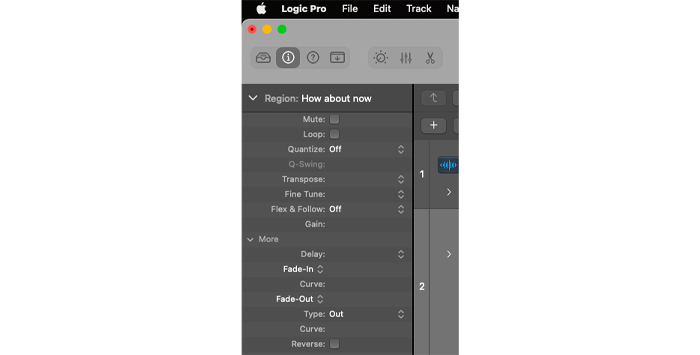
Click the option you want, then you can either click the up and down arrows or you can click the space next to it and type the value in directly. A little experimentation with this will mean you can then just enter the number the next time you use the feature and makes adding a fade to your audio file quick and painless.
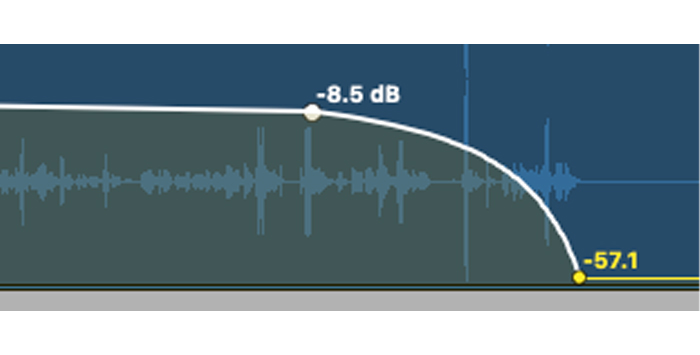
It’s also possible to create a curve fade using the Region Inspector. This means that the fade-out won’t be linear but will instead increase the closer to the end of your selected audio region it gets.
Creating a curve will make the fade out sound more natural and allows you to tailor the fade out to your specific track.
To do this, set a value in the Curve box underneath the Fade Out option.
The greater the value, the greater the extent of the curve on the fade. Again, a little experimentation will mean that you quickly learn what works and sounds good.
Volume Automation is a more flexible and precise tool for creating fades. It will work for both audio data and MIDI as well.
To begin with, you need to press A on your keyboard so that the automation becomes visible. You can also click the icon on the task bar.
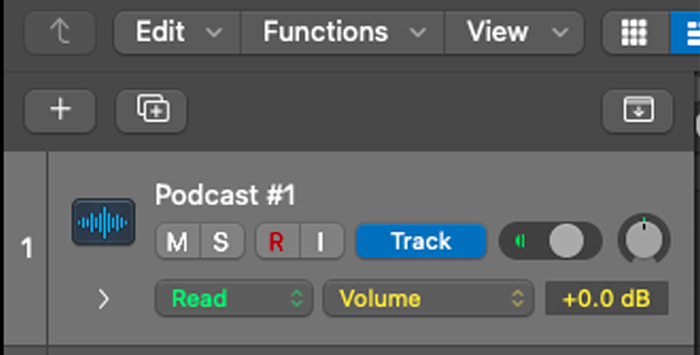
Go to your audio track and in the audio track menu, then select Read and Volume from the Automation Parameter choices.
Once this has been done, select the pencil tool from the Tool drop-down menu.
You then need to place two dots on your track which will make up the fade out. This will create an automation point. The furthest-right automation point should be at the bottom of the track as this represents silence. This will create a linear fade, as in the first method.
And that’s it! You have now applied automation to create a fade-out. Automation is a simple, fast, and effective wave of having real control over the fade out on your track.
It’s also worth briefly mentioning that you can reverse this method at the start of a track to create a fade-in.
This is another technique to create a fade that works well but only with with an audio file — it won’t work with MIDI.
Press E on your keyboard to open the File Editor. You will see it appear at the bottom of the screen.
Select the audio you want to apply the fade to in the usual way by left-clicking while holding the Command key and dragging until it has been selected.
Once this has been done, go to the Tools menu on the File Editor and select the Fade Out tool.
This creates fades that are linear on your audio files.
Fade-outs are a great way to control your sound and mix your audio together and makes your music production sound more professional.
And Logic Pro X makes it very easy to take control of your sound and do just that — fade audio. So whether you are working on audio data or MIDI, Logic Pro X will be able to produce the perfect fade-out for you every time you master with logic pro x.
Fade-outs are most commonly used either to create smooth transitions into another song or to provide a clean end to an existing song. This is especially useful for a song that doesn’t have a defined ending — rather than simply staggering to a halt the song can be gradually faded out before the end.
Sometimes fade-outs can be used to shorten the length of a song too. If your song has a long ending to it you might want to fade it out early if, for example, it’s going to be played on the radio and you are worried that it might be too long to get decent airplay.
It can even be used as a form of audio punctuation. If a song fades out very gradually then it implies the song carries on after the sound has faded. The song might have ended but an extended fade means it can still stay in the memory long after the final notes have been heard.
If you want to create an automation curve on your fade-out, Logic Pro X makes this easy. Go to the Tools menu and select Automation Curve Tool.

You can then go to the fade that you created on your track and simply drag the section of the fade that you want to have the curve on. Logic Pro X will create a smooth curve for you.
You can play about with this to find the best place to put the curve on the fade by simply dragging the curve where you want it to be and listening to the effect it has on the fade out.
Once you’re satisfied with its positioning, that’s it — there’s nothing else to do!
There is also a Curve setting in the Region Inspector. You can set the value of this manually and Logic Pro X will apply the automation curve to your track.


