JG McQuarrie
Jul 03rd, 2023
Adobe Audition is a powerful digital audio workstation (DAW) that allows users to have control over their recordings in all sorts of powerful and flexible ways.
The ability to fix problems with audio that has already been recorded is common to all DAW software but Adobe Audition is a great tool for this kind of editing. And getting rid of plosives is one great way to improve the quality and listenability of your audio.
When you hear a plosive on recorded audio, you won’t miss it. It’s the harsh, difficult-to-listen-to sound that can sometimes be generated when consonants are pronounced. Most commonly this can come from the letter P — if you say a word too loudly that begins with P you will cause a pop sound on the audio. This is what a plosive is.
They sound like a little explosive noise, which is where the term plosive comes from. P isn’t the only consonant that can generate plosives though — B, T, D, and K can all cause them to occur to a greater or lesser extent.
These plosives sound really bad when they are recorded and will distract your listeners, so knowing what to do about them is a valuable skill for any producer. And you can use Adobe Audition and its tools to remove plosives easily.
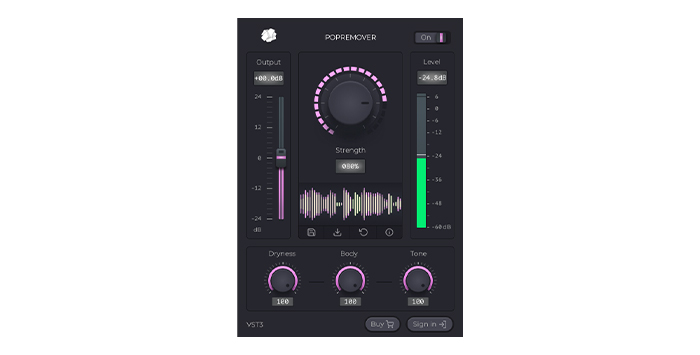
CrumplePop’s PopRemover makes removing plosive sounds easy and is considerably more effective than any built-in tool.
It’s also very simple to use. First, identify the part of your recording that has the plosive sound. Once you have done this, apply and open the PopRemover plug-in. The central knob will control the amount of pop removal that will be applied. Just choose the amount you want and the plosives and pops will be gone.
You can also alter the Low, Mid, and High frequencies so you can be sure that any changes you make match the rest of your recording. Saying that, the default settings are usually good enough unless you are going for something specific.
Cleaning up recordings has never been easier and thanks to plug-ins like the PopRemover, getting rid of plosives is a simple affair for anyone.
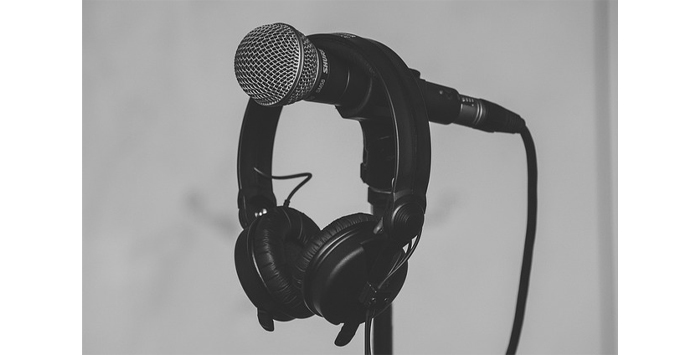
One of the best techniques for avoiding plosives is to not record them at all. This means paying attention to the way the person you are recording is speaking.
An easy approach is to tilt the microphone at an angle. Plosives are caused when little pockets or puffs of air hit the microphone’s diaphragm. This is what causes the pop sound to occur in the first place.
Tilting the microphone so that the speaker isn’t hitting the diaphragm square on makes it much less likely the microphone will pop. The puffs of air bypass the microphone and so the plosive doesn’t occur. It sounds simple but it makes a real difference!
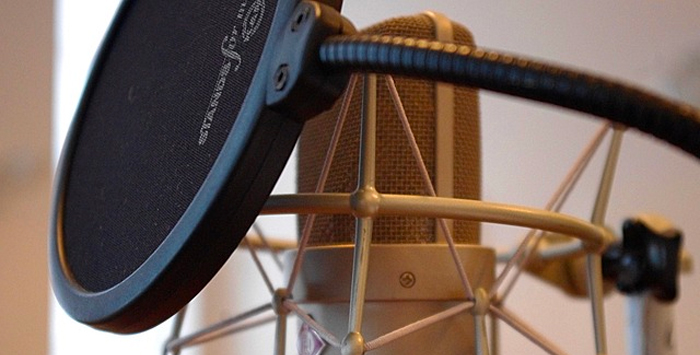
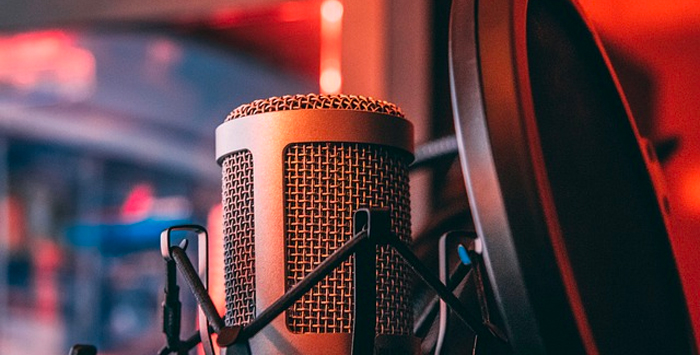
Another similar approach is with the use of pop filters. Pop filters are a screen that sits between the microphone and the person using it.
There are different types and styles — the most common and affordable ones are round and consist of a thin fabric sheet that sits between the microphone and the person using it, though there are also more expensive ones that wrap entirely around the microphone.
However, the way they work is the same. By introducing a barrier between the microphone and the person using it, the pop filter prevents the air puffs from hitting the microphone which helps remove pops and plosives from your audio.
The placement of the person using the microphone is also important in eliminating plosives. The further away someone is from a microphone, the less chance there is of the puff of air that causes plosives hitting the diaphragm. And even if it does, the further away the person is, the less of an impact it is going to make.
This is something that requires a little practice. You want the person using the microphone to be far enough away not to cause plosives but not so far away that they sound too quiet on the recording.
There’s no one “ideal” place to have someone, as everyone speaks or sings at a different volume but it’s worth taking the time to ensure that you have optimal placement. Even small differences can have dramatic results and can really help with the elimination of plosives.
If, despite your best efforts, you still have plosives on your recording, using Adobe Audition’s FFT Filter will help you deal with them.
An FFT filter allows the selection of specific parts of the frequency spectrum within an audio signal. It uses Fourier transforms to look at the signal and analyze it. This means we can isolate the part of the audio signal causing the plosive and remove or reduce it. However, if this sounds complex, Adobe Audition makes it easy to do.
Firstly, you need to identify where a plosive occurs. This is usually visible as a spike in the audio, visible on the audio waveform.
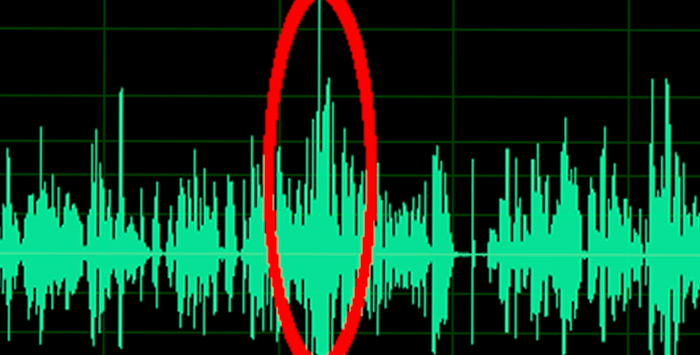
Once you have identified it, zoom in on the plosive using your mouse wheel to zoom in and highlight it using the time selection tool. Select the time selection tool and drag to highlight the plosive.
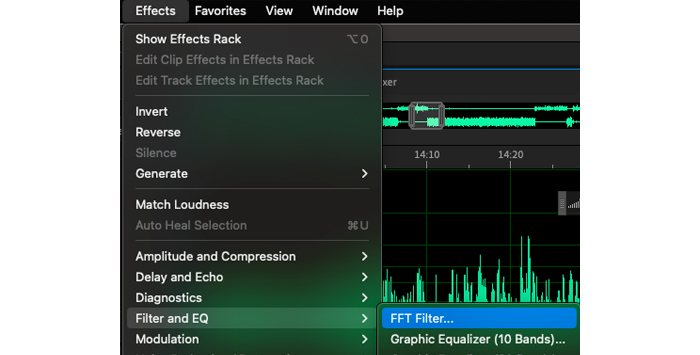
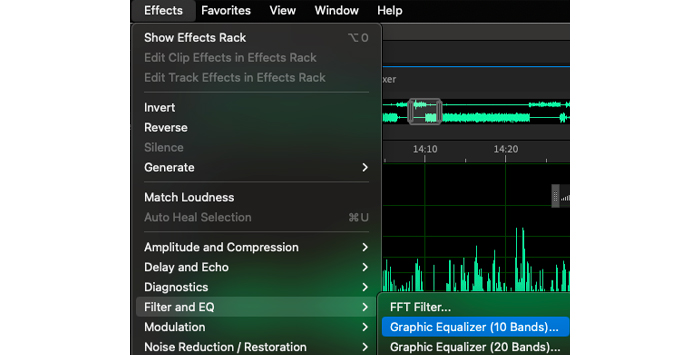
Next, select the FFT Filter by going to the Effects menu, then Filter and EQ, then choosing FFT Filter.
You will then see the FFT Filter. Go to the Presets and choose the option “Kill The Mic Rumble”.
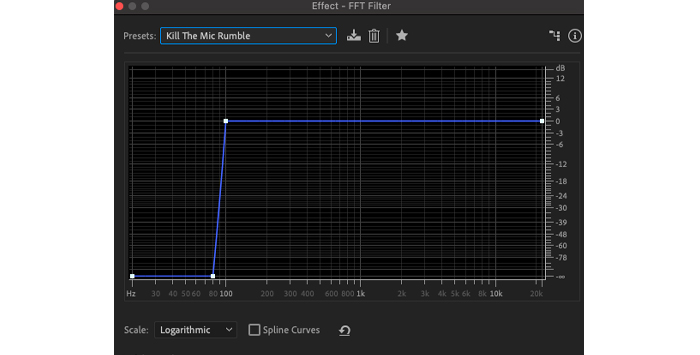
This will help eliminate the spike that was visible in your audio. Click on Apply and you will see the spike disappear.
Listen to your audio on playback now and you will find the plosive either reduced or gone. If you are happy with the result – then you are done. If not, you can go back and apply the effect again until you get the result you are looking for.
It is also possible to use a high pass filter to achieve similar results.
This is another method to help deal with plosives but this time using equalization (EQ) which Adobe Audition has built-in to its software.
Similar to the FFT Filter, this will allow you to adjust a part of the audio spectrum to reduce the sound that causes the plosives. Adobe Audition comes with a 10-band, 20-band, and 30-band graphic equalizer as well as a parametric equalizer. Whichever one you choose will help you reduce plosives.
As with the previous method, identify the plosive or plosives you want to reduce and highlight it using the time selection tool.
You can then access the EQ filters by going to Effects, then Filter and EQ, and selecting the one you need.
For this example, the 10-band graphic equalizer has been selected but if you want to go into more detail you can use the 20- or 30-band one.
Once the equalizer has loaded, you want to adjust the low-frequency part of the signal, which are the sliders on the left-hand side. You want to use these to reduce the bass as plosives occur at the low-frequency end of the spectrum.
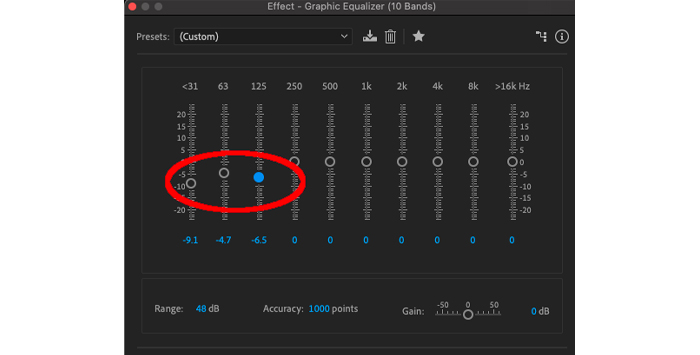
Adjust the sliders then click apply to playback the change to the plosive. If the changes have resulted in its elimination then you are done! If not, go back and adjust again until you are happy with the results.
And because Adobe Audition supports non-destructive editing, you can make as many changes as you like and be confident you can always go back and undo the changes you made if you listen back to them at a later stage and aren’t happy with the results.
5. Volume Reduction
This is a simple technique and a little cruder than the two previous ones but if you are in a rush or need to take action quickly it can still help. It won’t actually eliminate the plosive, but by reducing its volume it will be a lot less obvious on the final track.
As before, highlight the section of audio that contains the plosive.

Using the heads-up display, you can then adjust the volume settings of the selected clip. You can do this by dragging the decibel (dB) down so that it reduces the volume of the selected clip.
Once you have it at a level you think is appropriate, listen back and confirm that you are happy with the results.
It’s worth mentioning that, because the Volume Reduction technique of removing plosives reduces the volume of the whole of the selected clip, you should consider using a light touch when applying it. You don’t want there to be a sudden drop-off in volume in that part of the audio — this would sound bad to your listeners and would just be a different type of audio problem for them to contend with instead of the plosives.
So a gentle, slow approach is best when using volume reduction to remove plosives.
Plosives are an unfortunate side-effect of some recordings. They sound harsh on the recording and make for an unpleasant listening experience for your listeners.
However, with Adobe Audition and a little know-how, you now have the tools to help with removing plosives and ensure you create nothing but the best-quality recordings for your listener.


