Marco Sebastiano Alessi
Oct 10th, 2022There are many reasons why you might need to split audio in your projects: to work on audio and video individually, edit audio over different video clips, enhance your sound, crop or trim a section of audio or a video clip without affecting the complete sequence.
Or maybe you’ve just learned how to remove background noise in premiere pro and don’t want to risk compromising your entire file.
You can use software to split audio, edit it and then merge it again; however, this means you will need to install different audio programs, get to know them, and probably invest a lot of extra time processing your projects. Why go through the hassle when Adobe Premiere Pro allows us to do everything in a single platform?

Adobe Premiere Pro is better known as video editing software. Though it does not have as many tools to edit audio as a dedicated audio editor or DAW, it does offer enough tools to optimize audio for videos.
It even allows us to trim, cut, add audio effects, and normalize audio.
In this article, you’ll learn how to split audio from a video and how to split a stereo audio track to make two mono tracks.
It’s an easy process once you learn how to do it, so I created this step-by-step guide to help both beginners and those familiar with Adobe Premiere Pro, as well as experienced users who need a quick guide.
Before we begin, ensure you have Adobe Premiere Pro installed on your PC or Mac. You can download and install it from Adobe’s website if you haven’t done so yet.
Let’s start with something you’ll need a lot in your video editing process. You might need to separate the audio waveform from your video to create different effects and transitions.
Splitting audio from the video with Premiere Pro is super easy.
Create a new project on Adobe Premiere and import the file you want to split. Or, if you are already working on a project, drag your video clip to your Timeline panel to start working.

With your video clip on your Project panel, you can now create a new sequence or add the clip to an existing one.
When you import a video clip to your Timeline panel in Premiere Pro, you see the audio and video clip have their independent track, but they are linked together.
All the editing you do will be on the linked clip; if you click on either and drag, the linked clips will move as one.
So, if you want to use a specific section of the audio, not the complete recording, or just want to get rid of one clip but keep the other, you’ll need to create a linked clip by unlinking them.
You can have linked clips multiple times too, giving even more options to edit audio according to the visuals.
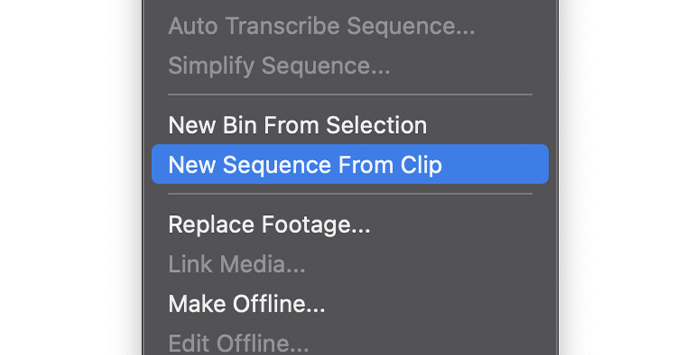
1. Select the clip you want to split.

2. Right-click on it and select Unlink in the pop-up menu.
3. Audio files and video are now split, and the video remains selected after the split. If we want to work with this clip, we can move forward. But if you want to edit audio, you need to select the now independent audio clip.
4. After splitting audio from video, you can now edit and move the clips individually, which means you can create a sequence with the audio from the first video at the end or vice versa.
If you separate audio and then change your mind, you can link it back in seconds:
1. Select the clips you want to link. Using shift-click will allow you to select multiple clips.
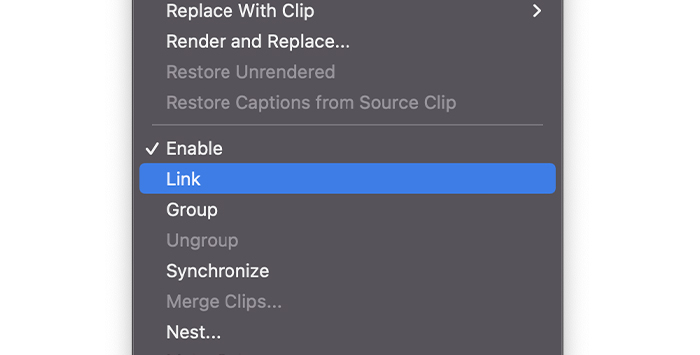
2. Right-click the clips you selected and choose “Link” from the pop-up menu.
3. Your clips will be linked again.
If you relink the clips, Premiere Pro will automatically synchronize clips if it identifies it have moved out of sync.
The Link feature is also helpful when you record audio with an external mic to have better quality than the one from your camera.
You can split the audio from the video and then Link the external microphone audio clip to the video and synchronize it.
Audio can be recorded in different ways, like stereo and mono. It will depend on the microphone you use to record. Let’s see the difference between stereo and mono.
· A stereo microphone uses two channels to record individually from left and right. It helps create ambiance sounds, and it’s also used for acoustic performances.
· Mono microphones only use one channel, so everything you record will be output in a single track.
Cameras sometimes record audio in stereo instead of mono, and when we import the video in Premiere Pro, we get an audio clip with two audio tracks.
Usually, that’s not a problem if you’re using the built-in microphone of your camera; you can still edit your audio file like you would with a mono audio track.
Issues might arise if you use a stereo microphone and use its channels for different purposes and do not record a single audio source.
Stereo microphones are typically used to record interviews, with the interviewer on one channel and the interviewee on the other.
You’ll want to split this stereo track so you can edit each one independently and raise or lower each speaker’s volume level.
Another use for splitting is podcasting. Recording a two-person episode with a stereo mic to later edit background sounds that one channel picked more than the other or to mute one speaker while the other is talking to get better sound quality.
If you’re on one of the two scenarios, you can separate audio by splitting a stereo track into a dual mono track. Just one thing before you begin: you need to do these steps before you add the clip you want to split into the Timeline.
If you already have it there, you’ll need to delete it, or you won’t be able to separate the audio channel.
First, we need to get the stereo audio track we want to split.
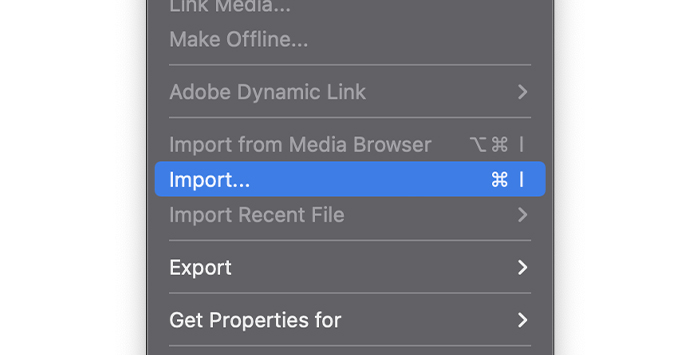
1. Go to the File menu and look for Import on the dropdown menu.
2. Select the file and leave it on the Project panel.
Here’s where things will get tricky, so follow each step carefully.
1. On the Project panel, right-click the audio file you want to split. You can select multiple clips simultaneously if you have several clips to split.
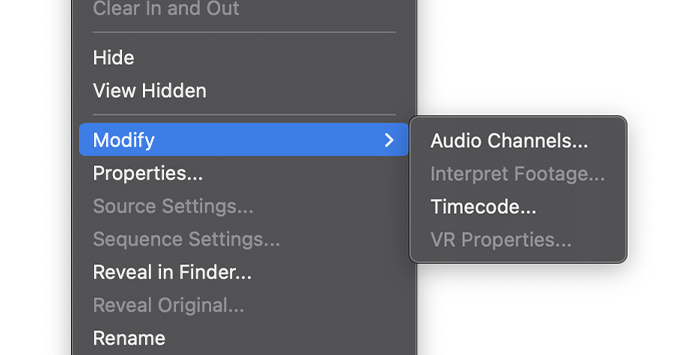
2. In the menu, look for Modify and select Audio Channels.
3. The Modify Clip window will pop up.
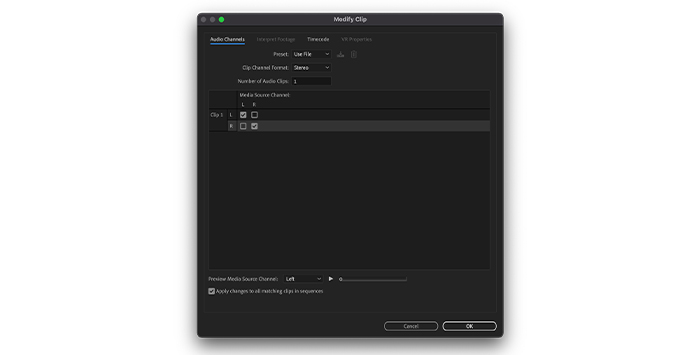
Don’t be afraid of all the options available here. Everything you need is in the Audio Channels tab.
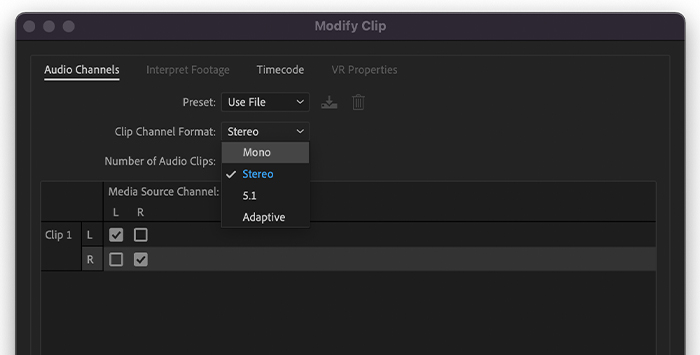
1. On Clip Channel Format, choose mono from the dropdown menu.
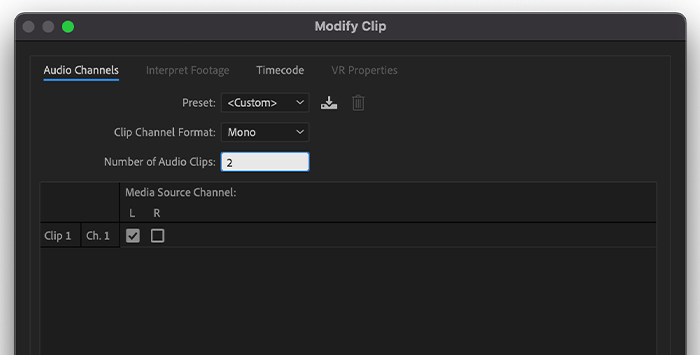
2. Move down to Number of Audio Clips and change it to 2.
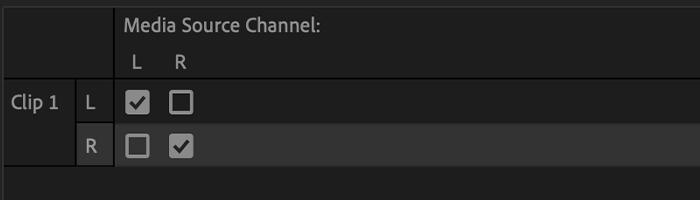
3. Down on the Media Source Channel, you should see two audio channels indicating one is right and the other is left. Leave everything as it is.
4. Click Ok.
5. Now you can drag your audio clip to the Timeline.
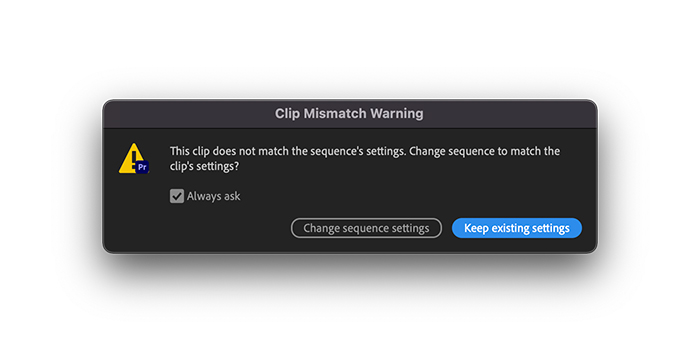
6. We might get a warning message saying the clip does not match the sequence settings. That’s because of the changes we just made. Click Keep Existing Settings.
7. The clip will display in the Timeline in two separate audio tracks.
Once we get our separate tracks, we can edit as we please. But there’s something essential left to do. Right now, we have our audio clips just like they were on the stereo clip.
If we listen to them individually, we’ll hear only the audio from one side. We need to pan these audio clips to listen to them from both the right and left sides.
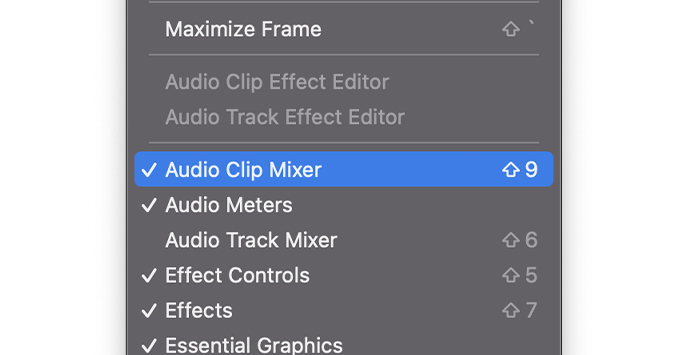
1. Go to Audio Clip Mixer in the Audio Effects panel. If you can’t see it, go to Window on the menu bar and mark Audio Clip Mixer.
2. Click on the tab next to Audio Effects, which will open the mixer.
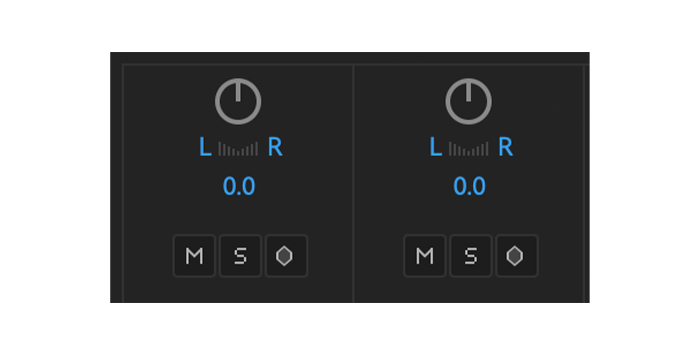
3. Select each audio clip and move the virtual knob at the top. You’ll see L and R indicating left and right. Just center it where you can hear the audio from left and right.
4. Now you can continue editing the rest of the clip.
If splitting stereo tracks is something you constantly do, there’s a way to do this with a default setting:
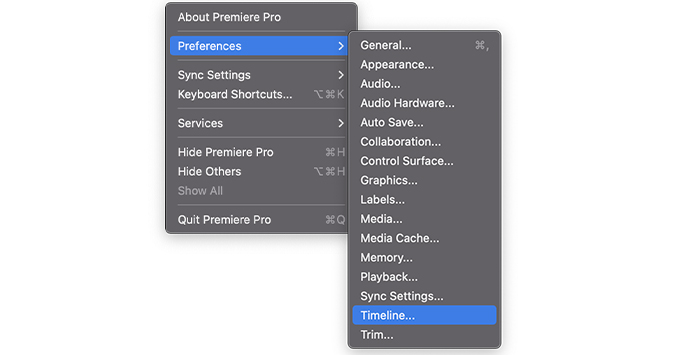
1. Go to your Preferences and choose Timeline from the left menu.
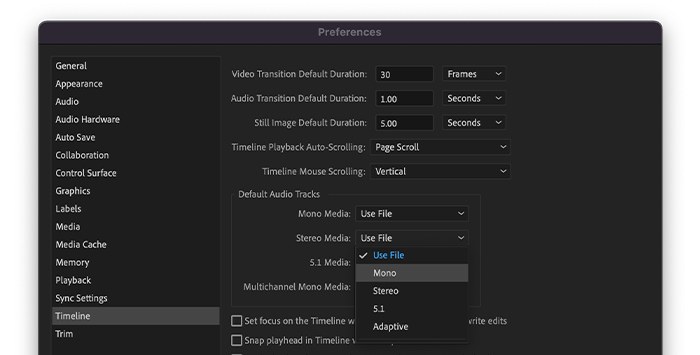
2. In the Default Audio Tracks area, change the Stereo Media to Mono from the menu.
3. Click OK.
With these changes, every time you import a stereo clip, it will be “translated” into a dual mono channel. You won’t need to repeat these steps with each project.
Adobe Premiere Pro is fantastic for editing, and once you get used to it, I’m sure splitting audio will be a piece of cake for you. If not, make sure you always keep this guide at hand!
Splitting means you are separating part of a clip to edit or move it independently. You can split the video multiple times using the razor tool, but the total duration of the video remains the same.
When you trim a clip, you are cutting a part of it: it’s a way to shorten the clip by deleting part of the video. Knowing how to trim audio is useful when you want to make your video more fluid or look more professional.
Cropping means removing areas from your video image without stretching it. It is commonly used to change the aspect ratio or to center the image on something specific in the video.
Splitting, on the other hand, is the process of dividing a clip into multiple clips.


