JG McQuarrie
May 10th, 2023
Considering it is free, the most amazing thing about Audacity is how powerful it is. Whether it’s simple tasks or complex production techniques, Audacity has tools for just about everything.
And when it comes to editing your audio, Audacity makes things easy for you. Splitting audio to edit your tracks is a vital ability to be able to get right, and fortunately, Audacity makes this critical skill easy to manage.
Splitting a clip is the process of taking one audio track and dividing it in two. This allows you to move either or both of the pieces of audio, apply different effects to them or do basically anything you want to them.
Whatever your reason for wanting to split a clip, the method to split audio in Audacity is very simple.
First, load your audio recording into Audacity. Then locate your desired split point. Move the playhead there by dragging it, or by simply left-click your mouse button. This will place a line on the audio waveform where the split will occur.
Go to the Edit menu, select Clip Boundaries, and then select Split.
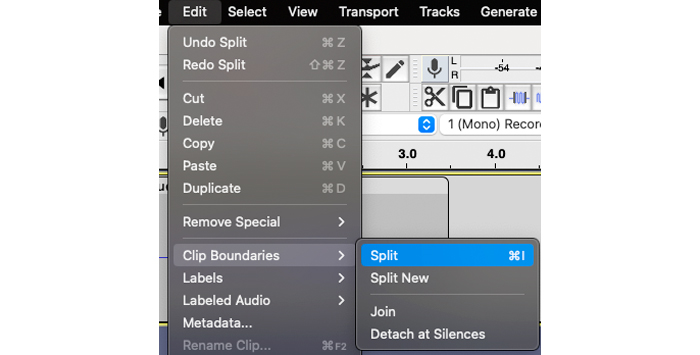
Once you have selected Clip Boundaries your audio will then be split in two. You can repeat this process for splitting audio tracks to produce multiple tracks if you wish.
Edit > Audio Clips > Split – To split the clip at selection region or the current cursor position. Right-click > Context menu Split clip – To split the clip at the selection region or current cursor position.
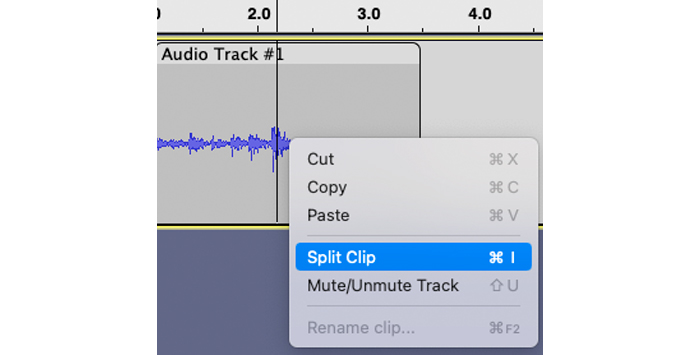
Another way to achieve the same result is to use the right-click context menu. Once you have placed the playhead or marker where you want your track to be split, right-click your mouse.
This will bring up the right-click context menu. Choose Split Clip from this and your clip will be split in the same way.
There’s no difference between these two methods and they both achieve the same thing. The right-click context menu just provides another way to get the same result without having to scroll through menus to get to the option you want to use.
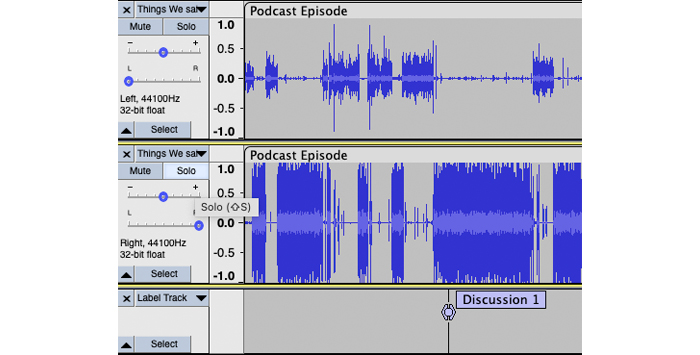
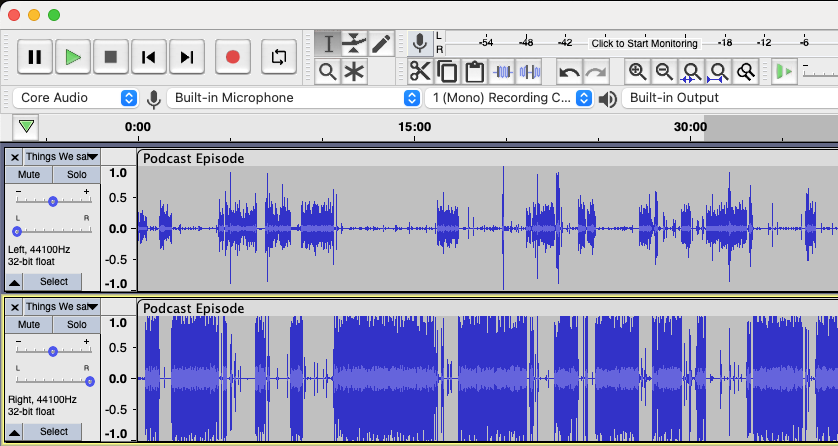
If you have a track that has been recorded in stereo, you might want to split the single track into two separate ones.
For example, you may have a podcast host on the right-hand channel and another on the left. It’s easier to edit if these are on separate tracks. Or you may have one instrument on one stereo channel and another on the right.
Whatever the reason, splitting the stereo track is simple but it’s not done from the usual Audacity menus. Instead, you need to use the drop-down menu on the track itself.
Load the audio file you want to split into mono tracks.
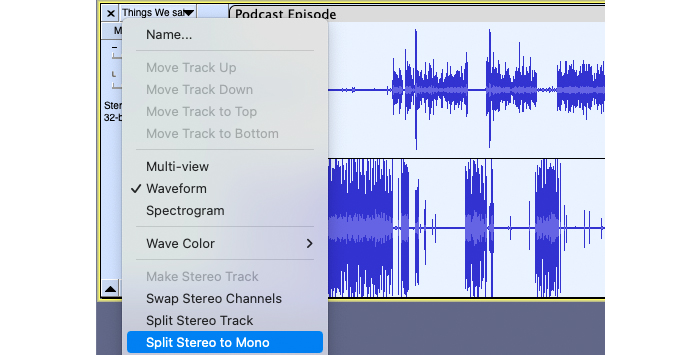
Click on the track menu. This is at the top of the track on the left-hand side and will bring up the track menu.
Select the Split Stereo To Mono option.
Your single track will then be split into two separate tracks with each being an individual mono track.

You will also notice the menu option immediately above Split Stereo To Mono is Split Stereo Track. This will achieve the same result and split your stereo clips into two mono audio tracks.
However, the pan controls will be to the far left and far right on each new audio clip. This can easily be adjusted by moving the pan control to the center position, then the audio clips will be back in the middle.
If you have a long piece of audio you may use labels to identify different parts of it. This is a common way of keeping track of different parts of your audio file.
If you have a podcast that runs for a long time you might put labels on the audio to identify different subjects covered in the discussion. Alternatively, if you have ripped a vinyl LP to audio as a single file you could add labels to identify each individual track.
Rather than going through manually and splitting each track, which is a tedious and long-winded way of getting everything separated, Audacity allows you to split tracks into multiple clips where your labels are.
Firstly, you need to add labels to your tracks. To do this, identify where you want your track label to go and either move the playhead there or left-click to place a marker. Once you have done this, go to the Edit menu, select Labels, and then Add A Label At Selection.
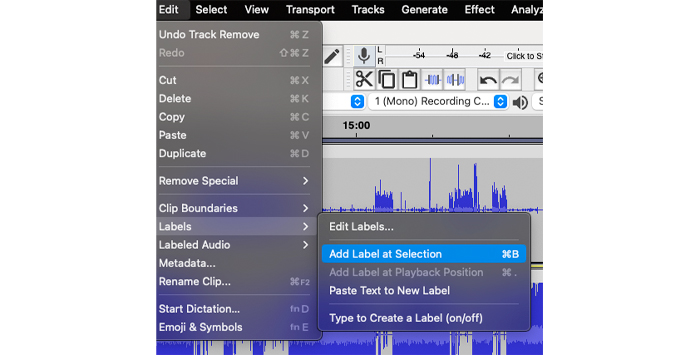
You will see that Audacity has added a label track beneath your other tracks. Add a useful name to your label then repeat this process for as many labels as you want to add to your audio.
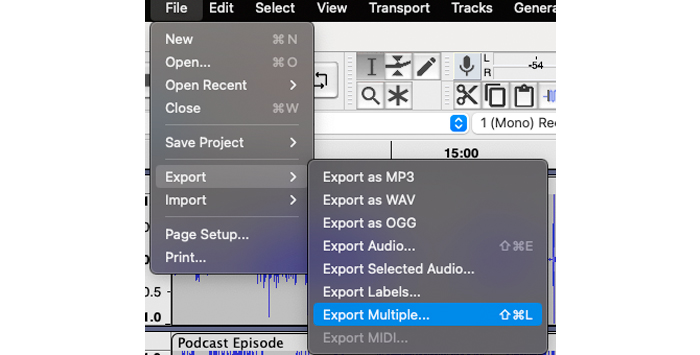
Once you are happy with the labels and their positions, go to the File menu, choose Export, then Export Multiple.
Select the location you want to export your audio files to and the format you want your audio files exported in. Ensure that under Split Files Based On you have Labels selected and under the Name Files option you have selected the Using Labels/Track name option.
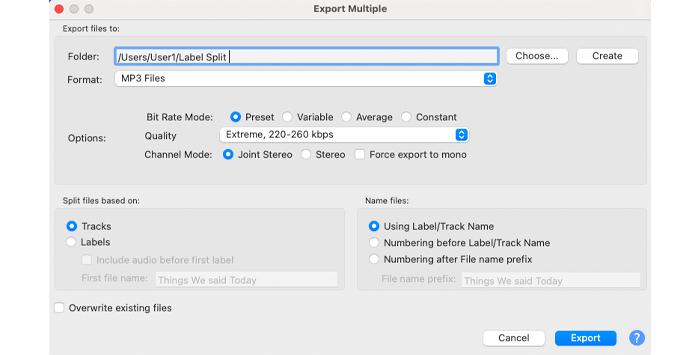
Click the Export button.
Audacity will then export each labeled section of your audio track as a separate file so you have multiple tracks. Audacity will also ask you to add metadata to your files for each individual exported audio clip.
You can add this additional audio data if you want or simply skip it if it’s not relevant to you.
Background noise is a perennial problem and can be picked up at any point during the recording process. It’s easy to miss during the recording process too. So when you listen back to your recording and you find background noise you didn’t even realize you were recording, something needs to be done about it.
Audacity has a Noise Reduction tool that can help with the elimination of unwanted background noise.
The first thing to do is load your audio file. Once this is done, locate a portion of your audio that only contains the background noise, such as just before two people start speaking or maybe during a gap in the conversation.
Select this part of the audio by left-clicking your mouse and then dragging it so that a couple of seconds are chosen.
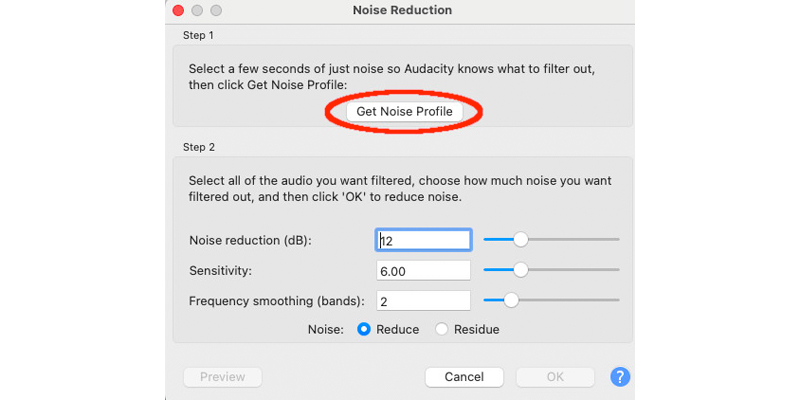
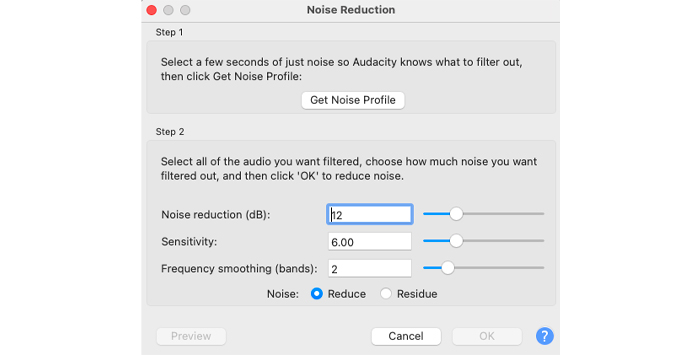
You can then go to the Effect menu and choose the Noise Reduction option. Once done, click on the Get Noise Profile option. This instructs Audacity to look at the selected audio so it knows what part of the sound needs to be eliminated from your audio.
Once this has been done, you can return to your audio and choose the part of it that needs to have the background noise eliminated.
Once you have selected it, go back to the Effect menu again and select Noise Reduction. This time, rather than choosing any options, click OK and Audacity use noise reduction on the selected audio.
The change can be incredible. Noise Reduction is one of Audacity’s greatest strengths. That said, it is worth pointing out that the tool works best on constant noise, like hum. Audacity’s Noise Removal tool works less well on variable noise like traffic sounds or people talking. Regardless, the Background Noise removal tool in Audacity can make a big improvement to poorly recorded audio.
However, Audacity’s background removal tool is not the only one when it comes to cleaning up audio. CrumplePop’s range of audio restoration plug-ins, which are fully compatible with Audacity, can do an amazing job of cleaning up audio.
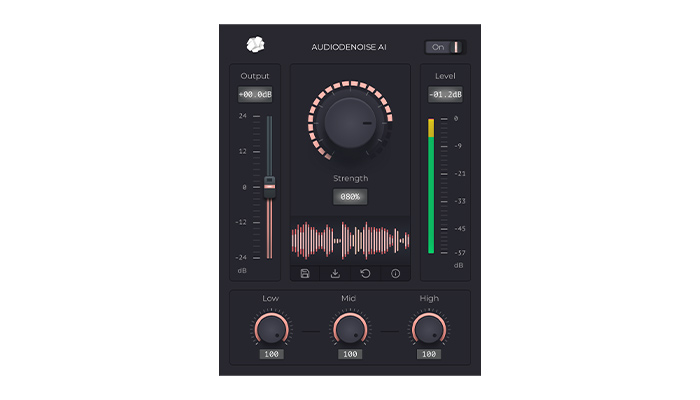
The AudioDenoise plug-in can achieve even better results than Audacity’s built-in Noise Reduction tool. Problematic background noises can be easily and effortlessly eliminated. Just load up your audio file, select the section you want to remove noise from (or select the entire track) and the AudioDenoise plug-in will do the rest.
The default settings produce great results but if you need to adjust levels then the central dial can be used to increase or decrease the noise removal amount. The plug-in is simple, intuitive to use, and produces amazing results on even the worst background noise.
Audacity is a digital audio workstation (DAW) that always manages to impress with its range of tools. That the software is free only makes the quality of tools available all the more remarkable.
Splitting, adjusting, and exporting audio clips from Audacity really couldn’t be simpler and the results are great. A simple, easy-to-use tool that won’t cost you a single cent — Audacity really does make life so much easier and better!


