Marco Sebastiano Alessi
Sep 04th, 2023
As a music producer or audio engineer, there are some crucial tools you can’t do without in your recording, mixing, and mastering sessions. Compressors and limiters are definitely among those crucial plug-ins you’ll need to make your audio content ready for publication, and although these two effects share some similarities, their purpose and impact on your audio can be quite different.
In today’s article, I’ll answer the main questions in the limiter vs. compressor debate. To do so, I’ll cover how both compressors and limiters work, when to use each one, why you would need both, and in which order you should use them in your daily audio production work.
Let’s dive in!
In short, a compressor shapes the sound by decreasing the dynamic range of an audio signal. On the other hand, a limiter controls the loudness of an audio signal to prevent it from clipping. This is the very short answer and there are many more aspects involved, so to provide you with a better and more thorough explanation, let’s delve deeper into the purpose of compressors and limiters.
A limiter is a more aggressive compressor with a faster attack and a higher ratio (which means more compression applied.) While both compressors and limiters can control volume peaks, they apply gain reduction differently, and this is the key difference that defines which one will best suit your needs.
First off, what is a limiter? A limiter is a tool used in audio production by producers and audio engineers to affect the highest peaks in an audio signal and limit them so they won’t cross cross a defined ceiling limit. A limiter typically has two main objectives: to catch peaks beyond 0 dB, and to apply compression to prevent audio clipping, making an audio signal louder without reaching the point of distortion.
In a nutshell, a limiter prevents the louder parts of an input signal from passing a threshold. Imagine the limiter guarding a ceiling (let’s say you set the threshold level at 0 dBs which would be when the audio gets distorted) and catching every peak that dares to cross it, pushing it back down (with compression), thus keeping distortion away.
You’ll often hear about brick wall limiters. These limiters are even more aggressive, preventing an audio signal from even reaching the threshold. Usually, compressors and limiters act when the signal crosses the threshold and reduces its volume keeping it around the threshold. The final output gain might end up just above the threshold, and that’s usually fine. But if you use a brick wall limiter, it will ensure that the signal stays below the threshold, applying all the compression needed to do so.
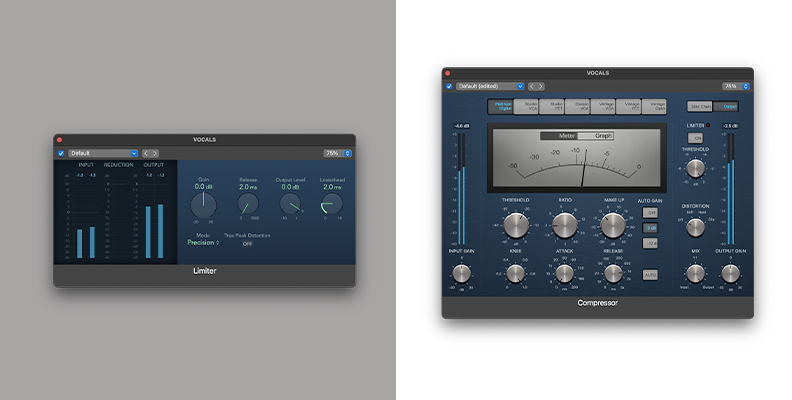
You can find many limiters plugins with different controls and parameters. Different limiters might have different interfaces, but they all serve the same purpose. More often than not, you won’t be able to customize it as you would with a compressor.
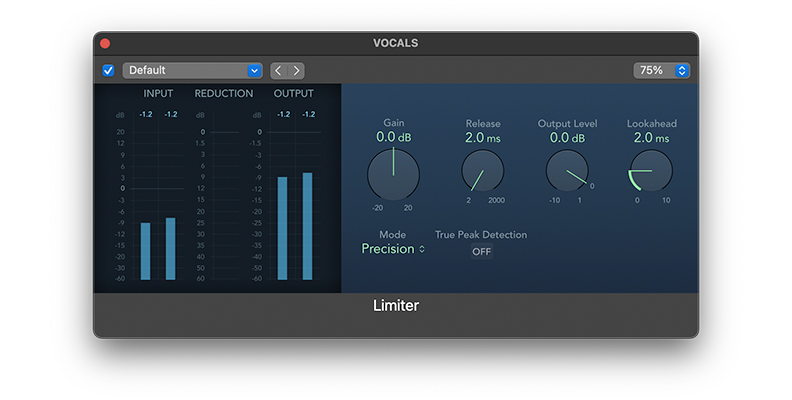
These are the parameters you can find in a limiter:
Some limiters will only come with a gain parameter to adjust, and it will automatically detect the maximum level and add compression on an infinite:1 ratio. Others can merge the attack and release control into one.
Since limiters are more commonly used during mastering sessions, they often have attack, release, and high ratio settings fixed to focus on increasing loudness and avoid audio clipping as a main objective.
If you’re familiar with compression, you might be thinking that a limiter sounds a lot like a compressor. And you would be right; a limiter is a compressor with a high ratio, usually beyond 10:1.
So how does it differ from a compressor? Well, let’s look at compressors to understand how they work and highlight the differences between the two effects.
Compressors reduce the dynamic range of a signal by identifying the loud parts and quietest parts and reducing the difference between them by making the softest parts louder and the louder ones quieter. A compressor makes volume consistent throughout the audio track so that all the elements, like instruments and vocals, are balanced.
In a song, you often have quiet parts like the intro or bridge and then louder and more dynamic ones like the chorus. Compressors make it possible to hear everything clearly by reducing the output gain of tracks with louder input gain, which is how you can hear a smooth flute among the loud sounds of a drum or backing vocals or what is accompanied by an electric guitar.
In short, a compressor’s primary goal is to reduce the dynamic range. It does so by creating a consistent volume level using dynamics control while preventing the audio from getting distorted.
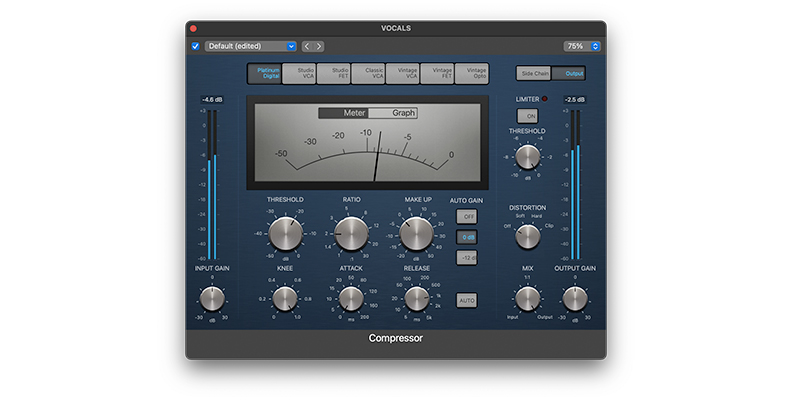
Unlike limiters, compressors allow more control of their settings: you can manually adjust the ratio, attack, and release speed to control how compression behaves.
There are four essential controls in a compressor: threshold, ratio, attack, and release.
The threshold sets a volume limit at which the compressor will kick in. If the signal doesn’t reach the threshold you set, then the compressor won’t affect the track.
The ratio setting determines how much compression the compressor will apply to the signal that reaches and exceeds the threshold. For example, if you set a 2:1 ratio, a signal 2db over the threshold will be reduced to 1dB.
Compressors give you more control over ratio than limiters allowing you to specify how much compression to apply. When you want to slightly attenuate high peaks, a compressor with a low ratio will work better than a more aggressive limiter, as it’ll preserve the original dynamic range.
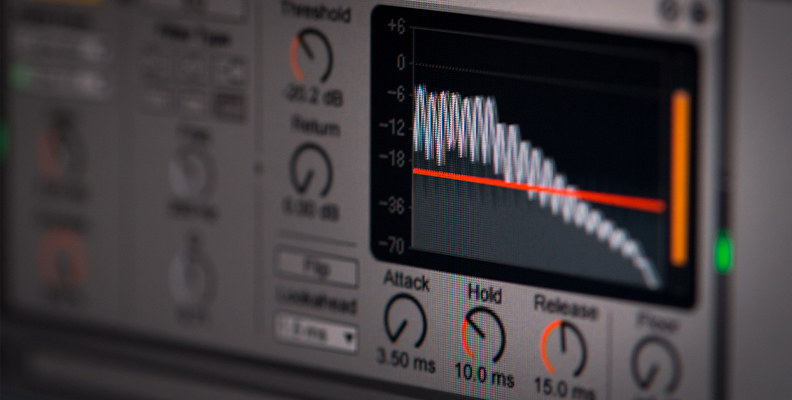
The attack time setting controls how fast the compressor kicks in when the audio reaches the threshold. Think of it as compression speed: a faster attack will cause a sharp compression, and a slower attack will provide a punchier sound as you will allow the signal to pass the threshold.
The release determines how fast or slow the compressor will stop working. A slower release means the compressor will continue after the signal goes below the threshold, which results in a more transparent sound, while a fast release helps create a more rhythmic effect.
Occasionally, you may find a Knee parameter in some compressors. The knee refers to the sharpness of the compression: like the attack and release, it affects how the compressor behaves once the signal reaches the threshold.
You might also find a makeup gain, which allows you to counteract the volume loss caused by the compressor.
Now you know the actual difference between compressors and limiters. But which one should you use and when?
Like most things in audio and music production, there are no rules for when to use each effect. However, here are the most common uses for a limiter and a compressor that you can use as a starting point as you experiment with them.
The most common use for a compressor is during the mixing process. Add a compressor to a mix bus or individual instrument tracks to create a consistent volume. Alternatively, add some color by adding more than one compressor and other effects. Usually, you want to add a compressor on individual tracks.
Compressors can also be used as creative tools. For instance, if you experiment with the attack and release speed, you can give more punch to percussions or make a guitar solo more galvanizing. Furthermore, applying a compressor on individual tracks can create a more harmonious and coherent mix.
Limiters are an essential tool during the mastering process when you want to achieve industry-standard loudness while preserving the integrity of your mix. The mastering engineer will add the limiter in the master bus at the end of the chain. This is essential because when you’re mastering, you want to maintain your signal and the sound you obtained during the mixing process. At this stage, your job is to create a polished sound, not alter it.
The main purpose of a limiter lies in catching peaks and keeping them at bay. Many audio engineers use them in the mix bus to gain volume. However, loudness should not be your priority during mixing, and a limiter can over-compress a signal when used excessively.
While both compressors and limiters are used for gain reduction and to avoid clipping, a limiter has defined faster attack and release speeds and a higher ratio that makes its compression more aggressive. Limiters focus on reducing gain in high peaks to avoid distortion, preserving the original sound, and achieving industry-standard loudness.
On the other hand, with a compressor, you can get more creative and bring to life different sound effects, add color to the audio signal, and enhance certain elements of your mix. Finally, you can customize it more than a limiter and use it on individual tracks or mix buses to create a unique mix.
In the world of audio engineering, both effects are crucial and can help you achieve outstanding results in music production.
Good luck!


