JG McQuarrie
May 10th, 2023
Recording audio can produce some great results but there is always a chance of picking up stray sounds you don’t want. Sometimes they can be clear and obvious, like a cough, but sometimes they can be less obvious during the recording process.
Pops and clicks can easily occur and cause real problems in any audio recording. However, Audacity provides several methods of click removal so your resultant audio can sound clean and pure.
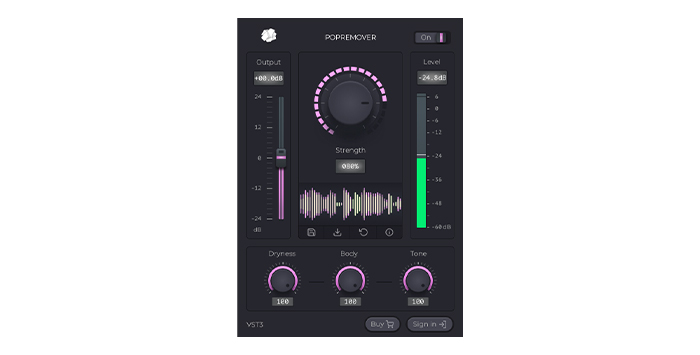
When it comes to click removal, CrumplePop’s PopRemover is the perfect way to eliminate unwanted sounds on your recording. The plug-in is a simple yet powerful tool that scans your audio, identifies unwanted pops and clicks, and removes them automatically.
You can adjust the sensitivity of the removal by adjusting the central Strength knob so that the removal can be fine-tuned to whatever condition your audio is in. There are also low, mid, and high controls to ensure a perfect acoustic match with your audio every time. And you can change the output by adjusting the Output slider on the left-hand side.
The PopRemover plug-in is available for both PC and Mac and is supported by all major digital audio workstations (DAWs) that support VST3 or AU including Audacity. If you want click removal for recording there really is no better way than with CrumplePop’s PopRemover. Simple, powerful, and effective — what more could you ask?
One of Audacity’s great strengths is the range of built-in tools it has. The Click Removal tool is an effective way of helping to deal with clicks and pops.
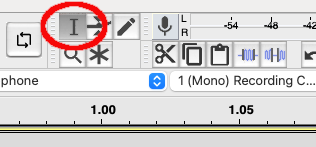
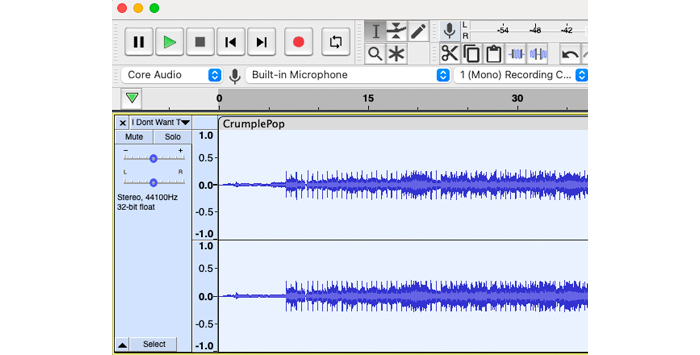
Load your audio into Audacity and either select a section of the file you want to work on by left-clicking your mouse and dragging it or by selecting the entire track.
Keyboard shortcuts: CTRL+A (Windows) COMMAND+A (Mac)
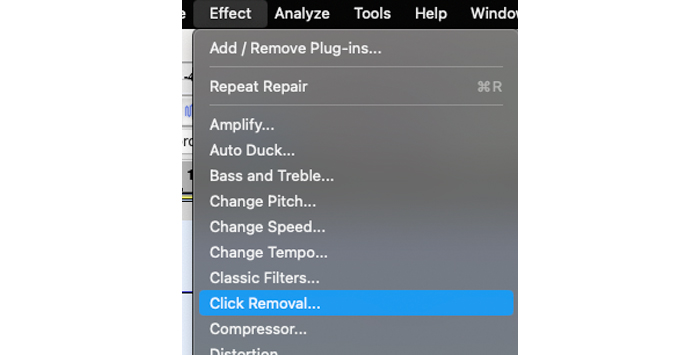
Once you have selected your audio, go to the Effect menu and select the Click Removal tool. This will bring up the Click Removal dialog box and its settings.
There are two settings that can be adjusted:
You can use the Preview button to adjust these until you are happy, though the default values are generally effective. Once you are satisfied, click OK and Audacity will apply the changes to your audio.
The Click Removal tool is effective at what it does but sometimes you need to work with more precision than an automatic tool. To do this, you need to cut and join the audio yourself.
Find the portion of audio that contains the click or pop that you want to eliminate. Then zoom into it so that you can easily identify it.
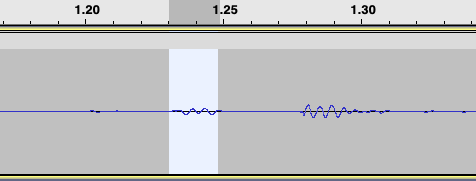
Highlight the part you want to cut out by left-clicking the mouse and dragging it so the pop or click is selected. You can then press either the Backspace or Delete keys to remove the section and your clip will be automatically rejoined. You can also right-click over the selected sample and click Cut to achieve the same result.
There is something to be aware of when using this method. Cutting in this way will remove all sound, not just the clicks or pops. So if your click is in the middle of dialogue, the dialogue as well as the click or pop will be removed, which can result in a slight “stutter” on the audio.
To keep this to a minimum it’s a good idea to zoom in as far as you can to the click or pop and select as little audio as possible. This will result in less of the audio being cut out and so will help to keep this “stuttering” as short as possible.
Audacity also contains a Repair Tool that can fix certain audio problems including clicks and pops.
Zoom into the click or pop as closely as you can and select it. Once you have selected it, go to the Effect menu, then choose Repair. Audacity will then repair the selected piece of audio.
Please note that this only works on extremely short sections with a sample level of up to 128, otherwise Audacity will produce an error. However, despite this short sample level, it can still provide good results to remove clicks and pops if they are very short. If the sample level proves to be too short, you will need to use one of the other methods.
If you find that Audacity is unable to resolve the issues you are having with click removal, another option is to export your file and import it into another tool that can help.
The best way to do this is to export your file as a lossless file to preserve its quality as an AIFF or WAV. When it comes to AIFF vs WAV the differences are small so either format will suffice.

Once exported, you can use tools such as GoldWave or ClickRepair to try and remove the problems with your audio. Both pieces of software have tools dedicated to removing clicks and pops. Although neither GoldWave nor ClickRepair is free, both have free trial versions available. That means you can test them out to ensure they can help your click removal problems before deciding whether they are worth spending money on.
You can also save your audio from both pieces of software as lossless files and reload them into Audacity with no loss of sound quality.
While clicks and pops can cause even the best-recorded audio to sound poor, eliminating them is getting easier and easier. And while many expensive software packages can remove clicks it would be an error to write off free software like Audacity.
Whether you are using a dedicated plug-in like CrumplePop’s PopRemover or Audacity’s own range of tools, you can now remove clicks and pops and relegate them to the past.
Yes, Audacity can remove clicks and pops. The tools available in Audacity really are remarkable, given that it’s a completely free piece of software, and there are several methods detailed above that can be used for click removal. Whichever method you use for your click removal though, you will be able to use Audacity to get rid of clicks and pops.
Alongside clicks and pops, plosives can be an issue on audio recordings. Plosives are loud sounds like “p” and “t” that cause the microphone to “pop”. There are a couple of simple techniques you can use to deal with them.
Firstly, zoom in on the part of your audio that has the plosive noise and select it by left-clicking and dragging your mouse. Once it has been selected, simply reduce the volume of the clip. You can do this by going to the Effect menu and selecting Amplify.
Drag the slider until Amplification (dB) has a negative value. The larger the negative value the greater the reduction in volume. You want to choose a volume that will reduce the plosive noise but not great a quiet moment, so you may need to experiment to get the level correct. When you have the right volume, click OK.
If this doesn’t result in the reduction you are looking for, you can also use EQing to get rid of plosive sounds. Plosives are mostly bass sounds (low frequency) so you can turn them down while leaving other frequencies alone.
Now go to the Effect menu and choose Graphic EQ. You can then reduce the bass frequencies by adjusting the sliders. Anything below about 200Hz will help eliminate the bass sound in your plosives, anything above that will likely result in some kind of error in the main part of your track.
As with the volume technique, this might require a little experimentation to get the levels correct but getting this right will make a big difference when it comes to eliminating your plosive sounds.


