Marco Sebastiano Alessi
Mar 13th, 2023
One of the features you frequently hear in podcasts is ducking, which is common at the beginning of the podcast and between different sections. But what is audio ducking? And how can you apply it to your tracks in GarageBand?
GarageBand is among the most popular software for music production. It’s an exclusive DAW for Apple devices available in the app store for free, which means you can start making music in no time and for free instead of buying a professional and expensive workstation.
Many people use GarageBand for music production, but because of its simplicity, it’s also a popular solution for recording podcasts. If you are a Mac owner, you probably already have GarageBand on your computer.
In this article, I’ll explain what ducking is and how to use this professional tool in GarageBand.
If you are an avid podcast listener, I’m sure you’ve heard the ducking effect in almost all your podcasts without realizing it.
Usually, a podcast will start with an introductory musical section, and after a few seconds, the hosts will start talking. At this point, you’ll hear the music playing in the background getting quieter, so you can clearly hear the person speaking. That’s the ducking effect doing its work.
Ducking is used when you want to lower the volume of one track to emphasize another. But this process is not simply about reducing the volume: it will decrease volume each time a lead track plays simultaneously with the ducked one.
Looking at the waveform in your GarageBand project, you’ll notice how the track you set to duck will bend down each time other sounds play. It does seem to be “ducking”, hence the name.
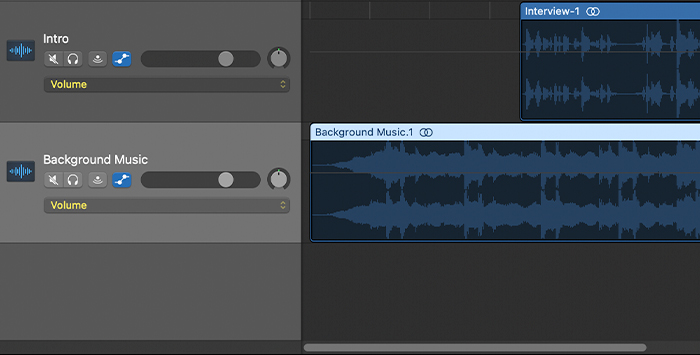
In GarageBand, you can set which tracks will be ducking and which ones will be in the spotlight with the intuitive ducking controls while at the same time keeping other tracks unaffected by the ducking feature. Ducking is applied to a specific track and not to the master track so that it won’t affect the rest of the mix.
The ducking feature was available in GarageBand for a while until the release of GarageBand 10, which removed ducking and other podcast features.
Below, I’ll show you how to use ducking in GarageBand’s older versions and its replacement, volume automation, in GarageBand 10 and above.
To install GarageBand, visit the Apple store on your device, sign in, and search “GarageBand.” Download and install it and follow the next steps to use ducking.
Open GarageBand and start a new project. With these versions of GarageBand, you’ll have a template for podcasts ready to use. Then record or import the tracks for your project.
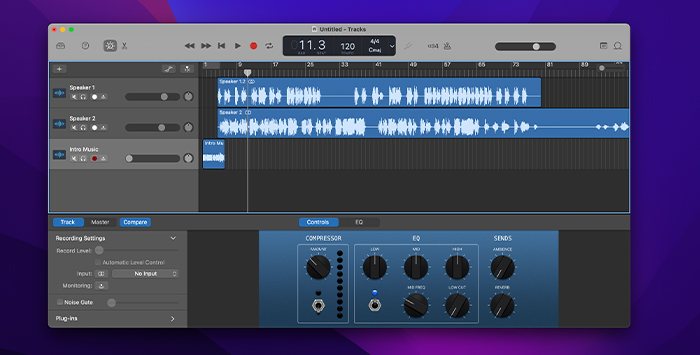
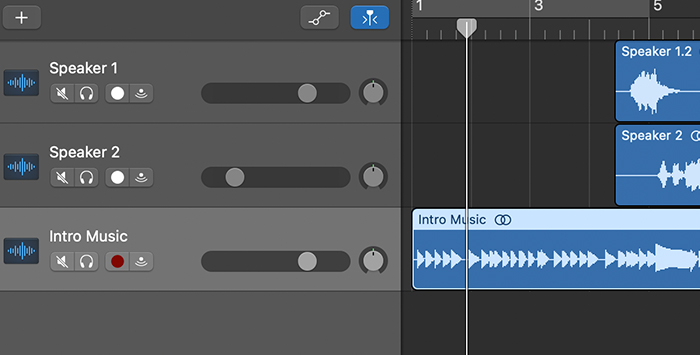
Enable the ducking controls on your project by going to Control > Ducking. You’ll see an up and down arrow in the track’s header when ducking controls are enabled. These arrows will allow you to set which tracks are ducked, which are leads, and which ones will not be affected.
Click on the upper arrow to select the lead track that will cause others to duck. The arrow will turn orange when the lead is active.
Select the track you want to duck and click on the down arrow in the track header. The down arrow will turn blue when the ducking feature is active.
If you want the rest of the audio tracks to remain at their original volume, you can click on the arrows until both are grey to deactivate ducking.
Play your project with ducking controls active and listen. Save your project when you finish and continue to add other effects like compression and EQ if needed.
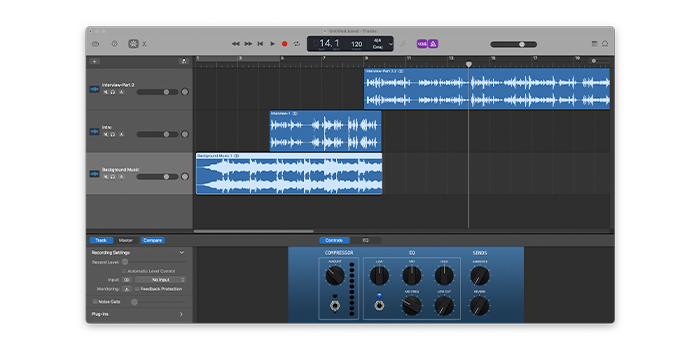
In the newer versions of GarageBand, the ducking feature and podcast templates have been discontinued to focus more on music production. However, it’s still possible to add ducking effects by fading out parts of the tracks with the volume automation feature. The process is more complex than with the ducking controls in previous versions, but you’ll have more control over how much a track is faded and for how long.
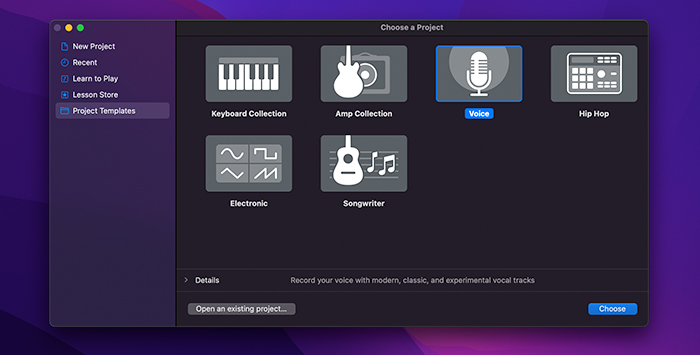
Open a GarageBand session or create a new project. Record and import your audio clips. The podcast templates are gone in the more recent version, but you can choose an empty project for a podcast and add the tracks you need.
Since GarageBand no longer has ducking controls, volume automation will allow you to lower the volume in different sections on a track automatically.
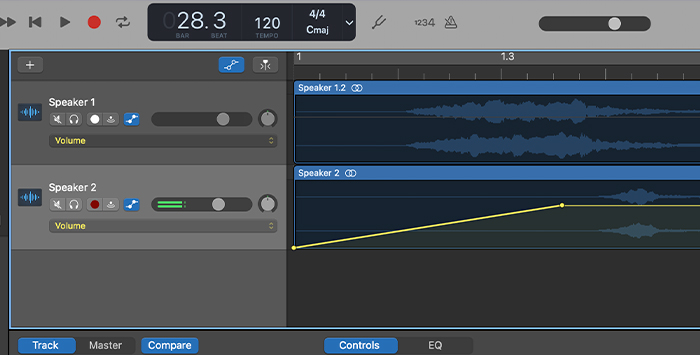
Activate volume automation by selecting the track you want to be ducked in the background, then press the A key.

You can also activate volume automation by going to Mix > Show Automation.
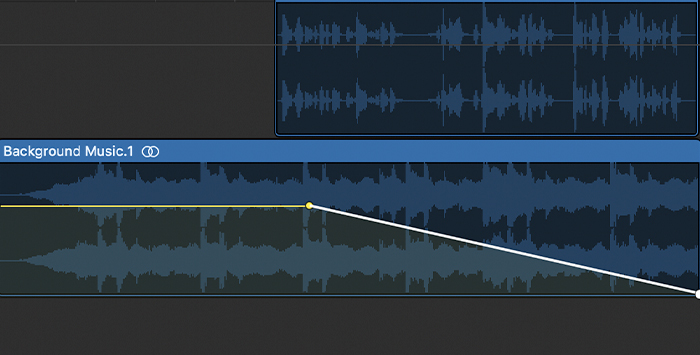
Click anywhere on the clip to display the volume curve. Click on the line to create an automation point. Then drag the points up or down on the volume curve to generate the fade-out and fade-in effect.
You can preview and change the automation points to shape the effect. Press the A key again when you’re done, then save and continue editing your podcast.
The ducking feature can quickly lower the volume of tracks when another one is playing without needing to adjust the settings on the master track. The most common use is in a podcast, but it can be used in various contexts.
You can use ducking in music production to automatically lower the volume of background sounds to highlight other instruments, like ducking a guitar under a flute solo in a song or ducking other instruments to favor the vocals.
Knowing how to use the ducking feature in GarageBand will come in handy on many audio projects, such as podcasts, voice-overs for movies, sound design, or music production. If you have a version of GarageBand that doesn’t have this option, you can still achieve similar results with volume automation, so don’t despair.


