JG McQuarrie
May 21st, 2023
There are many different ways to produce audio and get it to sound as good as possible. Understanding these techniques is important to ensure you always get the best quality out of your recorded sound.
And a great technique to use when it comes to improving how things sound on your recording is audio normalization.

Normalizing an audio file is the process of adjusting the volume across an audio track so the audio signal is at the same volume level throughout. This creates a consistent volume across the audio track so that everything sounds the same, rather than having loud bits and quiet bits.
Normalizing audio doesn’t change the dynamics or EQ of the source, it just adjusts the volume so quiet parts are raised to the same volume as louder parts. A quiet audio file will have different requirements compared to one that gets louder and quieter throughout.
Because every audio recording will have different sounding loud and quiet parts, normalizing won’t be the same for every track. It’s an important tool and can make a big difference to your listening experience but each track you normalize will have different requirements.
Normalizing audio can be used for a variety of different situations: music, podcasts, broadcast audio, digital audio, analog, and basically anywhere there is sound!
That depends on your audio file. Not all tracks require normalization and you should only normalize if you think it’s something that is required.
For example, if you have a podcast host who talks at a consistent volume and is good at keeping the same distance from the microphone then chances are that the volume across the recorded track will be consistent. In that instance, you probably don’t need to normalize audio.
But you might have a podcast host who keeps moving their head away from the microphone to check notes, or who sways back and forth when talking. That will mean the recorded volume will be inconsistent.
If you can easily hear loud and quiet parts of your audio depending on how close or far the host is to the microphone – this is a good time to use normalization to help level out the differences between the loud and quiet parts.
Or say you have a collection of songs recorded at different times. It might be that some are quiet and some are very loud.
Applying normalization to all of those songs will mean they all sound like they are the same volume, whether you have a quiet acoustic ballad or a raucous heavy metal thrash. This makes it much more pleasant for the listener so they can enjoy the music with being distracted by drastic changes in volume.
There are different types of audio normalization that can be deployed on your tracks.
Peak normalization is a fairly straightforward way of achieving normalization across your audio tracks. It works by increasing the level of the audio until the highest peak (that is, the loudest part of the recording) is brought up to what is known as zero decibels full scale (dBFS).
In applying exactly the same amount of increase across all of the track, the audio dynamics of your recording are not adjusted.
This means that, at the end of the process, you have a track that sounds just like the original only louder and with more consistent volume throughout.
Peak Normalization is not a very processor-intensive process, so it can be done quickly and easily even on old computers.
Loudness normalization is a much more involved process than peak normalization. Although it is a more intensive process the results are usually better.
Loudness normalization uses a measurement called LUFS. This stands for “loudness full-scale unit” and it is a more advanced procedure that creates an even volume on your track in a more natural way that the human ear can hear. The levels of the recording are adjusted not just to a single value, as with dBFS, but take into account the way the final track will be heard. That means the whole track is analyzed and an average volume is selected — this is the volume the track will be set at.
Peak normalization will just make your track louder but loudness normalization may make it quieter, but better.
This requires a lot more processing than peak normalization and will take longer. However, the trade-off is a better and more even-sounding final result.
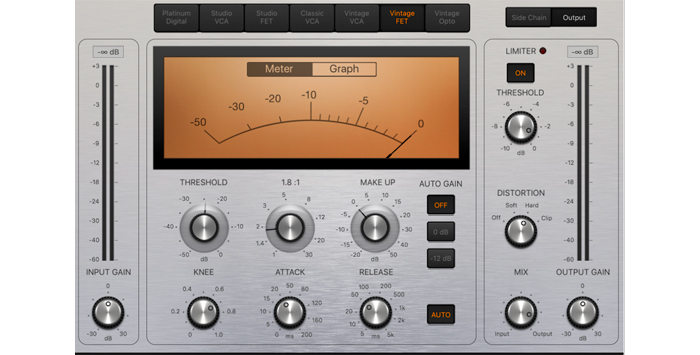
Normalization and compression are often thought of as similar or the same – but they are not. The process of compression is quite different.
When you use compression on your audio, what happens is that the dynamic range of the recorded audio is reduced. The dynamic range is the difference between the highest and lowest parts of the audio.
Because of this, with compression, the dynamics of your audio are altered because the highs and lows are adjusted to be as similar to each other as possible.
With normalization, whether it is loudness normalization or peak normalization, the dynamic range of your recording is not altered. It just gets louder or quieter overall.
Normalizing audio is a relatively straightforward process. All digital audio workstations (DAWs) will have an effect for applying normalization to your audio.
The example below uses the free audacity loudness normalization tools.
Firstly you need to select all of your audio file. Go to the Select Menu and choose All.
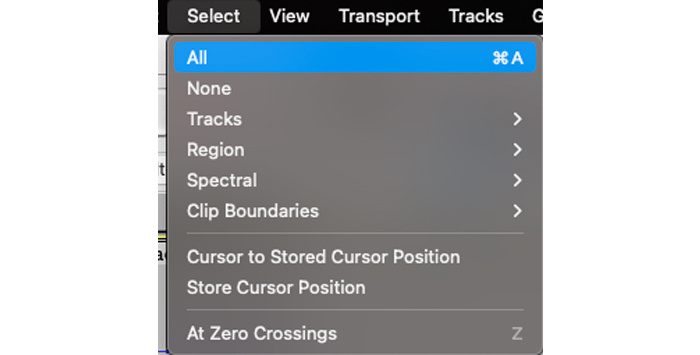
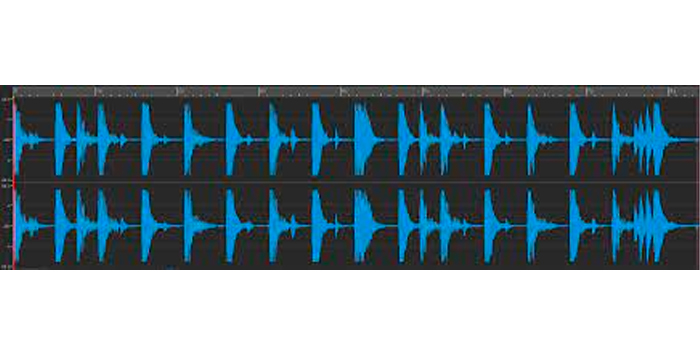
Once this has been done, you will see the track change color. That means it has been correctly selected.
Now go to the Effect menu and choose Normalize from the list. This will open the Normalization dialog box.

There are a few settings to look at here.
This means your audio will be centered at the zero position. If your DC offset is not at zero it’s possible there will be distortion on your recording. Generally speaking, you can just leave this setting as default.
After this, there is the “Normalize Peak Amplitude To”, which has a decibel rating (dB). Peak amplitude means you are setting how loud you want the track to be.
As good practice, set it at -1 for the best results. You do this because it is just a little below the maximum volume and leaves a bit of room if you want to add effects, processing, or do anything else with the audio.
This value can also be lowered but it’s not a good idea to raise it by much. This can cause distortion, clipping, and other problems with your audio.
This is a very important setting, so it’s good to know what it means. If you have two different audio tracks on each of the stereo channels then this setting needs to be understood. If your recording is mono then you don’t need to worry about it.
When the Normalize Stereo Channels Independently box is left unchecked (this is the default option) the Normalize setting will work on both audio sources together, and adjust the volume by exactly the same amount on each.
So if both of the stereo channels are at the same volume, this deals with any peaks and troughs in the volume.
However, when you choose this option, the normalization will work on each of the tracks independently of each other.
You might want this if both of the stereo channels have been recorded at different volumes so that they end up at the same volume.
Once you have finished with the settings, just click OK and the normalization will be applied to your audio file.
Audio normalization is a simple process but it can make a real difference to how professional and easy to listen to any track is. By getting a consistent volume all the way through your audio it will be easier for listeners to enjoy whatever it is you want them to enjoy in the first place!

Audio normalization can have a big impact on the way track sounds but there are both pros and cons to using it.


