Marco Sebastiano Alessi
Aug 17th, 2022We’ve all heard of auto-tune; whether we like it or not, it has become a must-have in the music industry, especially for producers working in the fields of pop, RnB, and hip-hop.
However, using an auto-tune plugin is a much more common practice than you think, regardless of whether artists use it to add an eccentric vocal effect to their creations or to make their audio sounds more professional with pitch correction.
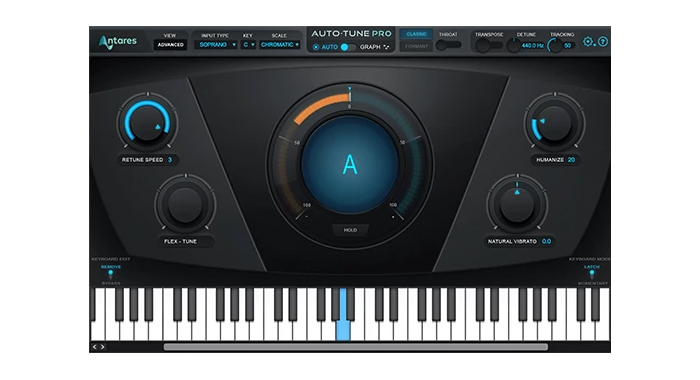
Auto-Tune automatically adjusts the notes of your vocal track to fit a target key. Like with all pitch correction tools, you can change certain parameters to make the singer’s voice sound natural and pristine if you want to add a professional vibe to your vocal performance. In addition, and especially with Antares Auto-Tune, you can create a more artificial voice by using extreme vocals correction, robotic effects, and various vocal modulation plug-ins.
There can be some confusion for Mac users as AutoTune in Logic Pro X is called Pitch Correction, while the more graphic and manual correction is called Flex Pitch in Logic Pro X
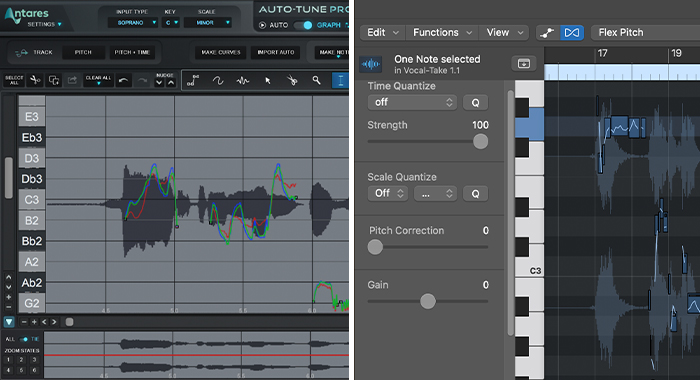
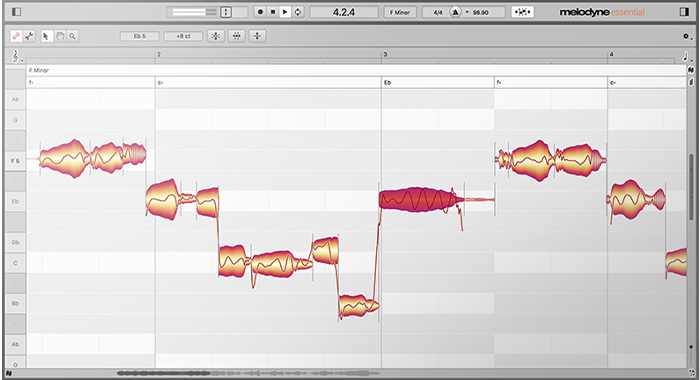
Flex Pitch shows a piano roll-like editor where we can sharpen or flatten the vocal notes, edit things like note length, gain and even add or remove vibrato. This is a more advanced tool that can be used together with or instead of auto-tuning.
Most people use Flex Pitch to make their vocal recordings more professional, but it can be more time-consuming than auto-tune, as everything needs to be done manually. On the other hand, if you know what you’re doing, Flex Pitch allows more control over specific sections of the song to make the correction more subtle; if you don’t want people to notice you used auto-tune, this plug-in can help you hide the finishing touches.
Whether pitch correction or Flex Pitch is right for you will depend on your needs. The latter is generally used to manually fine-tune the vocalist’s pitch and make the effect as subtle as possible. Auto-tune can also be used to make quick fixes on your pitch, but additionally, you have access to dozens of effects that can help you create a truly unique vocal sound.
Let’s see how to use auto-tune in our vocal tracks using the stock Logic Pro X Pitch Correction plug-in.

First, add a track to your session by clicking on the add icon (+ symbol) and choosing your input signal. Then click the R button to enable recording and start singing.
Alternatively, you can import a file or use Apple Loops:
· Go to your menu bar under File >> Import >> Audio File. Select the file you wish to import and click Open.
· Use the finder tool to locate the file and drag and drop it into your Logic Pro session.
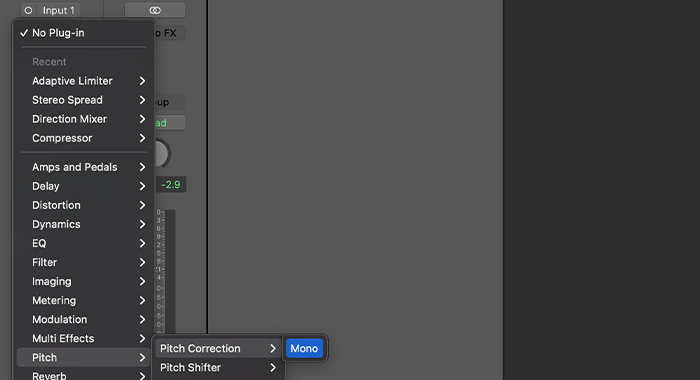
Once you have recorded or imported a vocal track to our project, highlight it, go over our plug-ins section, click Add New Plug-in > > Pitch > > Pitch Correction, and choose Mono.
The pop-up window with the plug-in will appear, where we will do all the configuration. This step might feel overwhelming at first, but don’t worry: you just need some practice.
Here’s what you’ll see in the pitch correction window:
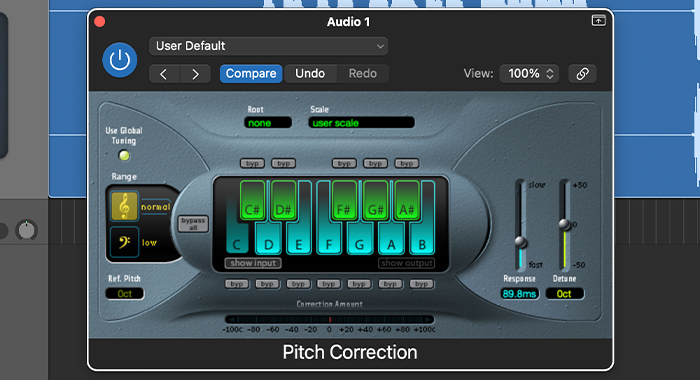
Before you do anything, you need to know the key to your song. If you don’t know it, there are different ways to find the root note:
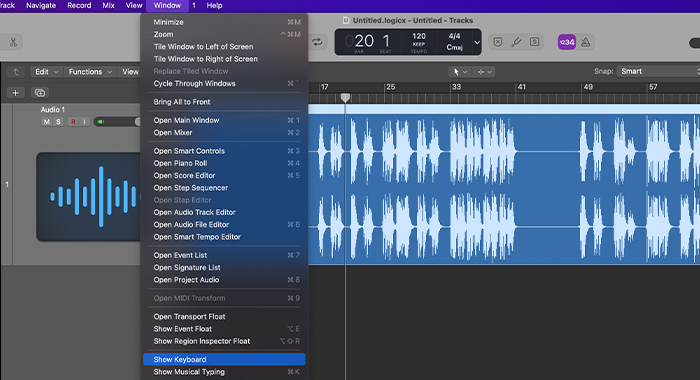 You can do it the old fashion way using a piano or keyboard. In Logic, go to Window >> Show Keyboard to display the virtual keyboard. Start playing keys until you find one that can be played during the entire song in the background; that’s your root note.
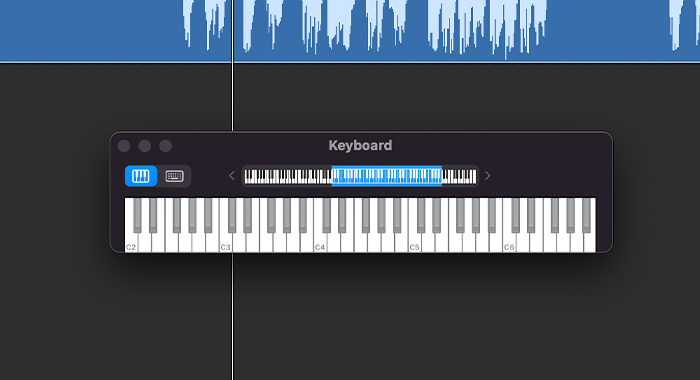
Once you select the key from the drop-down menu, next to it, choose the scale. Most songs are in the Major scale or Minor scale, and generally, a Major scale is a more cheerful sound, and a Minor scale has a darker and somber sound.
Now, choose the tone of the voice so that the pitch correction tool can pick that vocal tone range and do a better job fine-tuning the track.
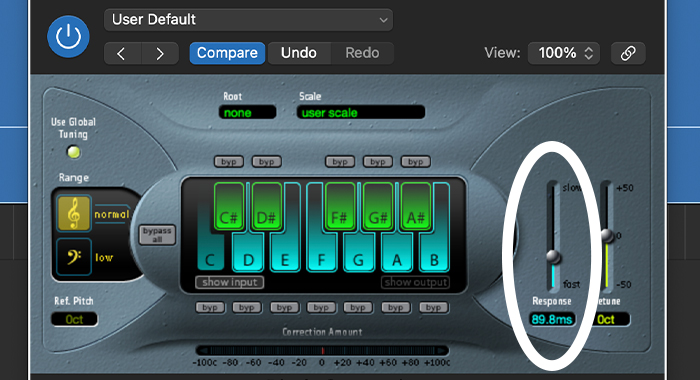
Next, go to the two sliders on the right, and look for the response slider. Lowering the slider to the bottom will create a robotic effect. Play back the track, listen to how it sounds, and adjust the response slider until you hear the sound you envisioned.
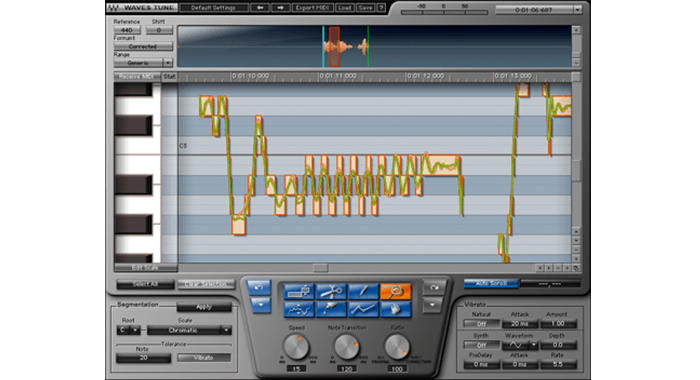
As we mentioned at the beginning, there’s another tool you can use in Logic Pro X to correct your vocal’s pitch in deeper. If you’re familiar with Melodyne or Waves Tune, you’ll have no problem using this plug-in.
I’ll assume you already have recorded or imported your vocals as per the previous steps. So, we’ll jump straight to using Flex Pitch.
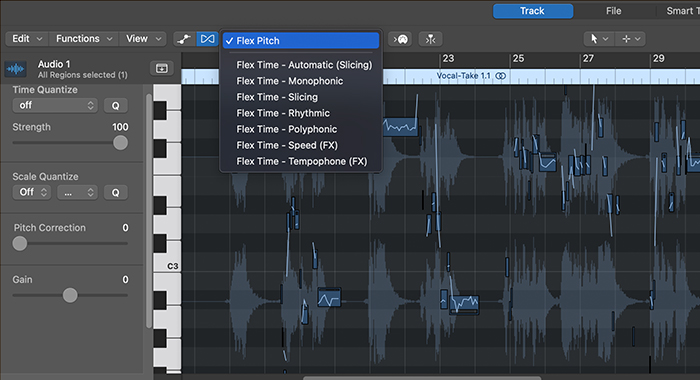
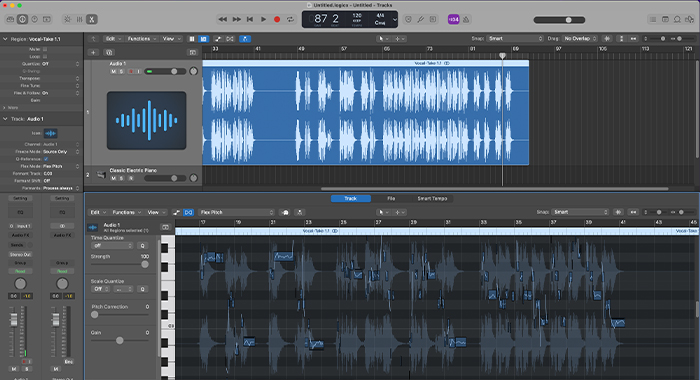
Highlight your track and open your track editor window by double clicking on it. Now select the Flex icon (the one that looks like a sideways hourglass), and choose Flex Pitch from the Flex mode drop-down menu. You should be able to see the piano roll where you can edit in more detail your vocal track.

You’ll notice little squares over the waveform with six dots around it. Each dot can manipulate an aspect of the vocals, like the pitch drift, fine pitch, gain, vibrato, and formant shift.
Let’s assume you want to correct a specific syllable where the singer is slightly out of tune. Click on the note, move it up or down to fine-tune it, and then replay that section until you’re happy with the result.
You can use Flex Pitch to create a robotic effect similar to autotune. The difference is that with auto-tune, you can do so in the entire track; with Flex Pitch, you can add the effect to sections like the chorus by modifying the pitch on that specific note.
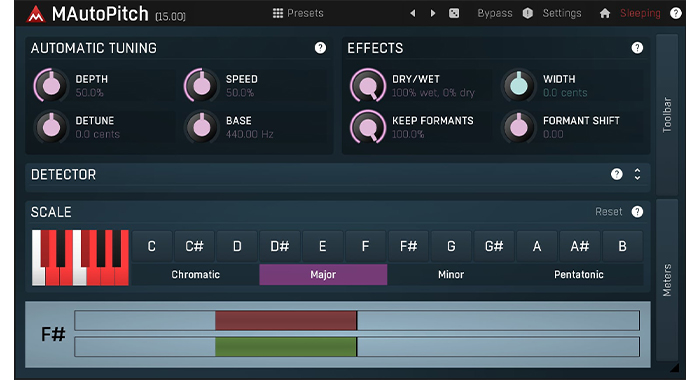
There are many pitch correction tools available and compatible with the most popular DAWs. On Logic Pro X you can use the autotune plug-in or Flex Pitch, but third-party plug-ins can also do an excellent job. Here’s a list of other plug-ins you can check out for pitch correction:
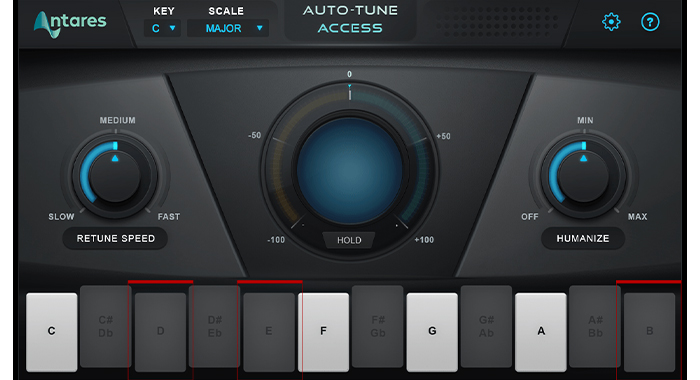
Nowadays, everyone uses auto-tune and pitch correction, either to enhance their vocal recordings or to change their voice, with dedicated audio libraries like Auto-Tune Access. Whether you use Antares auto-tune plug-ins as a stylistic choice or pitch correction tools to fine-tune your performance, these effects make your music sound more professional and unique.


