Marco Sebastiano Alessi
Sep 21st, 2022Audio interfaces are a crucial element of your recording studio, as it’s where most of the audio processing happens. That’s why taking your time to research which audio interfaces are available and what would be most beneficial for you is so important.
Whether you’re starting with a Beginner Audio Interface or opting for a high-end recording station, options are endless, with devices that provide plenty of functions and features for every need in the music industry.
However, there’s one feature that every musician, producer, and audio engineer looks for in audio interfaces: low latency.
If you’re starting your home studio, I’m sure you’ve heard many users and manufacturers talk about the latency of their devices. But what is latency? Let’s take a look at why this is such an important thing to consider when buying your first low latency audio interface or upgrading your old one.
A low latency audio interface is the best way to upgrade your workflow and audio performance because it delivers the best audio quality and gives you the possibility to expand your sonic palette.
The best audio interfaces feature fantastic sound quality and near-zero latency giving you full control over your audio recording process.
Let’s delve into the world of USB audio interfaces with close-to-zero latency!
We call latency the time gap between a stimulus and a response. For example, the times it takes our brain to process a sound and when we hear it and then react to it. In music production, this is the time it takes for the sound to travel from its source to our ears.
To understand how this process works and what we mean by “gap”, first we need to understand how audio interfaces work. Let’s take a singer as an example: to record a voice, they’ll need a microphone connected to their audio interface, which is connected to a computer running a DAW (digital audio workstation).
In this example, the singer is the source of the sound whose voice will be recorded with the microphone. When we hit record on our DAW in the computer, the microphone will capture the sound and transfer it into the audio interface.
A low latency audio interface has a built-in ADC (analog to digital converter) that does precisely that; it converts an analog signal to a digital signal so our computer can store the sonic data.
The converted signal is then processed by our DAW, where we will see the singer’s voice translated into a waveform. The input latency is the time gap between the singer’s voice and our DAW recording and showing the waveform on our computer.
Then, the DAW will send the audio recording back to the audio interface, where its digital to analog converter (DAC) will transform that digital signal into analog and send it to the output device, such as studio monitors, speakers, or headphones.
The output latency is the gap between our DAW playing the audio until we hear it on our speakers or headphones.
When we talk about latency, we refer to the delay caused by all the processing involved. The sum of the input latency, the processing between, and the output latency is called round-trip latency and is measured in milliseconds. Latency is a critical parameter to consider; it will be a determinant factor in low latency monitoring of our audio recordings.
Having an audio interface with high latency will make our monitoring a chaotic task, as we will be listening to our singer’s voice, guitar, or MIDI instruments with an unbearable delay. That’s the reason why we should always look for the best low latency audio interface. Luckily, almost all current audio interfaces in the market provide low latency, even for home studios.
Now you might be wondering what causes latency and how to avoid it. We know our signal travels through many layers that cause a delay between processes, but it’s not the only thing affecting the latency.
The first thing you’ll need besides a low latency audio interface is a computer; the lower your CPU, the more latency you’ll get. With a higher CPU speed, you will have more power to process more effects and plug-ins on your DAW.
Buffer is the memory used in your computers for audio storage while your computer processes the audio coming from your audio interface. From your DAW, you can change the buffer size; the larger the buffer, the more time your computer needs to process audio.
More size will allow you to use more plug-ins and have better performance and stability in some systems. However, having more time for processing the audio means slower response and more latency.
There is no perfect buffer size; there will be times when you need the lowest latency possible, but on other occasions, you’ll need to choose performance over latency. Finding a balance between stability and low latency will be up to you and your requirements.
The quality of the audio interface may affect latency. A cheaper audio interface will have fewer components to provide audio quality, including low latency.
The connection type is another thing that can affect latency. The most common connections are USB-A, USB-C, Firewire, and Thunderbolt. We can find USB 2.0 and 3.0 as well as Thunderbolt 2 and 3. The fastest connection and those that will have less latency are USB 3.0 and Thunderbolt 3.
The audio signal is transported through the cables of our interface, and having the fastest connection will give us lower latency. However, to achieve this, it’s fundamental that each component of your recording setup is compatible with the others, ensuring a smooth, high-speed data transfer.
Working with computers means working with an operating system, software, and drivers. We need to make sure our DAW is compatible with our computer, that we have our audio interfaces’ drivers up to date, and that everything is compatible with each other. Not having compatible hardware and software can have a significant impact on latency.
Whichever low latency audio interface you choose, you might still find some latency when recording or performing live. After all, it’s virtually impossible to achieve zero latency, and that’s okay.
However, here are some things you can do to reduce latency:
Now it’s time to jump to the best low-latency audio interfaces. We’ll provide you with all the necessary information to make the best decision for your projects, needs, and current hardware.
Let’s dive in!
The following audio interfaces are the ones providing the lowest latency. You’ll find interfaces for all budgets, for all operating systems, with few and a lot of inputs and headphone outputs, and many other features.
Let’s take a look at the best low latency audio interfaces.
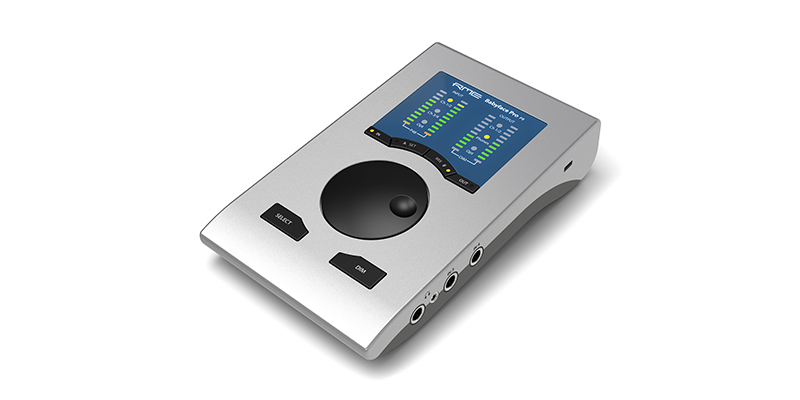
The Babyface Pro is a very small, high-quality, low latency audio interface that comes in a sturdy silver aluminum case. Despite its size and look, it weighs 680g. The Babyface Pro design makes it perfect for a home studio and to be placed on your desktop. It is also portable enough to carry with you.
It comes with two XLR microphones inputs with two preamps that provide 48V phantom power individually with a gain of up to 76dB, which is an excellent solution if you own microphones that need an extra push.
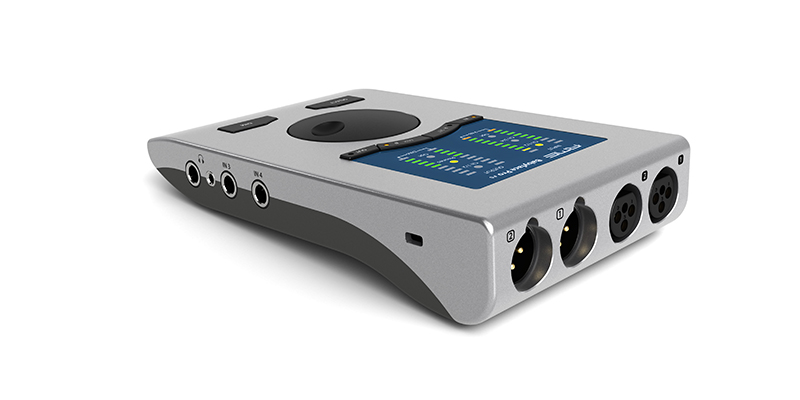
Two headphone outputs are included with separate low and high impedance headphones drivers. One is 3.5mm, and the other is 6.3 mm with a higher output level. You can connect two separate headphones simultaneously!
The Babyface Pro connects to your PC via a USB-C port; it includes both USB types A and C. Something interesting is that RME develops their own USB and Firewire technology, allowing them to deliver us the best latency-free experience.
Even though the Babyface Pro FS is USB powered, it offers a lockable DC port for an alternative power supply in case you use it as a standalone preamp.
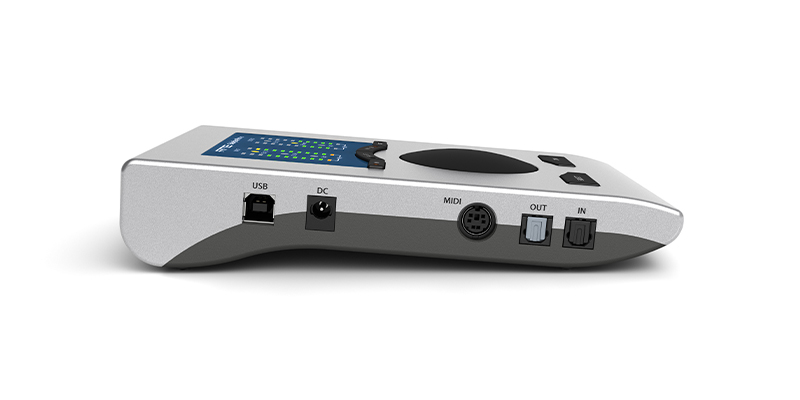
The Babyface Pro Fs also features an optical Toslink in and out and MIDI input and output. RME provides a breakout cable to use with your MIDI devices.
On the front of the USB-C audio interface, we found a LED display where we can see which inputs and outputs are connected with four buttons under the LED panel to select inputs, outputs, and modes. A big knob in the middle controls volumes, and at the bottom is a select and direct monitor button. The direct monitoring button will lower the headphone output volume to hear our sound bypassing our computer and all the processes, making it latency-free.
The RME Babyface Pro FS is around $1,099.00.
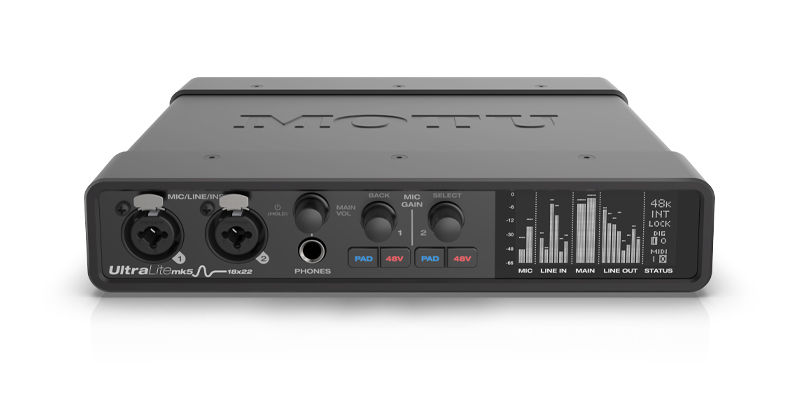
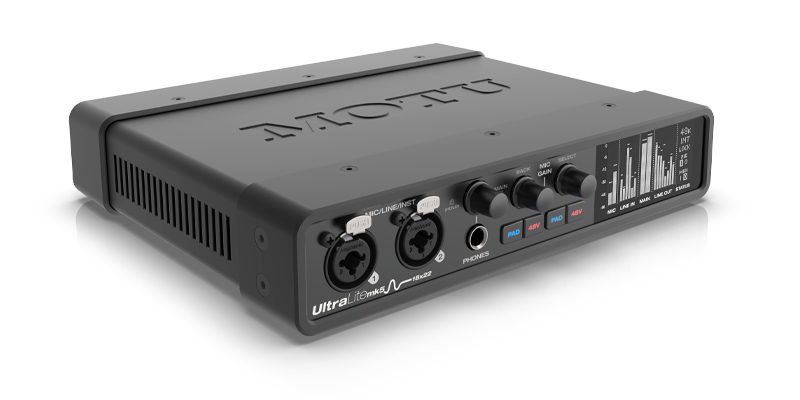
Undoubtedly one of the best low latency audio interfaces, the MOTU UltraLite-MK5 comes in a compact, steel housing with the perfect size for both studio and stage purposes. You can use this low latency audio interface for recording and production in your home studio or mix on-stage live performances with no other hardware or computer. Its design allows it to be placed on your desktop or rack mounted.
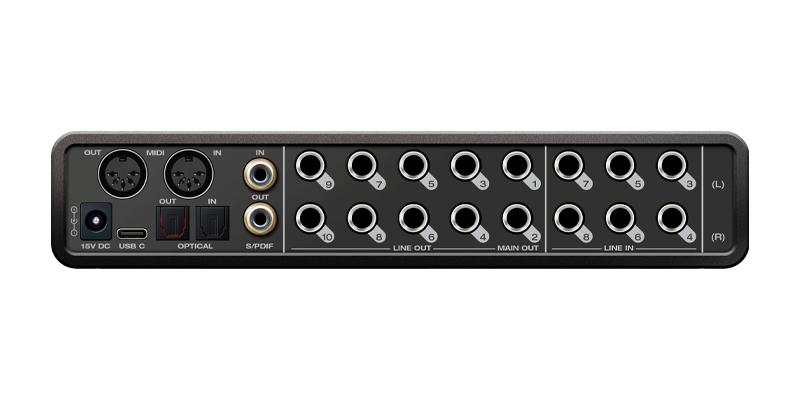
The UltraLite-MK5 can be connected to audio gear such as speakers, headphones, instruments, mics, MIDI devices, and more. It comes with two combo XLR jacks for microphones, lines, and instruments. This is in addition to six balanced TRS line inputs, ten balanced TRS line outputs, one 6.3 headphone jack, 8-channel optical input and output, and one MIDI in and out. It connects to the computer through USB-C, compatible with USB 2.0 and 3.0.
On the front, we find the combo XLR inputs with volume knobs, PADs, and 48V buttons to turn on and off these features. There is also the headphones jack and headphone volume control. The OLED display shows us the levels of our input channels.
The UltraLite-MK5 includes ESS Sabre32 DAC technology to deliver a measured 125 dB dynamic range. Its drivers are optimized for all operating systems to provide a solid low latency performance. In Digital Performer DAW, the UltraLite-MK5 has shown a trip latency of 2.4 ms at 96kHz and 32 sample host buffer.
The software included is CueMix 5, MOTU Performer Lite, and 6GB of virtual instruments, loops, and sounds from Big Fish Audio. You can find the UltraLite-MK5 for around $600.
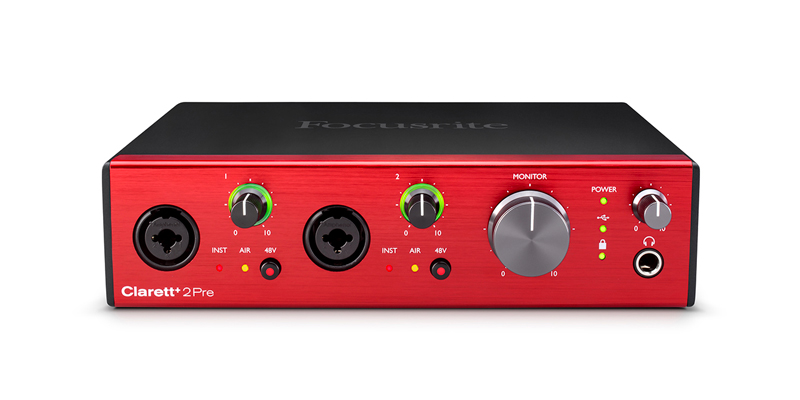
Focusrite includes two Clarett+ mic preamps on this incredible series, allowing you to record clear sound with low distortion and ultra-low noise. It has independent analog to digital and digital to analog converters for more accurate recordings.
The Clarett+ 2Pre comes in a similar metal housing to other Focusrite devices. It’s red on the front and black on the rest. The knobs run smoothly, and the buttons have a premium feel.
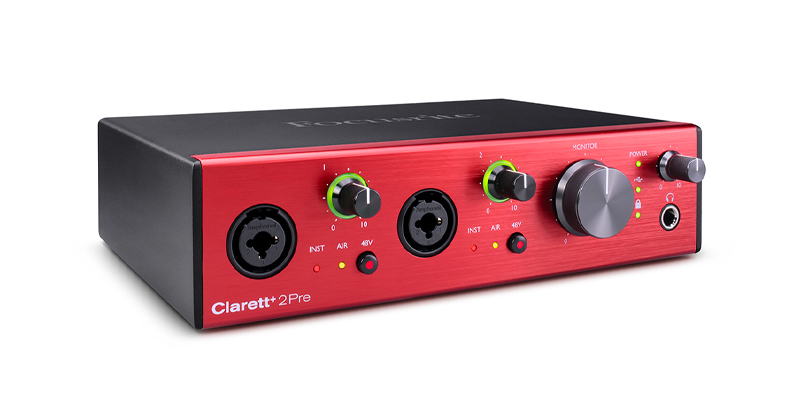
On the front, we have the two XLR, TRS, and JFET instrument inputs for mic, instruments, and line-level devices. Each channel has a gain knob and a 48V button to control phantom power independently. The Clarett+ 2Pre features two LEDs that indicate when an instrument is connected and when the AIR mode is active. Finally, we have a 1/4 headphone jack and knob volume.
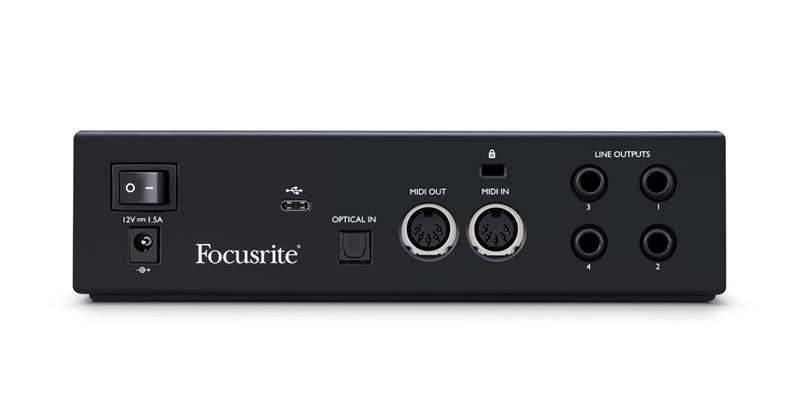
On the back, we find the RCA outputs, the 12V DC input to supply power, and a USB-C port to connect it to your computer, which can be used to power the audio interface. One thing some users love about the Clarett++ 2Pre is the switch to turn off and on the audio interface. It allows you to keep the interface off without disconnecting it from your computer or DC and stay connected all the time.
It also features optical input, MIDI input and output, and two stereo balanced TRS outputs for speakers or monitors.
The Clarett+ 2Pre comes with the Hitmaker Expansion, which is a pack of plug-ins including:
These plug-ins are more than enough to start producing, mixing, and mastering your music in studio quality with the Clarett+ 2Pre. This fantastic interface is available for only $629.99.
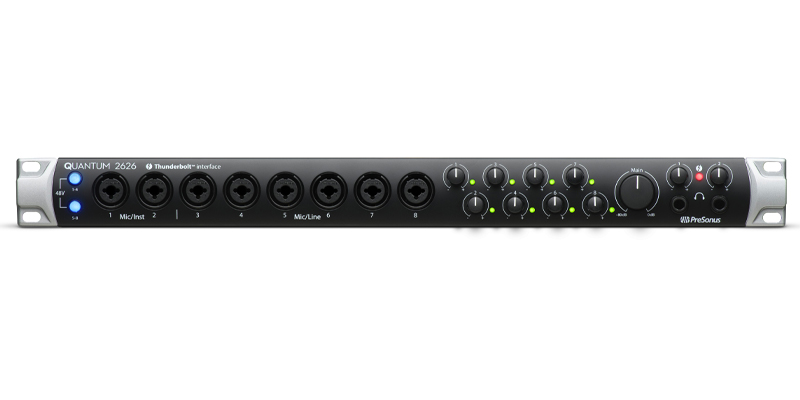
With less than 1ms of trip latency, the Quantum 2626 has been called the fastest audio interface on the planet. It comes with high-definition D-A converters and clear and transparent XMAX mic preamps. Its ultra-low latency will allow you to record to your DAW with plug-ins in real time. And it’s Thunderbolt 3!
The Quantum 2626 is a rack-mounting low latency audio interface suitable for all sizes of music studios. With 26 instrument inputs and 26 outputs, you’ll never find lacking inputs for all your devices. Let’s take a look at all is connections:
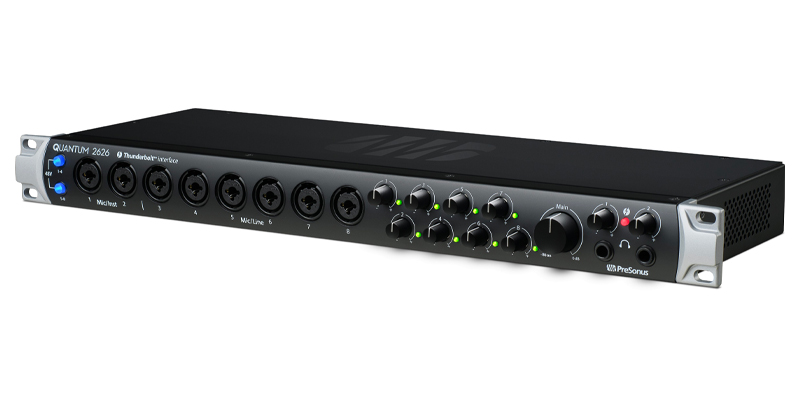
On the front, we have eight XMAX preamps. The first two channels are XLR mic and instrument combo, and the rest are XLR and line level input combo. You can activate phantom power in two sections individually, from channel 1 to 4 and from channel 5 to 8. Next, we have the eight gains for each channel, the master volume, and two headphones jacks with a volume knob each.

On the back, we find balanced send and return for channels 1 and 2, allowing for the use of an external mic preamp for those channels. Next are eight DC coupled balanced line outputs, main left and right outputs for monitors, MIDI in and out, 16 channels ADAT optical input and output, BNC in and out connectors, and the thunderbolt jack to connect the low latency audio interface to your Mac or Windows computer. At the left end, we have a button to power off and the 12V DC connector.
The Quantum 2626 has Mac and Windows drivers to perform with low latency in both systems and includes PreSonus’ DAW Studio One Artist and Studio Magic Suite. It is compatible with other DAWs available for Windows and Mac, such as Pro Tools, Logic Pro, or Cubase.
As you can see, the Quantum 2626 offers everything you may need in your music production career, but it might be overwhelming for beginners. However, with $900, you can get the best low latency audio interface on the market.
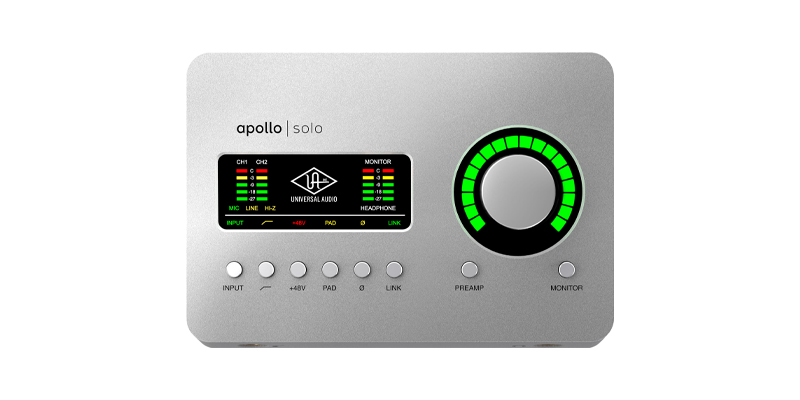
The Apollo Solo by Universal Audio comes in an elegant all-metal rugged housing built to last. It’s pretty compact, but with the Apollo A-D and D-A conversion that Universal Audio offers, you shouldn’t judge this low latency audio interface by its size.
The Apollo Solo has built-in UAD-2 processing to record using effects and plug-ins with near-zero latency regardless of buffer size. Thanks to the Unison technology, it provides the sound of classic tube mic preamps as well as classic guitar amps emulations. It also includes UAD plug-ins like Teletronix, the famous La-2A compressor, EQs, and many more that can be processed in real-time.
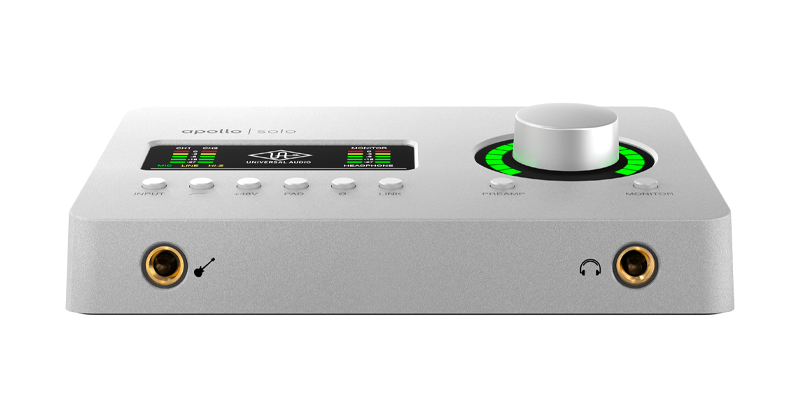
On the front, we have the High Z input for instruments and a 1/4 headphone jack with a superior headphone amplifier to hear every detail of our mix.
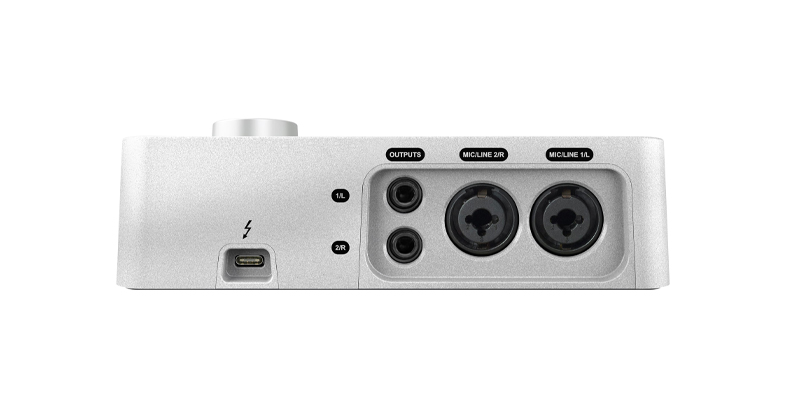
The two Unison mic preamps are on the back with a combo XLR mic and line-level input. On this side, we’ll also find a left and right output for studio monitors and the Thunderbolt port for lower latency and better stability.
On the top, there’s a display panel that shows levels for your microphones, line-level devices, and High Z instruments, as well as the headphone output levels. We can control gain with a big knob next to the panel and change between preamps and monitoring with the buttons below the knob.
It includes the LUNAR software, but it’s only available for Mac. Nonetheless, you can use this fantastic interface with most DAWs. You can find the Universal Audio Apollo Solo Thunderbolt 3 at $699.
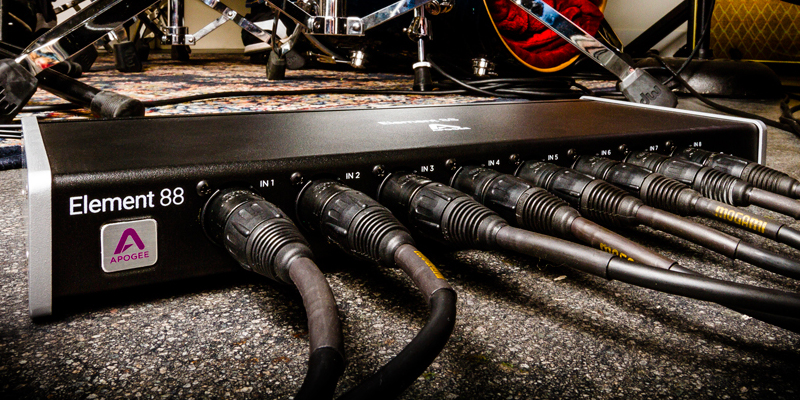
The Apogee Element 88 includes the finest mic preamps to capture every detail of your performance with a gain range of up to 75dB to provide a crisp sound with low distortion. It features high-quality Apogee ADC to minimize unwanted noise and offers the best audio quality.
The Element 88 Thunderbolt Driver provides a low latency of 1.42ms round-trip and the highest stability. The Element 88’s drivers use the minimum CPU power to help your computer run plug-ins with zero latency monitoring: it creates the perfect balance between latency and performance automatically for you.
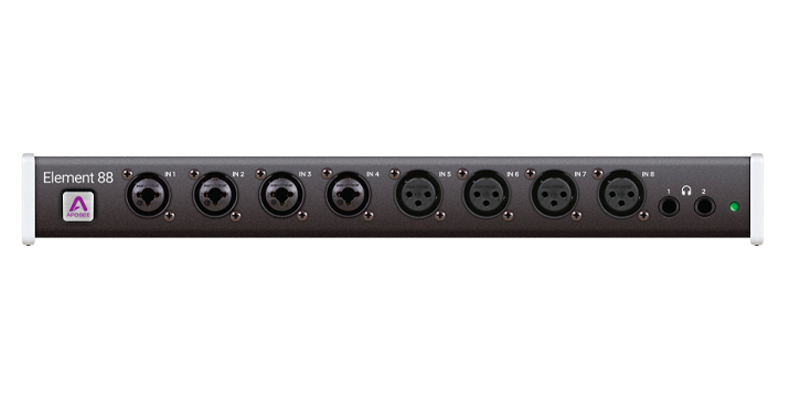
This rack-mounting low latency audio interface comes with eight channels on the front; four are combo jacks XLR for line, mic, and high Z instruments; channels 5 to 8 are combo XLR mic and line level inputs. We have two 1/4-inch headphone outputs and a status LED at the end.
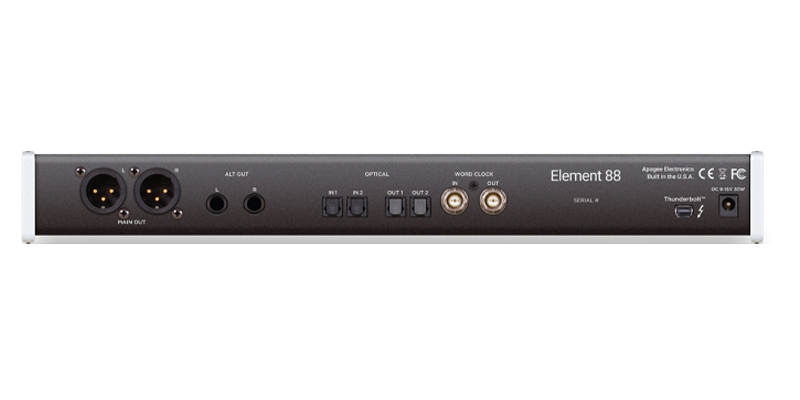
On the rear panel, we have two balanced left and right XLR outputs, two balanced TRS outputs, two optical in and out, BNC in and out work clock, a Thunderbolt port, and a 12V DC connector.
The Element 88 runs Apogee FX Rack plug-ins via hardware DSP. It also comes with Apogee Console Software for Mac and Apogee Control Mobile App for wireless control with your mobile iOS devices.
The Apogee Element 88 is undoubtedly one of the best audio interfaces for under $1500.
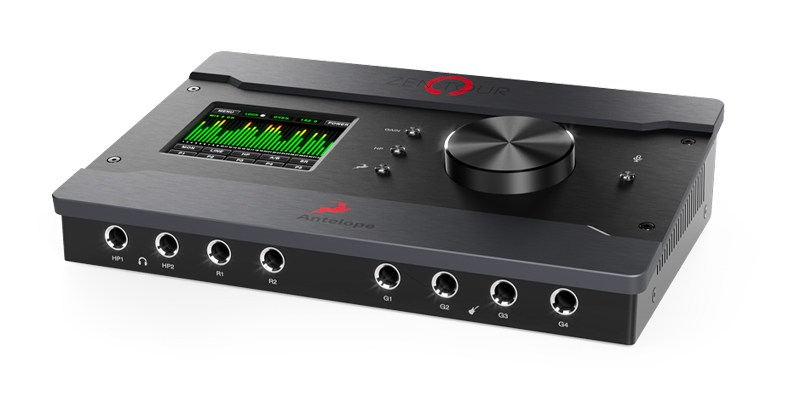
The Zen Tour is the best-selling audio interface from Antelope. It is a nice-looking desktop interface with a robust build, a professional piece of audio gear with portable Thunderbolt and USB connections, and a built-in DSP: perfect for everyone’s needs.
The Zen Tour comes with four combo mic and line level inputs, four high z and line inputs, two mic preamp line outputs for instruments, eight analog outputs, and two headphones’ outputs for monitoring. It features optical connections such as ADAT, S/PDIF, USB, and Thunderbolt connectivity.
A Talkback button is also available on the Zen Tour, which is a nice feature to communicate with the recording artists during sessions.
The Antelope Zen Tour uses the incredible FPGA (Field-Programmable Gate Array) to provide parallel processing with the lowest latency possible.
Thanks to the Thunderbolt high-speed, we can use effects from the afx2daw plug-in in real-time in most used DAWs. Thunderbolt connection helps us achieve a smooth workflow in the DAW while all processing happens in the Zen Tour audio interface.
You can use the Antelope Zen Tour, a standalone audio interface, but first, you’ll need to set up the configurations with your computer. It also offers remote control via smartphones and tablets through apps available for Mac, Windows, iOS, and Android simultaneously; you’ll just need to be in the same network.
For guitar players, you have access to legendary guitar amps, cabinets, and effects with zero latency.
The Antelope Zen Tour is now hard to find and is currently out of stock in many online stores. But it’s a great device if you do manage to acquire it.
When you’re ready to buy a new or your first audio interface, there are a few things to consider, so here is a brief list of the top things you need to look out for searching for the best low latency audio interface.
Before jumping into low latency audio interfaces like the Apogee Element 88 or the Quantum 2626, first, ask yourself if you need all those inputs and outputs. Yes, those ones provide incredible performance and lower latency than others, but remember, latency does not depend only on your audio interface.
Buy equipment based on what you need: define how many instruments and microphones you will use and if you’ll be recording mostly songwriters or full bands. Then ask yourself how you will monitor your mixes; how many headphones, monitors, or speakers you have.
Doing this exercise will help you narrow down your search and the price range of possible low latency audio interfaces.
Direct monitoring is indispensable for any producer, and thankfully manufacturers include this feature with almost all low latency audio interfaces. But just make sure you check this on the specs or see a DM button on the interface. This feature will bypass the lengthy processing of analog-to-digital and digital-to-analog conversion that low latency audio interfaces do. Instead of sending the signal to your DAW, it will go through an independent routing to your headphone output.
I suggest you look for a connection using USB 3.0 or Thunderbolt 3. You can run projects with higher tracks, outstanding performance, and low latency with these connections. Also, check if the audio interface is powered by a USB-C cable or DC-powered.
Most of the time, you can connect your audio interface to your computer via a USB cable, but that’s not always the case. Thunderbolt interfaces are also a common option these days, and they deliver fantastic audio quality.
If you buy a second-hand audio interface, you might come across one with a FireWire connection, which used to be one of the most common connections among Mac users for high-speed data transfer. If your computer doesn’t have a FireWire port, you can’t use this type of audio interface, as FireWire to USB-C adapters won’t solve the issue.
In general, a USB-C connection is the safest option.
Check that your computer is compatible with the audio interface you want. I know this seems obvious, but sometimes we get so excited about hardware that we forget to look into the requirements. On every audio interface’s official website, you can find a compatibility list.
Software processing is also something you should focus on. Plug-ins often require plenty of CPU, which has an impact on your low latency audio interface. Make sure you buy an audio interface that runs smoothly when you apply your favorite plug-ins and will still give you the chance to direct monitoring your recordings.
Unless you want to upgrade your audio gear, you’ll probably need a DAW and plug-ins to start working with music production. Most low latency audio interfaces offer some software, usually lite versions or trials, but not all of them. Check out the software included, as sometimes the final price is a great deal for what’s inside the bundle.
Often, when you buy audio interfaces, you also get everything you need to start recording your music, so don’t underestimate the importance of bundles when choosing your new audio interface.
Look for audio interfaces that offer a standalone DAW plus a series of plug-ins that will satisfy your recording needs. If you choose wisely, you might be able to save a lot of money and time by buying everything you need in one go.
The best audio interface is the one that best satisfies your needs without overcomplicating your workflow. So don’t just look for multiple outputs, a phantom power switch, or optical outputs if you don’t think you’ll need them in the foreseeable future.
Look for a device that can record pristine sounds and enhance the dynamic range of your content. Make sure you get an interface you can use to connect your MIDI interfaces to your DAW. Pay attention to compatibility: there’s no use in buying the best audio interface if you can’t connect it to your computer hardware via a USB cable.
If you’re recording other artists, two-line outputs would definitely come in handy. Finally, get an interface that comes with an impressive software bundle: you’ll save a lot of money and expand your sonic palette considerably.
All in all, the best audio interface combines great performance, latency-free monitoring, and good audio quality for recording sessions that will deliver professional results at a fraction of the cost of a professional recording studio.
After analyzing many of the best audio interfaces, we considered these seven to be the best low-latency audio interfaces, according to their features and user reviews. So, which audio interface has the lowest latency? Our answer is Quantum 2626. But it might not be the best low latency audio interface for you, so we have decided to give you three options.
For the lowest latency, we would go for the Quantum 2626, which has less than 1ms latency. It has the lowest audio latency, and that’s why it’s our first spot.
The second spot is tied with the MOTU UltraLite-MK5 and the Clarett+ 2Pre. Both are similar in price, are Mac and Windows compatible, and the size and features are good enough for both beginners and professionals.
On our third spot, we choose the Apollo Solo Thunderbolt interface due to its portability. It’s great to have a low-latency, DSP processing, and Unison preamps in such a small device.
But don’t let us decide for you. Discover all that’s available in the audio production market and start your creative journey!