JG McQuarrie
Nov 21st, 2022
Chances are if you have seen a movie you have seen a green screen. From the biggest high-budget blockbuster to the smallest indie flick, almost anyone can use green screens these days. And television is getting in on the act now too.
A once prohibitively-expensive technology has, thanks to software video editing, become available to almost everyone.
If you have ever asked yourself the question, What is a Green Screen? then the answer is simple — it’s a screen that’s green!
You get your actors to perform in front of the green screen or green screens, then you replace the screen with whatever your imagination (or budget) can conjure up.
Usually, the color of the screen behind the performers is green — hence green screen developing as a generic term — but it can sometimes be blue, or even yellow.
The practice of removing a color screen in this way is called chroma key (chroma key is sometimes also referred to as Color Separation Overlay, or CSO, in the UK) because you are literally keying away chroma color.
And when it comes to video editing DaVinci Resolve green screen is a great place to learn and a great tool to use. But how do you use a green screen in DaVinci Resolve? And how do you remove the green screen?
There are two methods that you can use for chromakey in DaVinci Resolve.
You will need two clips for this process. One green screen clip will be the foreground clip, which is the one with your actor standing in front of a green screen. The other clip is the background footage that’s replacing the green screen. This is the one you will see behind the actor.
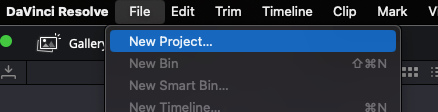
Start a new project in DaVinci Resolve. Go to File then New Project.
Go to File, Import Media.
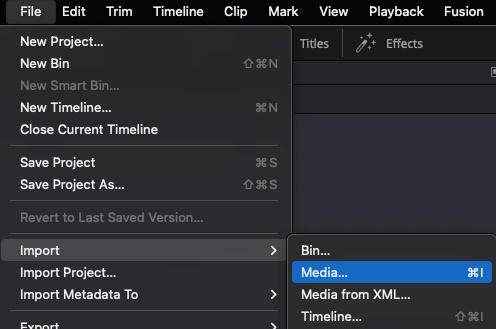
Browse your computer and select the clips that you want to add, then click Open.
Your clips will appear in the Media Pool.
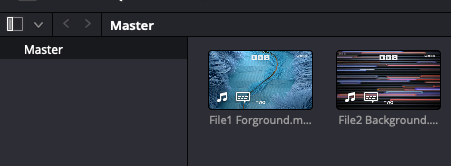
You then need to drag them to your timeline.
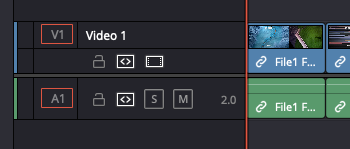
Place the background clip on the Video 1 channel. Place the foreground clip on the Video 2 channel.
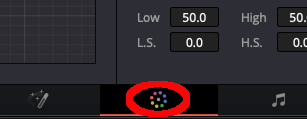
Click on the Color icon a the bottom of the workspace.
Select the 3D Qualifier icon. It’s the one that looks like an eyedropper. This will bring up the options you can select from.
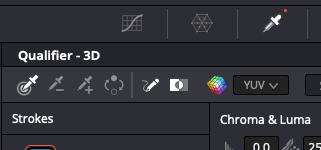
Click on the Color Picker Eyedrop (it’s the one on the far left).
Adjust your foreground clip so that you can see the green screen. You then need to click on the green part of the image so the eyedropper picks it up. It’s important to only click on the green, as this is what DaVinci Resolve is going to key out.
However, if you make any errors you can always undo them by going to the Edit tab and clicking on Undo.
Right-click on the gridded window which is to the right of the main window. Select Add Alpha Output from the pop-up menu.
Alpha output determines how transparent an object is, relative to its background.

Once you select Alpha Output this will bring up a “node” — a small version of the main window.
Left-click on the blue square on the node, and drag it to the blue circle which is to the right.
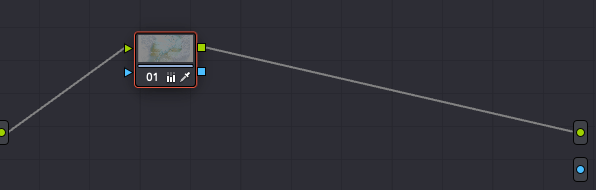
Your background will now be visible behind the shape of the actor as a transparent area.
To reverse this, so that the actor remains visible and the background is behind the actor, you need to click the Invert Icon in the Qualifier box.
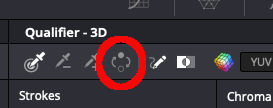
The subject will now become visible and the background will be inserted behind them.
You may also need to clean the image once this has been done. Sometimes there can be “fringing”, where some of the green can still be seen around the edges of the actor.
And that’s it! You can now remove a green screen from your video footage and replace it with whatever you like.
With some green screen footage, you may need to make additional adjustments. You might need to crop something out of the final frame that you don’t require. Or perhaps your footage needs to be resized so that the foreground and the background match, to make it more realistic.
DaVinci Resolve can help with this too.
To do this you need to use the Power Windows setting, which is also known as masks.
Select the Window icon.
Select the Shape the Power Window needs to be for you to adjust your footage.
Adjust the edges of the Power Windows. You can do this by clicking and dragging the points which surround the power window.
Adjust the shape you have selected to ensure that your foreground eliminates or adjusts any issues you are having but isn’t in danger of affecting your actor while they are performing. For example, if you are cropping something out, make sure the crop won’t affect any part of the actor as they move.
You can adjust the settings of the Power Window shape further by using the Transform option. This will allow you to change the shape’s opacity, position, and angle. You can also adjust the Softness of the shape’s edges.
Some of these settings may take a little practice until you get the desired results, but it is worth spending time with them to learn what kind of differences they can make to your footage.
Once you are done, click OK and the effect will be applied to your footage.
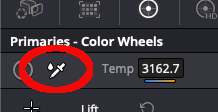
Sometimes when using a green screen the effect can look a little unnatural. The eye is very good at picking up when something doesn’t quite “look” right, and a poorly-applied green screen can have this effect. Fortunately, DaVinci Resolve can help color correct too by adjusting their color correction and exposure tools.
There is another way to remove a green screen using DaVinci Resolve. This method is a little simpler than the first one, but the results can be just as effective. This is known as the Delta Keyer method.
Go to the Fusion tab at the bottom of the screen.

Right-click inside the Nodes panel. Go to Add Tool, then to Matte, and choose the Delta Keyer option.
You then need to link this tool between two nodes. This will cause a new node window to open. From there you will be able to access all of the Delta Keyer settings.
As with the first method, you need to select the color that you want to key. To do this, use the eyedropper to select the green background that you want to eliminate.
You can then use the Green, Red, and Blue sliders in the settings panel to adjust the keying that DaVinci Resolve does. Adjust the sliders until the green has gone.
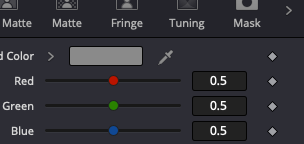
Your actor will now be in front of a blank background.
To add a background, you can now go to Edit mode and the background will be inserted behind the actor.
This method is a little less involved than the first one but the results work very effectively.
DaVinci Resolve is a powerful piece of software that allows editors control over their footage and an excellent piece of software for post-production work on video. And as green screen usage becomes more and more common in both cinema and television production, learning how to use it is a valuable skill for any up-and-coming editor to develop.
Learning how to remove a green screen in DaVinci Resolve is invaluable since it is so widely used. Learning the skills that help with a green screen and controlling your footage will always stand you in good stead… And now you can!