Marco Sebastiano Alessi
Nov 22nd, 2022Premiere Pro offers many effects you can use to enhance your video and audio clips, and among the most practical ones is the transition effect, which can dramatically improve the quality of your content.
Here’s a step-by-step guide to adding transitions to your clips in Adobe Premiere Pro. As important as learning how to fade out audio in Premiere Pro, video transitions can make your content look more professional and smooth, so mastering this effect is crucial if you want to upscale the quality of your videos.
Let’s dive in!

Transitions are effects provided by Premiere Pro to add at the beginning or the end of a clip, to create a fade-in or fade-out effect, or to place between two clips for a gradual shift from one scene to the other. The amount of transition effects available in Premier Pro range from a default transition effect to more theatrical transitions like zoom, 3D transitions, and others.
Transitions help us change between clips seamlessly, especially if your edit has too many cuts, providing a more pleasant visual experience. I’m sure you’ve seen transitions everywhere: in music videos, documentaries, vlogs, movies, and commercials.
When the transition is between two clips, it will merge the end of the first clip with the beginning of the second clip, creating a perfect fusion between the two.
There are three different types of transitions in Adobe Premiere Pro.
Default audio transition and default video transition are two simple techniques to add transitions that’ll make your video look more professional in no time. After you familiarize yourself with the effect, you can apply double-sided transitions or single-sided transitions directly from the effect controls panel.
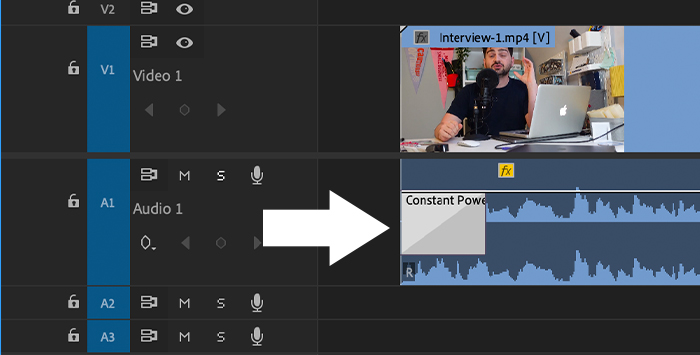
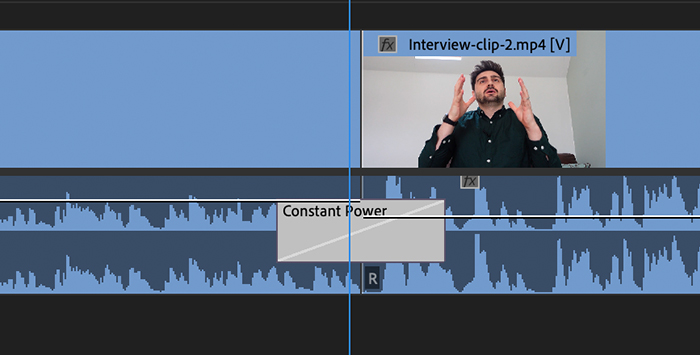
We call it a single-sided transition when used on a single clip. It shows in the Timeline divided diagonally into two halves: one dark and one light.
These are the default video transitions placed between two clips. When a double-sided transition is in place, you will see a dark diagonal line in the Timeline.
Follow these steps to add a video or audio transition to a single clip from the effect controls panel.
Bring all the media you want to use and add transitions to your Premiere Pro projects.
1. Open the project or create a new one.
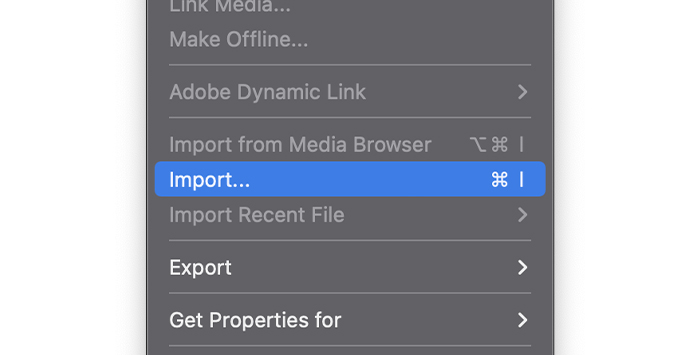
2. In the menu bar, select File, then Import videos, or press CTRL + I or CMD + I on your keyboard to open the import window.
3. Search for the clips you want to edit and click open.
We need to create a sequence to start editing in Premiere Pro. Creating one is easy once you have imported all the media to Premiere Pro.
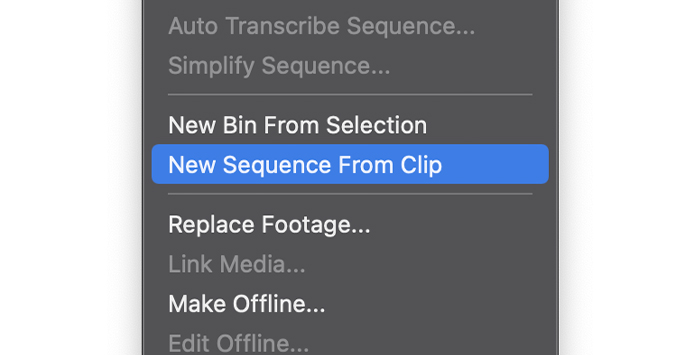
1. Select a clip from the project panel, right-click it and select Create a New Sequence from the clip, then drag all the clips you will be working with.
2. If no sequence was created, dragging a clip to the Timeline will make one.
In the Effects panel, you can find all the built-in effects pre-installed in Premiere Pro. To make the Effects panel available, you must first activate it.
1. Select Window in the menu bar.
2. Scroll down and click on Effects if it doesn’t have a checkmark.
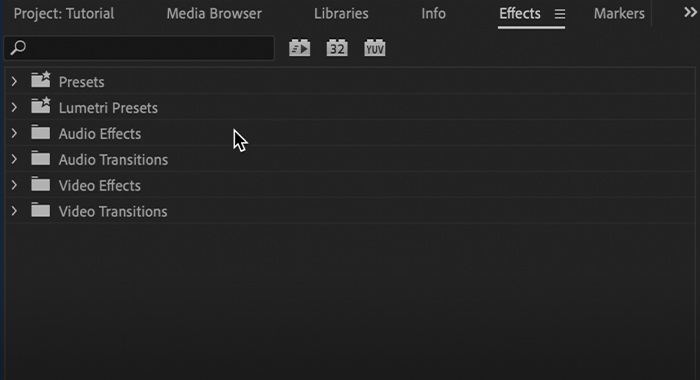
3. You should see the Effects Tab in the Project panel. Click on it to access all the effects in Adobe Premiere Pro.
4. Click on Video transitions or Audio transitions, depending on which type of video clip you have on the Timeline.
5. Click on the arrow next to each category to display more available options.
1. Go to Effects panel > Video Transitions or Audio Transitions if you’re working with audio clips.
2. Expand the categories and select the one you like.
3. To apply the transitions to your Timeline, simply drag the desired transition and drop it on the clip’s beginning or end.
4. Play the sequence to preview the transition.
You can add single-sided transitions to multiple clips or add double-sided transitions between two clips.
1. Go to File > Import and bring all the clips to your project.
2. Drag the files to the Timeline and ensure they’re all on the same track without empty spaces.
3. Preview the sequence and edit as needed.
1. Go to the effects panel and choose either Audio or Video transitions.

2. Expand the categories and select one.
3. Drag and drop the transitions between the two clips right in the cut line.
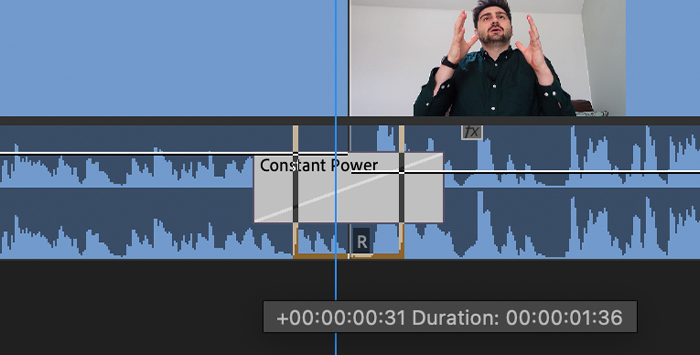
You can change the transition length between the clips by dragging the transition edges in the Timeline.
You can apply transitions to multiple clips simultaneously. The transitions applied to all clips will be the default transition.
1. Select the clips in the Timeline using the mouse to draw a bow around the clips or select them with Shift+Click.
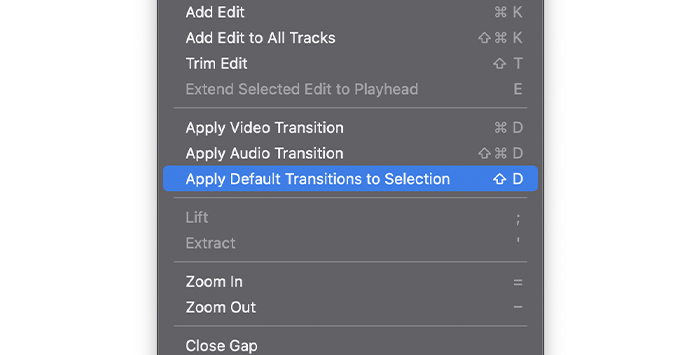
2. Go to the menu bar Sequence and choose Apply Default Transitions to Selection.
3. The transitions will apply where there are two clips together.
4. Preview the sequence.
You can set a specific transition as a default when using the same transitions effect repeatedly.
1. Open the Transitions effects in the Effect panel.
2. Right-click the transition.
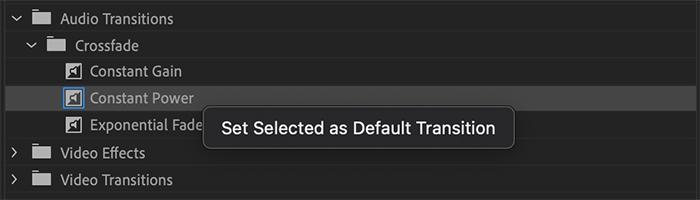
3. Click on Set Selected As Default Transition.
4. You will see a blue highlight in the transition. It means that’s our new default transition.
Next time you want to apply a transition, you can select the video clip and use the keyboard shortcut CTRL+D or CMD+D for video transition, shift+CTRL+D or Shift+CMD+D for audio transitions, or Shift+D to add a default audio and video transition.
The standard transition duration is 1 second, but we can adjust it to fit our projects. There are two methods to do it:
From the Menu:
1. Go to the menu Edit on PC or Adobe Premiere Pro on Mac.
2. Scroll down to Preferences and select Timeline.

3. In the Preferences window, adjust the video or audio transitions default duration by seconds.
4. Click OK.
From the Timeline:
1. After applying a default transition, right-click on it in the Timeline
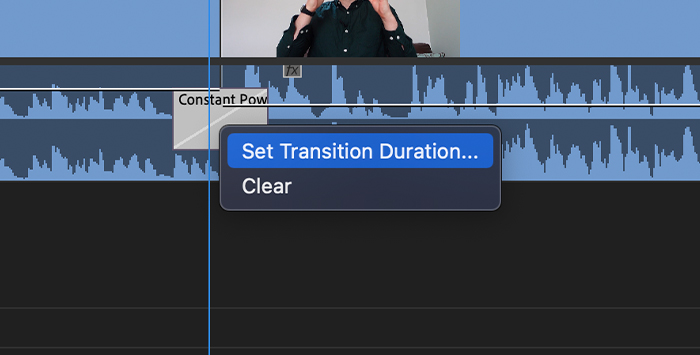
2. Select Set Transition Duration.
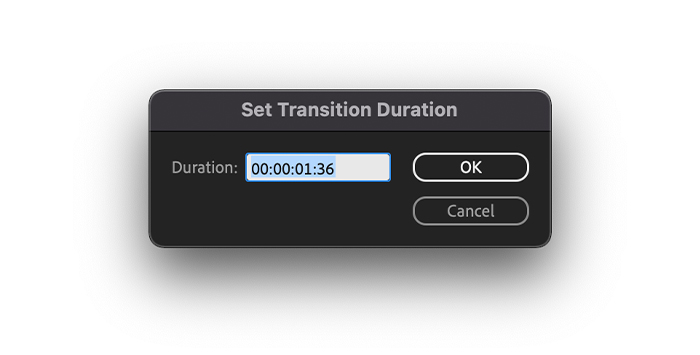
3. Type the duration you want in the pop-up window and click OK.
Removing transitions in Premiere Pro is very simple. Just select the transitions in the Timeline and press the backspace or delete key.
You can also remove it by replacing the transition.
1. Go to Effects > Video Transition/Audio Transition.
2. Select the effect you want.
3. Drag and drop the new transition into the old one.
4. The new transition will reflect the duration of the previous one.
5. Play the sequence to preview it.
Here’s a brief list of tips to get the best transitions in Premiere Pro.
Learning how to add transitions in Premiere Pro can embellish every project, as it improves the flow of your visuals when moving from one scene to the next. Play around and try all the transition effects available until you find the one that works best for you.
Good luck, and stay creative!


