Marco Sebastiano Alessi
Mar 21st, 2023
Have you ever spent time filming a video project only to find out that your audio sounded much worse than you expected when you started to edit in Adobe Premiere Pro?
In some cases, it might just be that your audio track needs to be lowered, or if you’re working with multiple audio clips, you need to find a better balance between all audio recordings and adjust the levels to have a consistent audio volume throughout the video. Learning the art of audio leveling and volume control is a crucial step in the life of every filmmaker!
In this article, you’ll find a step-by-step guide on the many ways to adjust the audio gain volume of your audio. I’ll go through some concepts about audio gain, normalization, and other methods to adjust the volume in Premiere Pro and achieve your creative goals.
There are three main concepts when exploring audio editing and mixing: volume, gain, and normalization. While all three of them refer to audio levels, they’re not the same. Let’s analyze the differences before delving deeper into the guide.
I’ll start with what I believe is the easiest way to adjust the volume in Premiere Pro. This method is for an easy fix in audio volume and works better with a single audio track.
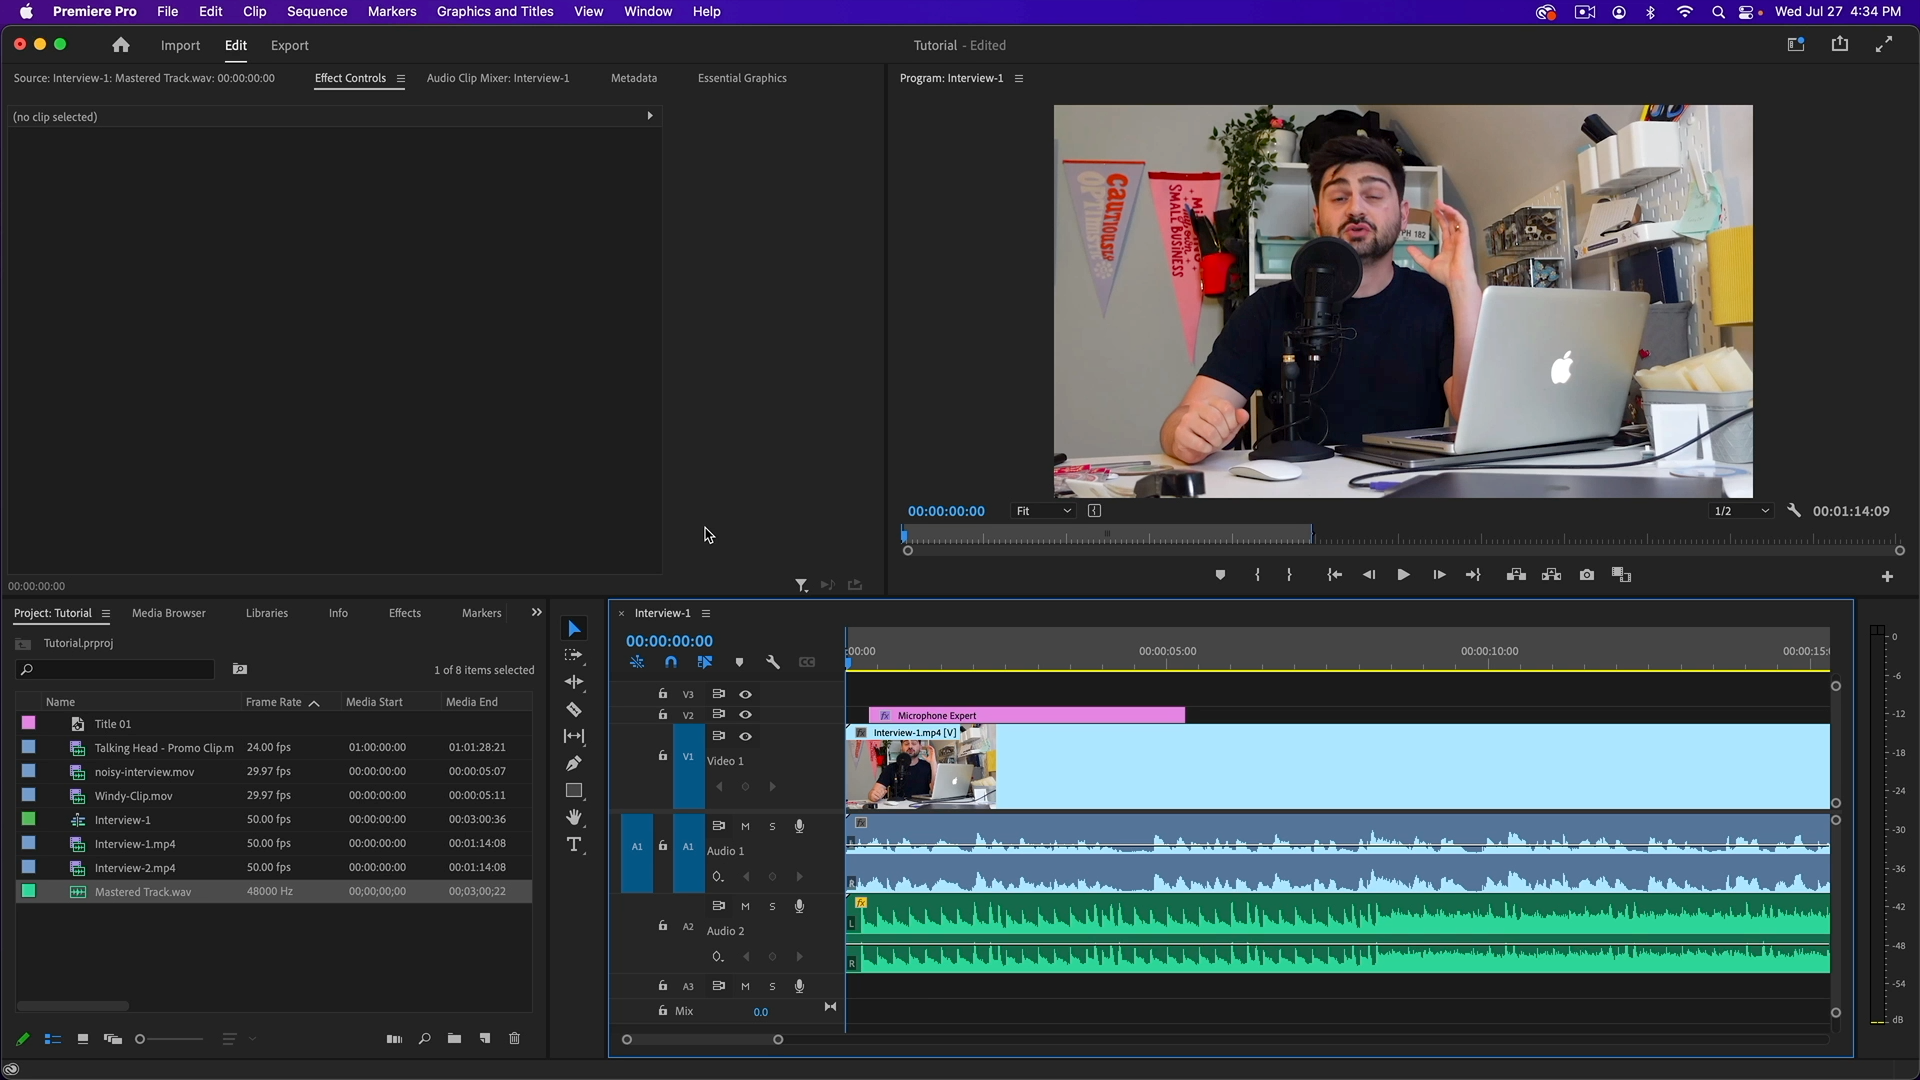
First, make sure to have all the video clips and audio tracks you’ll be working on within Adobe Premiere Pro. Import them or open a previous project and select the audio track you want to adjust the volume in the Timeline.
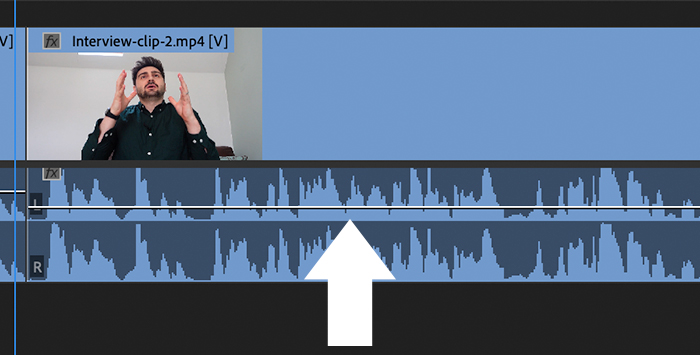
If you look closer at the audio track in the Timeline, you’ll notice a thin line. If you can’t see the waveform, you can expand the track by double-clicking on it. If you hover the mouse over it, the icon on your line will change. When it does, you can click and drag up and down to turn to change the audio levels.
If you’ve used Adobe Premiere Pro before, you know that the Effect Controls panel is your go-to for any effects settings. You can adjust volume from there, too, with more options than the Timeline. However, using the Timeline might be more accessible for a quick adjustment.
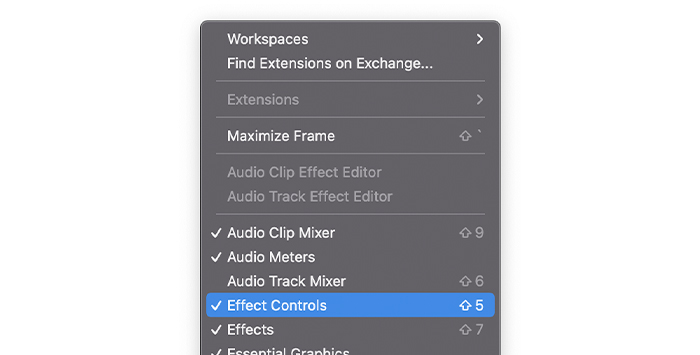
First, ensure you have the Effects Control panel visible. You can check this under the menu Window. If the Effects Control has the checkmark, it is enabled; if not, click on it.
With your project open, or files imported, select the audio clip for which you want to adjust audio and click on the Effects Control panel to see all options for that audio track.
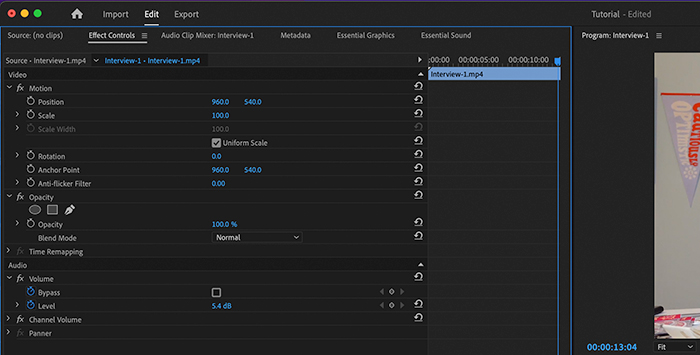
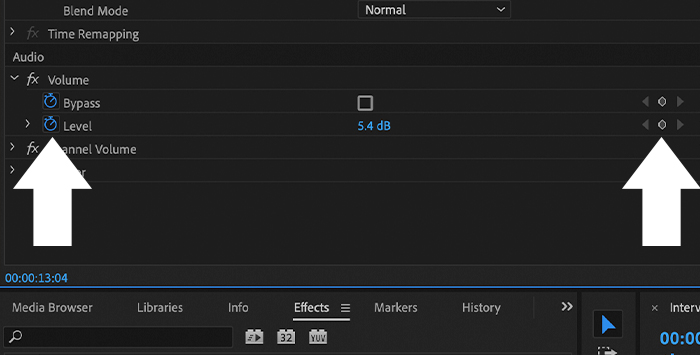
Under the Audio section, you will see two options, Bypass and Level. You can manually type in the volume desired in dBs or click and drag to left and right to raise or lower the volume.
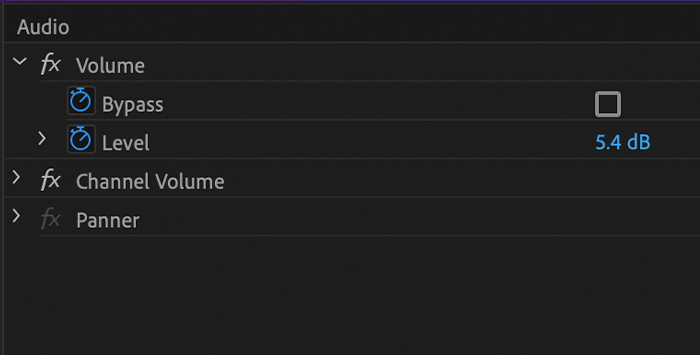
To change the volume of the entire audio track, click on the stopwatch to disable it. Otherwise, it will create a keyframe which I’ll explain in the next step.
Adobe Premiere Pro lets you use keyframes to manipulate the volume levels of your audio clips. You can use keyframes for sections where it needs to be louder, like a person speaking in the background, or make it quieter, like the sound of a plane or any unwanted sound that occurs during recording.
You can adjust keyframes from the Timeline or through the Effects Control panel. I’ll show you both so you can decide which works best for your needs.
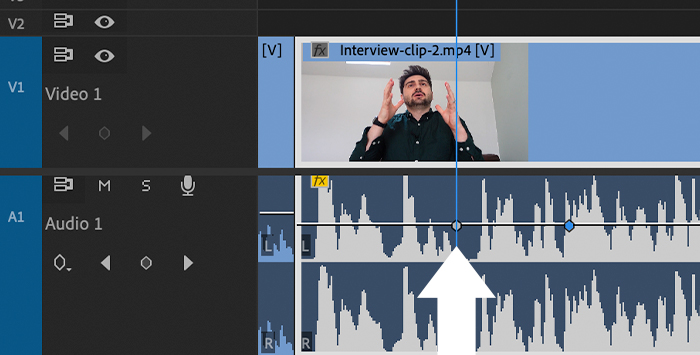
Move the playhead to the clip section where you want to adjust the volume to create the first keyframe where the volume adjustment will begin. Use the CTRL+Click on Windows or Command+Click on Mac to create the keyframe.
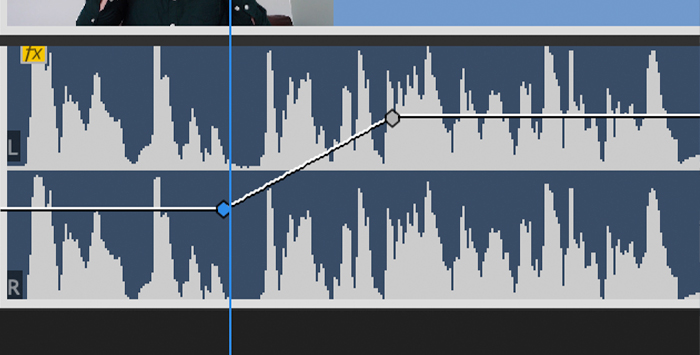
You can click and drag each keyframe to adjust the volume. Add all the keyframes you need to change the volume level on your audio clip.
If you’re doing this from the Effects Control panel, move to the Audio section and ensure the stopwatch is enabled. If it is, you’ll see the section colored in blue, and the keyframes button (a diamond icon) will appear to the far right next to the dB value.
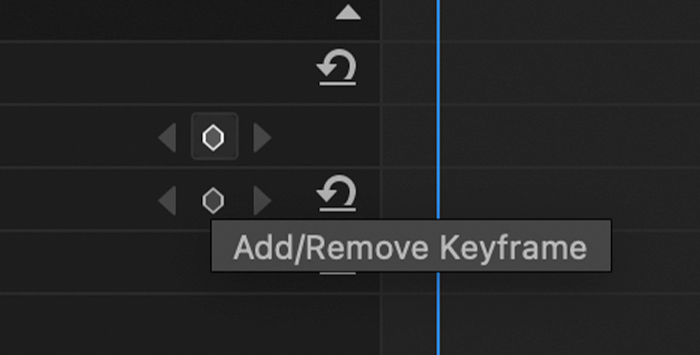
To add keyframes, use the playhead in the Timeline on the right of the controls and set a new level in dBs: this will create a keyframe automatically. You can also create a keyframe by clicking the diamond icon, and it will appear in the Timeline on the right and be visible in the waveform on the main sequence Timeline.
In the Timeline on the right, you can move each keyframe in time and adjust the volume typing or dragging the dB values. Changing these values will only affect the keyframes, not the entire audio track volume.
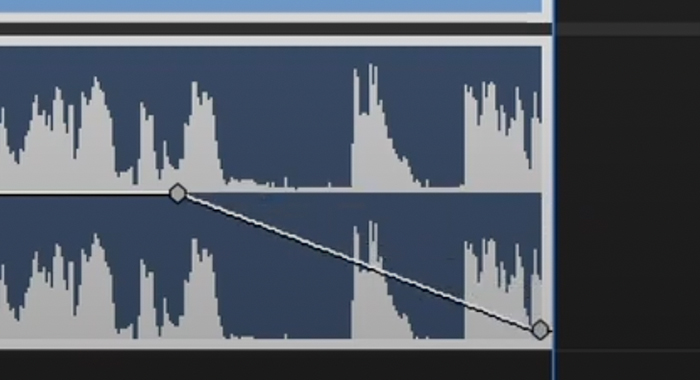
Keyframes can be used to create other audio effects like fade in and fade out by adding keyframes at the beginning or end of the clip to increase or decrease volume levels. It can also be used for ducking effects and creating other automation audio effects.
When you increase the volume of an audio clip, sometimes it could go over the limit and create distortion or clipping. To avoid this distortion, audio engineers use normalization to increase volume without affecting the audio quality. Premiere Pro has a normalization feature to increase volume or make multiple clips in a video to the same audio level.
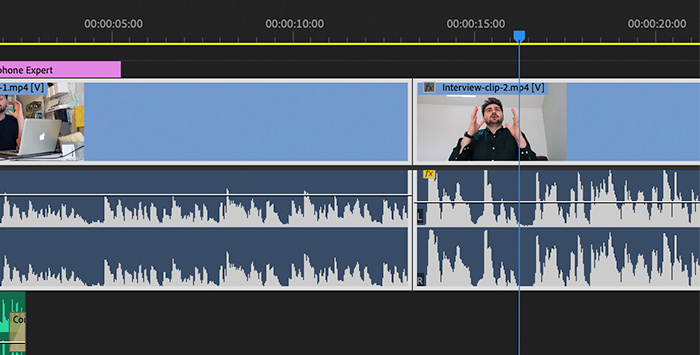
Import the media to the Timeline and select the audio clips to normalize; use Shift+Click to select multiple clips. Right-click your selection and then choose Audio Gain, or if you prefer to use keyboard shortcuts, press the G key.
You can also select files from the Project panel to have them ready to use in multiple sequences. To select non-consecutive audio clips, use CTRL+click on Windows and Command+Click for MacOS. Use the shortcut G or right+click > Audio Gain to open the Gain options.
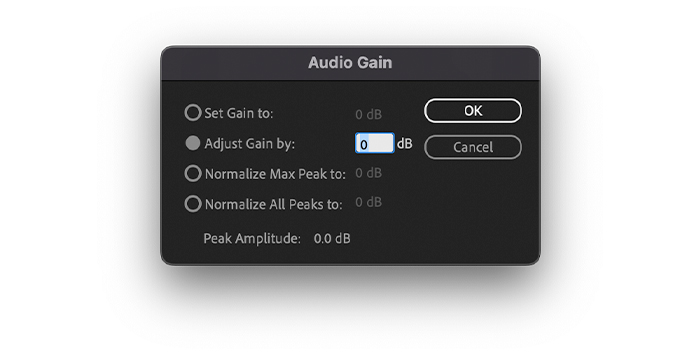
A pop-up audio gain dialogue box will appear with different options. The peak amplitude of the selected clips is analyzed by Premiere Pro automatically and will display in the last row. This value is essential because it will be your reference to adjust audio gain and set the peak limit.
You can choose to select the audio gain to a specific value. Use “Adjust Audio Gain by” to adjust audio gain; a negative number will decrease gain from the original levels, and a positive number will increase the audio gain level. The “Set Gain To” dB value will be immediately updated to match the new audio gain level of the clip.
If you want to make multiple audio clips equally loud, use “Normalize All Peaks to” and add a value under 0 to avoid clipping. Here’s where the peak amplitude value will help you decide how much volume you can increase without distortion.
Click the OK button to apply the new settings and listen to the audio clips. If you need to make changes, you can open the audio gain dialog box again to make changes. Use the audio gain command (the G key) for quick access.
Depending on your settings, you’ll notice the waveform will change its size after normalization. Keep an eye on the audio meters when adjusting audio gain levels and normalizing peaks. If you don’t see them, go to Window and check Audio Meters.
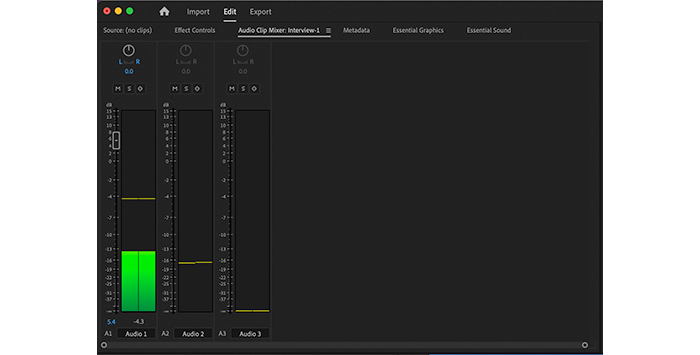
You can adjust the master clip in the Audio Clip Mixer or the entire audio clip in the Audio Track Mixer. Use the master clip to add the same gain level to all your audio clips. Adjust the faders to adjust the audio gain. For YouTube videos, it’s recommended to stay below -2db.
With Adobe Premiere Pro tools, you’ll be able to deal with audio levels related issues and enhance the quality of your future projects. Now you now know different ways to adjust audio levels depending on your needs, from simple volume adjustments from the Timeline to more advanced tools like normalization and options to adjust gain settings.
Good luck, and stay creative!


