Marco Sebastiano Alessi
May 31st, 2023A creative project, be it a radio show, podcast, music, or multidisciplinary project, requires passion, attention to detail, and the tools necessary to craft the perfect sound.
Audacity is one of the most straightforward programs for audio editing because its user interface is incredibly intuitive, yet it provides everything we need to bring professional audio recordings to life. Furthermore, understanding how to move tracks in Audacity and edit them in seconds will optimize your workflow and make audio editing much easier.
In this article, I’ll show you how to cut audio in Audacity, split and trim tracks, and export the resulting audio file.
Let’s dive in!
Audacity is an open-source, free software for audio editing available on Windows, MacOS, Linux, and UNIX operating systems. Its availability on multiple platforms is one of the reasons everybody loves Audacity. Thanks to its cross-platform operation, you can start a project on any computer and continue on another regardless of what operative system you’re using.
Although the program interface in Audacity might look outdated, the program itself is straightforward and customizable to your workflow. For instance, you can change the dashboard depending on the tools you use more often, so you won’t need to look for them every time.
With some guidance to understand where the menus and tools are, you’ll be ready to cut audio in Audacity to edit audio projects like podcasts, interviews, music production, and more.
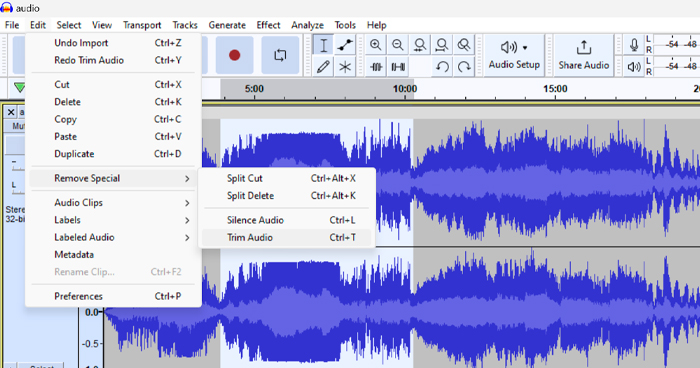
Press Stop to ensure the track is not playing. If you want to delete certain parts while leaving others untouched, select the audio to keep and go to Edit > Remove Special > Trim Audio. If you made a mistake, undo and redo the process until you get it right.
Before jumping to the guide, you’ll need to download and install Audacity if you don’t have it already. Make sure to download the newest version to receive all the latest features.
Go to Audacity’s website and download the installer. Click on the link of your operating system to begin the download. Legacy versions of Audacity are available for older operating systems like Windows 7 or earlier and macOS 10.12 or earlier on the download page.
Run the installer and wait for Audacity to install. Once installed, open Audacity with a double click on the Audacity icon.
Audacity allows you to import an audio file or record audio directly from Audacity with a USB or aux microphone, headset mic, audio interface, or a mixer. If you’re using any of these devices to record audio, connect them to your computer, ensure you have all current drivers installed, and confirm that your system can recognize them before running Audacity.
You can select your input and output devices on the main screen above the timeline. Select your device from the dropdown menu and start recording. If you don’t see your audio interface or microphones, restart Audacity: that fixes the problem most of the time.
If you work with audio files previously recorded on other devices, you can run Audacity after the installation and proceed to the next step.
Audacity allows you to import various audio formats like MP3, WAV, FLAC, AIFF, and OGG.
To import your audio files to Audacity, go to the top menu bar File > Import > Audio and browse for the local folder where you have the audio files you need to edit. If you’re editing a podcast, interview, or another project with more than one audio file recorded independently, you can select multiple files with Shift + Click, then click Open.
Another method to import audio files is by selecting them from your system’s folder window, dragging them to the Audacity window, and dropping them in the timeline. This simple drag-and-drop method allows you to select only the clips needed and import them to Audacity.
Finally, for those who prefer using keyboard shortcuts: press Ctrl + Shift + I to open the browser window (Cmd + Shift + I on macOS) and click Open.
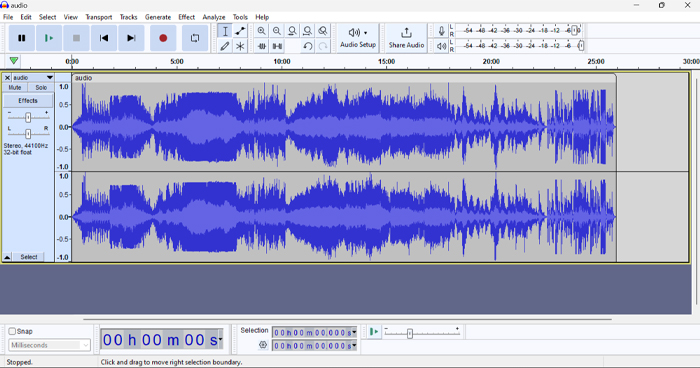
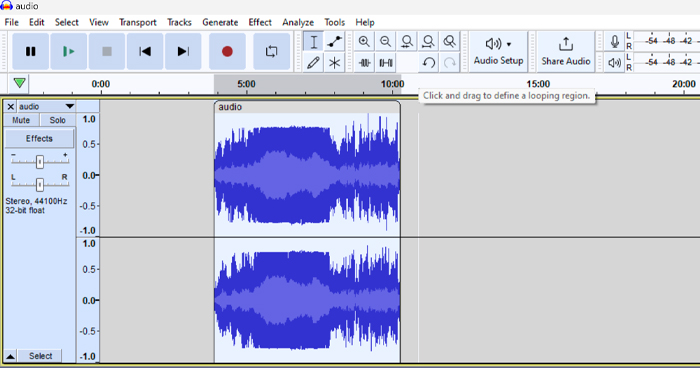
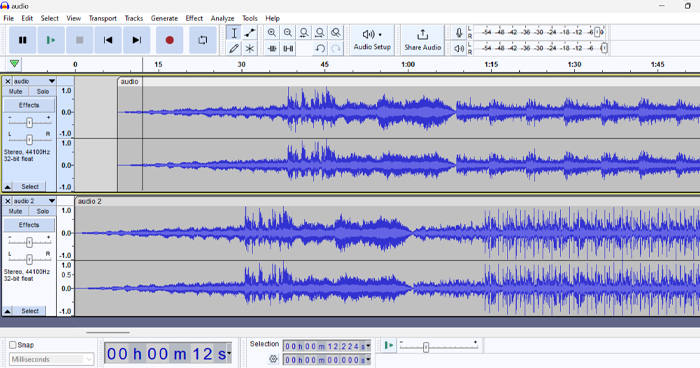
All the audio files will appear as a waveform in the timeline, one audio file per track. Preview the tracks by pressing the Play button or the space bar to ensure you imported the correct audio files before you begin editing. Then proceed to identify which parts will need to be edited.
If you need to remove an audio track because the imported audio file is incorrect, identify it and click Select from the Track Control Panel at the left of the track, then press Delete.
With the imported audio files on the timeline ready, the next step is to cut the audio.
Whether you want to remove a section from the beginning, a noise in the middle, or split the audio in two, Audacity offers different and simple ways to cut audio files.
First, choose the selection tool if you haven’t already. It’s the icon that looks like the cursor from a word processor.

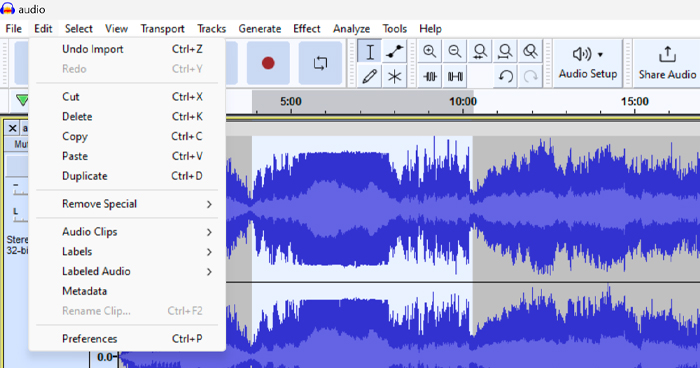
Select the part you want to cut audio from and go to Edit in the top menu bar, then choose Cut, press Delete, or use the keyboard shortcut Ctrl + X.
After removing the selected audio, the clip will adjust automatically and join the other two parts into one audio clip on the track.
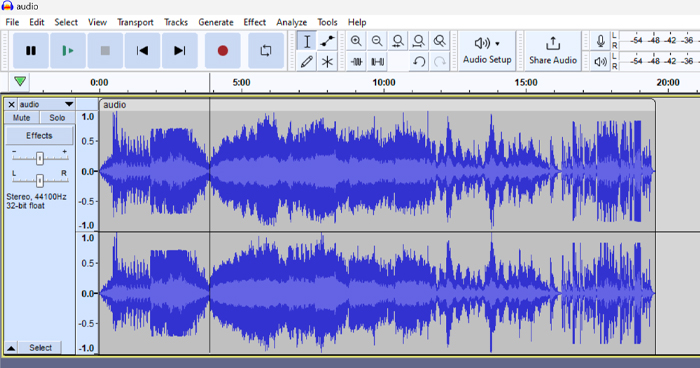
Cut is a good solution when you only want to remove background noises or speech mistakes but leave the rest of the track untouched.
Use Trim when you want to keep something in the middle of your audio track but remove everything before and after the selection.
Like in the previous step, make sure you have selected the Selection tool. You can press F1 if you don’t see the toolbar.
Select the audio track section you want to keep and go to the Edit menu, then Remove Special (or Clip Boundaries, depending on the version) > Trim Audio. The shortcut for Trim is Ctrl + T.
Trim will remove everything from the audio track except for your selection and leave a single audio clip.
Let’s see how to split the audio file into two clips in your track. You can use this tool to add background music or another audio track in between or if you need to rearrange the order of the audio recording.
With your selection tool, click on the part of the audio track where you want to split the audio. You can listen to the audio track to make sure you select the right time. You can zoom in and out using Ctrl + 1 and Ctrl + 3 or with the lens icon.
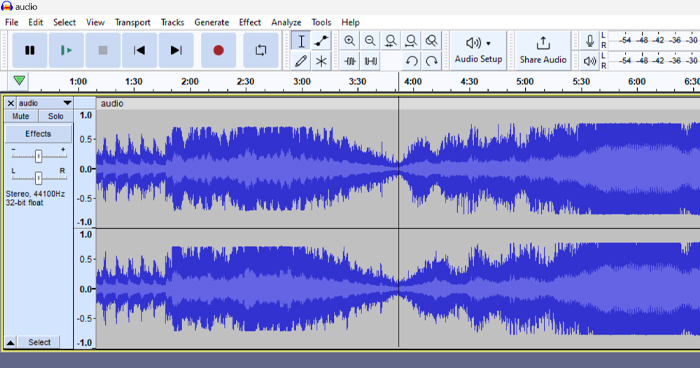
When you find the right spot, go to the Edit menu and choose Audio Clips > Split or use the keyboard shortcut Ctrl + I. Your audio track will be divided into two clips you can edit individually.

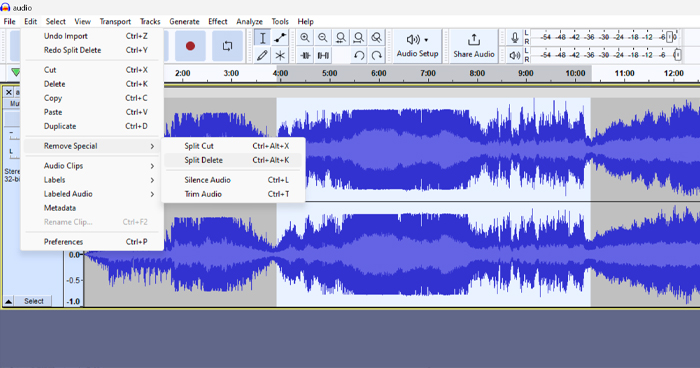
Let’s say you want to cut a part of the audio track in the middle but also split the clip, leaving the gap in the middle.
Select the section you want to cut and click Edit > Remove Special > Split Delete to remove it. You will end with two clips with a gap in between. This split is helpful when you have other music or audio tracks and want to keep the duration of your project the same.
Another scenario is that you want to split the audio file but keep it in a separate track to use later or edit it individually. In that case, select the part you want to save for later and go to Edit > Audio Clips > Split New.
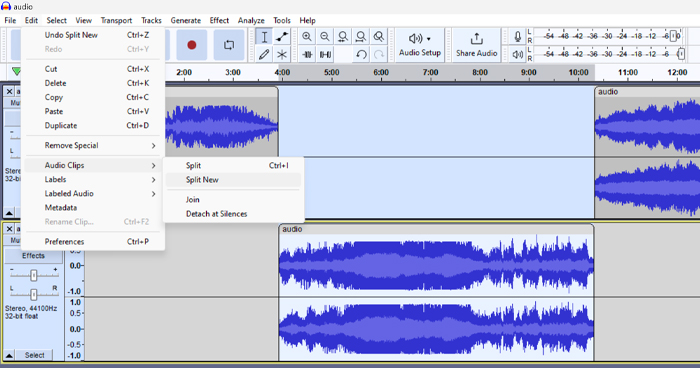
Your trimmed audio will be in a separate track from the original.
As a podcaster, occasionally you’ll have different audio files for each person involved in the project, so let’s assume all the takes have an intro you want to remove. You can cut audio at the beginning of multiple clips at the same time.
Listen to the audio and select how much time you want to cut audio from the tracks.
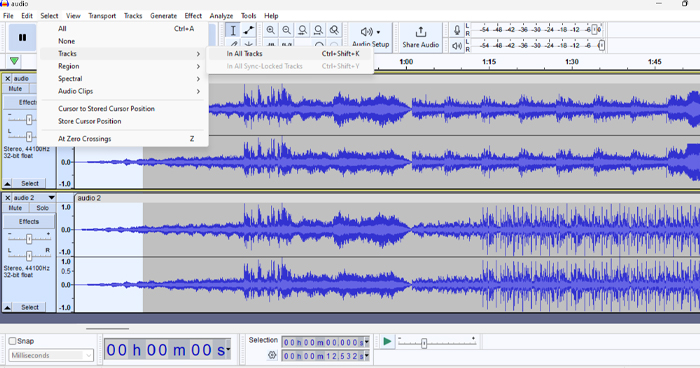
Go to Select > Tracks > In All Tracks or press Ctrl+ Shift + K. Audacity will select the same section in all tracks. Now you can press Delete to remove that area from all tracks.
When you split, trim, and cut audio files in Audacity, you can rearrange them to build the storyline of your audio project. You can move the trimmed audio file in the timeline by placing the cursor on the top of your audio track, where you can read the audio file name. Click and simply drag the audio clip when the cursor shifts to a hand.
Audacity allows you to edit other things such as volume, remove echo and noise, add sound effects, EQ, and much more. Once you master it, Audacity is an exceptional tool that can upgrade your audio projects.
To save your trimmed audio file, you need to export it. Listen to it to make sure every cut and trim is done correctly.
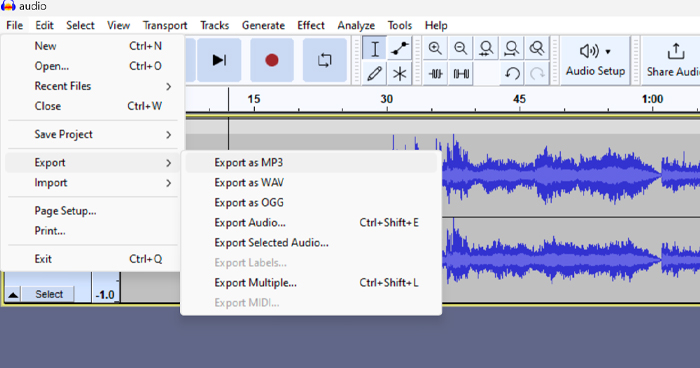
To export audio, go to File > Export and choose your desired audio formats. Choose the destination folder and add a name for the new trimmed audio file. You can select bitrate mode, quality, and channel mode too.
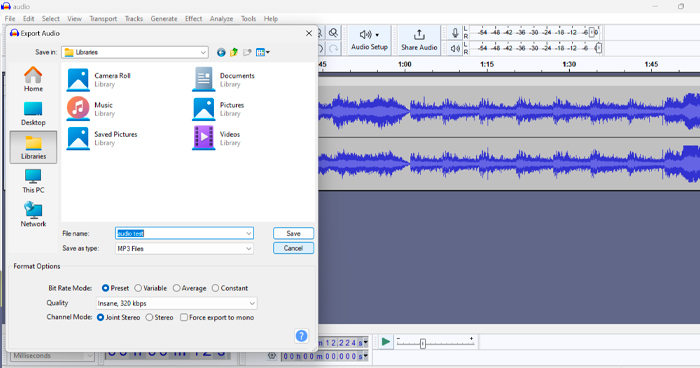
Click Save and proceed to fill in the metadata tags. This audio data is vital for podcasts to set the name and episode number, don’t forget to add it when exporting audio.
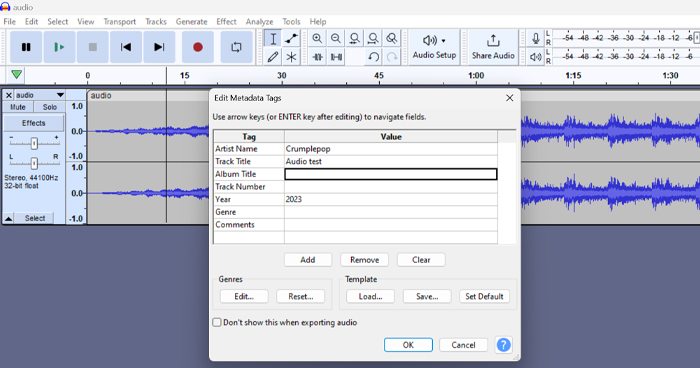
Click OK to finish, and your trimmed audio will be waiting in the folder you selected.
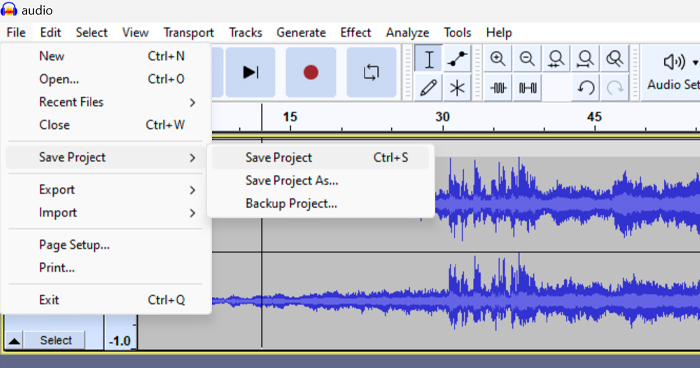
You can save the Audacity project should you want to continue your editing session another time: simply go to File > Save Project.
I’ve been using Audacity for years and couldn’t be happier with it. Ultimately, it’s the perfect software for those who want to get things done in no time and need an interface that has all the basic tools necessary to create great audio.
Now that you know everything about cutting and trimming audio, it’s time to unleash your creativity. Good luck!
Select the part of the audio you want to remove and highlight it with the Selection Tool (F1). Press Delete or go to Edit > Delete to cut audio.
If you want to keep the same length of the audio track but without some audio parts, highlight the section you wish to remove and go to Edit > Remove Special > Split Delete.
You could also choose Edit > Audio Clips > Split. It will split the audio track leaving the unwanted part in separate clips that you can remove by selecting them and pressing Delete or you can move them to the beginning or end of the audio track.
If you want to trim audio files and remove the rest of the clip, highlight the section you want to keep and go to Edit > Remove Special > Trim Audio. After that, you’ll have just the part of the audio that you wanted.


