Marco Sebastiano Alessi
Aug 08th, 2022In principle, recording audio is extremely simple these days. All you need is a good microphone, a PC, and a digital audio workstation (DAW). A simple setup that can potentially help you can reach millions of people worldwide.
While good USB microphones are affordable and easy to use, and virtually everyone owns a PC, the DAW is the only element in the equation that requires a bit of a learning curve.
While there are dozens of digital audio workstations that let you record and mix audio professionally, many opt for free or inexpensive software to start their audio recording journey.
There are essentially two great DAWs available for free right now. One is Mac-only GarageBand, a professional audio workstation that comes with a plethora of effects to make your audio sound professional.
The other one, and the focus of this article, is Audacity. While not as shiny-looking or effects-packed as GarageBand, Audacity is a fantastic workstation used by millions of creators worldwide, who praise its minimalist design, no-nonsense workflow, and simplicity.
Personally, I love Audacity. While I have other professional DAWs I regularly use to record music, this free software is still my weapon of choice when I create mixtapes, add background music to my radio shows, or record tracks made with my old synth, a Roland JX-3P.
Today I want to introduce you to some techniques that’ll help you get your way around this software, and we’ll look specifically into How to Move Tracks in Audacity.
Despite its apparent simplicity, you can really do a lot with this free DAW, so hopefully, this article will shed some light on the best features this workstation has to offer.
Let’s dive in!
Let’s start with a brief introduction. Audacity is a free, open-source digital audio workstation that’s been around for over twenty years. Since its inception, it has been downloaded over 300 million times.
Audacity features the classic nondescript design typical of open-source products, but as soon as you scratch the surface, you’ll realize Audacity is a powerful editing tool that can meet the needs of podcasters and music producers.
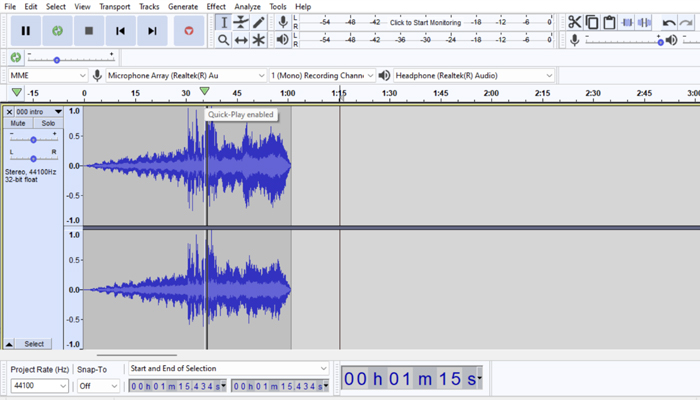
Recoding audio is as simple as it can be. There’s a red button on the top center of the dashboard, and if your recording settings are right (i.e., if you chose the right input for your microphone), then you can start recording right away.
Post-production is also extremely intuitive. On the main menu on the top left, you’ll find Edit and Effects, and here you’ll find all the tools Audacity offers to enhance audio.
On Audacity, you can’t add plug-ins or connect third-party VSTs: everything you can use to adjust your audio is already included in the list of built-in effects. However, the effects available are professional, easy to use, and can improve audio quality significantly.
Audacity is a great option for artists who just started recording and want to get an idea of how DAWs work. Professional musicians can use it to sketch out ideas or record minimal pieces. Podcasters and DJs can use it to create their works quickly and efficiently, and if they have a good microphone, they really won’t need a more sophisticated and expensive DAW.
Moving tracks makes sense for a variety of reasons. Both musicians and podcasters might want to move tracks up or down or back and forth to bring to life the audio product they envisioned.
For instance, if you’re a musician, you may want to add a specific effect to a part of your song without affecting the entirety of the tracks. Using Audacity, this is only possible by separating all the tracks and using dedicated effects on both.
If you’re a podcaster, you might want to add a jingle, background music, or a break in between your show. Or, let’s say you need to remove part of your audio because your guest’s internet connection broke down while explaining something important. You can do all this by simply moving, or removing, certain audio parts.
With Audacity, the process of moving multiple tracks is as easy as it can get, thanks to the amazing Time Shift Tool.
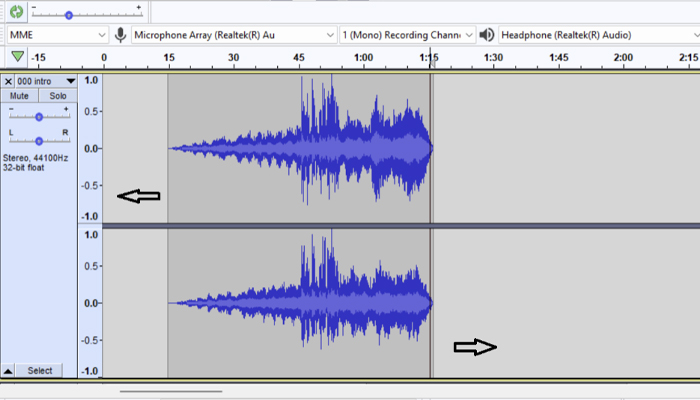
After you import audio, there are two ways of moving an audio clip up or down, and it all comes down to the reason why you need to move the track in the first place and your audio track configuration.
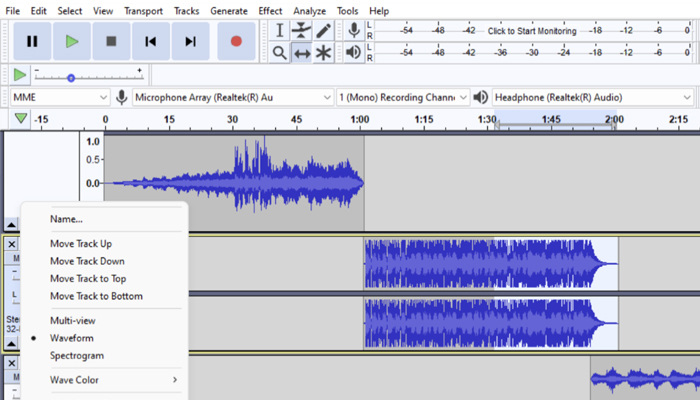
If you need to move an entire track up or down because you want to give a certain order to your set, then all you have to do is go to the single track’s dashboard on the left and drag it up or down until it moves to the right location. Alternatively, open the track’s dropdown menu and select “Move track”.
On the other hand, if you want to move just a specific part of your track while leaving the rest of the audio clip untouched, first you need to create a new audio track, which can be either a Stereo or Mono track but must be exactly like the track you intend to move. For instance, if the track you’re editing is stereo, then you must create two stereo tracks and two stereo clips in the process.

After you create the track, hover over the audio file using the selection tool and click the area where you want to split the audio so that one part will remain in the original track while the other will be placed in the new track.
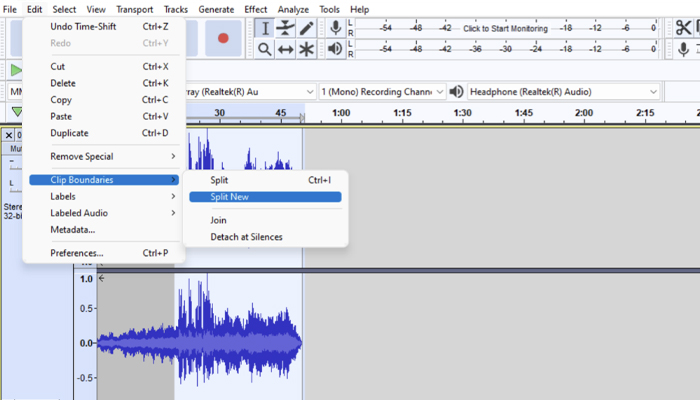
Next, go to Edit – Clip Boundaries – Split. After you click on Split, you’ll see a thin line separating the track in two, which means now you have two audio clips that can be moved independently.
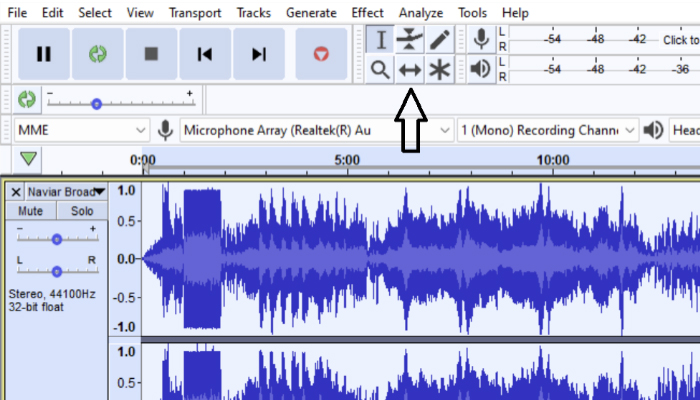
From the top edit menu, click on the icon Time Shift Tool, click on the audio file you want to move, and simply drag it up or down onto the new separate track. You can make minor adjustments to make sure tracks are in line, and there are no unwanted gaps between them.
Et voilà! Done.
If you want to move multiple clips back and forth within the same track, all you need is the Time Shift Tool.
Note: Audacity 3.1 removed the Time Shift Tool, replacing it with handles for your audio clips. To see how to move tracks in the latest Audacity please watch the video at the top of this article.
Select the Time Shift Tool icon, hover over the track you want to move, and click on it. After that, simply move the track wherever you want it to be.
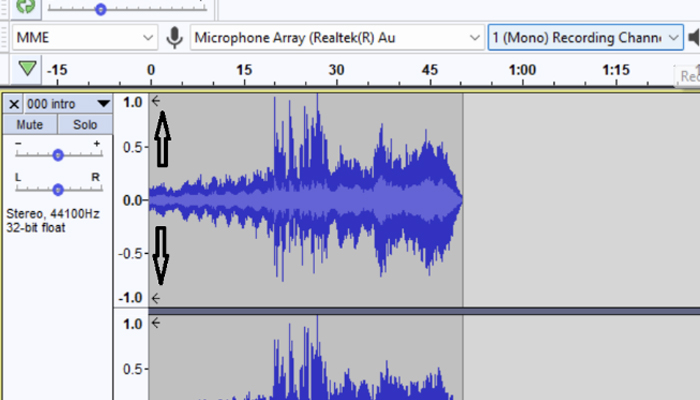
It’s an extremely simple process, but there’s a caveat. When you move the track too far back, Audacity doesn’t stop when you reach the end of the track, so you might end up missing parts of your audio if you’re not careful.
You need to pay attention to the small arrows pointing to the left in the audio file. When they appear, it means some parts of the audio track have disappeared, and you’ll need to move it forward if you want it to be heard.
I’ll dedicate the final part of this article to the four main ways to split an audio track on Audacity. Each option has its use and can be a great option when editing audio.
All these options are available in the main edit menu, on Edit – Remove Special/Clip Boundaries.
This is the procedure I mentioned earlier, so I won’t spend too much time on it. In short, you can use this tool to get two separate clips that can be moved and edited independently using the selection tool and the time shift tool.
The option Split Cut lets us split the audio tracks, cut one of the two parts and paste it somewhere else if needed.
In order to do this, just highlight the part of the audio track you wish to cut using the selection tool. Next, go to Edit-Remove Special-Split Cut, and you’ll see that part of the audio disappeared. You can paste it somewhere else by simply clicking on the area where you want the audio to appear and using the shortcut Ctrl+V.
The Split Delete option works exactly like the Split Cut version except, as you might have guessed, instead of cutting a certain area of audio highlighted with the selection tool, it simply deletes it.
This is a good way to remove unwanted audio while leaving the rest untouched.
If you want to split an audio file and move one of the two resulting files to a new track, then use the selection tool and go to Edit-Clip Boundaries-Split New.
In all the cases above, once you split the audio file, you can use the Time Shift Tool to move the tracks around and place them wherever they need to be.
I hope you enjoyed this article and found some valuable information as to how to multiple clips in Audacity.
Like many other DAWs, also Audacity requires a bit of practice before you can truly master it, but there’s no doubt you can get very good results in a very short time with this powerful digital audio workstation.
Good luck, and stay creative!