Marco Sebastiano Alessi
Nov 14th, 2022There are many tools that allow us to give our videos a professional look, but few people take into account that the quality of our audio is as important as the video. We could have a decent video recording, but if we recorded the audio with a low-quality device, with echo, or plenty of noise, our whole project might be compromised.
In this article, we’ll go through a particular audio editing tool you can use to give a better sound to your videos. Have you heard of the fade-in and fade-out effect?
A fade effect is when you make your audio start at a lower volume and increase in volume until a certain level. There are many ways you can add this effect to your video: you can start loud and decrease the audio volume, increase it fast at first and then slower, or vice versa. It’s also used in transitions to make two clips transition smoothly from one to another.
I’m sure you’ve heard this effect on commercials, YouTube content, and even in popular songs. Now it’s your turn to learn how to fade out audio in DaVinci Resolve, the audio post-production, and video editing software by Blackmagic Design. DaVinci Resolve is free to download, so anyone can try it, or you can upgrade to the Studio version for a one-time payment of $295. Aside from this powerful tool, the DaVinci Resolve plugins will provide you with everything you need to create fantastic video content.
We’ll jump straight to the different methods to make your audio fade professionally in DaVinci Resolve; then, we’ll give you some extra tips to clean your audio from unwanted noise to make it sound even better.
Download and install DaVinci Resolve, and let’s get started!
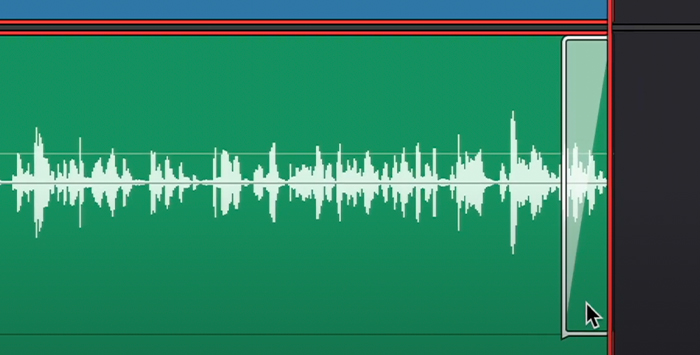
This method to fade audio in DaVinci Resolve is for those who want to spend less time editing and want to make a good-quality video with a nice fade-in or fade-out effect. It’s done manually on the Timeline; quick and easy without needing to dive into many settings.
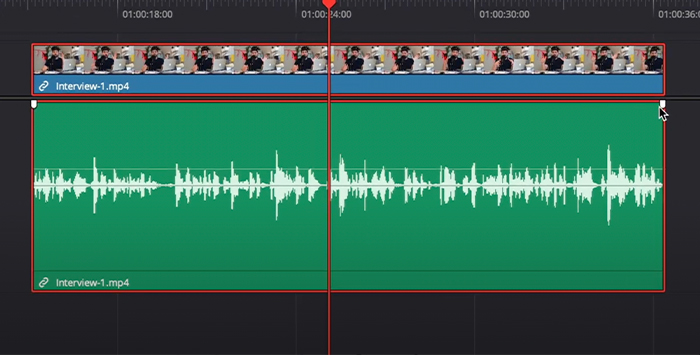
The pros of using this method are that it’s simple and fast. You only need to move the fade handles to the position desired, and you’re all set!
But there are some cons, too. You can’t adjust more specific volume and duration parameters, so you cannot have the same settings on different audio clips. Also, you can only add a fade at the clip’s beginning or end.
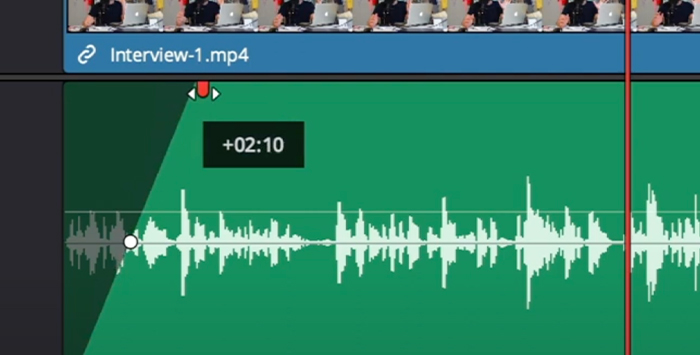
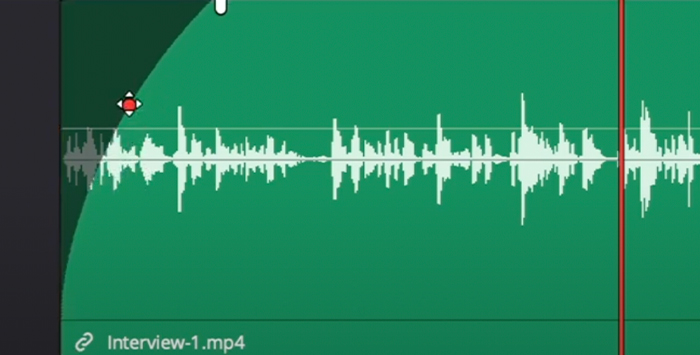
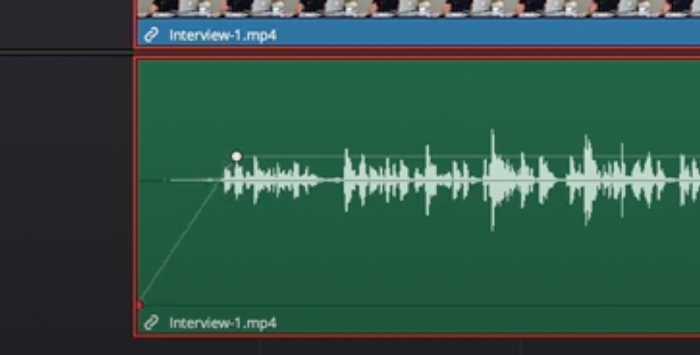
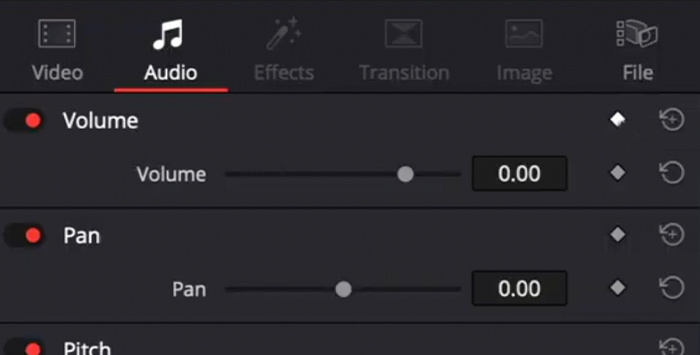
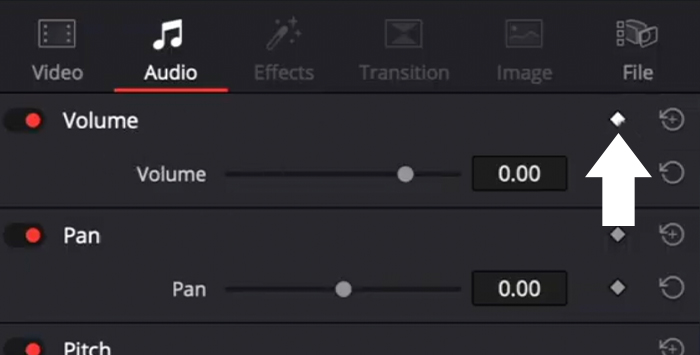
Adding a keyframe into our audio clip will allow us to properly create audio fades with more control over time, curvature form, and the starting and ending point. We achieve this by creating fade markers on the clip, which we can adjust manually or in the settings screen.
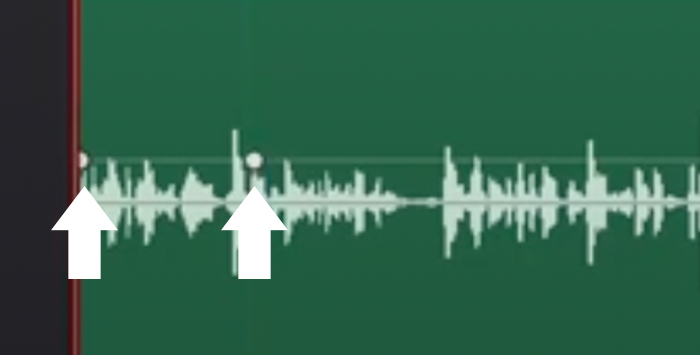
We’ll be working on the volume control, the thin line in the middle that runs through the audio clip. Dragging this line up and down will adjust the volume, but it will change throughout the clip. To change it in a specific section, we’ll use keyframes. Follow the next steps to fade in audio using keyframes.
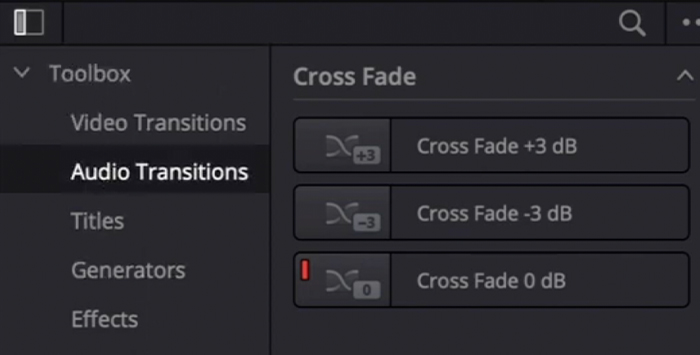
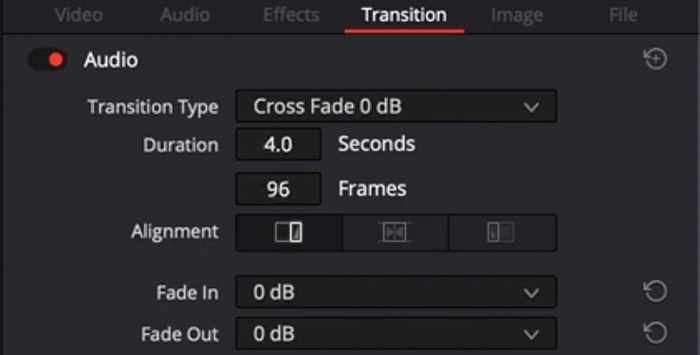
The third method to fade audio in DaVinci Resolve is an automatic way to add fade-out and fade-in transitions. The settings on the Crossfades effects are preset, but you can adjust them in the Inspector tab. Now, let’s add the Crossfade.
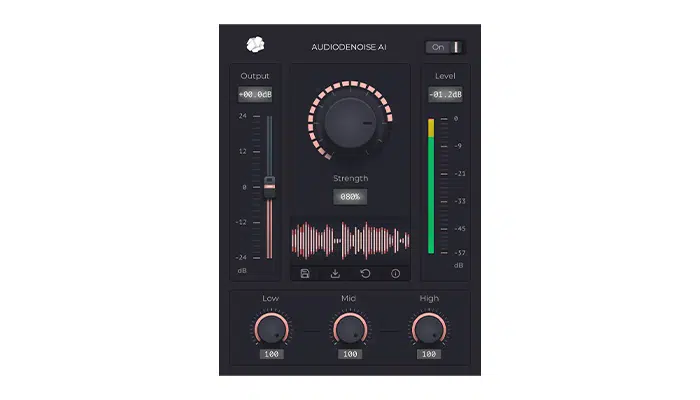
Sometimes we record poor-quality audio despite our best efforts, and we need to do some arduous post-production work to make your video clip sounds professional. Having all our audio tracks clean from unwanted noise will allow us to make smoother fade-out crossfade transitions between audio without the noise interfering with audio quality.
If you want to remove hiss, background noise, or hum, we’ll show you how to do it in seconds inside DaVinci Resolve with our plug-in AudioDenoise.
Following these simple steps will make your video clips look and sound more professional, and your audience will be more engaged. What’s excellent about DaVinci Resolve is that you can do things in many different ways, which is ideal when you want to improve your workflow. If you keep exploring the software, you’ll find more ways to enhance your video clip.
Good luck, and stay creative!
Select the clip to add a crossfade, follow the path Effects Library > Audio Transition, and choose the crossfade effect you prefer. To add the effect, simply drag it to the clip in the Timeline.
We can do it if you have a big project and want to add a fade-out to all your audio clips simultaneously to save time.


