Marco Sebastiano Alessi
Dec 26th, 2022It’s common to see smooth transitions in videos, with the image slowly fading to black at the end of a scene. Occasionally, we find this effect at the beginning of a video clip, creating a welcoming intro to videos or a new movie scene.
When this effect is at the beginning of a video clip, we call it fade-in. When the effect is present at the end of a clip, it’s called fade-out. It was only natural that Adobe Premiere Pro, one of the best video editing software available on the market, would offer a professional tool to fade in and out video clips.
Just like when learning how to fade out audio in Premiere Pro, you’ll find out Adobe Premiere Pro has different ways to achieve this effect: that’s why today we’ll bring you a guide to fade-out video using Premiere Pro pre-installed tools.
You don’t need to buy any external plug-ins to follow this tutorial. Just download, install Premiere Pro (or use Premiere Pro cc), and follow the instruction below. Luckily, Adobe Premiere Pro is one of the most intuitive video editing software, so mastering new effects won’t take you long at all.
Let’s dive in!
The fade-in and fade-out effect allows you to smoothly transition between two objects by increasing the opacity from 0 to 100% at the beginning and then decreasing once again at the end. If you want to remove the fade-in and out effect by reducing the Fade-In/Fade-Out Time to zero frames. You can adjust the Fade-In/Fade-Out Time to finetune your video transition effect.
The first and simplest way to fade in and out our videos is with transitions. Premiere Pro has plenty of video transitions to apply to our clips. But to create a good fade-in and out effect, we’ll focus on three methods: Crossfades, Film Dissolve transitions, and keyframes.
If you want a quick fade-in and out effect, look no further: the Film Dissolve effect will provide you with the fade effect you’re looking for. To apply it to your videos, follow the next steps.
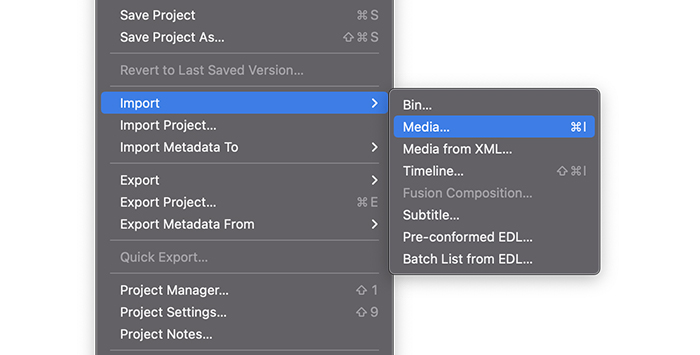
Import the clips to Adobe Premiere Pro or open a project if you’re already working on one. You can import all types of media by going to File > Import. Search for the clips and click open.
To create a Timeline, right-click on the video clip you want to add the Film Dissolve transition and select Create a New Sequence from the clip.
Arrange the clips in the way you want them to play in the preview.
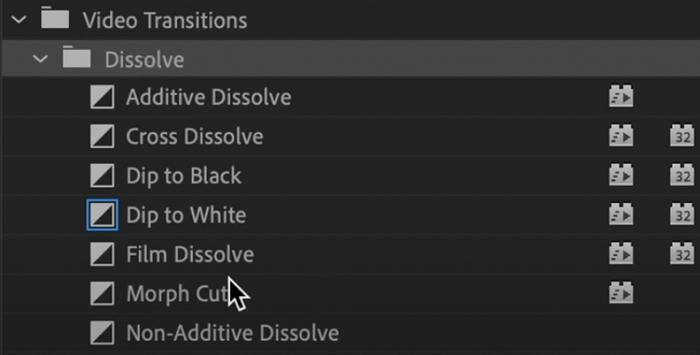
The video transitions folder is located within the effects in the Effects panel. You can use the search box and type Film Dissolve to find it quickly, or you can follow the path Effects > Video Transitions > Dissolve > Film Dissolve.
To apply the fade-in and out transitions, click on Film Dissolve and drag it to the beginning of the clip for a fade-in entrance. If you want to fade out the scene, then drag the effect to the end of the video.
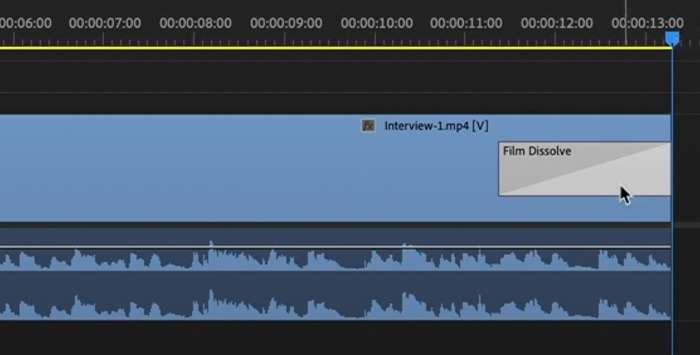
The Film Dissolve effect will appear as a sub-clip within the video clip, where you can adjust the transition settings. You can edit the length of Film Dissolve in the Timeline by dragging the edge of the transition. The longer the duration, the slower the image will fade in and out.
Always preview every minor change you make. It will allow you to experiment and make changes early in the project.
Fade-in and out effects can be used anywhere in your projects. You can use fades in between clips, too: if you have multiple clips with different scenes and want to shift from one clip to another with a crossfade, you’ll need to drag and drop the transition between two clips in the same track.
Working with keyframes can be challenging at first but highly rewarding once you become familiar with the tool. With keyframes, you can create animation for texts and other media, but right now, let’s focus on using keyframes for fade-in using the Opacity control.
Select the clip and go to the Effect Controls panel.
Under Video Effects, you’ll see the option Opacity. Click on the left arrow to see more settings.

Here you’ll learn how to fade in and out by changing the opacity in your video.
1. Next to Opacity, you should see a percentage number and a little diamond to the left.
2. We’ll change the opacity to 0% for a fade-in effect.
3. Click on the diamond on the right to create the first keyframe. You can see these keyframes in the right area of the Effects Controls panel.
4. Move the playhead forward, change the opacity to 100%, and create another keyframe.
5. It will tell Adobe Premiere Pro that the video should start black at the first keyframe and gradually reduce the opacity until it reaches the second keyframe.
1. For a fade-out effect, we’ll do the same video transition as before. We’ll begin by moving the playhead where we want to start fading out the clip.
2. Leave the opacity at 100% and add a keyframe.
3. Move the playhead to the end of the clip, change the Opacity to 0%, and create another keyframe.
4. This time, Adobe Premiere Pro will start fading the clip from the first keyframe until the second.
Essentially, Keyframes are a way to add the fade transition manually. The learning curve might be steeper, but you’ll have more control over the fade-in effect once you get used to it.