JG McQuarrie
Jan 27th, 2023In this article:

Sound engineers, producers, and podcasters have to deal with myriad problems and recording sound always comes with its own challenges. Capturing good audio is key to ensuring that everything you or your hosts want to capture is put across in the best possible way.
The problems that commonly occur when recording are often discovered too late. You think you have the perfect sound recording only to listen to the playback and find that something has gone awry.
And audio clipping is a real problem.
In its simplest form, audio clipping is something that occurs when you push your equipment past its ability to record. All recording equipment, whether analog or digital, will have a certain limit to what they can capture in terms of signal strength. When you go beyond that limit, audio clipping occurs.
The result of audio clipping is distortion on your recording. The recorder will “clip” the top or bottom of the signal and your clipped audio will sound distorted, fuzzed, or otherwise of poor sound quality.
You will instantly be able to tell when your audio has started clipping. The deterioration in what you are listening to is extremely noticeable and the audio clipping sound is hard to miss. Digital clipping and analog clipping sound the same and can ruin your recording.
The result is clipped audio that is extremely difficult to listen to because of the degradation in quality.
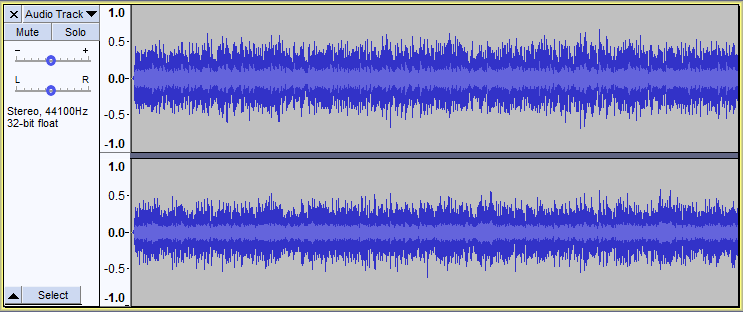
When you make any kind of audio recording, the audio waveform is captured in a sine wave. It’s a nice, smooth regular wave pattern that looks like this.
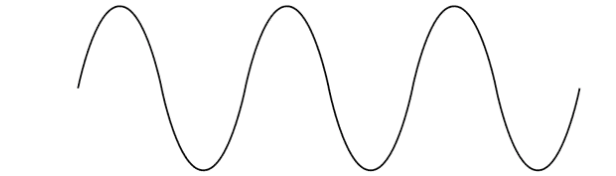
When recording, it is best practice to try and get your input gain set so that you record just slightly under -4dB. This is usually where the “red” zone on your level meter will be. Setting the level just a little below the maximum also allows a little “headroom” to ensure that if there is a peak in the input signal it won’t cause you too many problems.
This means you capture the maximum amount of signal without any distortion. If you record like this, it will result in a smooth sine wave.
However, if you push the input beyond what your recorder can cope with, it will result in a sine wave with the tops and bottoms squared off — literally clipped, hence why it is known as audio clipping.
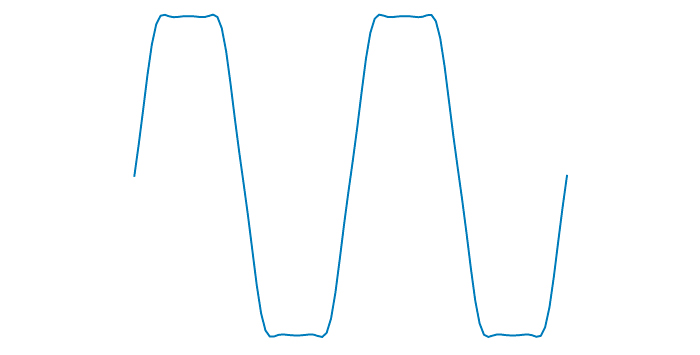
It doesn’t matter if you are recording using an analog device, such as magnetic tape, or if you are using a digital audio workstation (DAW) on your computer. It doesn’t matter if you are recording a spoken voice, vocals, or an instrument. If you push beyond the limits of what your recording technology can cope with, it will cause this problem.
The distortion is sometimes known as overdrive. Guitarists use overdrive all the time, but this is usually in a controlled manner, either with a pedal or a plug-in. Most of the time, overdrive or distortion on your clipped audio is something you want to avoid.
Audio clipping can occur at any point during the recording process, and the result is always the same — a fuzzy, distorted, or overdriven audio signal that is unpleasant to listen to. The more clipping you have, the more distortion you will have on the audio signal and the harder it will be to listen to.
It used to be that if you had clipped audio you only had two options. Either you had to live with the problem, or you needed to re-record the audio. These days, though, there are plenty of ways to deal with clipping if you discover you are suffering from it.
There are many methods to help prevent audio clipping, both preventative and after the fact.
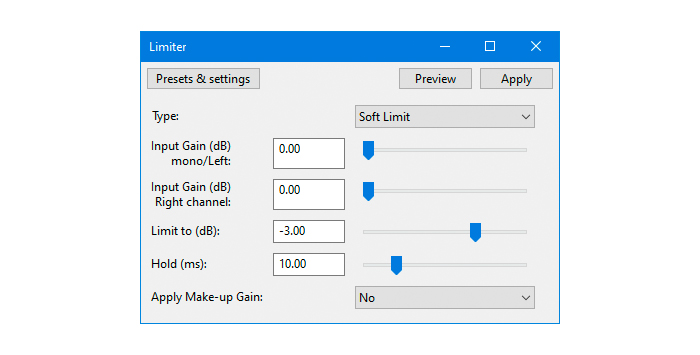
As you might expect, a limiter limits the amount of signal that reaches your recorder. Passing an audio signal through a limiter means that you can set a threshold, above which the signal will be limited. This will prevent the input signal from becoming too strong and causing an audio clip.
Almost all DAWs will come with some kind of limiter plug-in as part of their default toolkit for audio production.
A limiter will let you set the peak volume in decibels (dB) and what it should be limited to. Depending on the sophistication of the software, it may also let you set different levels for different stereo channels or different levels for different input sources.
This can be useful if, for example, you are recording different interview subjects who have different hardware and therefore have different volumes. Setting the limiter for each subject helps to balance your audio in addition to avoiding audio clipping.
Choosing different levels will allow you to set your limiter so that the audio signal you record sounds natural without risking clipping. If you apply too much effect from your limiter it can result in audio that sounds “flat” and sterile. It’s a balancing act.
There is no one “correct” level for a limiter, as everyone’s audio set-up is different. However, it only takes a little time to experiment with the settings to ensure any potential audio clipping is kept to a minimum.
Using a compressor is another good way to avoid audio clipping. A compressor will limit the dynamic range of the incoming signal so that there is less difference between the parts of the signal which are loud and the parts of the single which are quiet.
This means that all the parts of the overall signal are much closer to each other in terms of their relative volumes. The fewer peaks and troughs you have in your audio the less chance there is of audio clipping occurring.
In other words, a compressor adjusts the dynamic range of the incoming signal so that it is easier to manage. However, by adjusting the dynamic range of the signal you also adjust how it sounds. You can change this by altering the attack and release of the compressor until you get a level that you are happy with.
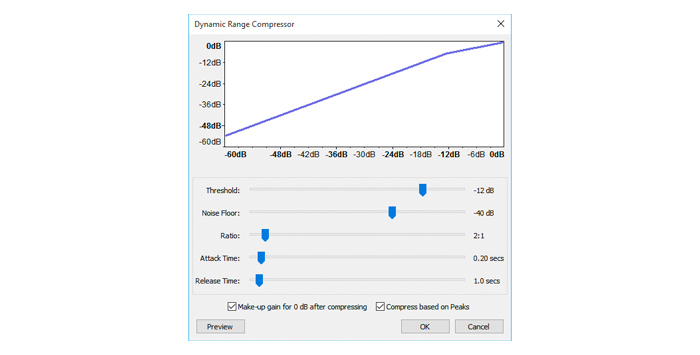
You can adjust four different settings to help deal with audio clipping.
The first two are threshold and ratio. The threshold is set in decibels (dB) and this tells the compressor when to start working. Anything above the threshold level will have compression applied to it, anything below will be left alone.
The ratio tells the compressor how much compression should be applied. So for example, if you set a ratio of 8:1 then for every 8 decibels over the compression limit, only one decibel is allowed.
Generally, a ratio of between 1:1 and 25:1 is a good range to have, but it will depend on the audio you record where you want to set it. Setting it too high may alter the dynamic range too much so your audio doesn’t sound good, setting it too low may not have enough of an effect.
There is also a noise floor setting, which can be adjusted to take into account how much background noise your hardware produces.
Most DAWs will come with a compressor built in, so it’s easy to experiment with the settings to find out what will work with your recording and what levels will avoid audio clipping.
Compressors and limiters can both be used in conjunction with each other. Applying both to your audio will help reduce the amount of clipping that can occur, and balancing them against each other will help to keep your audio sounding as natural and dynamic as possible.
As with a limiter, there is no one setting that is correct. You will need to play around with the settings until you find one which works for you.
A compressor is a valuable tool in any producer’s toolkit and can be invaluable when it comes to dealing with audio clipping.
Although limiters can be an extremely useful tool to prevent clipping from occurring, what happens when you listen back to your audio and it’s already too late and the audio clipping is already there? That’s where using a de-clipper comes in.
DAWs often come with de-clipper tools built-in as part of their basic features to help deal with audio clipping. For example, Audacity comes with a De-Clip option in its Effects menu, and Adobe Audition has a DeClipper under its Diagnostics tools.
These can make a difference and can help clean up audio straight out of the box. However, sometimes the scope of what the built-in features can achieve is limited, and there are third-party plug-ins available that can do the job better.
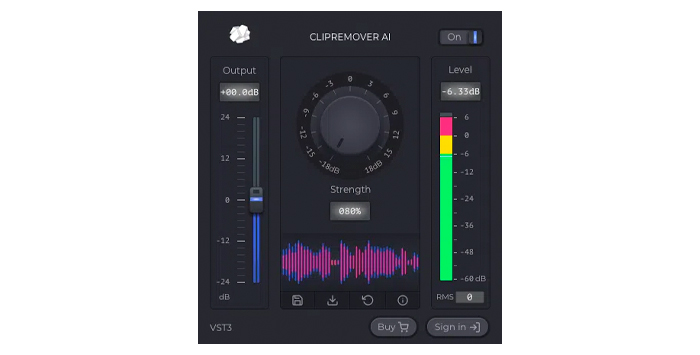
There are many de-clipper plug-ins on the market, and they are designed to help restore audio that has already been clipped when it was recorded. CrumplePop’s ClipRemover is a perfect example, able to restore clipped audio effortlessly.
The advanced AI can restore and recreate the areas of audio waveforms which have been removed by clipping. It also results in much more natural-sounding audio than some de-clipping software.
The ClipRemover is also very simple to use, which means there’s no learning curve — anyone can use it. Simply select the audio file which has the clipping audio, then adjust the central dial to where the clipping occurs. Then you can also adjust the Output slider on the left to control the volume level of the track.
ClipRemover works with all the most common DAWs and video editing software, including Logic, GarageBand, Adobe Audition, Audacity, Final Cut Pro, and DaVinci Resolve, and will work on both Windows and Mac platforms.
De-clippers are a great way to help restore audio that has already been clipped and can help rescue recordings that would otherwise be unsalvageable.
As with many audio issues, prevention is better than cure. If you can avoid your audio clipping before it gets recorded your life will be much easier. One of the easiest ways of achieving this is to do some test recordings before you begin.
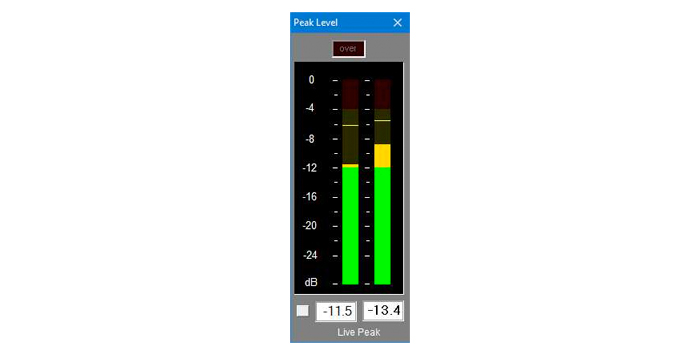
Once you have a setup you think will work for you, record yourself singing, playing, or speaking. You can monitor your recording levels with your DAW’s level meters. The idea is to set your levels so they remain in the green, just slightly below the red. This gives a visual indication as to what’s going on — if your levels remain in the green you are good but if they stray into the red you are likely to get clipping.
Once you have done your test recording, listen back to it. If it is distortion-free then you have found a good level. If there are distortions, then adjust your input levels down a little and try again. Repeat this process until you find a good balance between a strong signal and no clipping.
It’s important when you are doing a test recording to speak, sing or play as loud as you are likely to get on the real recording.
If you speak in a whisper on the test recording and then speak very loudly when it comes to the actual recording, your test won’t be much good! You want to replicate the sound you will hear when you go live so you get the best test recording possible.
Backups are incredibly useful. Anyone who has used a computer will know that data and information can easily be lost, and having a backup is a simple, but vital, protection against such loss. Exactly the same principle applies when it comes to recording audio.
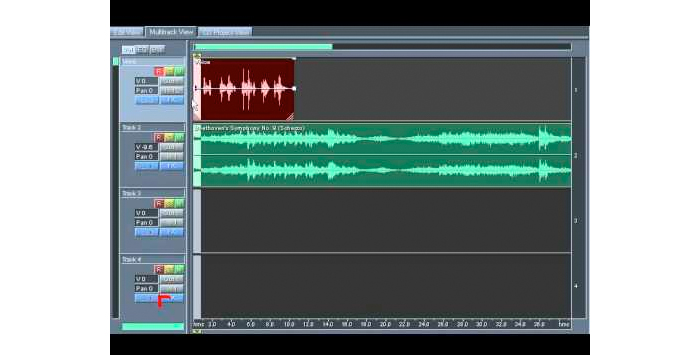
When you are recording your audio, record two different versions of it, one with the signal level set where you think it will be OK, and one with a lower level. If one of the recordings doesn’t sound correct then you have the other one to fall back on.
You can create a backup track one of two ways.
There are hardware splitters, which will take an incoming signal and split it so that the output is sent to two different jacks. You can then connect each jack to a different recorder and set the levels as required, one “correctly” and one at the lower level.
You can also do this within your DAW. When your signal arrives, it can be sent to two different tracks within the DAW. One will have a lower level than the other. As with the hardware solution, this means you have two different signals, and you can choose which one results in better audio.
Once you have recorded them it’s also a good idea to save each track as separate audio files, so they are both secure and available if you need to refer back to either one of them.
Backup tracks are a simple way to ensure that if you have issues with clipping you have an alternative that means you can work with your original recording without restoration work.
There are also practical ways to avoid clipping when recording.
When you are recording vocals or speech, keeping consistency can be hard. People’s voices can vary and they can speak at different volumes. This can make it hard to avoid clipping audio.
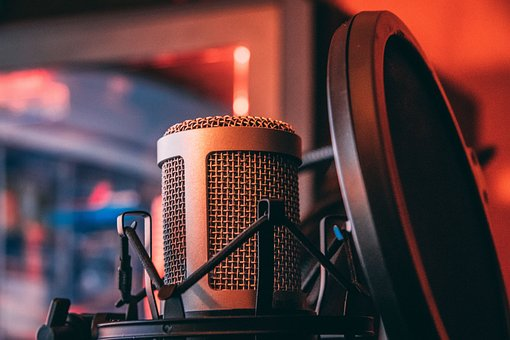
However, one good rule of thumb to prevent audio clipping is to ensure that the person using the microphone is always the same distance from it. It can be easy to move backward and forward when speaking or singing because this is how we behave in normal life.
Keeping a consistent distance between the microphone and the person being recorded will make it much easier to keep the volume consistent. This, in turn, makes it much less likely that you will suffer from clipping audio.
The microphone or instrument you are recording with is the first place where clipping can occur but it is not the only one. If you have a chain of microphones, audio interfaces, amplifiers, software plug-ins, and more, any one of them can lead to clipping.
All that needs to happen is that the gain is too high on one of them and your recording will start to clip. Most devices come with some kind of gain meter or volume indicator. For example, many audio interfaces will feature LED warning lights to tell you if the levels are getting too high.
Most software also comes with some form of visual indicator as to the levels. Check each of these to ensure that everything remains in the green.
However, not every recording device or hardware will necessarily come with this kind of indicator. Microphone preamps can be small but pack a big punch and can easily overload a signal without you being aware of it.
And it’s easy for an amplifier to generate too much signal if it’s not set to the right level. It’s worth checking every piece of equipment in your chain to ensure that nothing is going to boost the signal too far and cause that unwanted sound clipping.

Audio clipping also has the potential to damage speakers. Because speakers physically move, pushing them beyond their limits when playing back clipped audio can cause damage.
Normal sound waves will arrive and move the speaker in the way it was designed, smooth and regular. But clipped audio is irregular and this is what causes the problem. This problem can occur with any kind of speaker, whether it’s headphones or external speakers, tweeters, woofers, or midrange. Guitar amps and bass amps can suffer from it too.
Clipped audio can also cause potential overheating. This is because the amount of volume a speaker produces is directly related to the amount of electricity — voltage — the speaker receives. The more voltage, the higher the temperature, therefore the greater the chance of your equipment overheating.
Normally, a little bit of clipping isn’t too much to worry about in terms of physical damage but if you do it a lot, or have very heavily clipped audio then problems can occur.
Many speakers will come with some kind of limiter or protection circuit to mitigate against the sort of damage clipping can cause. But the best approach is to avoid clipping altogether — you don’t want to take unnecessary risks with your audio setup.
Damage is another reason to avoid clipping as much as possible.
Clipping audio not only sounds bad when it comes to listening back to recordings, but it also has the potential to damage the equipment you use. Even if there’s no damage, it can take a budding producer a long time to fix it.
However, taking time with your setup will ensure that any clipping is kept to a minimum. And if you need to fix audio clipping afterward it can be done with the minimum fuss.
And after that, you will have perfect, clear-sounding audio!


