JG McQuarrie
Jun 28th, 2023
Audacity is a great digital audio workstation (DAW). It’s widely used, easy for newcomers to start with, and — best of all — it’s free!
MP3s are probably the best-known music format in the world. Small file sizes and good sound quality means they have conquered pretty much every other audio format.
Bringing a great DAW and the world’s most common sound format together is a simple process but one well worth learning. Luckily, it’s easy to convert Audacity files to MP3 files – even for a beginner.

In older versions of Audacity, if you wanted to covert an Audacity file, you needed to download additional software to convert to an MP3. This was due to MP3 conversion not being native in Audacity.
The LAME library needed to be downloaded and installed separately. It was necessary to do this because of the patents the LAME library had.
If you have an older version of Audacity and have not installed the LAME library you can download it from this location. There are versions available for Windows, Mac, and Linux.
However, the latest version Audacity does not require a separate LAME download, so the best solution would be to download the Audacity’s latest version. Now, you won’t have to mess around with separate LAME installations and you will have the most recent version of the software, which is always a good idea.
When you record in Audacity, the sound is a .wav file. This type of file is lossless — there is no loss of quality, but the file size is massive. When you save an Audacity project, this format remains and the original .wav file is preserved.
However, if you want to export Audacity files to MP3s it is a simple process and you can do it with any file — it doesn’t even need to be original .wav files recorded in Audacity.
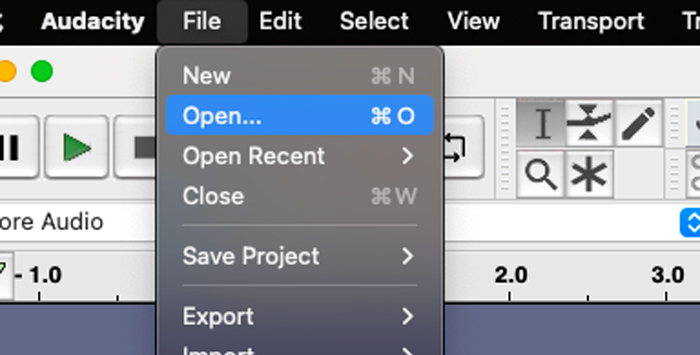
Firstly, import the file you want to work on. Go to the Audacity File menu, thens select Open.
Once you have the file loaded, you can continue to edit audio files if you need to do more work on your song or podcast. Once you are happy with your audio, you need to save it as an MP3 to convert it. To do this, go to the File menu again, go to the Export option, and choose Export As MP3.
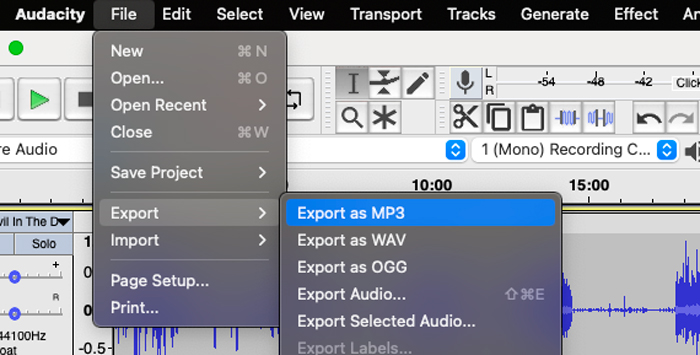
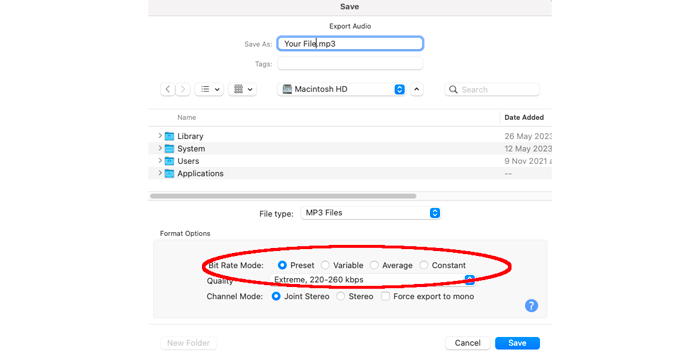
This will open the Export Audio window.
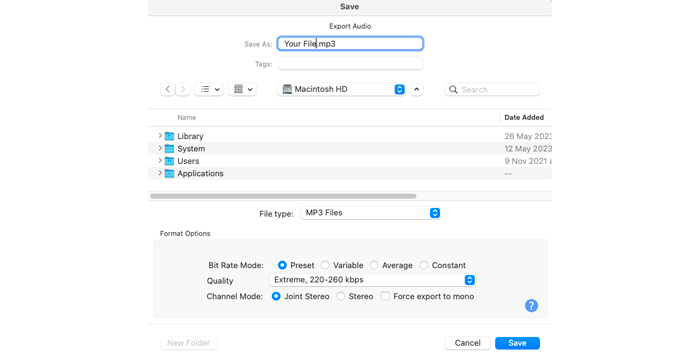
Select a file name and the location you want to save it to on your hard drive. You also have the option to choose the quality of the MP3 here.
There are different Bit Rate Modes that can be selected and each with different quality.
Because MP3s are a lossy format, when you convert to them some audio data is compressed or removed. These settings let you choose how much compression is applied and how the data is converted.
When it comes to selecting the Bit Rate Modes for your audio file, the built-in Preset is the most common to use. These are the settings that are recommended by LAME and the descriptions are simple to understand rather than being very technical.
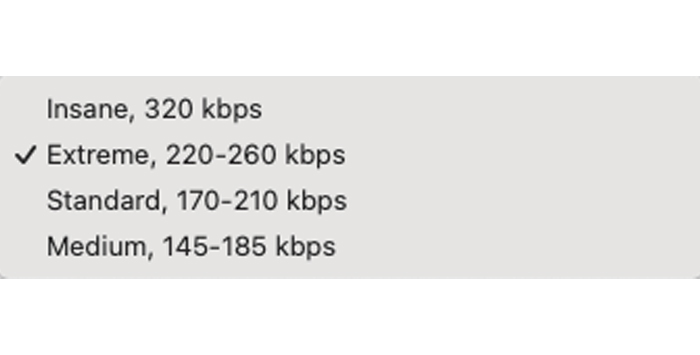
For most people, this will be more than sufficient, unless you have a particular reason to choose a specific type of bit rate.
However, if you do, Variable, Average, and Constant are also available as options.

When it comes to choosing the quality of your audio file, the higher the quality you pick the better the end result will sound but this will also effect how large the file size will be. It’s worth experimenting with exporting to different quality options so you can determine which is correct for you. You want an audio file that will sound good but not be too large.
Once you have selected your Bit Rate Mode and your quality, Audacity will open the metadata page to let you edit metadata tags for your audio track.
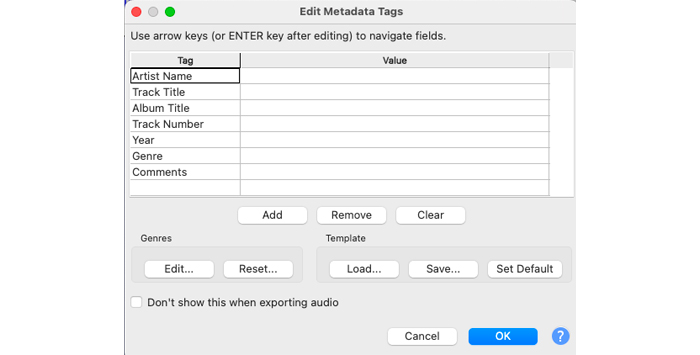
Metadata can be thought of as “data about data”. Your audio is the data, and the metadata is everything about it. This metadata is used by programs to sort and search — the more accurate the metadata the easier it is for your file to be found.
You can choose to add several variables to make sure your audio is labeled in the correct way.
Artist Name, Track Title, Album Title, Track Number, Year, and Genre are all pretty self-explanatory.
Comments may not be necessary if it’s a song you are exporting but if you are exporting a podcast this would be an ideal place to put the description of the podcast. Or if it’s a drama, you could add a plot description. That means the information is contained within the track itself, as well as on a website or other location where you may post the file.
There is also the option to set up a template.
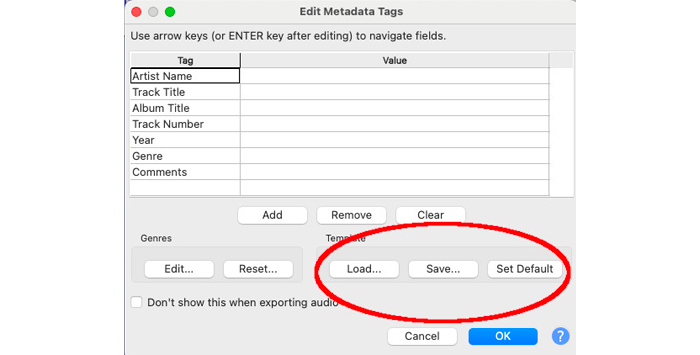
If you have a lot of tracks that need to be converted and that all have similar metadata, you can set up a template to pre-complete the fields. It saves a lot of typing and repetition!
Metadata tags are very useful when it comes to labeling and keeping track of your audio but it’s also worth mentioning that none of these fields are mandatory. If you want to leave them blank, you can.
Once you have completed the metadata tags, click OK and your file will be exported as an MP3.
And that’s it!

Audacity remains a remarkable product, considering it is completely free. Its flexibility and ease of use remain Audacity’s hallmarks, so when it comes to something like converting a file to an MP3 you know it’s going to be a simple, straightforward process.
And whether it’s music files or a podcast, now you can now convert Audacity to MP3 in no time at all!


