T Mango
Aug 21st, 2023You know the situation—you’ve worked hard to make a great recording for your podcast, music, or vocals. But just when you thought everything was going great, you play back your audio file and hear several annoying pops and clicks.
How frustrating!
Unfortunately, this is an all-too-common occurrence. During music production, it’s easy for noises or other disturbances to creep into your audio. They often result in pops, random clicks, mouth noises (i.e., plosives), or other unwanted noises in your recordings.
They’re annoying and can ruin an otherwise excellent audio file.
So, what can you do about it?
Firstly, you should try to minimize these annoying disturbances from occurring in the first place. But they’re hard to avoid, so when they do occur, you’ll need to remove them.
In this post, we’ll show you how.
We’ll look at three ways to remove pops, clicks, and other disturbances using Apple’s Logic Pro (a.k.a. Logic Pro X) using internal and external tools.
It’s hard to avoid clicks and pops being generated in your audio files during the recording process, as they can even occur even when you’re using high-quality microphones and audio interfaces.
They’re caused by a number of factors, including:
It’s also easy for clicks and pops to appear wherever there’s an edit in your file, i.e., where two regions of audio have been joined.
Fortunately, there are some useful tips you can apply during setup and recording to minimize the occurrence of clicks, pops, mouth noises, and other unwanted noises creeping into your audio:
Before starting, it’s worth checking that you’ve got Logic Pro’s advanced settings turned on. This gives you access to a number of advanced features across editing, mixing, audio recording, and customization.
From the Settings menu, choose Advanced, then ensure that the Enable Complete Features checkbox is ticked.
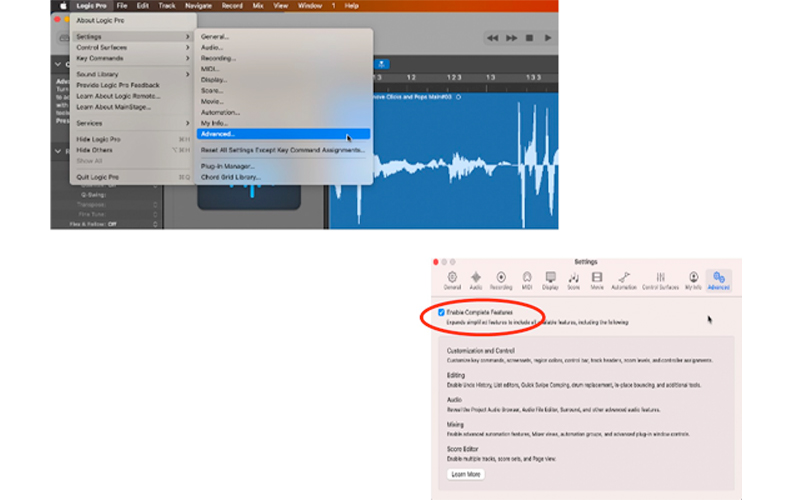
Once you’ve done this, you can enjoy all of Logic Pro’s advanced features.
Let’s now look at three methods for removing clicks and pops from your audio files.
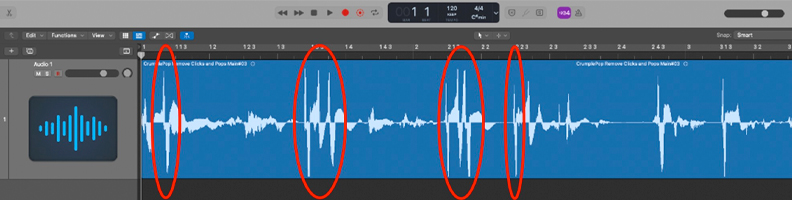
We’ll work with an example audio file (a voice recording), as shown below—notice that there are several ‘spikes’ in the audio waveform where annoying clicks and unwanted mouth sounds (i.e., pops) have occurred:
In the first method, we’ll use Logic Pro’s audio file editor.
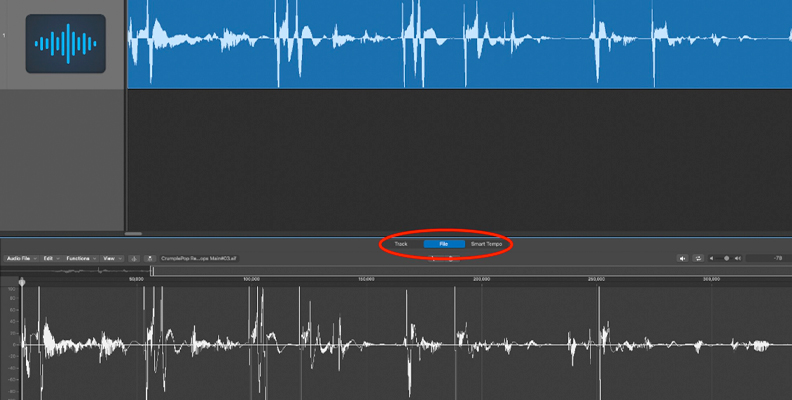
Double click on the audio track (or audio region) that you want to edit and this will open the Sample Editor window, in which you’ll see your audio’s waveform.
In the Sample Editor window, you’ll see three menu choices at the top, i.e., Track, File, and Smart Tempo—select the File option.
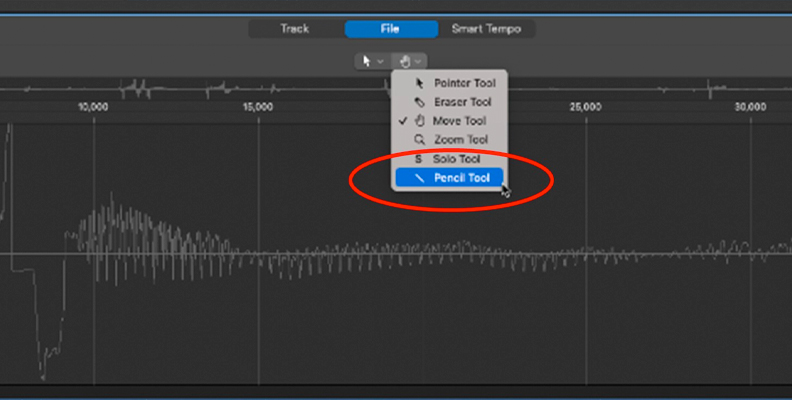
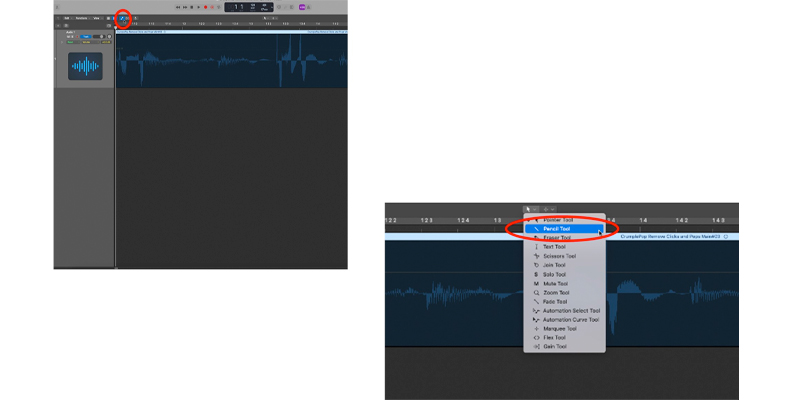
You’ll need to use the Pencil Tool to assist with your editing. To activate this, look under the File menu and find the pointer icon—click the drop down menu under it and select the Pencil Tool.
You can zoom into the region that you want to edit by using the slider tools at the top right of the sample window—use them to hone in on the area that you want to work with.

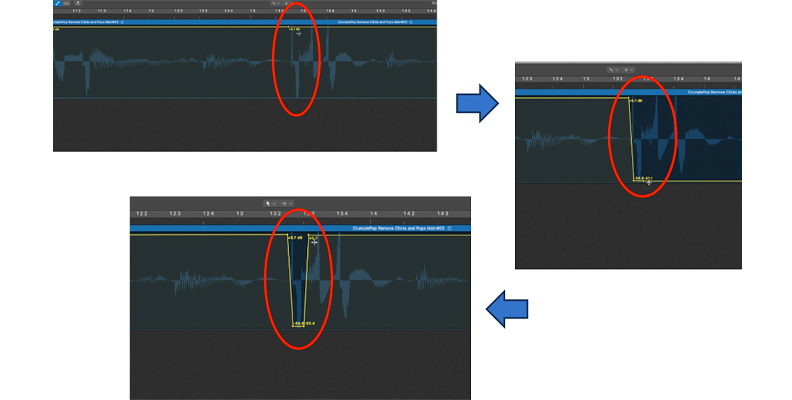
Find the area of the waveform where your pop or click exists by listening to your track or sliding the playhead back and forth to identify exactly where it occurs.
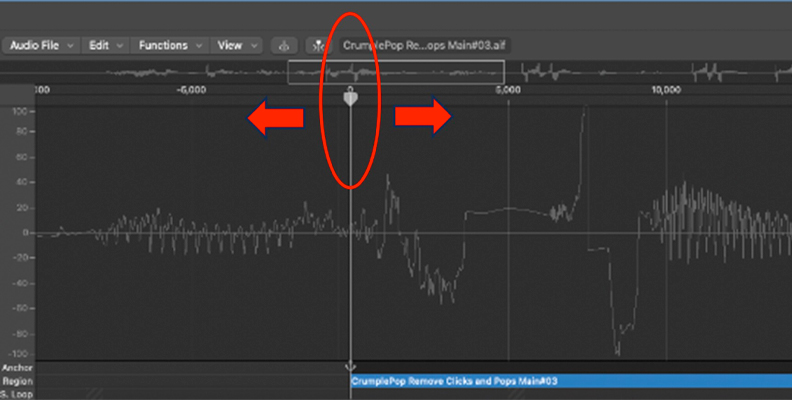
You can usually see the pop or click on the waveform as a spike or sudden increase in amplitude.

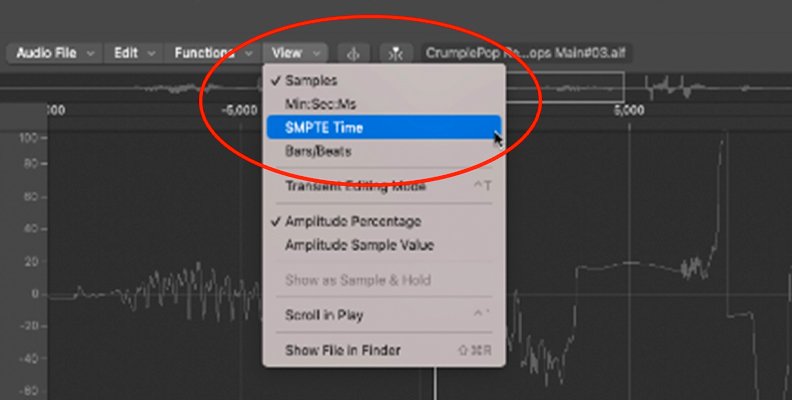
It’s also worth changing the view form samples (which aren’t very helpful) to a view that shows bars and beats. You can do this by accessing the drop-down menu under View and selecting SMPTE Time.
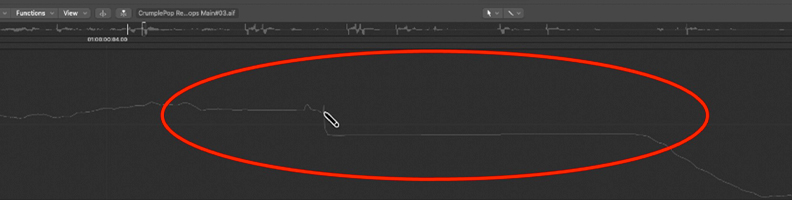
Once you’ve identified your pop or click, smooth out that area of the waveform using the pencil tool. To do that, hold down the COMMAND key and use the pencil tool to click and draw in a section of new waveform over the region where you hear clicks.
It might help to play the region of the audio file that you’re editing in real time, so that you can listen to the effect of your edits—it may take some trial and error to get it just right.
Once you’re happy with your newly edited, smoothed-out section of audio track, you should no longer hear the offending pop or click.
Repeat steps 4–6 for all of the regions of audio that you want to edit to get rid of the pops and clicks throughout your recording.
As you can see, it’s a time consuming and manual process to remove clicks and pops using the pencil tool. You can use similar manual approaches in most other DAWs as well, such as Pro Tools or Cubase.
But there’s an easier way to fix and de-click your audio files that’s far more efficient, i.e., use plug-ins.
Unfortunately, Logic Pro doesn’t ship with built-in plug-ins to easily remove clicks and pops in audio tracks. But there are several good external plug-ins that you can use, such as CrumplePop’s versatile PopRemover plug-in.
PopRemover uses AI automation to make the process of removing pops and clicks easy and efficient. It’s simply a matter of adding the plug-in to your project and adjusting a few parameters to de-click and remove pops from your audio file. And often there’s really only one control that you need to change.
Let’s look at how to use PopRemover.
You’ll first need to download and install PopRemover by following the instructions on CrumplePop’s free download page.
Select your track and go to its channel strip.
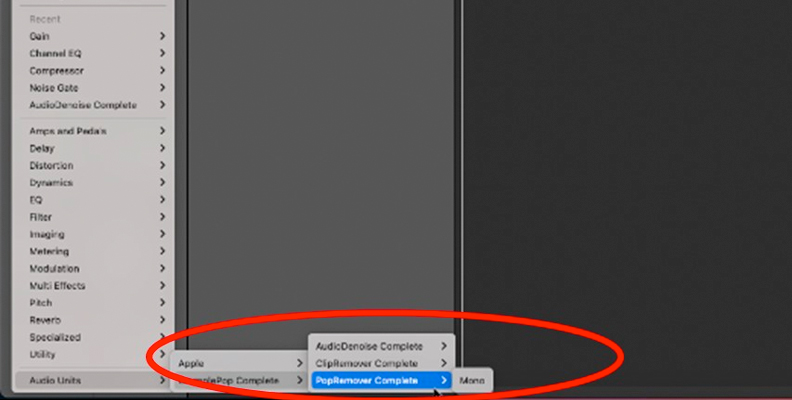
Choose Audio FX > Audio Units > CrumplePop Complete > PopRemover Complete > Mono (this, or a similar path, will appear depending on which suite of CrumplePop tools you install.)
The PopRemover window will activate and give you several parameters that you can work with by adjusting their slides and dials.
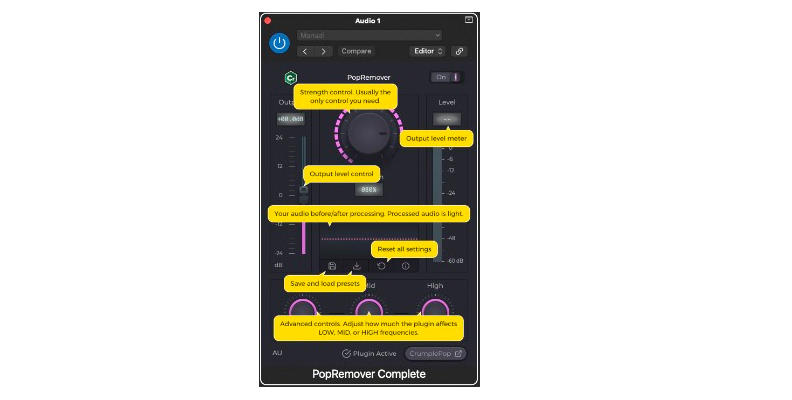
In many cases, the only parameter you’ll need to adjust is the Strength dial. Play around with it and listen to how your track sounds as you adjust the dial. You can also adjust the Output slider, and the Low, Mid, and High frequency dials.
You can switch PopRemover on and off by toggling the On switch (located above and to the right of the Strength dial) and listen to your track with and without PopRemover to gauge its effect.
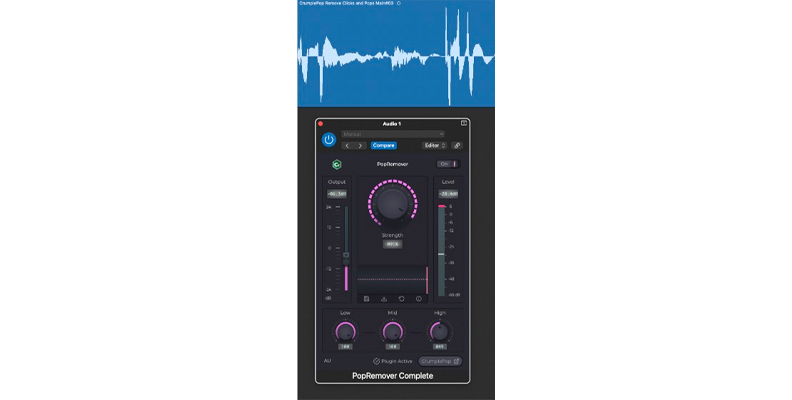
In our example, a Strength of 91 percent, an Output level of -6.3 dB, and a halfway reduction in high frequencies seemed to work best.
The PopRemover plug-in will make removing pops and clicks from your audio considerably faster and easier. Its AI functionality does a lot of the ‘heavy lifting’ when it comes to tweaking your waveforms in the background, allowing you to focus on how your track sounds.
If the pencil tool is too cumbersome or you don’t wish to use a plugin, there’s another approach that you can take by fading out and in at the points where you want to remove a pop or a click.
This is also a fairly manual process, but depending on the nature of the clicks and pops you want to remove, it’s an effective way to fix and de-click your audio.
Keep in mind that Logic Pro has a dedicated fade tool that you can use, but it’s quite limited in functionality and is really meant for adding a quick and easy linear fade to your audio.
For our purposes, we’ll need a more flexible and precise way of adding fades at the exact locations of clicks and pops, so we’ll need to use Logic’s Volume Automation tool.
Activate Automation by selecting the icon on the taskbar, located at the top of your workspace (ensure that your Automation parameters are set to Read and Volume). Then:
Using the Pencil Tool, set volume automation points to create a small fade (i.e., a fade out and fade in) at the exact location of your click or pop.
Repeat step 2 for all of the locations where you want to remove clicks and pops in your audio.
For a fuller explanation and helpful tips on using the Automation tool, check out our detailed guide on How to fade out in Logic Pro X.
So, there you have it—we’ve looked at three ways to remove clicks and pops using Logic Pro.
Two of the methods (using the pencil tool and the automation tool) are fairly tedious and involve a lot of manual work, while the third method (using a plug-in) is far quicker and easier. The method you choose depends on your resources, preferred approach, and the time that you wish to spend editing your audio files.
Whichever method you choose, you don’t need to let a pop or click ruin your audio file, as it’s easy to minimize their effect or completely remove them.


