Marco Sebastiano Alessi
Feb 02nd, 2023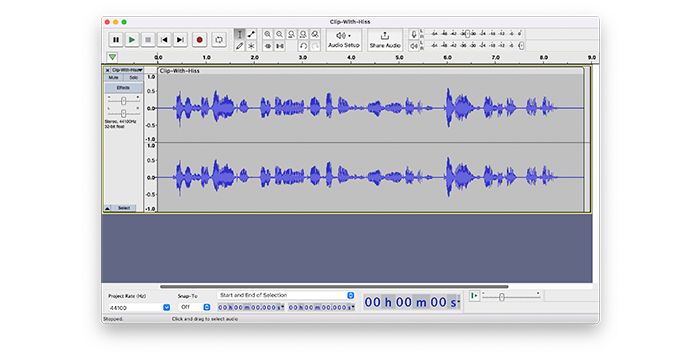
Everyone who has worked with audio knows how annoying it is to find background noise in their recordings: hearing that hissing noise or wind noise in your audio file can cause you a lot of headaches if you can’t re-record. Learning how to remove hiss from audio becomes crucial, but if you want to save your files, you need to do it right.
The good news is that it’s possible to remove background noise in audacity. We created this guide to help you remove background noise with the Audacity noise reduction tools, but let’s talk about what a hiss is before jumping to the tutorial. At the end of the article, we’ll give you some tips on how to avoid recording hiss.
Let’s dive in!
A hiss is any unwanted background noise that can appear in the background of your recordings. Usually, these are high frequencies audible as a high pitch sounds.
Hiss can be caused by electronics inside equipment like computers, audio interfaces, recording devices, microphones preamps, and other external sources such as wind, fans, or radio frequencies.
Hiss is sometimes referred to as the self-noise of electronic equipment. Even though all devices can produce self-noise, the amount of hiss will depend on the quality of its components; thus why so many cheap devices record lower-quality audio with more background noise.
Let me start by saying that removing hiss entirely using Audacity’s native effects is almost impossible. To remove noise from your audio files altogether, you’ll need professional third-party plugins like AudioDenoise.
Perfectly compatible with Audacity, AudioDenoise eliminates various unwanted sounds from audio thanks to a cutting-edge AI audio denoiser that can detect and remove even the most complex noise sources, leaving the rest of the audio spectrum untouched.
Plus, applying AudioDenoise couldn’t be easier; just drag and drop the effect on your audio tracks, and make all the necessary adjustments until it sounds pristine.
However, if you want to see what Audacity’s tool can achieve, you can use noise reduction tools to reduce the background noise to make our audio cleaner and more professional. It’s easier to mitigate hiss in speech recordings, as the human voice tends to be on the low to the middle side of the audible spectrum. But for recordings with other high pitch sounds, it can be more complex.
In this guide, you’ll find a few noise reduction methods that might help you mitigate only the background noise from your recordings using built-in effects from Audacity. Each one will work for different situations like podcast audio, music, video audio, etc. It will be up to you to find the best solution for your audio, depending on your project.
Audacity is an open-source software that you can download for free from Audacity’s website. It’s available for the most common operating systems such as Mac, Windows, Linux, Legacy Windows, and Legacy Mac. Audacity provides the same user interface in each operating system.
1. Go to the download page, and click on your operative system to begin the download.
2. Search and run the installer.
3. Open Audacity.
Start removing background noise in Audacity by importing the audio file. You need to be aware that Audacity is a destructive editor, meaning that any changes you save in the project will be permanent in the audio file. Make a copy of the original audio to use with Audacity; that way, you keep the original safe if you save it by mistake during the noise reduction process.
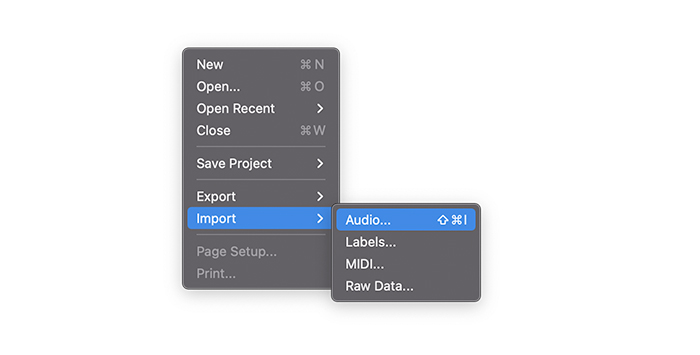
1. Click on File in the main menu, then Import > Audio.
2. Search for the audio file (remember to make a copy in advance).
3. Select the audio file and click open.
4. The waveform will appear in the Timeline.
This section presents four noise reduction techniques. Bear in mind that each noise is different, so try all approaches to see which one works best to remove background noise from your projects.
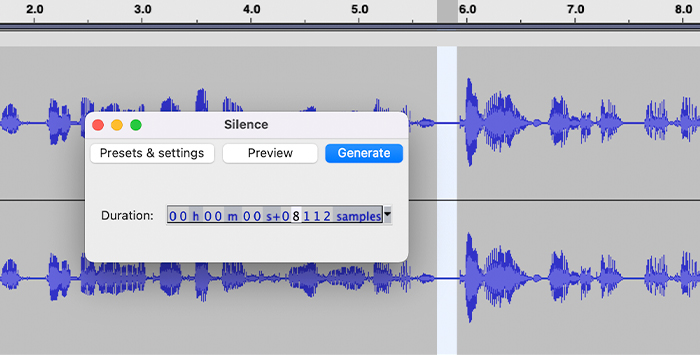
If you’re lucky enough, the hiss in your audio will be on a quiet part of the track. If this is the case, use the Silence tool to remove background noise in Audacity.
1. Play the audio file and find the hiss in the waveform.
2. Use the selection tool and highlight where the hiss is in the waveform.
3. Go to the menu bar Generate > Silence.
4. Click OK to remove the hiss.
Usually, however, the hiss is all over the audio recording, so this noise-removal solution might not suit your needs.

The Audacity Noise Reduction effect can be helpful in many situations. As the name suggests, it will reduce background noise from your audio, but it can work for unwanted city background noise, voices, traffic, hiss sounds, rumble and hums from home appliances, remove echo, and more.
Apply Noise Reduction to remove hiss from your audio recording, you must first get a noise profile from the audio.
1. Listen to the audio files to spot the hiss in the waveform.
2. Use the selection tool to highlight the part with a hiss and get a noise sample. You can use the Zoom in and out tool to better view the waveform and target just noise in your track.
(You can also select the entire track, click the noise profile button and analyze the noise profile of the whole track).
3. Go to Effect > Noise Reduction and click on Step 1 Get Noise Profile.
4. Repeat the “Get Noise Profile” path once more: Effect > Noise Reduction, but this time focus on Step 2.
5. Use the noise reduction slider to specify the volume to be reduced. Use the Sensitivity slider to reduce the noise. You can leave the default settings for the frequency smoothing band. However, if you change them, it is recommended to use lower settings for music and higher settings for the spoken word.
6. Always preview the audio while adjusting the settings.
The more noise reduction you apply, the more the noise reduction effect will distort your audio, so make sure you find a balance between noise and quality.
Try the next option if Audacity’s noise reduction effect was unsuccessful in removing hiss from your audio track.
A low-pass filter will help you eliminate high-pitched sounds in the audio clip by suppressing sounds above a specific frequency level.
Before adding the noise-reduction filter, you must know the frequency of the hiss.
1. Select the audio track.
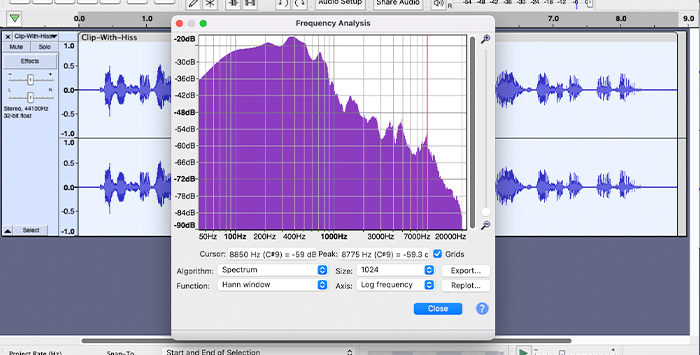
2. Go to Analyze > Plot Spectrum.
3. In the Frequency Analysis, you can observe a graphic. Frequencies go from lower to higher from left to right.
4. Hiss sounds tend to be on the higher frequencies, so check on the right side of the graphic.
5. A peak in the graphic means there’s a high pitch in that frequency.
6. You can take note of that frequency and close the window.
7. Select the track.
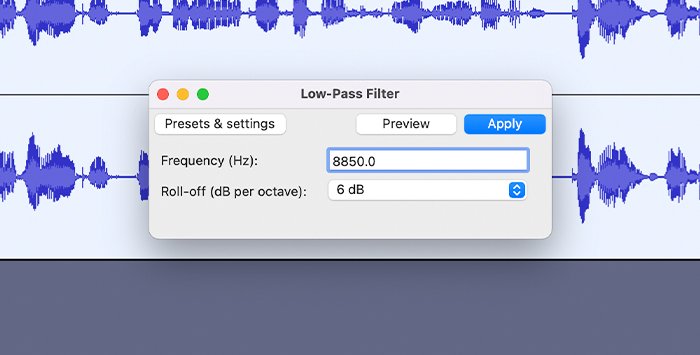
8. Go to Effects menu > Low-Pass Filter and enter a number below the frequency you want to attenuate.
9. Preview and click OK when you like the result.
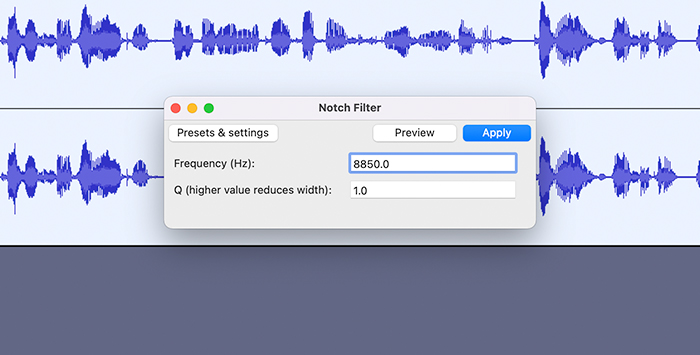
The last method is to use a notch filter. Like the low-pass filter, it’ll help you with noise reduction but without affecting too much of the audio track itself.
1. Select the track and go to Analyze > Plot Spectrum to find the frequency you want to minimize. Use the cursor to help you find the exact frequency.
2. Select the track and go to Effects > Notch Filter.
3. Type the frequency you noted in the Spectrum.
4. Preview and click OK when it’s ready.
Audacity usually does an excellent job at reducing background noise, but here are some tips to avoid unwanted sounds during recordings.
· Record audio separately from the video camera. Camera microphones are usually low-quality and can generate self-noise that is impossible to reduce.
· Avoid low-quality mics to prevent higher self-noise.
· Get a few seconds of room tone before you start recording. This will avoid having to remove noise in post-production.
· Use a Cloudlifter or similar inline preamps to add a clean gain to your microphones when possible. In this way, you can prevent the gain in the microphones and the self-noise from being recorded.
· Record audio using the correct cables and connectors. Incompatible cables and adapters can cause hiss noises.
Audacity noise reduction is an excellent option for both beginners and professionals, as it has everything you need for basic noise reduction and audio post-production. Getting rid of background noise in Audacity is a simple, fast, and efficient way to improve the quality of your audio recordings significantly, from removing unwanted noise to enhancing the frequencies of an entire recording. So what are you waiting for? Go ahead and download Audacity today!


