T Mango
Aug 10th, 2022If you’ve ever tried sampling music in the 1980s, you’d know that a decent quality sampler (i.e., using hardware) used to take up a lot of desk space and cost the equivalent of a small car.
Oh, how things have changed!
Software samplers today are powerful and inexpensive, and the samplers available in Logic Pro X (nowadays simply referred to as Logic Pro) are no exception.
With Logic Pro version 10.5, new samplers were introduced. Using these, you have access to impressive tools allowing you to generate, edit, and play different samples before adding them to your music or audio project.
In this post, we’ll step through some common features of the most accessible and easy-to-use of Logic Pro’s samplers—Quick Sampler.
There are several ways to load an audio file into Quick Sampler. We’ll look at three commonly used approaches: presets the Recorder, or an instrument track.
For the first two approaches, you’ll first need to have Quick Sampler open:
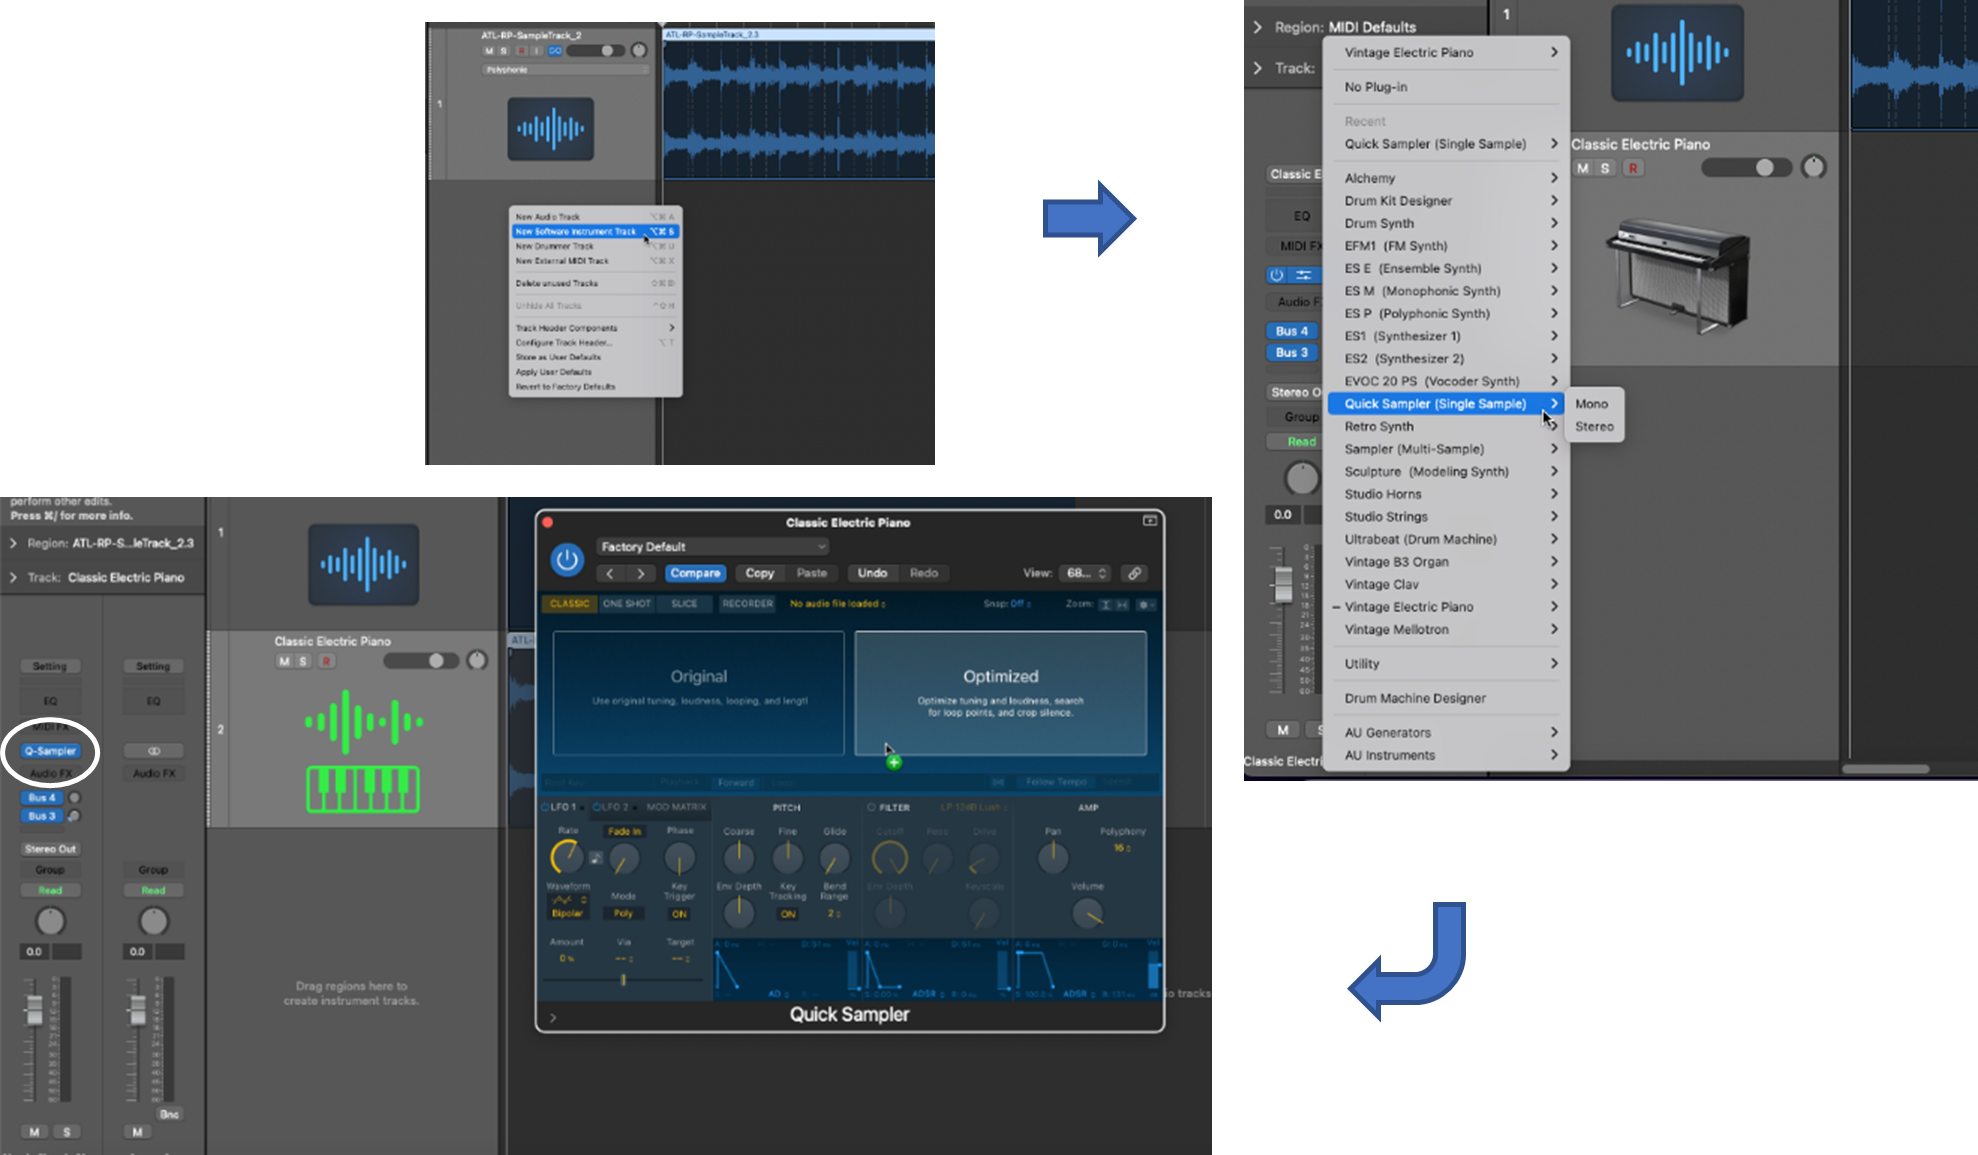
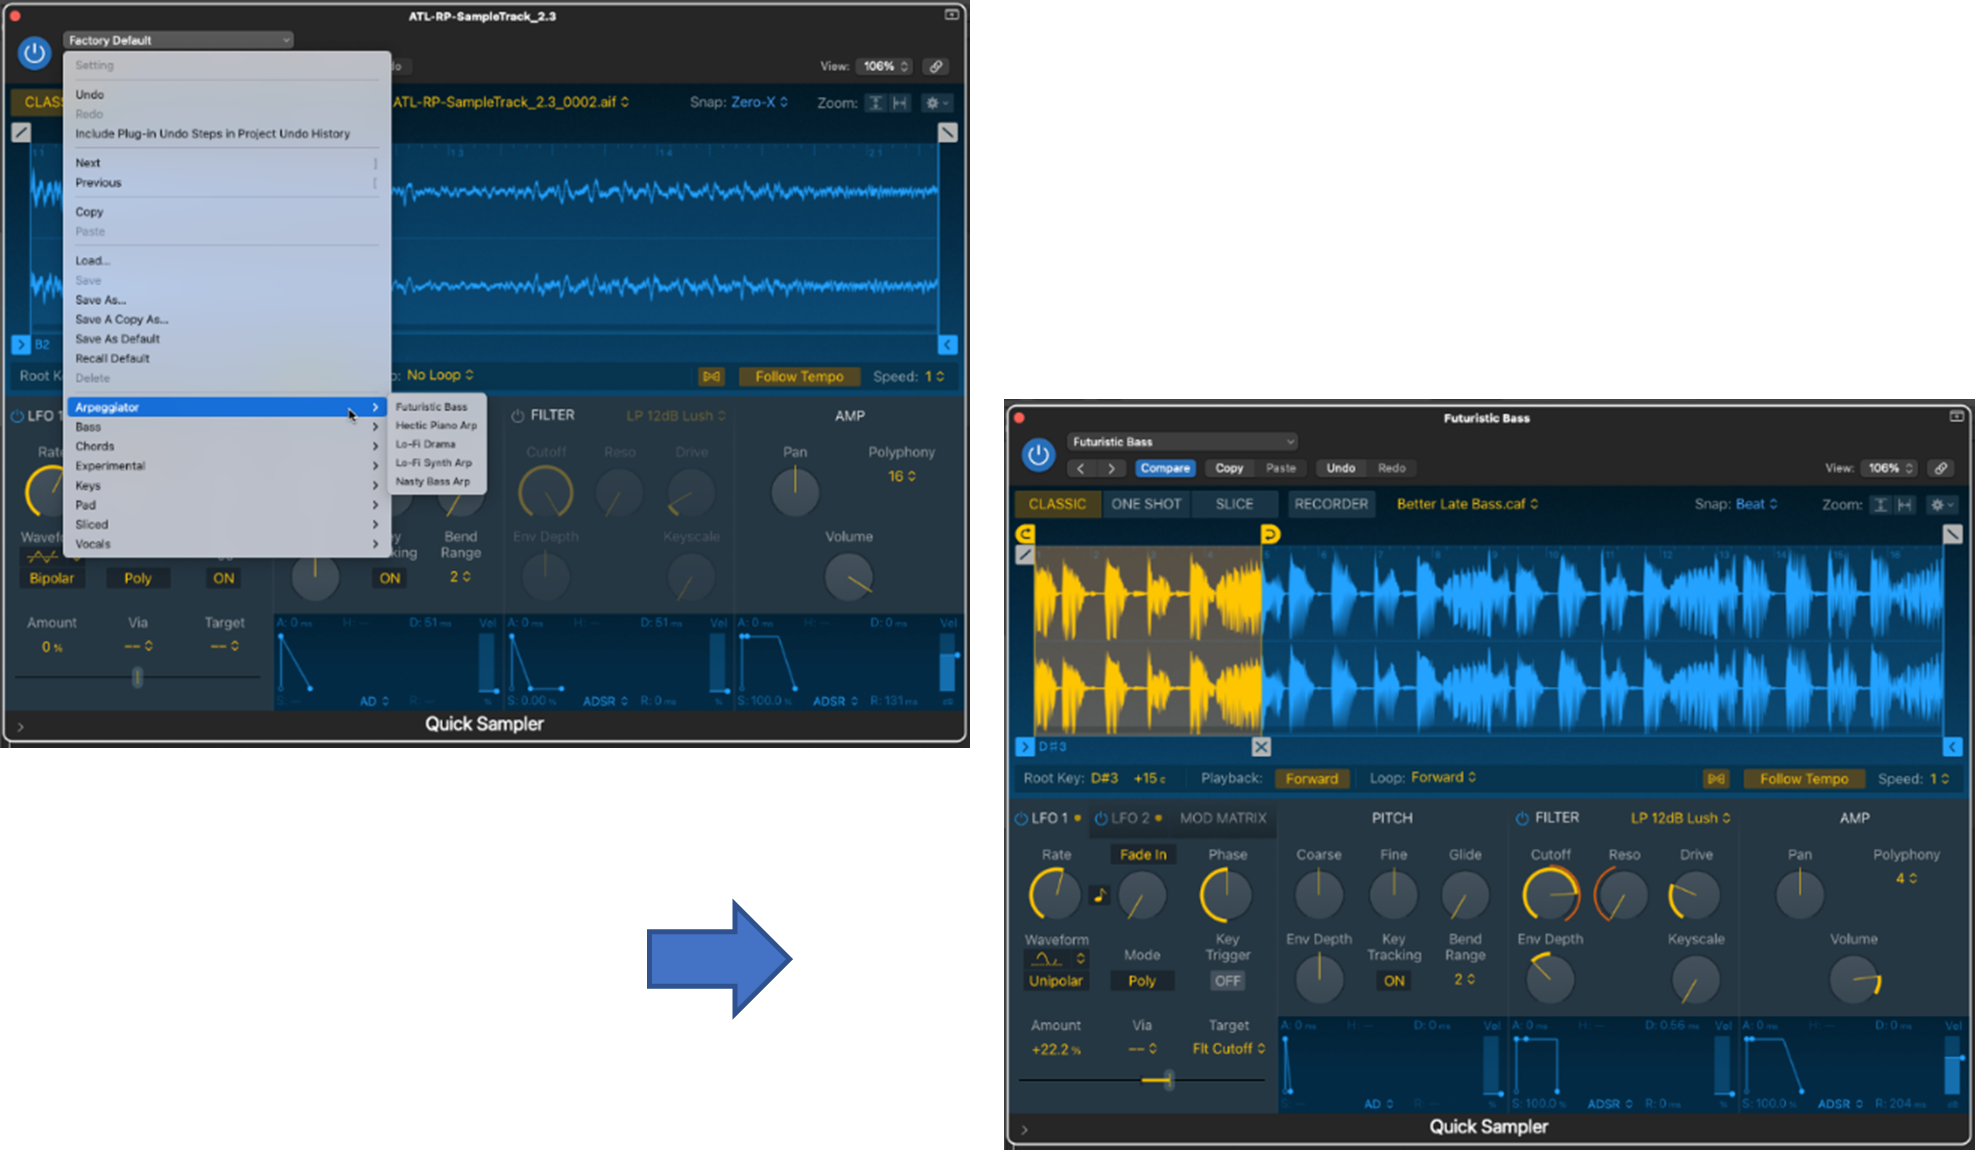
Quick Sampler has a range of preset sounds that you can use for your samples.
Step 1: Go to the menu at the top of the Quick Sampler window.
Step 2: Choose the type of preset that you want.
The selected preset will be loaded and ready for editing.
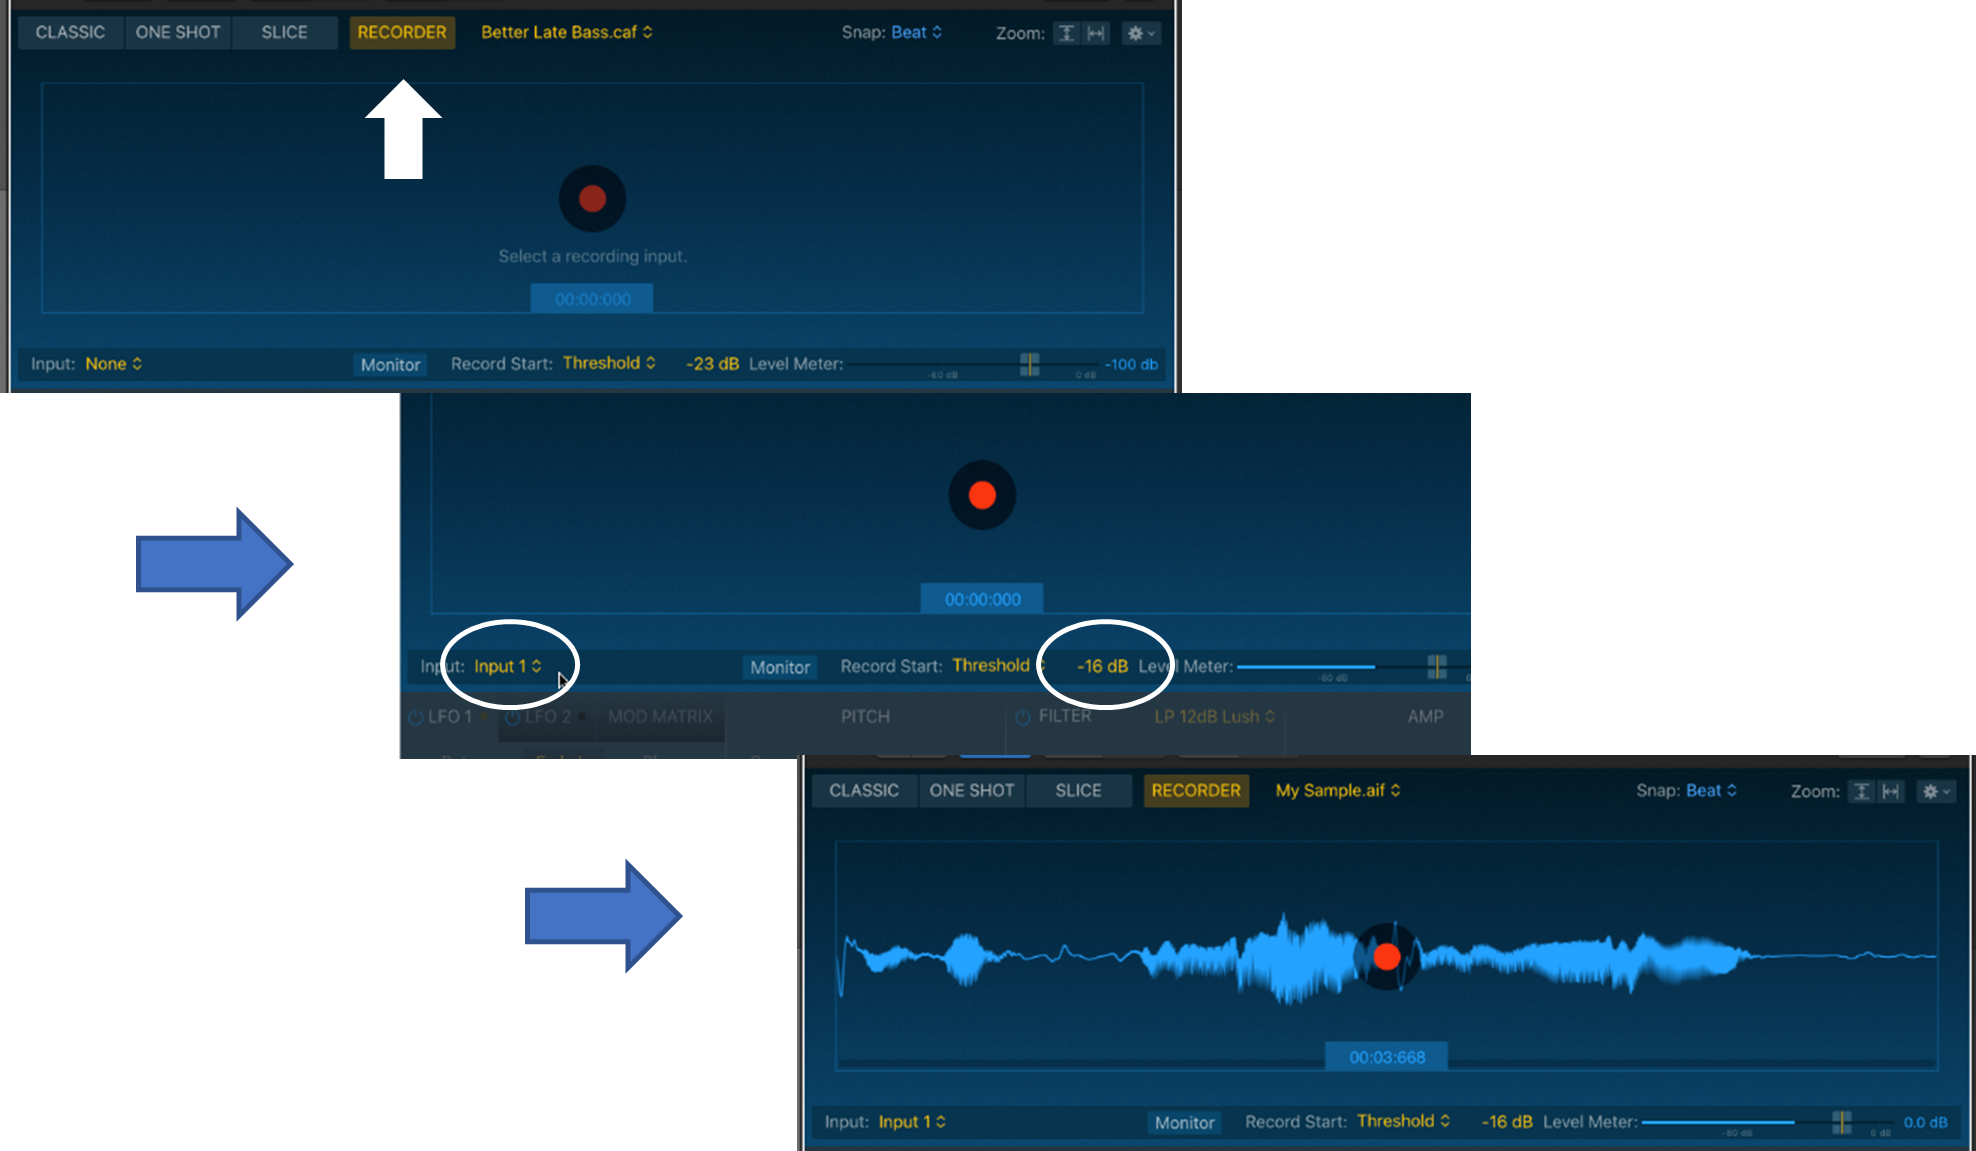
You can record audio directly into Quick Sampler using its built-in recording feature.
Step 1: Select the Recorder mode.
Step 2: Set the input.
Step 3: Adjust the recording threshold.
Step 4: Record your audio file.
The recorded audio will be loaded and ready for editing.
While the previous two methods of loading audio are done from within Quick Sampler, you can also load an audio file directly from the Tracks area of Logic.
If the audio track that you wish to sample is already in the form of a loop, then it’s ready to be loaded into Quick Sampler (go straight to step 4 below). If not, you’ll need to edit (i.e., trim) your audio track to create a loop.
Step 1: Upload an audio file from its source location (e.g., on your computer drive) to the Tracks area of Logic
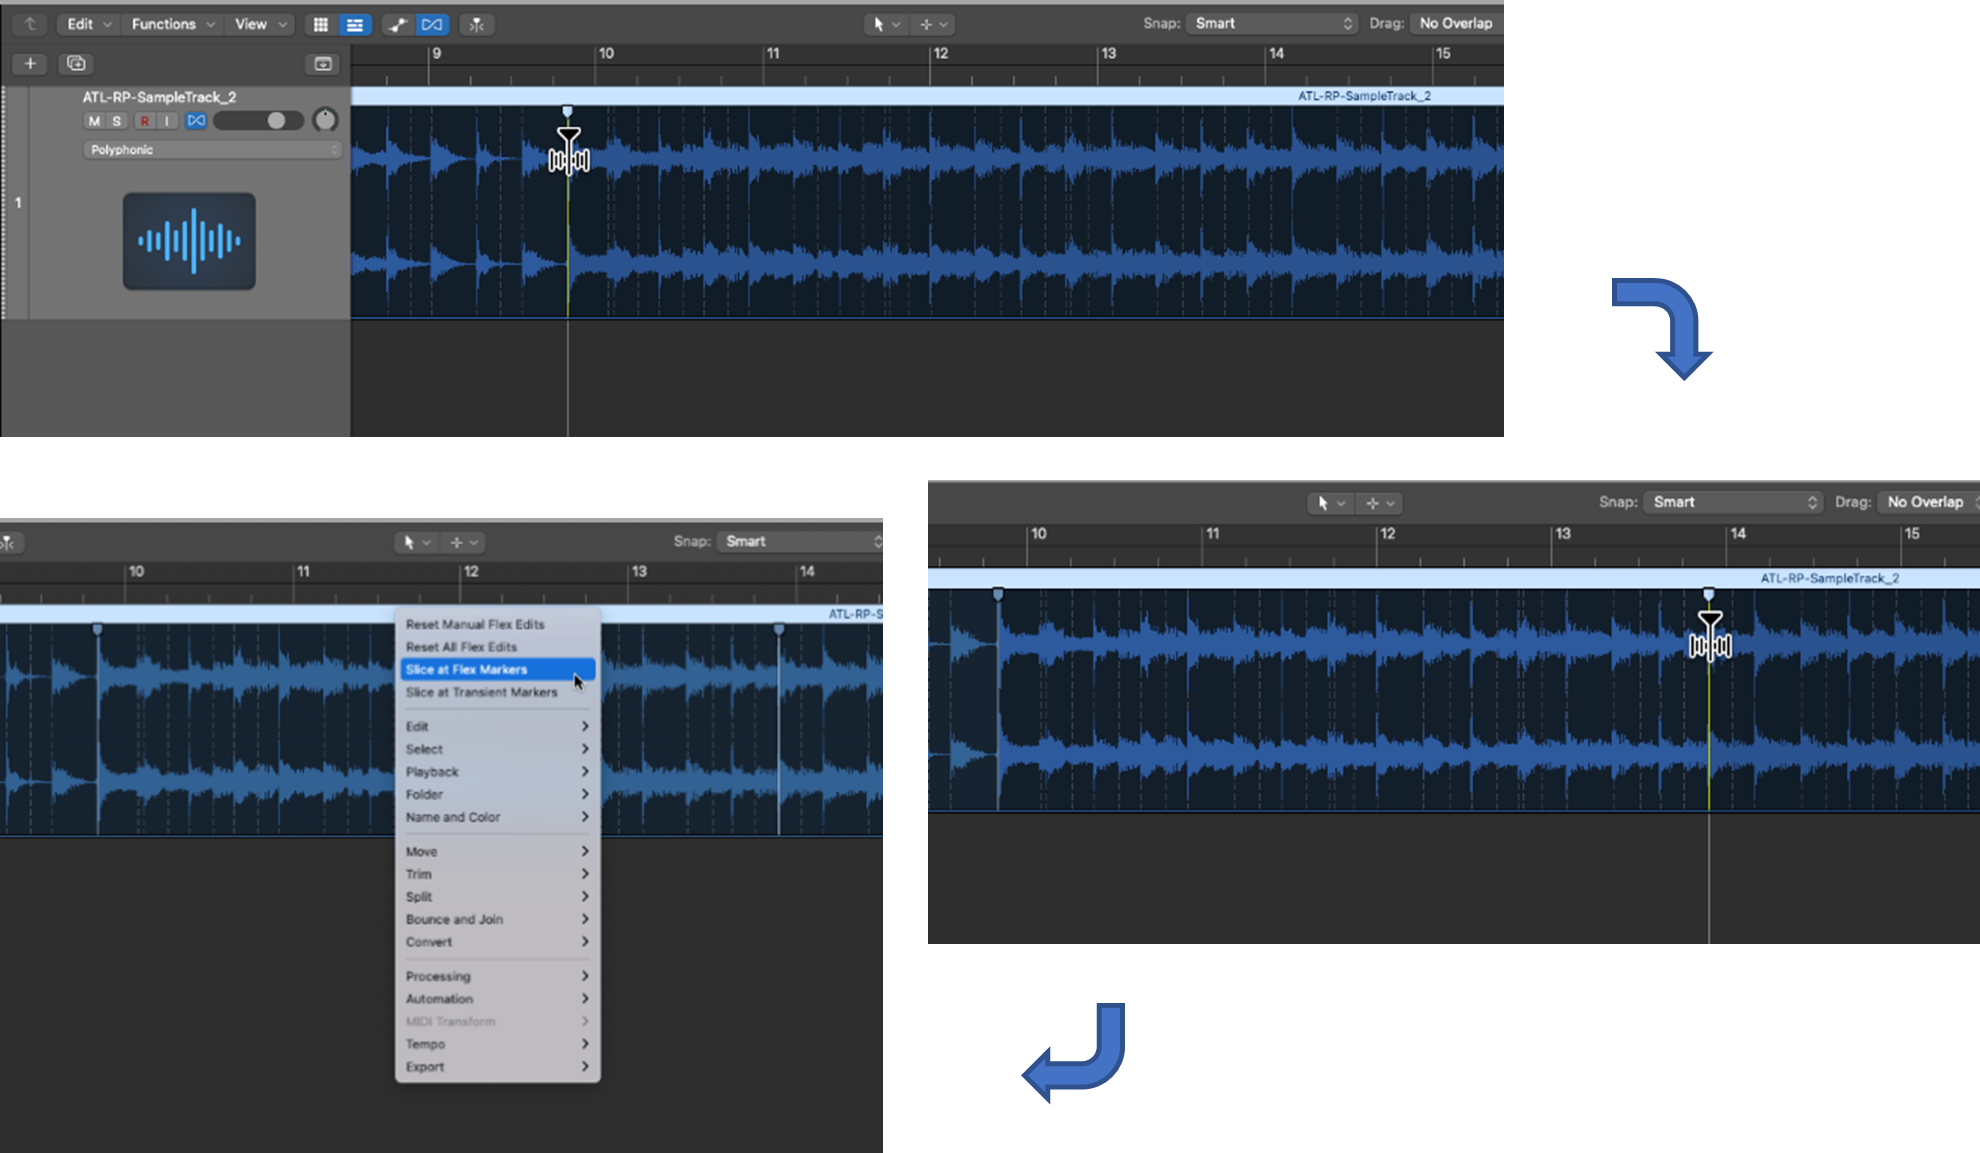
Step 2 (optional): Use Logic’s Flex Time to identify the transients in the uploaded audio track
Although optional, identifying the transients, this step will help you know where to trim your audio track to create a loop for sampling.
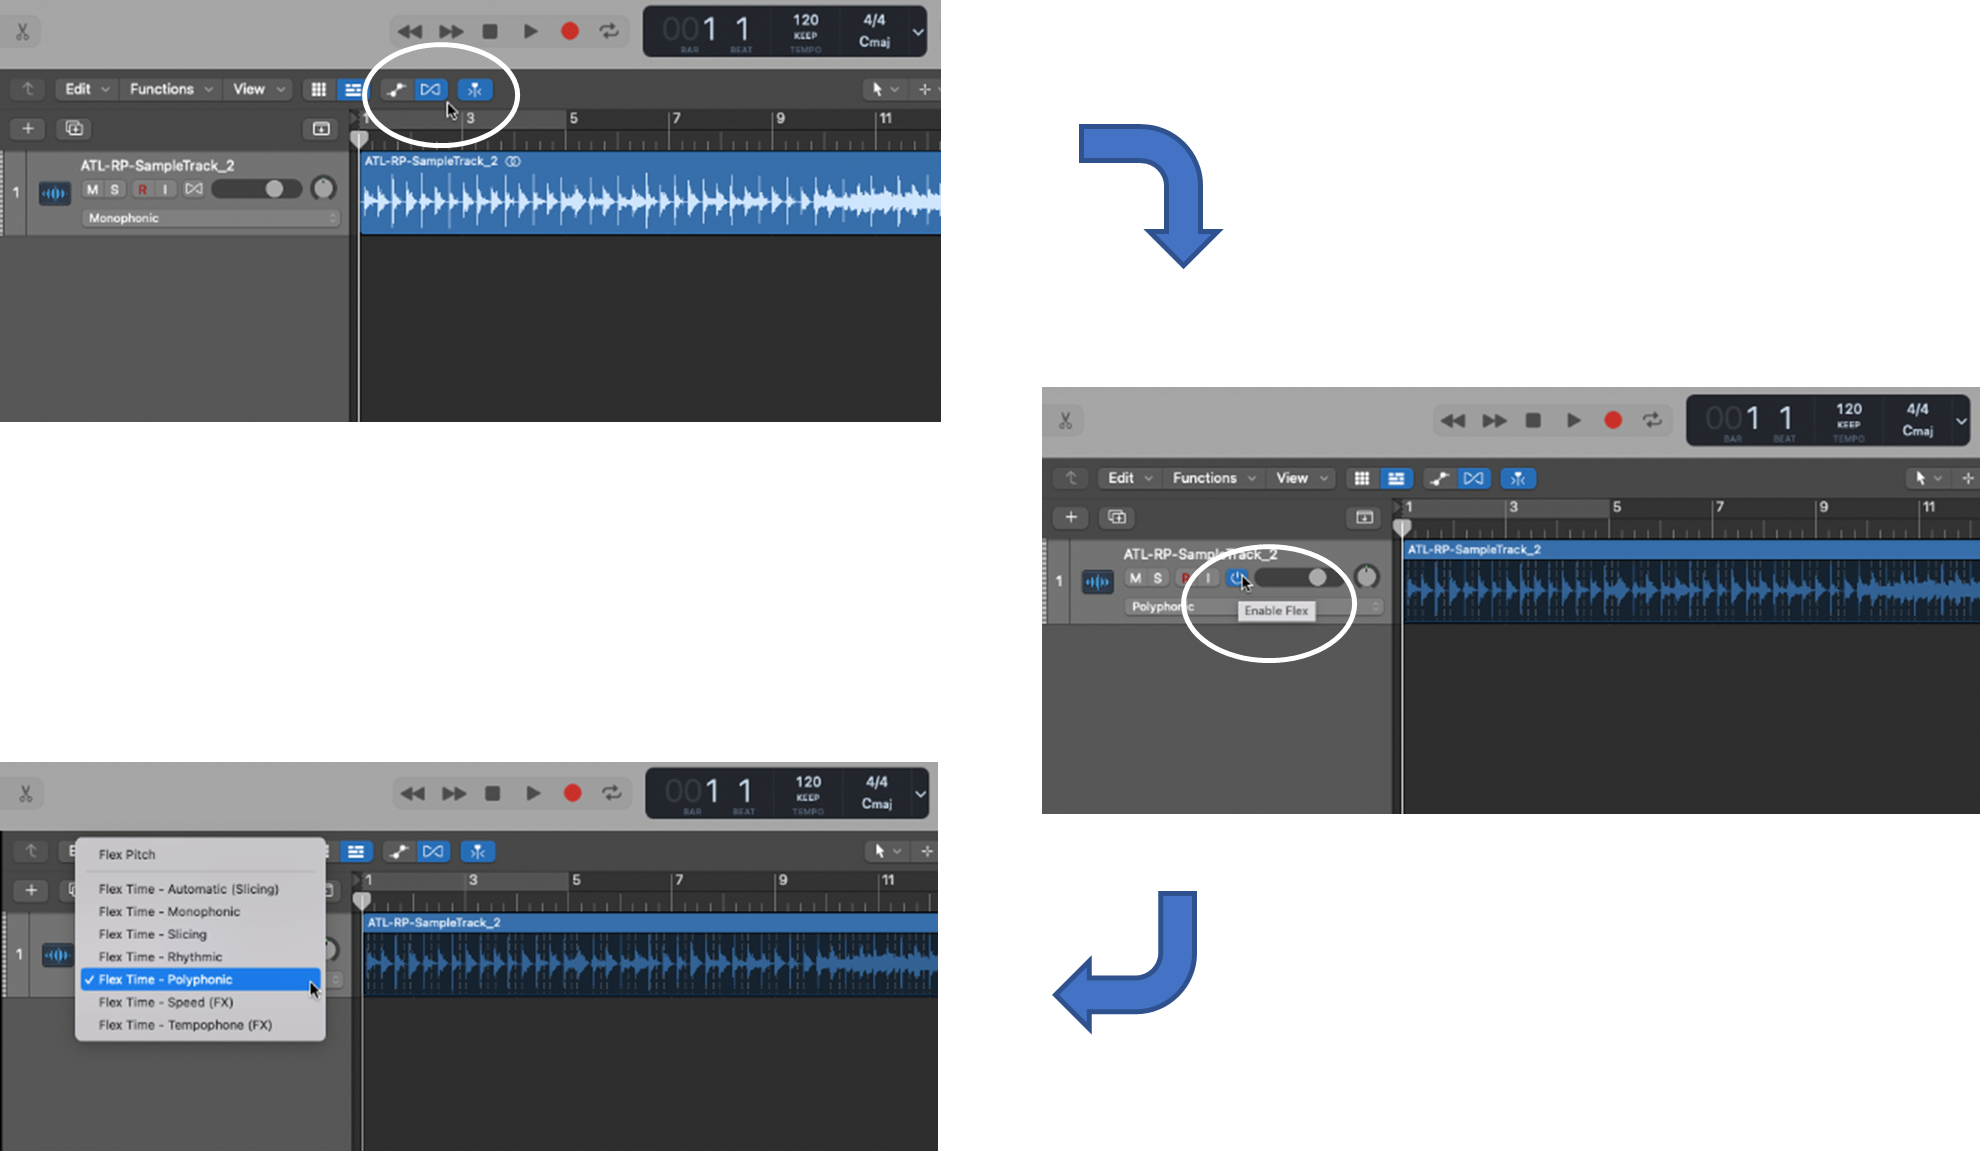
Step 3: Select and trim an audio region to create a loop
After you’ve created your loop (or if you already had a loop to start with), you’re ready to activate Quick Sampler.
Step 4: Upload your loop into Quick Sampler

You’ll notice that we chose Quick Sampler (Optimized). You can also choose Quick Sampler (Original). The difference between these is:
In our example, we’ll use Quick Sampler (Optimized) to take advantage of its optimizing capabilities.
Once you’ve loaded your loop into Quick Sampler using any of the above methods, it’s time to listen, explore, and edit to create your sample.
First, some Quick Sampler preliminaries.
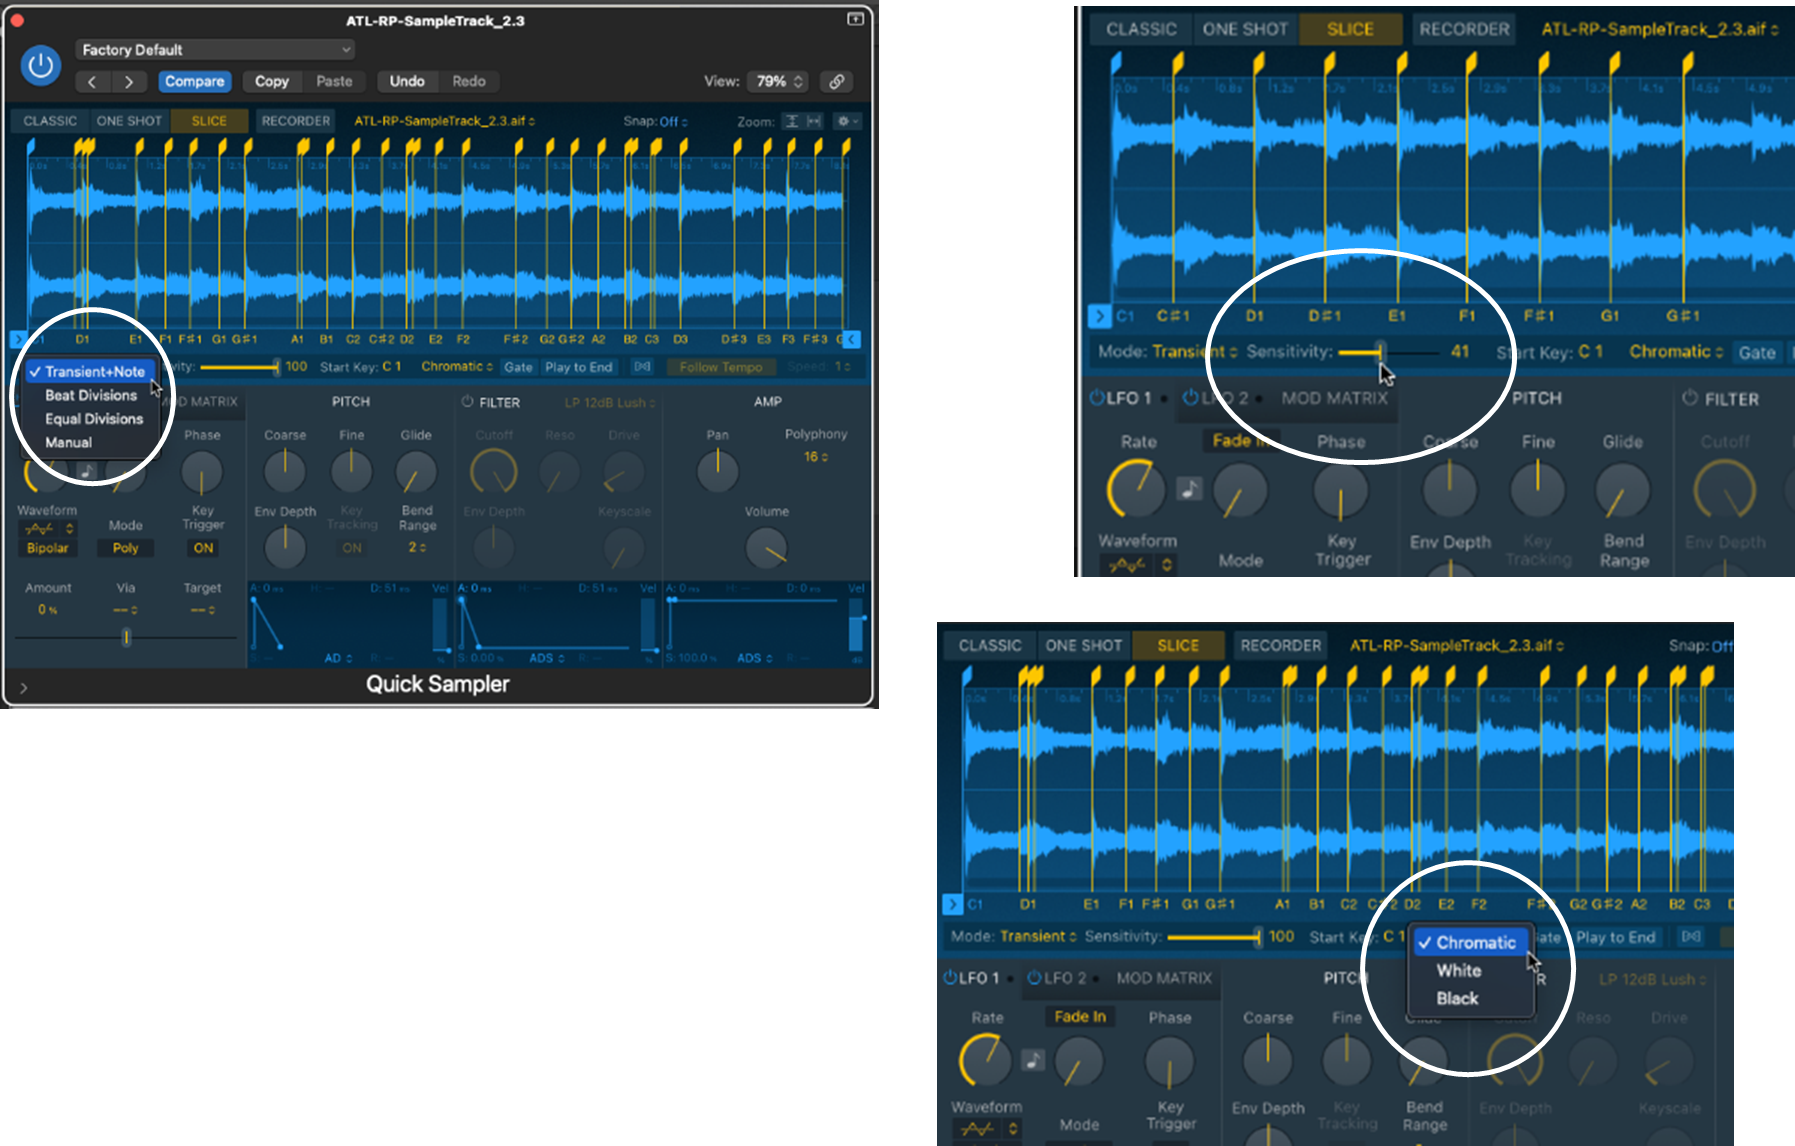
There are four modes in Quick Sampler:
As we’ll see, the slice mode is very useful for analyzing and editing your sample to isolate a segment that you’re interested in, or to divide your sample into beat divisions when creating drum or percussion samples.
There are other useful parameters that you can use to modify your samples in Quick Sampler—we won’t go into detail about these but they’re worth being aware of:
There’s also a mod matrix pane, with LFOs, that allows you to control modulation parameters (e.g., oscillator frequency and filter cutoff).
Quick Sampler’s slice mode is a way of ‘chopping samples’ to create slices based on parameters that you set (e.g., transients). It allows you to extract a segment of interest from your original sample or loop.
There are three parameters that determine how slices are created and mapped:
In our example, we’ll select: Transient+Note mode, a sensitivity of 41, and chromatic mapping.
Once you’ve set your slice parameters, you can hear each slice by either playing its mapped key or by clicking the play button that appears below the slice.
Play the slices and listen to them—how do they sound?
Are you happy with the start and end points of the slices based on the parameters you’ve chosen?
If you are, then you’re ready to select one or more slices to form your sample. If not, you can edit existing slices or create new slices based on the characteristics that you want.
To edit a slice:
Step 1: Adjust the slice’s start and end points
Step 2: Play and adjust the slice
To create a new slice:
Step 1: Select new slice positions
Step 2: Play and edit the slice
Once you’re happy with your slices, you can:
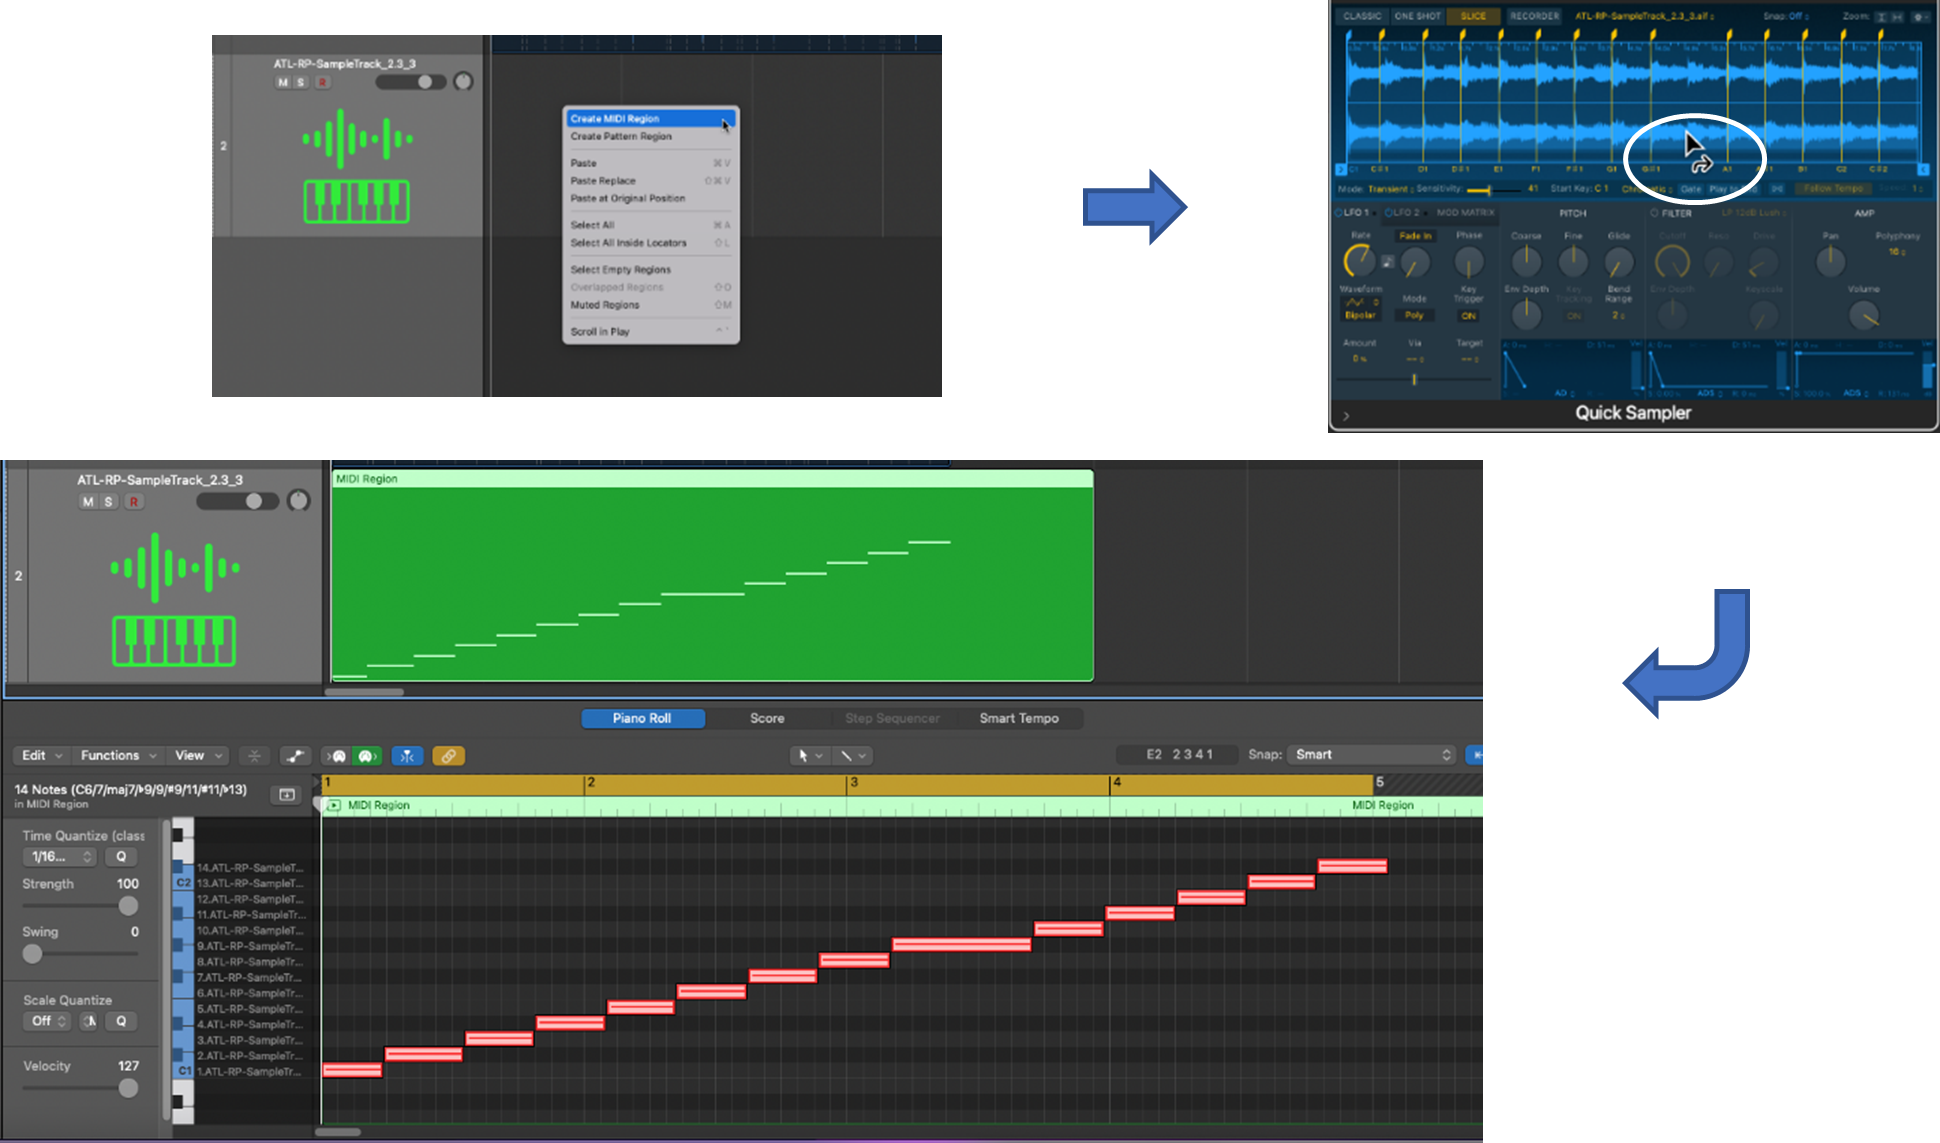
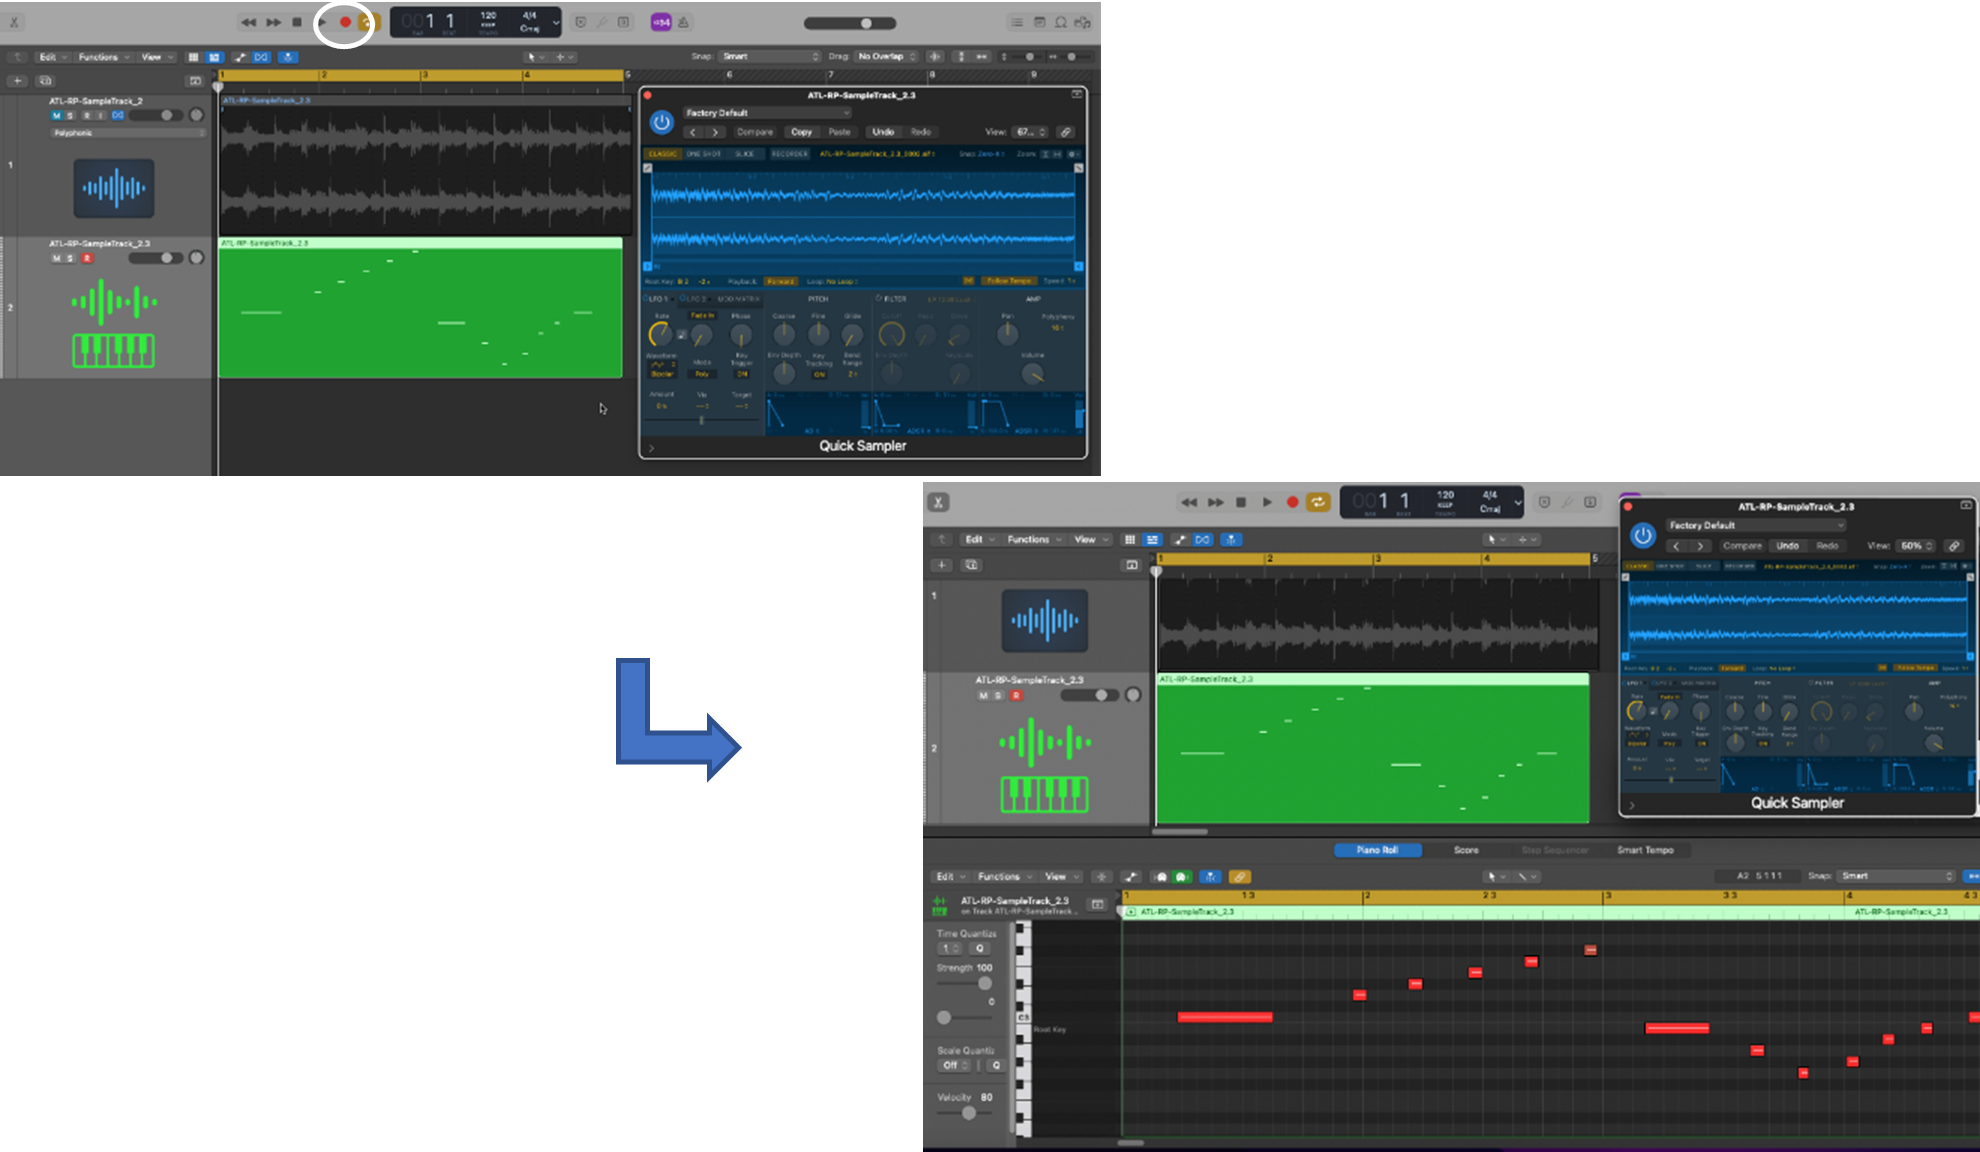
When a sample contains two or more slices, you can see the MIDI notes that are assigned to each slice in the sample. You can do this by creating a MIDI region for your sample.
Step 1: Create a new MIDI region
Step 2: Load the sample into the MIDI region
The sample’s information will be placed into the MIDI region—double-click on it to show its slices mapped to MIDI notes and the piano roll.
If you want a smaller sample containing only one or more of your slices, you’ll need to select those slices and crop the rest.
Step 1: Position the end-markers of the sample
Step 2: Crop your loop to create your sample
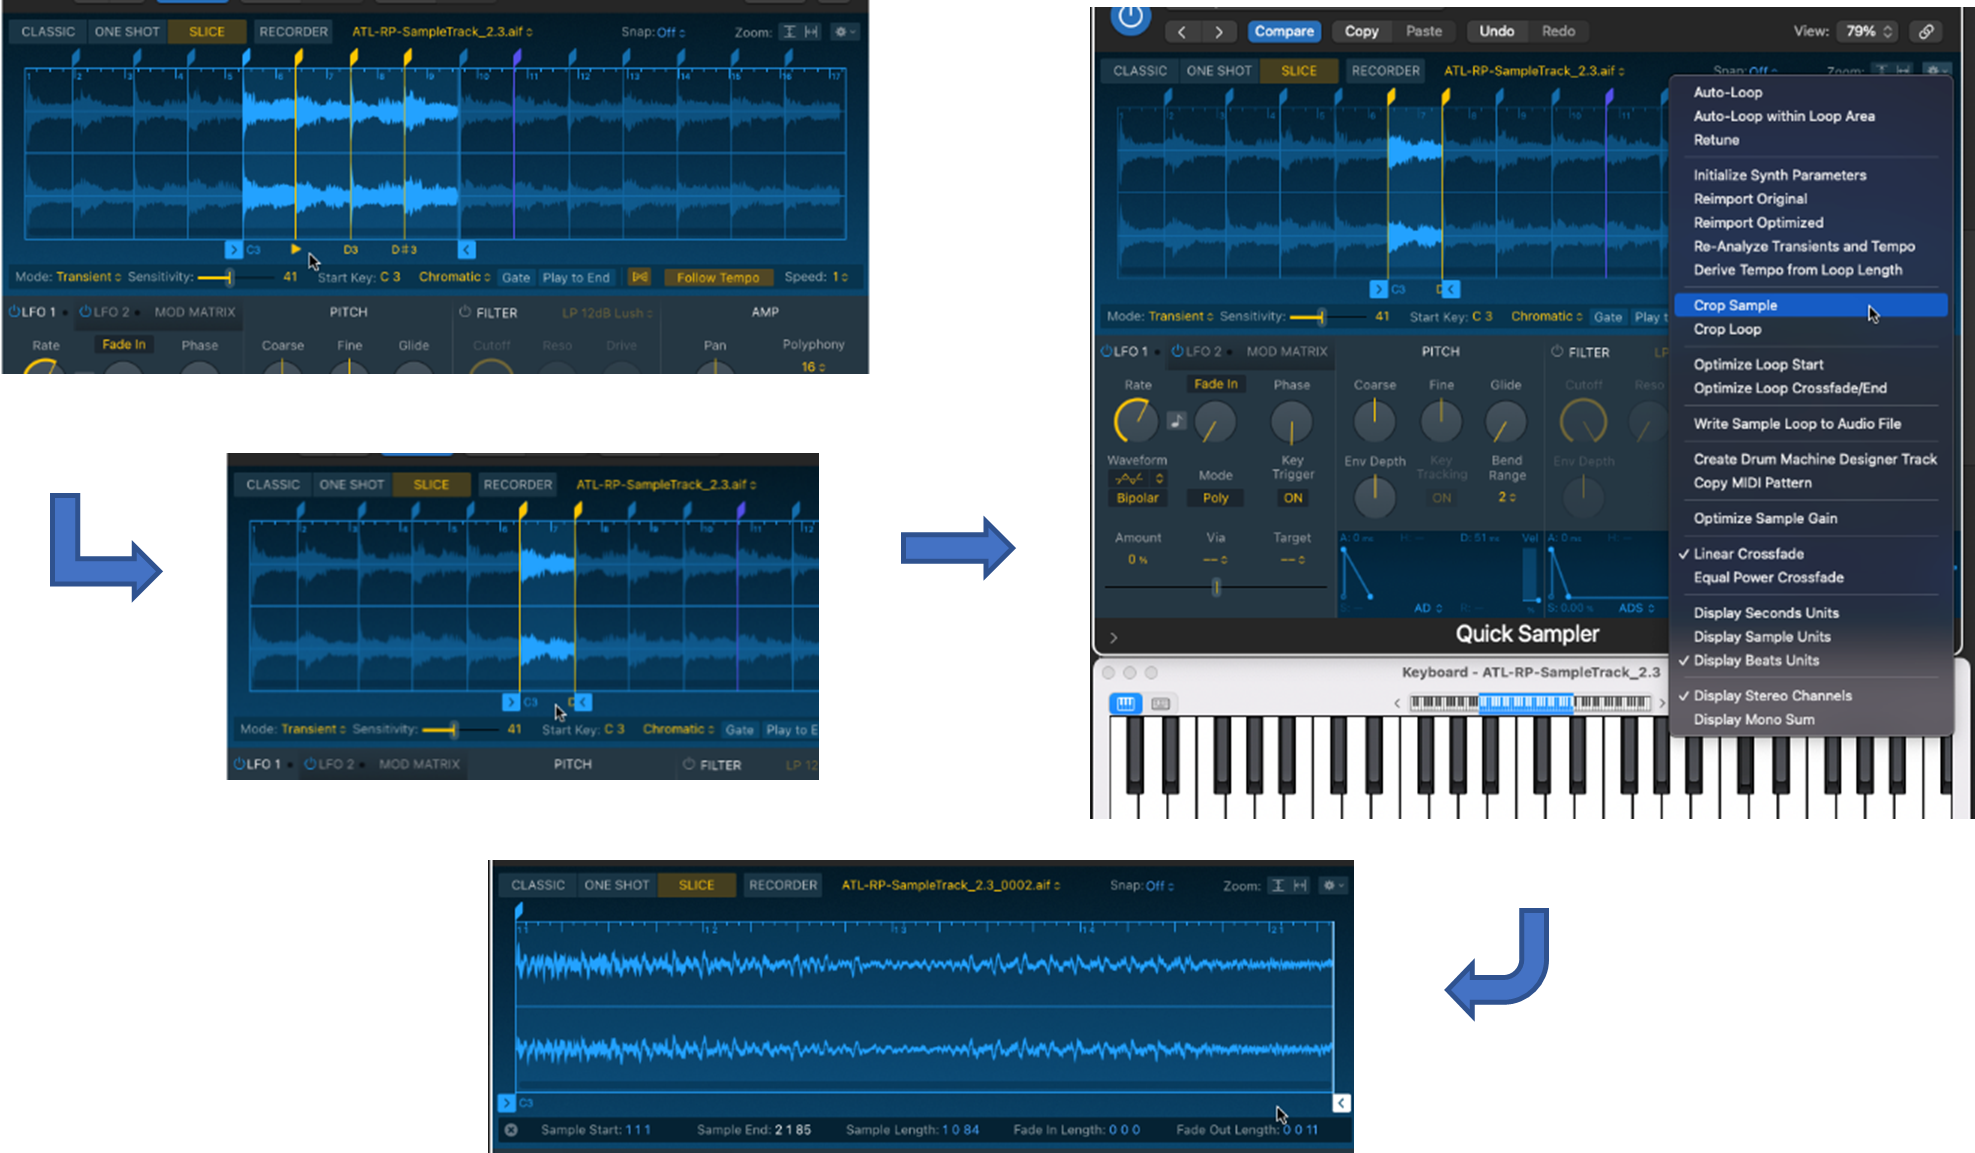
Well done—you’ve just created your new sample!
Now that you have your sample, you’re ready to hear how the sample plays when you vary its pitch and tempo. A good way to do this is to switch to Classic mode.
You can hear your sample across different notes as you play up and down the keyboard (i.e., attached MIDI controller or on-screen). Your new sample plays just like a new instrument—a sampler instrument.
As you play, however, you may notice that the pitch and tempo of your sample decrease and increase as you play lower and higher notes. If instead, you want only the pitch to change as you play different notes while keeping the same tempo, then you’ll need to set the Flex mode.
To set Flex mode to keep the same tempo:
Step 1: Locate and select the Flex icon
Step 2: Select Follow Tempo
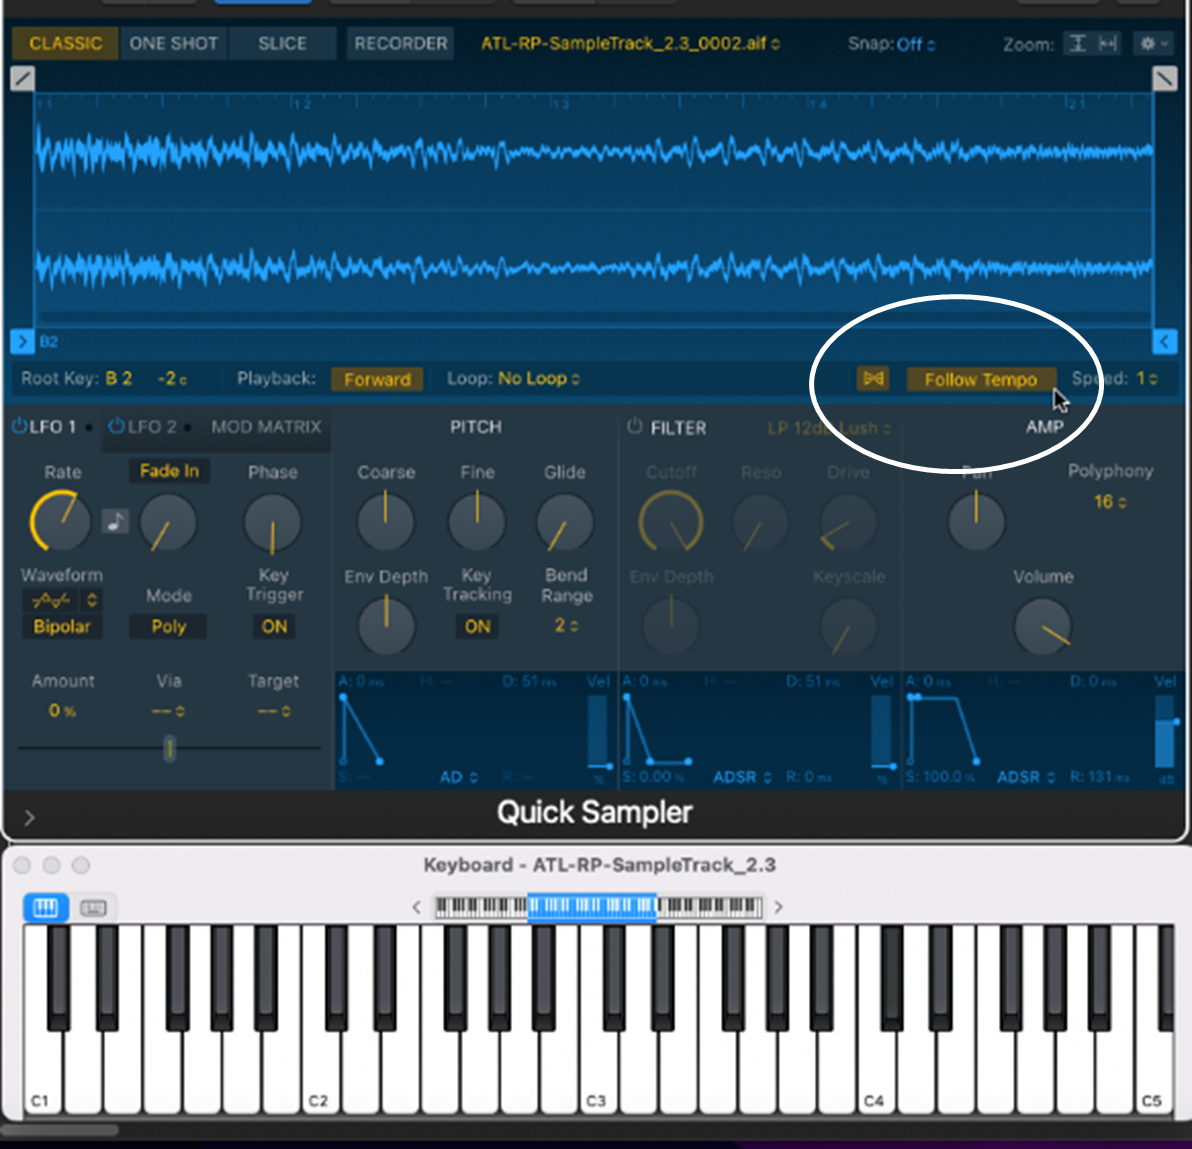
After you set the Flex mode in this way, when you play lower and higher notes your sample’s pitch will change but its tempo will stay the same.
Once you have a sample that you’re happy with, you can use it as a sampler instrument to create a new track in your project, i.e., a new sampler track.
In this post, we’ve stepped through How to Sample in Logic Pro X using Quick Sampler. It’s a powerful and versatile tool that allows you to sample music (or any sound) in various ways, adding scope and creativity to your song or project.


