Marco Sebastiano Alessi
Jul 24th, 2023
Needless to say, splitting tracks is a crucial skill in audio editing and music production. As an audio engineer or video editor, part of your daily job probably involves splitting tracks to cut sections, deleting bloopers, silences, retakes, or background noises, adding audio effects, and adjusting the volume levels of specific parts.
Luckily, you can easily split tracks in GarageBand, a digital audio workstation (DAW) that’s available for free for Apple devices, including Mac and iOS portable devices. Although GarageBand is one of the favorite DAWs among beginner music producers and content creators because it’s accessible and easy to use, don’t let its simplicity fool you! GarageBand is a powerful tool to easily record, mix and edit your music and audio files.
In today’s article, I‘ll explain how to split tracks in GarageBand on Mac and iOS.
Let’s dive in!
If it’s your first time using GarageBand on Mac, you’ll notice right away its interface is simple and easy to use. Let’s begin with the Mac tutorial to split tracks in GarageBand and create audio regions.
Go to the Appstore to download GarageBand for Mac and install it. Some Macs come with GarageBand pre-installed, so make sure to search for it on your installed apps before downloading it unnecessarily.
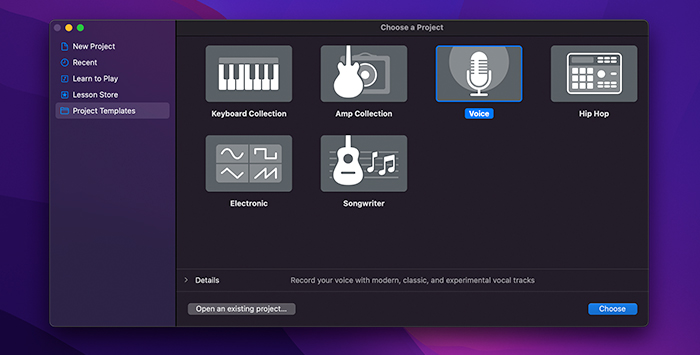
Once you installed GarageBand, run it and select New Project. Choose the option Empty Projects to import your recorded audio files or the option that best suits your project. If you’re recording a podcast from scratch, choose a voice project to start with the tracks ready for voice recording.
GarageBand offers different ways of doing things depending on your workflow, so importing audio and MIDI files to GarageBand can be done in different ways.
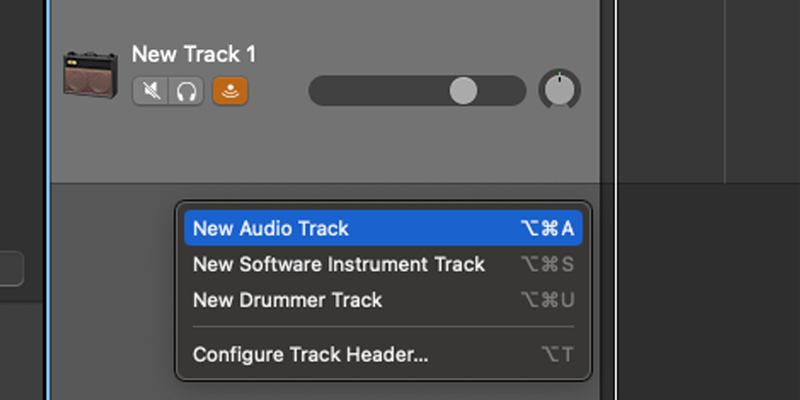
Create a new audio track if you don’t have one already in your empty GarageBand Mac session by right-clicking in the tracks area and selecting New Audio Track. Then right-click the new audio track and select Add Audio File from the dropdown menu. Browse the audio file in the import window and click Open. The audio file will be added to that track in GarageBand.
Another way to do it is via your Finder window. Open your Finder and locate the audio file on your computer. Click and drag the audio into your GarageBand session to add it to the current track.
If you are recording in GarageBand, ensure your microphone is designated as your input method and set the track ready to record. Hit the record button and start recording. You can stop and record as many times as you need. Don’t worry about making mistakes; you can remove the unnecessary takes when you split the audio track in GarageBand.
There are three ways to split tracks in GarageBand, and whichever you choose will depend on your workflow and preference. If you track split a region you did not want to split, you’ll be able to undo the action in a second, so don’t worry about it.
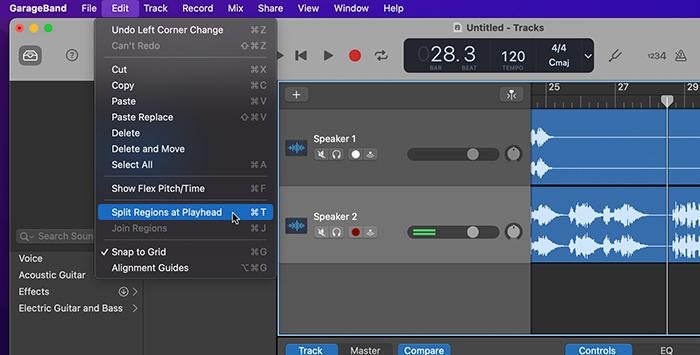
Move the playhead to the point where you want to split the track.
Select the track to highlight it. This is the vertical line that you see in the timeline.
Go to the Edit tab at the top of the menu bar and select Split Regions at Playhead.
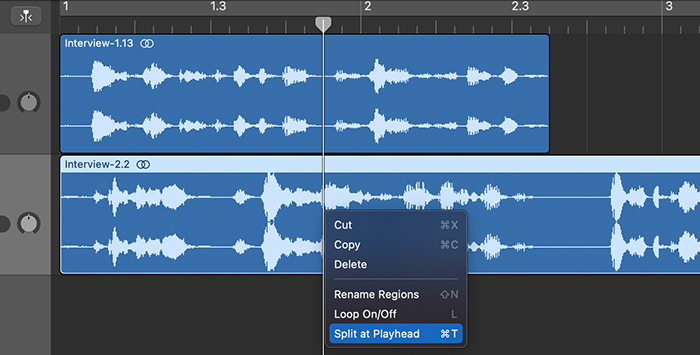
Place the playhead exactly where you want to split a track.
Highlight the desired track to split.
Right-click on the selected track and choose Split at Playhead from the dropdown menu.
In the track you want to split, move the playhead to the position where you need to split.
Select the track you want to split.
Press Command + T.
To quickly do multiple splits in a track, move the playhead to a split point and press Command + T and repeat the process. It will be faster than going to Edit > Split Regions at Playhead.
When you split a track in GarageBand, you can move the audio or midi region to a different part on the same track, move it to a new track to create multiple tracks or delete it entirely from the project.
Nowadays, creating new beats or recording a podcast on your mobile phone is easier than it’s ever been.
GarageBand is available for portable iPhone devices, offering a magnificent tool for those who are always on the move or recording interviews outdoors. The following steps to split tracks will work on all iOS devices.
Go to the Appstore on your iOS device and download the GarageBand app for iOS. Wait for it to install, then launch the app on your device.
The mobile app of GarageBand allows you to import audio from your device using the Files app, iCloud Drive, or your Mac.
To make things easier, move all the audio and MIDI clips you want to work with to your iPhone’s GarageBand File Transfer folder. In this way, the files will be visible from the Files tab of the Loop Browser in iOS.
The first thing you need to do when importing clips into GarageBand iOS is set the song’s length to Automatic. If you omit this, the imported clip will be cut to the current song length.
Open the Tracks view by tapping the Tracks button, then tap on the Loop Browser in the control bar (a circle one on the top right corner).
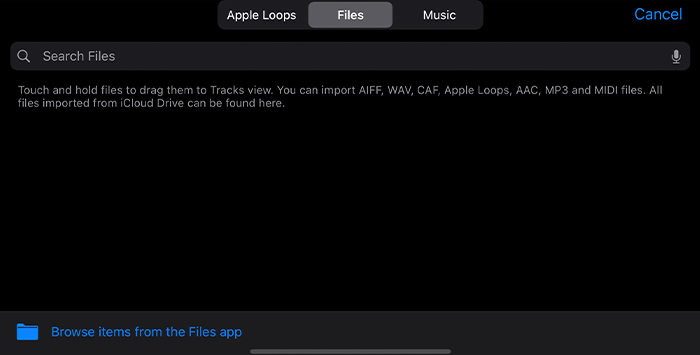
On the Loop browser, tap Files to find clips within the GarageBand File Transfer Folder. Or you can tap Browse items from the Files app if it’s in a different folder.
Tap the audio file to preview it, and when you’re ready to import, simply drag the audio or midi to the Track view.
Splitting tracks using your iPhone is very simple and intuitive.
Highlight the track you want to split by tapping on it.
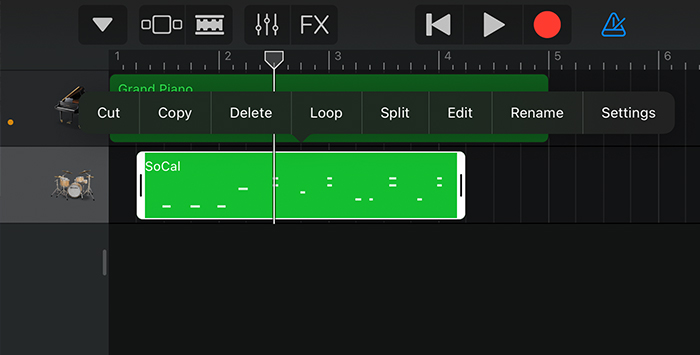
Tap it once more to show more actions and choose a split track option. The split marker with a scissors icon indicates you are in split mode. If you’re not ready to split, you can cancel by tapping outside the audio region.
Tap and drag the playhead to the position where you want to split the track into two separate audio regions.
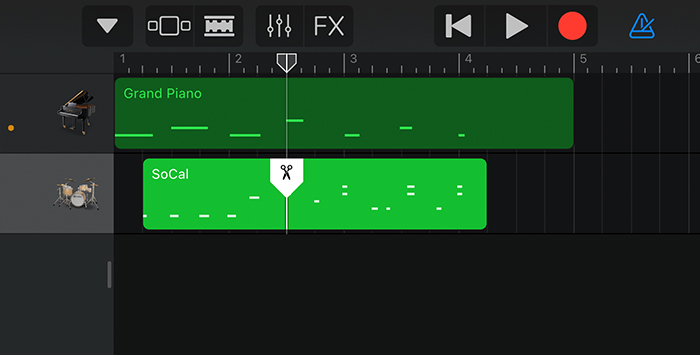
Tap the scissor icon and drag it down to split the track into two regions.
You can move the split icon to a different position to do a new track region.
Now that your track is split into multiple audio regions, you might wonder how to make each MIDI or audio file region into separate tracks. This will help you add effects and edit audio regions individually without affecting all the existing tracks and audio regions.
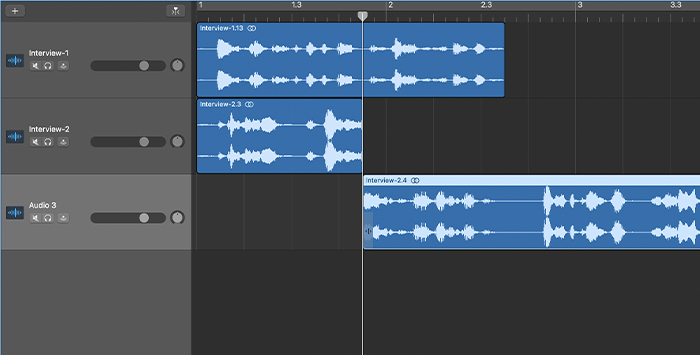
Create as many tracks as the regions you want to split into separate tracks. On Mac right, click the track header and choose New Audio Track. On iPhone, click the + button in the tracks area.
Select an audio region you want to move. Click and drag only the selected region to a new track and drop it.
Adjust the audio region in the new tracks to the correct position. You can move it wherever you want within the track region.
Repeat the process with all the audio regions you want to move, creating more audio or MIDI tracks and splitting new regions if necessary.
GarageBand is a simple software for music production and audio editing that allows you to record your voice, instruments, and virtual instruments, do basic editing like cutting, splitting, and trimming audio, and reorganizing tracks for creative purposes.
Its straightforward controls on both Mac and iPhone make GarageBand one of the best tools for splitting tracks, a skill that every music producer and audio engineer should master sooner rather than later.
Now that you’ve learned how to split tracks in GarageBand, you no longer have to worry about recording unnecessary background noises, long pauses, and silences. You have the tools to split regions and remove those unwanted sounds entirely or split segments into multiple sub-tracks to add audio effects independently.
Good luck!


