Marco Sebastiano Alessi
Jun 08th, 2023Out-of-sync audio is an inconvenience that happens all the time, even to the most experienced filmmakers. It’s a common issue when exporting audio-visual content from your recording device to a computer for the editing process.
It’s often better to record audio and video separately to be synced later in post-production. Most of the time, when filming an open scene, a lapel mic can be attached to the actor or actress, so the scene can be filmed with a camera from far away to capture the landscape. The dialogue would hardly be heard if you wanted to use the on-camera audio.
Luckily, professional video editing software come with features for synchronization, so today I’ll explain how to fix out-of-sync video and audio in Adobe Premiere Pro, using different methods depending on your workflow.
Let’s dive in!

Premiere Pro offers a few options for syncing audio, so I divided this guide into three sections to describe the most common methods to sync video and audio: merge clips, synchronize, and manual synchronization.
If you’re looking for a fast way to sync audio and video in Premiere Pro, the merged clip feature is your number one solution to do it in a breeze. Learn how to merge clips in premiere pro here.
The merged clip option won’t overwrite your original audio and video files, but it will create a new merged clip after synchronizing audio and video. If you have multiple video and audio clips that need audio synchronization, you can create a bin in your project panel and name it “merged clips,” so you can move all the merged clips there and avoid mixing merged clips with the original files.
Follow these steps to merge clips and quickly synchronize audio and video in a single process.
Because you might have a couple of video files that need synchronization, I suggest you rename your audio files before importing them to Premiere Pro. In this way, you can localize which audio tracks belong to which video clip.
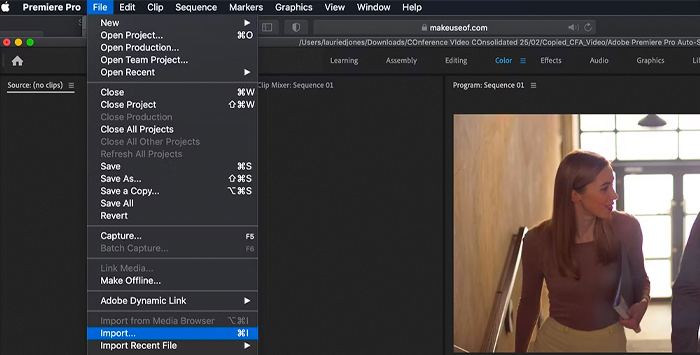
From the File menu, select Import and browse for the folder containing your audio and video clips. You can select multiple audio and video tracks to import. They’ll all appear on your Project panel.
Select the video and the audio track you want to synchronize first. Use Shift + Click to select adjacent audio and video or CTRL + Click for non-continuous clips. If you’re using MacOS, use CMD + Click to select separate video and audio clips.

Right-click one of the selected clips and choose Merge Clips from the dropdown menu.
You can rename the new merged clip in the Merge Clips dialog box. By default, it will have the original name and “-Merged” at the end.
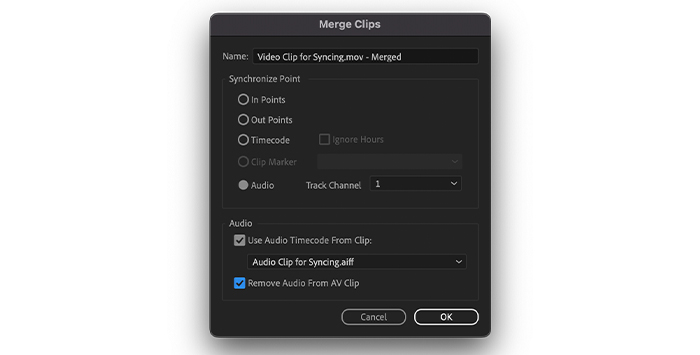
After renaming your merged clip, you can choose a synchronization point. Premiere Pro gives you the following options:
In Points will use a sync point based on an in point.
Use Out Points for audio syncing based on the out point.
Timecode syncing audio and video based on a separate audio timecode between the clips.
Clip Marker will sync both audio files based on numbered clip markers. This option will only be available if all component clips have clip markers.
Audio will synchronize and merge clips based on a reference audio track.
Select the Audio option and choose the camera audio track as the reference track in Track Channel.
In the Audio section, mark the Remove Audio From AV Clip checkbox. This will automatically delete your reference audio track and leave only the video and synchronized audio tracks.
Click OK to close the Merge Clips window.
Your merged clip will show on the Project panel with your chosen name.
Doing this from the Project panel will allow you to have the clips organized and ready to create a new sequence, so you won’t have to worry about audio clip synchronization later in your editing process.
You can merge clips from your timeline if you’re already working on a project and forgot to sync video and audio earlier.
Select the video track with the reference audio clip and the audio clip that you want to synchronize. Make sure the clips are in different tracks in the timeline.
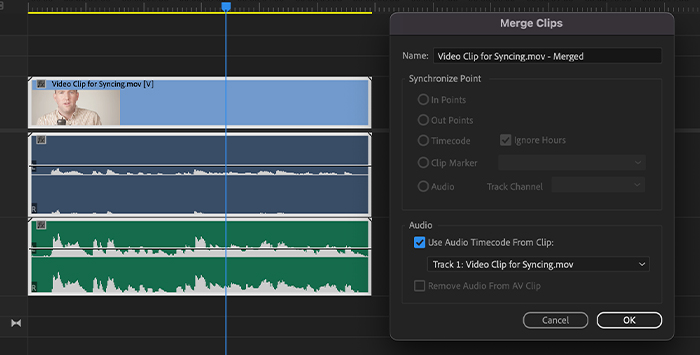
Right-click the clips and select Merge Clips. Choose Audio as a synchronization point and select the video clip audio track in the track channel. Remember to choose to remove the audio from the AV clip.
The new clip will be in the Project panel, so you must replace the new sync clip with the ones on the timeline. Just delete them and add the previously merged clips to your current sequence.
Adobe Premiere Pro has another feature called Synchronize, which is another straightforward method you can only use from the timeline. The difference here is that Synchronize won’t create a new merged clip in your Project panel; instead, every change will only occur in the active sequence.
If you want to use the same clip in different sequences, you must synchronize the clips on each timeline or create a merged clip after synchronizing.
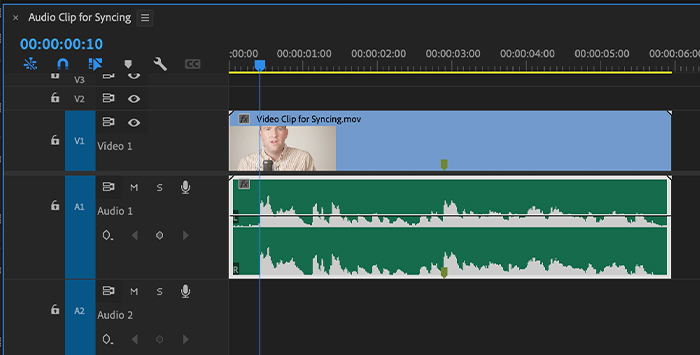
Create a new sequence or choose an existing one and arrange your audio and video clip in the timeline. The audio must be on a separate track, one above the other and not the same track next to one another.
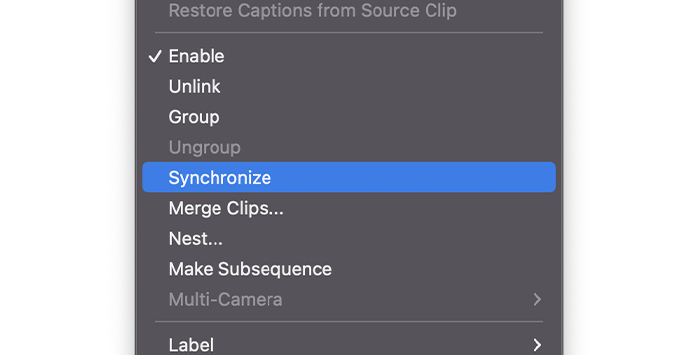
Select the arranged clips in the timeline, right-click on any of them, and choose Synchronize.
When the synchronize dialog box launches, you’ll need to choose a synchronizing point: based on the clip starts, the clip end, a timecode, a marker, or an audio track reference.

To have Premiere Pro automatically analyze both audio tracks and synchronize them, choose Audio and select the video clip track in Track Channel. Click OK to close the window.
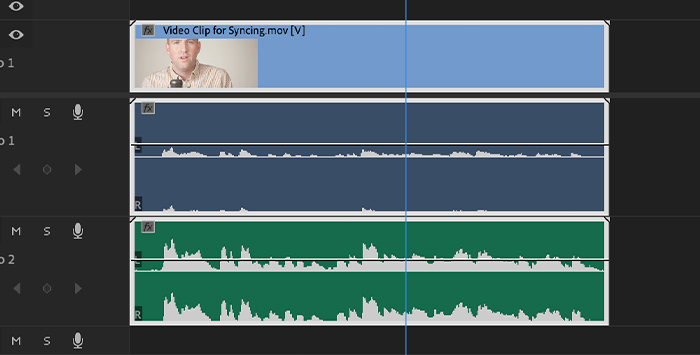
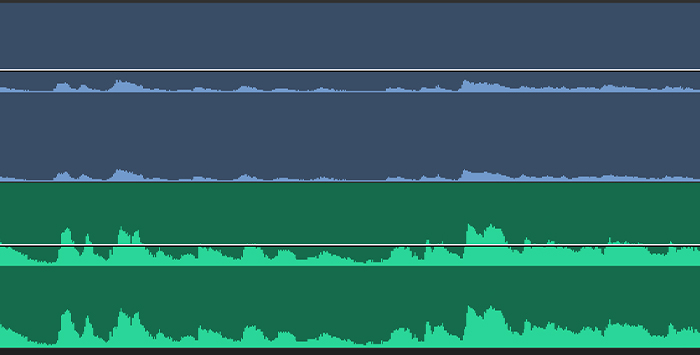
You’ll notice how the clips will automatically align. You can tell by looking at the audio waveforms that they are synchronized.
To delete the reference audio clip from the video track, select it and press Delete or Backspace.
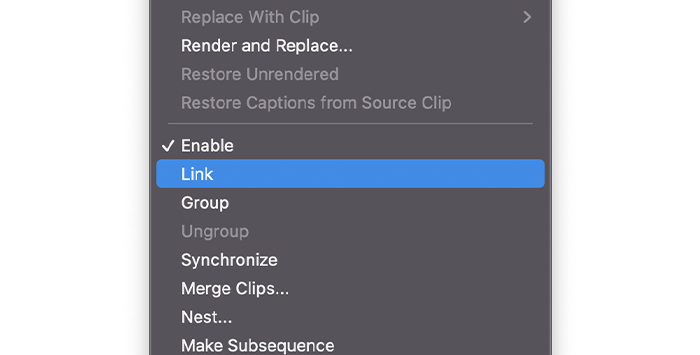
Link the clips, so they won’t separate if you move them across the timeline.
Select the clips in the timeline.
Right-click on them and choose Link from the dropdown menu.
Your audio and video clip will be linked, allowing them to re-arrange in the timeline.
Adobe Premiere Pro uses automated features to read and analyze the audio waveform and adjust it in the best possible way. However, even Premiere Pro sometimes makes mistakes, so the result might still be out of sync, and you’ll have to synchronize the clips manually in the timeline.
This method will also help you if a clapboard, clap, or other sound is not used during recording, and you’ll need to find another reference or visual cue to sync clips manually.
In the Timeline, stack the audio and video files on top of one another.
Zoom the timeline to expand the tracks and look at the audio waveforms with more detail.
Look for a spike in the audio waveform in both audio tracks. Listen to the audio to make sure it’s the same sound.

When you locate a good reference point, select the clip and hit the M key to create a marker. Do the same with the other clips.
Move the clips until they’re aligned with the markers you created in the previous step.
Play the clips and listen to ensure both audio clips are in sync with the video. It could take a while to find the perfect spot.
You can add multiple markers if you find different spikes that coincide during the clip and try to align them all for better synchronization.
Select the reference track and delete it to keep your timeline in order. Remember to link your synchronized clips when you’re done to avoid losing your work.
Since it’s possible to have multiple audio files for a single video clip, Premiere Pro allows you to merge up to 16 soundtracks in any combination of mono, stereo, and 5.1 audio. Considering a single mono clip equals one track, stereo audio includes two tracks per clip, and surround 5.1 contain six tracks.
To merge multiple clips, select all the clips that belong to the video clip you want to sync sounds with and arrange them in the timeline. Remember, you can only have one video clip with multiple audio tracks. If you need to sync several video files, you’ll need to synchronize each video individually.
The process is the same: select all the tracks, choose Merge Clips or Synchronize from either the Clip menu or by right-clicking, pick Audio as a Synchronization point, and select the reference track.
Be careful when selecting the reference track. Listen to all tracks in the timeline and identify your reference track from the moment you arrange them in the timeline.
With automated features, Adobe Premiere Pro allows you to synchronize clips quickly and efficiently. To make things easier for future recordings, always remember to have clear and loud audio recordings and a visual cue to use as a sync point when syncing the mic and camera audio.


