JG McQuarrie
Nov 03rd, 2023
There are many different types of tools that can be used in music production. Compressors, limiters, and gates all have different roles when it comes to achieving a particular sound.
Getting a handle on what they are and what they do is a great boon to any would-be producer. They are some of the most common tools used in music production, so understanding how they work and when you would use them is a great foundational step in developing music production skills.
Compressors are among the most common tools at a producer’s disposal.
A compressor is a tool that literally compresses the audio signal of your recording. It reduces the difference between the loudest parts and the quiet parts of your recording — “compressing” it — so that the difference in levels is reduced.
This has the effect of making the sound more consistent across the audio recording. It can also make recordings sound more punchy and consistent. However, too much compression can result in recordings sounding lifeless and flat, so it is important to understand the parameters involved with a compressor and the effect they have on the recording.
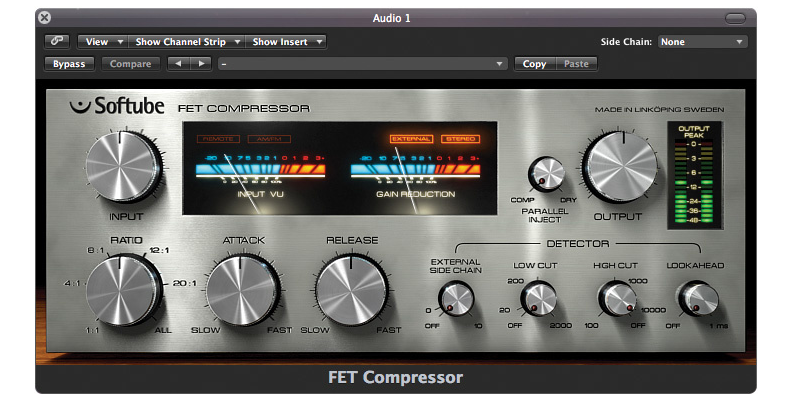
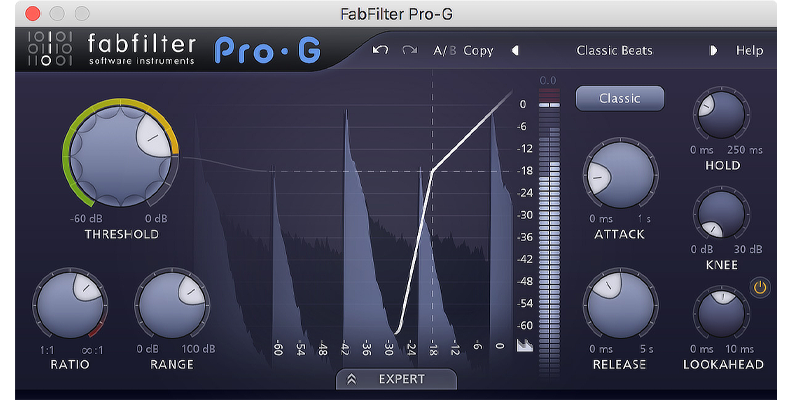
There are six parameters that are worth paying attention to when you are configuring a compressor.
The threshold is the level the compressor will start working at. It is set in decibels (dB) — the compressor will work on anything above the threshold level set and will leave anything below the threshold level untouched.
The ratio is the amount of compressor that is applied once the signal gets above the level set in the Threshold. This setting is also in decibels and setting the ratio tells the compressor how much the effect will be applied.
For example, if you set a ratio of 3:1, this tells the compressor that any signal that is above 3dB will be reduced by 1 dB. This works mathematically, so any signal that was at 9dB would be reduced to 3dB, and so on. If the ratio is set to 1:1 then no change is made.
Because the amount of ratio that is applied affects the audio so directly, it’s good to know how much to apply. A ratio of around 3:1 is considered fairly moderate and will have a noticeable effect on your recording but not too much. Anything above 5:1 is medium compression, and anything over 8:1 will be strong compression.
The best way to understand these ratios is to simply apply them to a recording you have made and listen to the differences. The results will be different on each recording, depending on the dynamic range of the audio, but it will help give you a good indication of the effect of different ratios. This, in turn, will help you judge what you need to apply to your own recording.
A ratio above 20:1 means that instead of compressing the track you are now limiting it. Limiters are different tools to compressors and achieve different results but they are related.
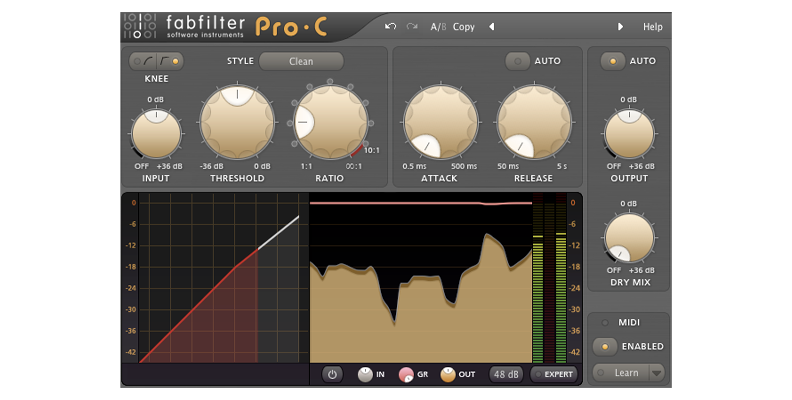
The knee tells the compressor how to deal with audio that is very near the threshold.
Essentially, it is telling the compressor how to transition between non-compressed audio and compressed audio. A soft knee will allow for more gradual, smoother compressions. A hard knee will be more abrupt.
As with ratio, there is no “correct” value for the knee, it will depend on your recording, so experiment a bit until you find the knee that works best for you.
A hard knee is more likely to produce an “edgier” sound, so if you have a song full of energy it’s a good choice. However, if you have something softer, especially with acoustic instruments, then a soft knee that produces a smoother tone would be a better choice.
This is the length of time it takes for the audio signal to be completely compressed once the signal has passed the threshold that you have set. When a compressor is applied to your audio, it doesn’t happen instantly — the attack time tells the compressor how quickly to apply the effect.
This is normally set somewhere between 20 and 800 microseconds for fast attack times and 10 to 100 milliseconds for slower attack times.
The release time is the opposite of the attack time. If the attack time tells the compressor how quickly to start the compression, the release time tells it how quickly it needs to be back to the original, non-compressed state.
Release times are set generally much longer than the attack times. They will normally run anything from between 40-60 milliseconds to 2-5 seconds. You want to keep the release time as short as possible while ensuring that your track still receives the compression it needs.
However, if the release time is set too short, you will be able to hear the compressor moving between active and inactive states. This results in a “breathing” effect that can ruin your audio unless it is an effect that you specifically want to achieve.

Output gain, also sometimes known as “make-up gain” is used because, although compressing audio makes us think the resulting audio is louder, it isn’t really, it just sounds like it. In order to actually increase the volume we set the output gain. It “makes up” the difference between compression and the final output, hence why it is sometimes known as make-up gain.
Many compressors will have VU meters to allow you to visually inspect how loud your output gain will be set. But whether you use metering or a fixed value, you want to aim for a little under 0dB so that you get as much volume as possible while still ensuring there’s a little space left for any other effects you might want to apply.
The technical answer is, “to ensure that there is the best possible ratio between high and low amplitude signals in your recordings.”
However, that’s a rather dry answer, if technically correct. Compressors are normally used to color the sound. Every compressor has a unique characteristic, whether they are fully digital plug-ins or old-style valve amps in physical hardware. Some will produce “classic” or “vintage” sounds, while others will be more suited to modern, contemporary sounds.
Any instrument or voice that has a large variance in the amount of audio dynamic is a good candidate for a compressor. Careful use can greatly improve the listenability of your recording and can make everything sound polished and professional. Or you can intentionally over-compress audio if you want to achieve a particular sound or dynamic on your recording.
As always, the key is to simply try it and see what results you get!
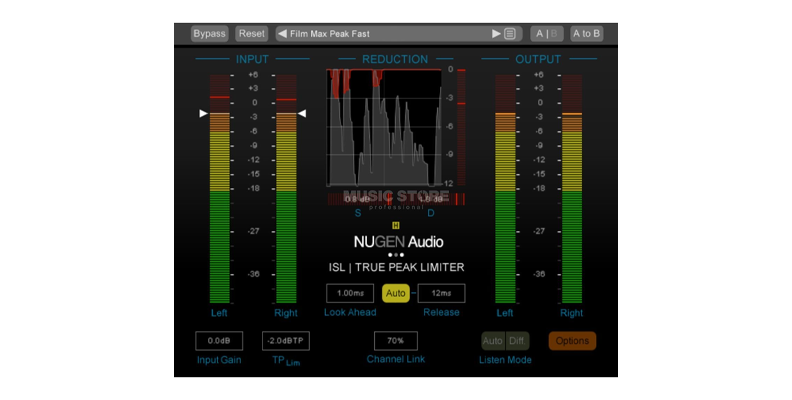
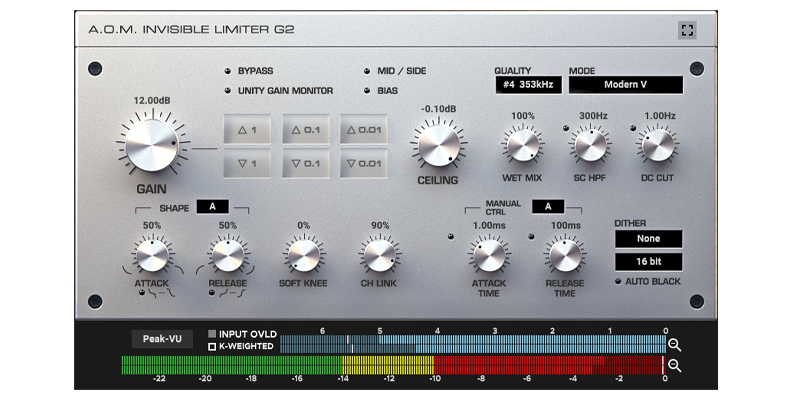
If compressors compress a signal to make the peaks and troughs closer to each other, a limiter limits the peaks and troughs. When you turn on a limiter, what you are doing is setting a ceiling level above which a signal cannot pass. If the signal does hit that limit, then it will be compressed.
Limiters and compressors are very closely related — a limiter is basically just a compressor with a very high ratio. The more you increase a compressor’s ratio, the more you apply compression until a level is reached where there is a ceiling through which a signal cannot get. It is “limited” as to how high it can go, therefore the compressor becomes a limiter.
As with a compressor, there are parameters with a limiter to help you control how it works.
Similar to a compressor’s threshold, with a limiter this sense the limit the signal cannot go above. This is sometimes referred to as a “brick wall” limiter or threshold because there’s no way the signal can get above it.
Typically you want to set this around -2 to -3dB of gain reduction. This will give the best results and ensure as much dynamism in the original signal while stopping it from clipping.
This is mostly used if you are applying a limiter during the mastering process. If that’s when you are applying the input gain then you will find it works as a volume control before the signal goes to any other plugin or hardware – it controls the input level.
If you are not using the limiter as part of the mastering process, you can ignore this.
This is how long the gain reduction will continue once the amplitude of your signal drops below the threshold gain again — in other words, when the limiter stops limiting the signal, how quickly does the signal return to normal?
If you set the time too long, it can result in a “pumping” sound, but if it is set too short then it can sound unnatural and jarring. Finding a balance between the two will give a happy medium.
Note that, unlike a compressor, a limiter doesn’t have an attack time. That’s because you want a limiter to kick in immediately when the signal is going to go over the threshold.
This setting is the same as it is in a compressor and sets how gradual the reduction in gain begins. A soft knee is still a smoother, more gradual transition and a hard knee is quicker and sharper.
This setting is one that only exists in digital limiters and not on physical hardware. It allows the plug-in to look forward in time to anticipate when the limiter needs to be applied. That means it can react as fast as possible, so you want the setting to be as short as possible. Anything between zero and 10 milliseconds will work.

Although it’s not the only place it is used, limiters are most commonly used during the mastering process.
As with compressors, they can help a song sound more professional and can help raise the volume of the song without the risk of any unwanted distortion or clipping.
Ensuring that the volume is consistent across the whole of the song means that the volume can be increased to levels that are consistent with commercial levels.
Another way to use a limiter is in a live setting. When you have an audience, you want to ensure that they get as much volume as possible, but not so much that you are either in danger of damaging their ears or the speakers and equipment you are using.
Passing your signal through a limiter ensures that the signal will never go above a certain level so keeps the volume in a safe zone while still ensuring the loudest sound possible.
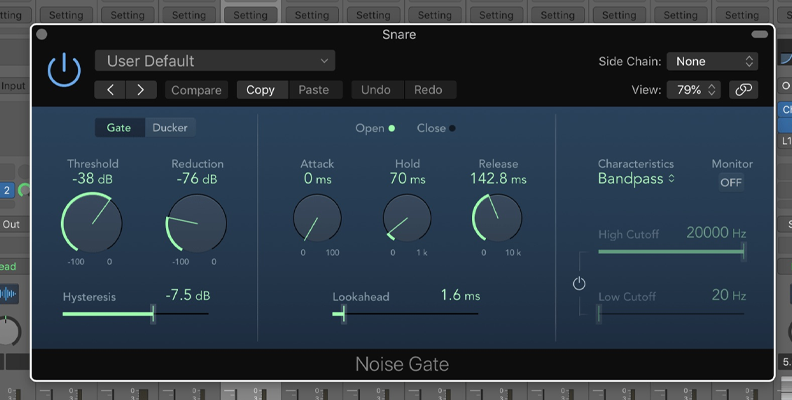
The final audio processors to be discussed here are gates.
Gates, or noise gates as they are sometimes called, provide a level that a signal must reach, otherwise no signal will be recorded at all. If the volume of the signal is over the level of the gate it is recorded, if it is too quiet then there is only silence. You can think of them as a fence — anything outside isn’t getting in.
Some gates can be set to mute rather than completely silence audio below a certain threshold, but the result is the same and any signal not reaching a particular level is reduced.
This is the level that sets when a sound is stopped or when it can get through. Any volume level below the gate will not come through and any above the threshold will be recorded.
Settings the threshold correctly will establish how effective your gate will be. You want to set it to ensure that unwanted noise is kept out but the signal that you want to record is not going to be affected by the application of the gate.
If you are recording in a professional studio or well soundproofed room with little extraneous noise this can be quite straightforward. However, it can sometimes be a tricky balance to get right if the recording environment is less than ideal. Experimenting will help you figure out the correct gate threshold.
The range will set how much the sound reduction will apply to signals which don’t reach the noise gate threshold. If you set it to maximum then it will be silence and anything less than that will allow varying amounts of noise through while still reducing the overall level of sound that falls below the threshold.
This can be useful if you want to allow a little sound through, for example, to preserve a “live” feel to a recording, but ensure that any noise that does get through isn’t going to get in the way of the listener enjoying what they are supposed to be listening to.
Setting the range can, in other words, be one way of helping to set the ambiance of your recording. Or, of course, it can remove all background noise and simply keep the recording clean. It’s entirely up to you!
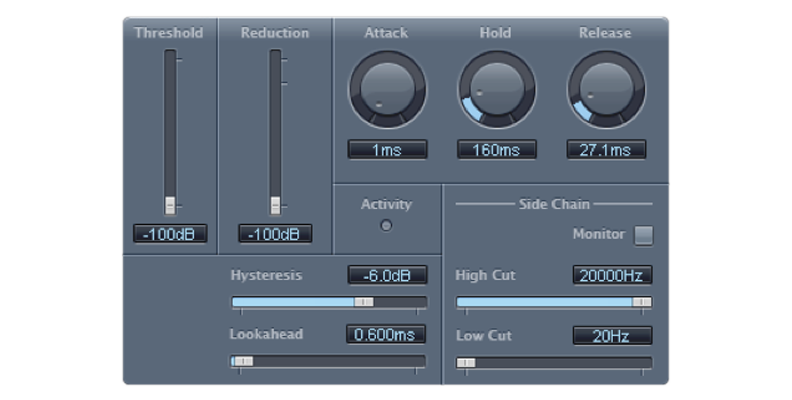
The attack will set the length of time takes for the gate to change from closed to open. A short attack means the gate engages very quickly but if it cuts in too quickly there’s a risk it could clip a part of the audio you don’t want to be touched.
Conversely, if it takes too long to engage you may end up with sound getting through that you don’t want to be heard.
The attack is usually set in tens of milliseconds — anything longer tends to let too much noise through but as always, it depends on the effect you want to achieve and the type of recording you have as to exactly how long the attack needs to be set for.
The release sets how long the threshold is active. The shorter the release, the quicker the part of the signal that is below the threshold will come back.
Controlling the release is a way of making the use of the gate sound natural. If the background went from normal volume to silent immediately it would be obvious to the listener and would sound unnatural.
Setting a release will allow a gradual change so that the listener isn’t even aware that the change is happening. This allows the change to sound organic and a natural part of the recording. A setting of around 300 milliseconds will allow a natural transition, but there is no one correct value. If the change sounds too abrupt make it a longer time, if it is too long then make it shorter.
The important thing with both the attack and release settings is to ensure that the listener is unaware of the changes and that the track sounds as natural and “untweaked” as possible.

One of the main uses of a noise gate is to eliminate background noise. Almost any recording environment is likely to have some stray sound in it, even if it’s just a singer rushing papers that have lyrics on them. But it could also be hum from equipment, traffic passing outside a window, a door being opened… the possibilities for background noise are endless!
By setting a noise gate you can ensure that anything which is quiet but still audible is kept off your recording. The cleaner a recording is when you make it, the less post-production work you will have to do, so noise gates can play an invaluable role when it comes to cutting down on any extra work that might need to be done once you have finished the actual recording itself.
However, noise gates aren’t just used for practical reasons like the elimination of background noise. They can also be used creatively to produce certain types of sounds or effects. If you increase the threshold so that it starts to cut into the audio signal you have recorded it can produce interesting textures and sounds that weren’t there before.
You can also eliminate high and low frequencies with noise gates, so if you have instruments that produce very spiked frequencies a noise gate can help control them.
You can even use them to create fade-ins and fade-outs if you set the attack and delay appropriately (though most digital audio workstations will have other ways of doing this.)
You can also use a noise gate to do what is called sidechaining or sidechain compression. This is where you use the noise gate as part of a signal chain. The output of one track to trigger another track. So for example, you might use the volume of a drum kit to control the volume of a guitar to ensure that they are the same volume.
This is a more sophisticated use of the noise gate but it helps to give some insight into just how flexible a tool a fate can be.
However, whatever you use the gate for, it is an invaluable tool in any producer’s arsenal.
When it comes to audio production, the more tools a producer has available the better the results will be. Understanding the most common tools means that a producer has a solid foundation to build any most sophisticated production techniques upon.
Compressors, limiters, and gates are a fantastic way for anyone who is doing production to really gain control of their sound, whether it is during the recording process itself or working with recorded audio in post-production.
Whichever audio processor you choose to work with — or all of them — you can now be certain of understanding them and getting great results every time.


