Marco Sebastiano Alessi
Aug 24th, 2022Whether you’re creating a video and need an instrumental track or an audio content creator who needs to remove the vocals from a song to extract the instrumental parts for background music, there are tools to remove vocals from the audio that can help you.
Removing vocals from a track is a technique all electronic music producers should be familiar with. It’s not a perfect tool or one that always brings satisfactory results. However, removing vocals is an automated process that can help you explore new music production techniques and expand your sound library.
Today I’ll look into one of the most straightforward and effective tools to remove vocals from audio: Audacity’s Vocal Reduction and Isolation tools. Audacity is a great software for beginners and professionals alike, thanks to its intuitive interface and wide range of editing tools, despite being free software.
Content creators of all kinds may need this editing effect. Podcasters, filmmakers, and performers often come across unwanted voices in their recordings, so having a free tool at your disposal that can help you improve your content is a life-saver. For example, you might be working on a music video and have a section where you need to remove the vocals to create an instrumental version of the song.
Before I describe how vocal removal on Audacity works, I’ll have to explain the basic principles of sound distribution and give an overview of how Audacity works. Don’t worry, because I’ll keep it as simple as possible while providing you with all the information you need in order to learn how to remove vocals in Audacity efficiently.
Let’s dive in!
Audacity is a free DAW (digital audio workstation) that can record audio and offers plenty of editing tools to help enhance your sound. Compared to more professional and expensive DAWs, Audacity is a more basic audio editing and recording tool that doesn’t offer options to add digital instruments or external plug-ins.
It’s a simple DAW but can be incredibly effective in many contexts and is some of the best free podcast recording software available today.
The intuitive interface makes it ideal for those who want to enter the world of audio production. It’s a great option for musicians, podcasters, and audio editors. Audacity is definitely the best free option in the market.
Despite its minimal interface, Audacity offers many effects and audio editing tools to improve the quality of audio. If you’re a songwriter recording a new album, my guess is that you’ll find everything you need in Audacity to record your music efficiently.
The same goes for podcasters. Provided you have good-quality recording equipment, and you’re recording in an ideal environment, using Audacity will give you everything you need to enhance your sound and make your podcast ready for publication.
Before we dive into learning how to remove vocals in Audacity, it’s essential to understand the concept of phase cancellation.
Sounds travel in waves. I’m sure you have seen plenty of sine waves used to describe how sound frequencies move. Now, if you have a stereo track, you’ll have sound coming from both the left channel and the right channel. The volume and distribution of sound will give the impression of audio either coming from one of the two sides or from right in front of you.
If the same sound arrives at the same time from both sides with equal strength (volume), it’s reinforced and will sound louder and richer. In general, vocals are placed right in the center of an audio image (or center panned audio) because they’re often the most prominent sound in the audio track.
This means that the voice will have the same audio signal coming from the left and right sides simultaneously.
When you invert one of the audio channels, so instead of two identical audio waves, we have a mirror-like or inverted audio image. These two waves cancel each other out. This is how phase cancellation works.
Removing vocals in Audacity is a relatively straightforward process, which makes it the ideal option for beginners or people who need fast results.
If you want to start using Audacity and don’t have it yet, you can download it directly from their website. The installation process takes minutes, and as soon as it’s complete, you’ll be ready to go.
First of all, open Audacity. You’ll see a page that looks like this:
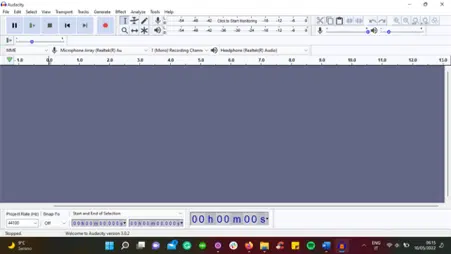
This is the starting page of Audacity. Next, drag and drop the audio file you want to edit inside Audacity’s page. Give it a couple of seconds, and you’ll see the new audio track. Now you’re ready to start the vocal removal procedure.
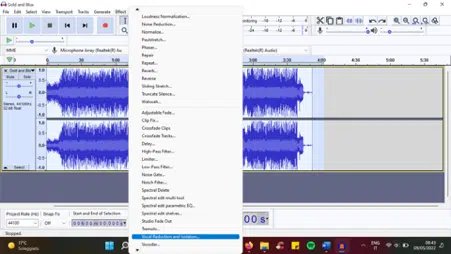
Select the area where you want the vocals removed. If you want the entire piece without vocals, select the whole track. A selected area is highlighted and looks brighter than the rest.
On the menu bar, go to Effect and select Vocal Reduction and Isolation. It’s all the way down, and you may not see it at first, but it’s there.
Another way is to split the stereo track into two mono tracks and invert one channel. While you can use a few different techniques, this is undoubtedly a valid option. Again, there might be a few different steps involved, but I’m describing the method I’ve used for years, and I think it’s the easiest way.
If you choose to split stereo track into left and right channels, simply select the area of the audio file where you want the audio removed and use the Nyquist plug-in effect Vocal Reduction and Isolation.
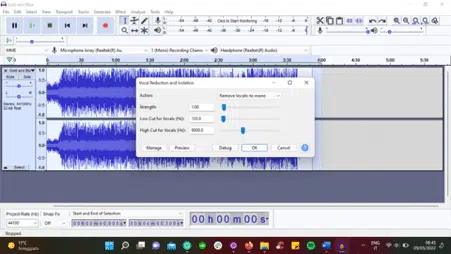
A new window will open up, showing the vocal removal settings. In the image below, you’ll see the settings already provided by Audacity, which are the ones I generally use as I think they work quite well. However, you can adjust them to your needs if necessary.
Listen to the audio track now. You’ll notice the vocals have been removed, and the track sounds slightly lower than before. If you want to restore the original volume, you can go back to Effect and select Amplify (right on top of the drop-down menu).
A pop-up window will open, showing you the effect’s settings. Audacity automatically detects the maximum amplification you can add to the track, so you can use this parameter if you’re looking for the loudest sound. Click OK whenever you’re ready.
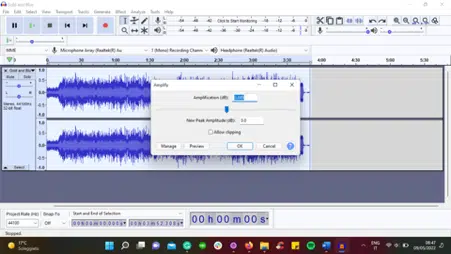
You’ll see that now the audio wave looks louder. Listen to the track, and if you’re satisfied with the result, you’re ready to export it.
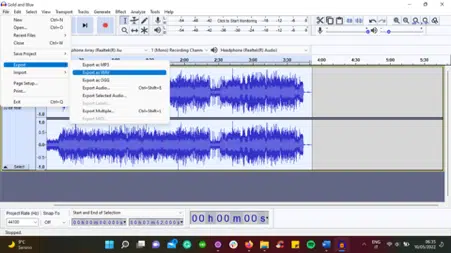
Exporting on Audacity is super simple. On the top menu, go to File – Export – Export as MP3, WAV, OGG, etc.
And you’re done! You’ve successfully removed vocals from a track using Audacity. I’d recommend saving a project file as well, as you might want to make some additional changes to the track in the future. To do that, go to File – Save Project.
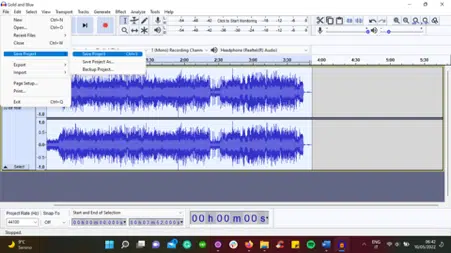
Audacity’s files have the AUP3 extension, so make sure you save it appropriately.
I hope this article gave you an idea of how to remove vocals in Audacity using Vocal Reduction and Isolation to edit your audio. Overall, it’s a simple process, but as you learn more and more about audio production, having the information included in this article at your disposal will help you make the most of this fantastic tool.
Let me reiterate that it’s hard to achieve optimal results using any vocal remover or isolation effect. It might sound incomplete, leaving artifacts and backing vocals that can be distracting. If you intend to publish a track using audio with vocals removed, ensure that the sound quality is high enough to provide an acceptable output.
Unless you have permission to do so from the content creator, you can’t remove the voice from a recording and then publish the instrumental track. It’s a severe copyright infringement, so unless you have obtained written permission from the original author, the backing track should stay on your hard drive and not be published online.
Good luck, and stay creative!


