T Mango
Aug 24th, 2022In music production, an effect that’s often applied to songs is a fade-out or a fade-in. You’ve probably heard it many times before.
Think of The Beatles’ Hey Jude, for instance—this well-known song has a long, drawn-out refrain as it slowly fades out into silence.
While fading out appears to be less popular nowadays, it’s still a useful feature in music production.
It can help to resolve a piece of music that has no obvious ending, for instance, or can provide a smooth transition between sections of music (by both fading out and fading in). It can also help to minimize the sound of stray ‘clicks’ or ‘pops’ that may have crept in towards the end of your recording.
In this post, we’ll explain—step-by-step—how to fade in and out in GarageBand using a Mac. It’s a versatile feature that’s easy to use in your audio or music projects.
In GarageBand, you can create a fade-out effect (at the very end) or a fade-in effect (at the beginning) for your whole song using the master track.
By default, the master track is hidden, so to see it you’ll need to reveal it. And when you do, it appears as a new track below the last track in the Tracks area of the GarageBand workspace.
The master track header shows the automation icon that’s used to toggle on or off the automation curves (or automation lines). These curves allow you to visualize the effects of select automation parameters that you can control, like the volume and pan of a track.
In this post, we’ll only look at the volume parameter, as that’s what we need to use to fade music.
While fading out can be done automatically for a whole song, fading in can only be done manually.
You can also fade in or out of individual tracks in a song, although this, too, can only be done manually.
As mentioned, you can add an automatic fade-out effect to your whole song—but not to individual tracks in your song—using the master track.
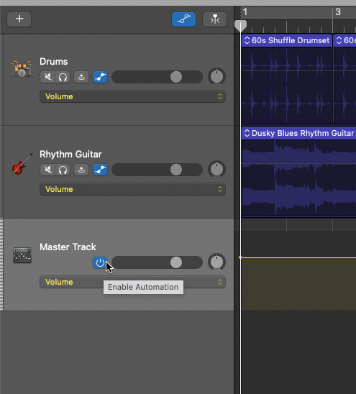
Step 1: Show the master track
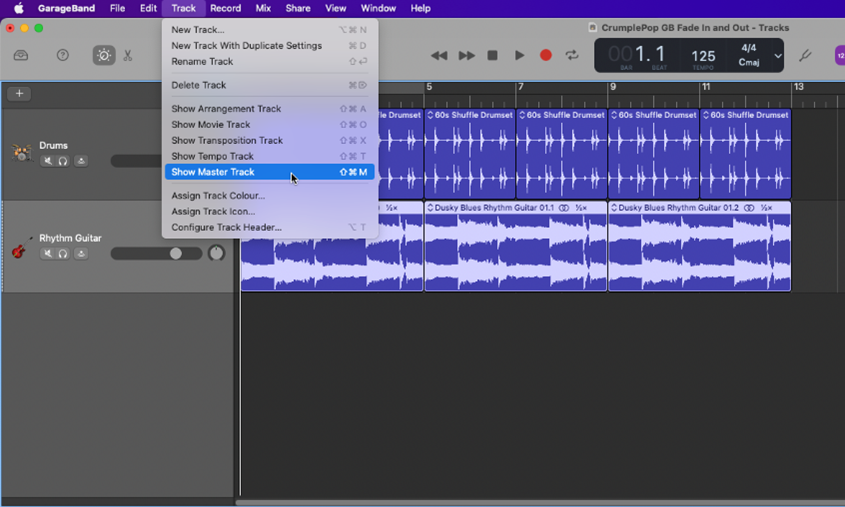
Step 2: Add the fade-out option to your mix
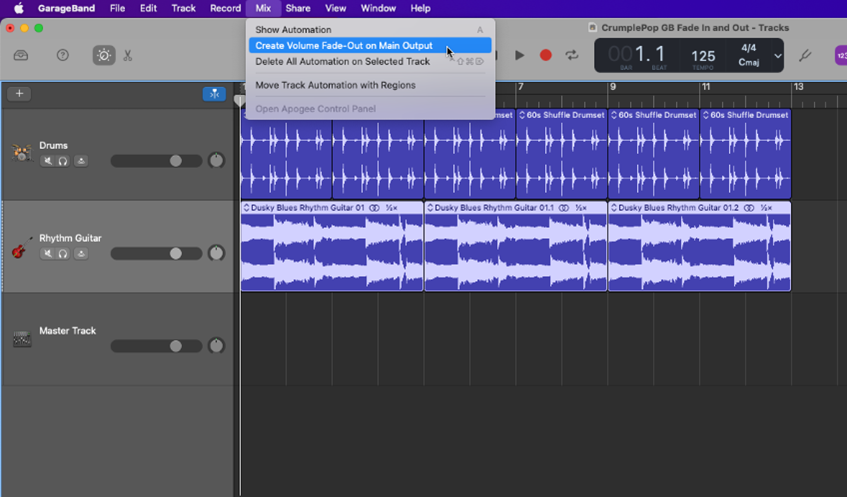
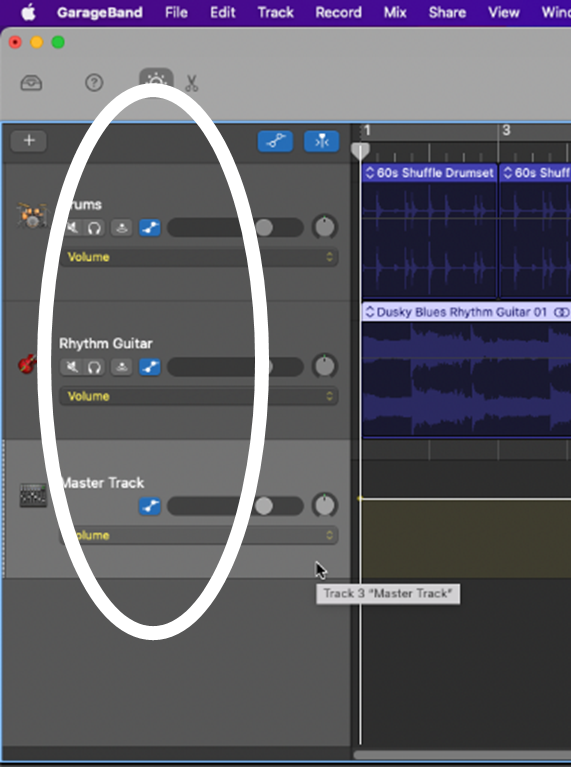
After doing these steps, the Automation controls should appear on all of your tracks.
Step 3: Make sure that the automation menu is set for volume changes
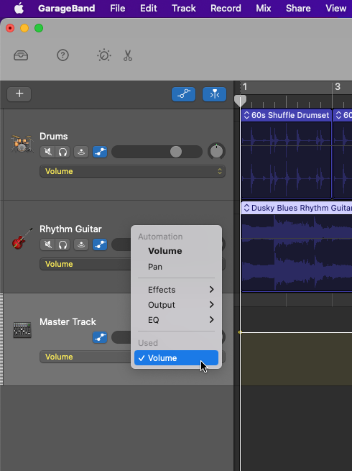
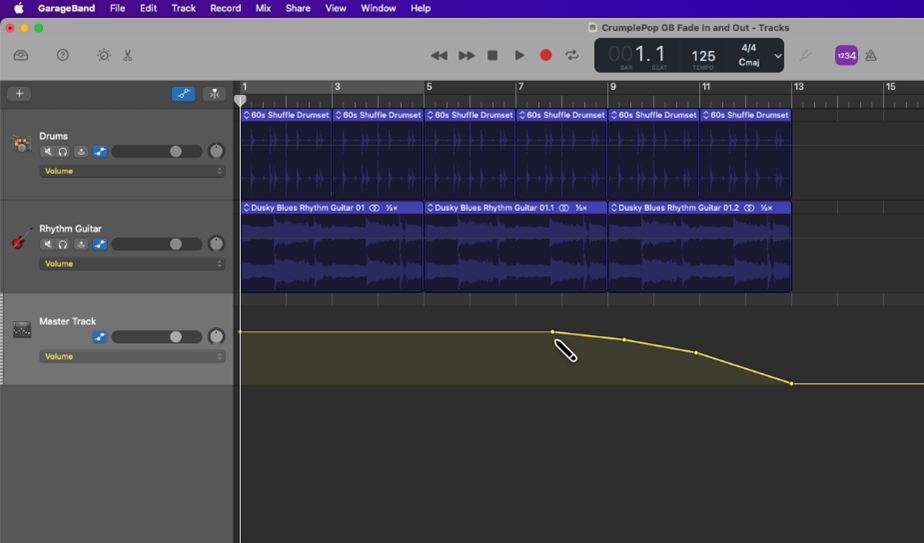
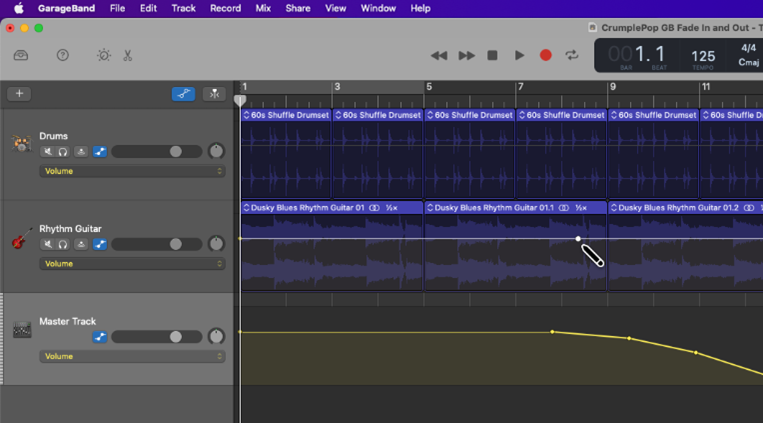
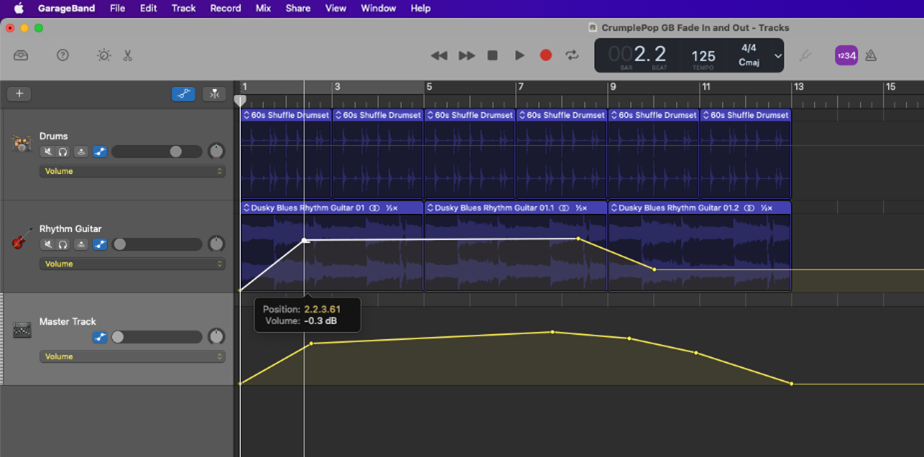
You’ll notice that a yellow line appears across the length of the track—this is the track’s automation line. It shows its volume level at all points across its timeline. If the automation line doesn’t appear, or if it’s faint, try clicking on the track.
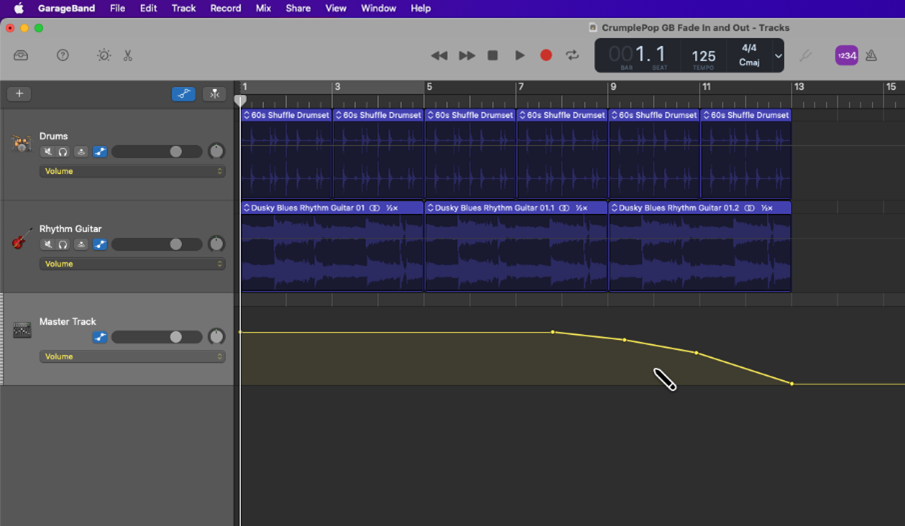
The fade-out effect begins where the automation line starts to fall, i.e., where it starts to look like a curve.
There are four volume points that are set by default.
These act like “smart controls” that you can use to set the amount (intensity) and timing of the fade-out:
You can also toggle on and off the fade-out for your whole song by clicking the automation icon in the Master Track header.
In addition to automatically fading out your whole song, you can manually fade your whole song. You can also manually fade out any one (or more) individual tracks in your song.
Step 1: Show the master track’s volume line
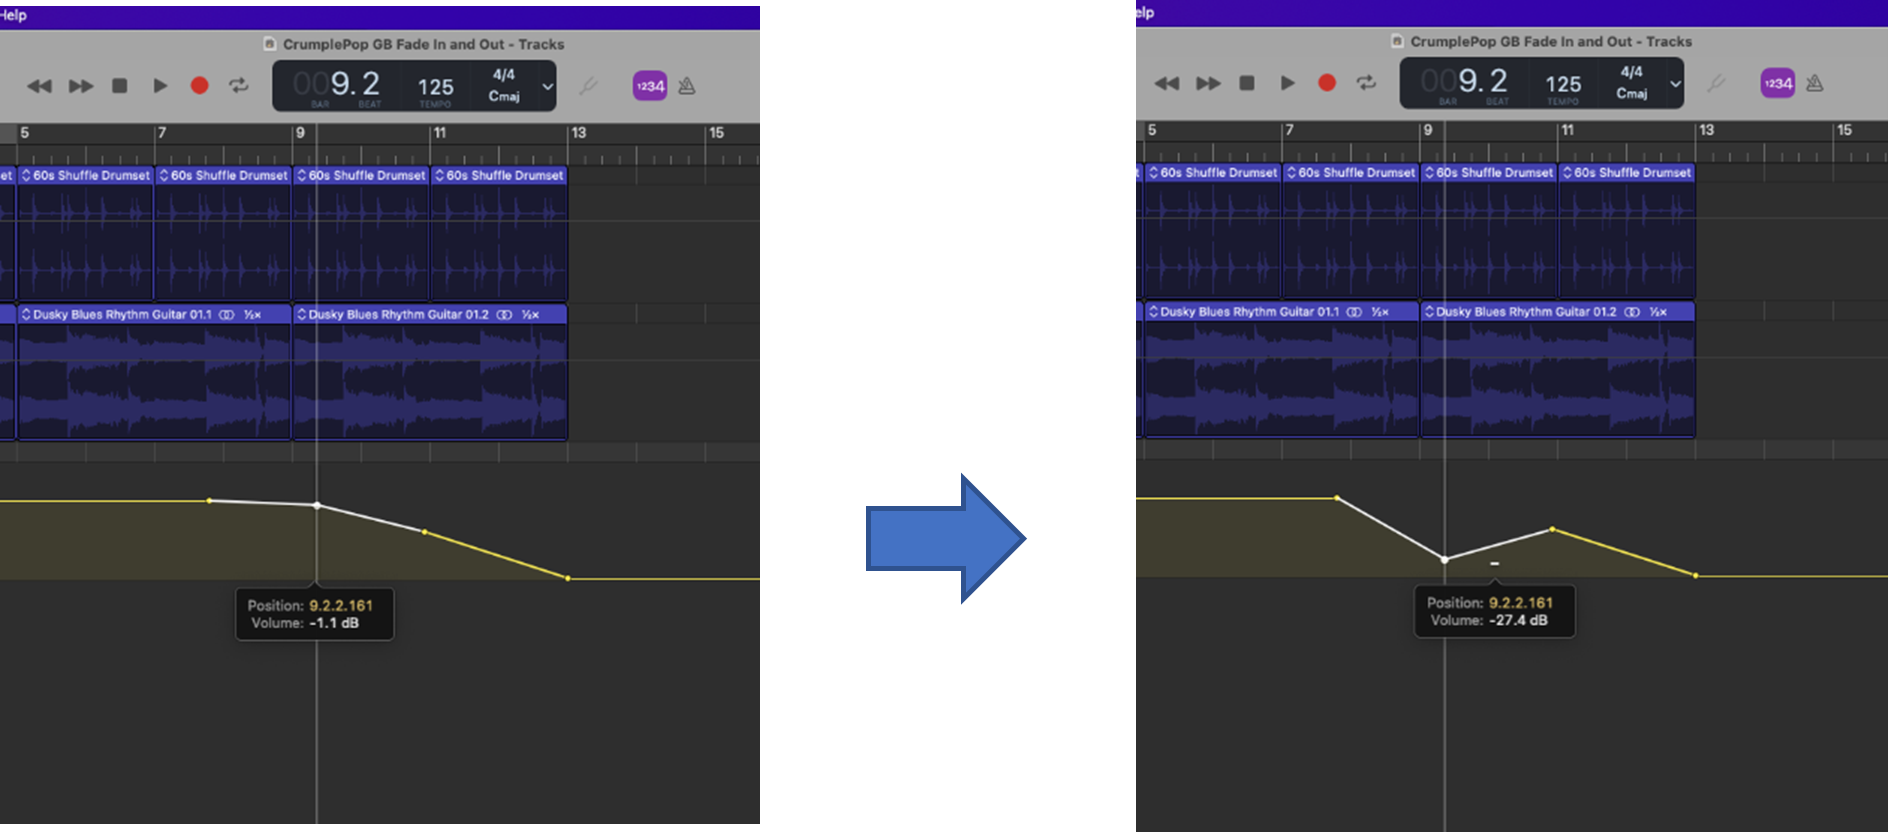
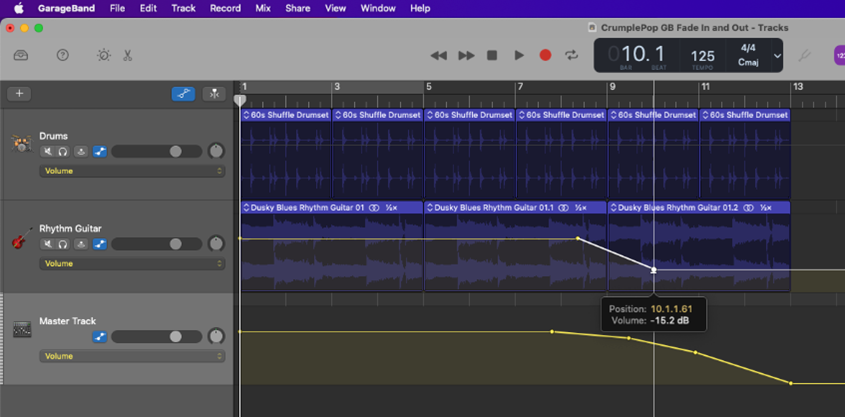
Step 2: Add volume points where you want to make adjustments
Step 3: Control the intensity and timing of the fade-out effect
You can do this with or without the Master Track Fade-Out being on:
Step 1: Set the Master Track Fade-Out to be on or off
Step 2: Select the track that you want to fade out
Step 3: Add volume points where you want to make adjustments
Step 4: Adjust the amount and timing of the fade-out for your individual track
You can do this for the master track or individual tracks (or both!)
Step 1: Show the master track’s volume line
Step 2: Set up the fade-in effect
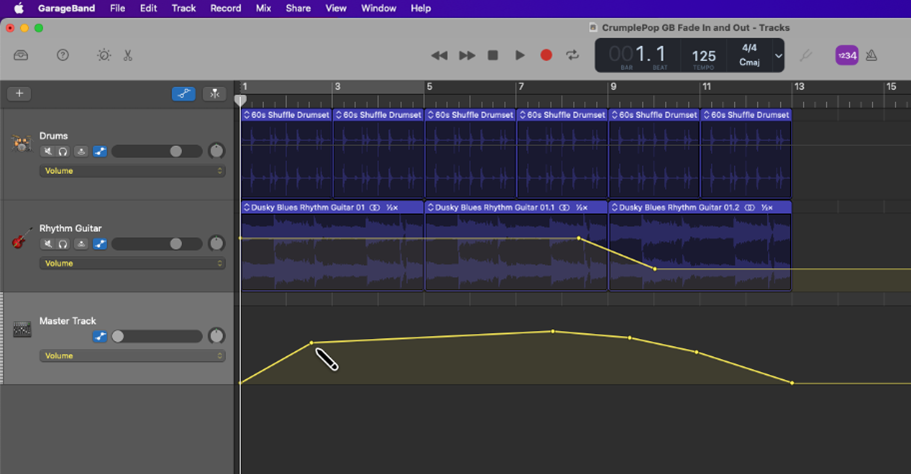
Step 3: Control the intensity and timing of the fade-in effect

This is similar to manually fading out a single track, but in this case, you set your volume points at the beginning of your track’s timeline where you want to fade in.
As before, you can do this with or without the master track’s fade-in or out effect being on.
Step 1: Set Master Track Fade-In (or out) to be on or off
Step 2: Select the track that you want to fade-in
Step 3: Add volume points where you want to make adjustments
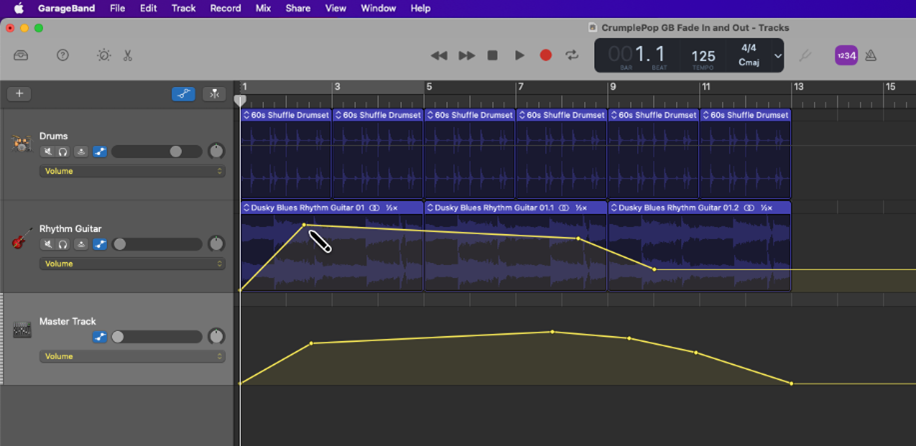
Step 4: Adjust the amount and timing of the fade-in for your individual track
Adding an automatic fade to your song, customizing its settings, and controlling the fade parameters of individual tracks are easy to do in GarageBand. Fading in and out is a versatile feature that lets you enhance the volume dynamics of your mix and gives you additional scope for artistic expression.
So, the next time you feel the need for a smooth transition in or out of your song, or for only some of its tracks, your solution in GarageBand may be only a few clicks away.
You can fade out a whole song automatically in GarageBand IOS by selecting the Fade-Out option under Settings. To fade out individual tracks, turn on Automation (tap the track and select from the pop-up menu) and adjust the automation curves.
Additional GarageBand Resources:


