Marco Sebastiano Alessi
Jul 08th, 2022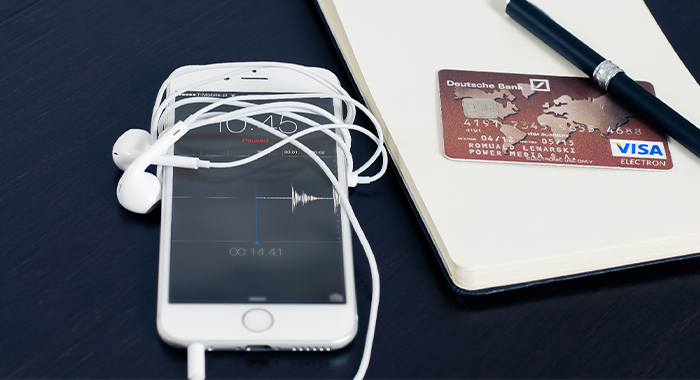
Podcasting has become increasingly popular over the last decade. For many, it’s the best way to absorb content daily, as you can find a podcast about any topic you can imagine.
Many content creators and bloggers are looking at podcasting as a new way to maximize their audience. If you are considering starting your own podcast but are wondering how to do it, today we’ll look into how you can create a show immediately. You don’t need expensive studio equipment or experience in audio mixing: all you need is your iPhone and a desire to bring to life a high-quality podcast.
Let’s dive in!
Recording podcasts in a fancy studio is a thing of the past. Today, people want things fast, and a mobile phone is something we carry with us all the time and can wear many hats. Since it can be our digital wallet, camera, or notepad, why should it not become our recording studio?
A good thing about iPhones is that their camera and audio recording capabilities have improved dramatically and will undoubtedly continue to do so, making them the best devices for audio recording on the go.
Besides your iPhone, the next thing you want to have in mind is an external microphone. You can start with the iPhone’s built-in mic, but podcasts require good audio quality these days. I’m not saying you should run now and buy one, but if you’re serious about podcasting, investing in a good mic should be one of your priorities.
Below you’ll find some external microphones recommended by podcast creators which deliver incredible sound quality for the price. If you’d like to learn more check out our post on the Best Budget Podcast Microphones.
These tiny microphones are worn by the person speaking. They come with a clip you can use to attach them to your clothes and hide them, allowing hands-free operations while recording.
They’re omnidirectional, meaning they capture sound from all directions. Place it close to your chest or neck, and it will deliver crystal clear audio to your recordings.
Lavalier microphones are usually cheaper than others, but that doesn’t mean their performance is subpar. Getting one will be an upgrade compared to your iPhone’s built-in mic, delivering good sound quality for the price.
There are many options to choose from, but if you’re looking for good sound quality, you can’t go wrong with the Rode SmartLav+ or the Shure MVL.
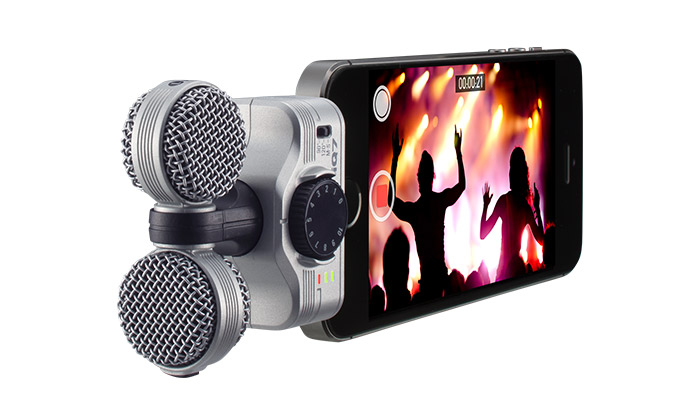
The Zoom’s iQ series are stereo microphones built to turn any iOS device into a high-quality audio recorder, perfect for field recordings, interviews, and podcasting. These are very small and portable but still include a mic gain control and a headphone jack to monitor your audio while recording.
You can record using Zoom’s free Handy Recorder app, which allows you to edit your audio with compression and equalization and add reverb and other effects. It also works with voice memo or GarageBand.
The iQ6 and iQ7 mics may not be entry-level microphones but will guarantee clear sound for your podcast.

This external mic is the best option if you want to expand the potential of your recordings. Just plug the Shure MV88 into your iPhone and start recording! Additionally, you can download the free ShurePlus MOTIV app that allows you to control settings like input gain, stereo width, and switch between the cardioid and bidirectional polar.
If you’re doing a video podcast, an upgraded version of the MV88 is available as a kit, including a condenser microphone, a tripod, pop filter, and a phone clamp. Get everything you need for your podcast for $249.
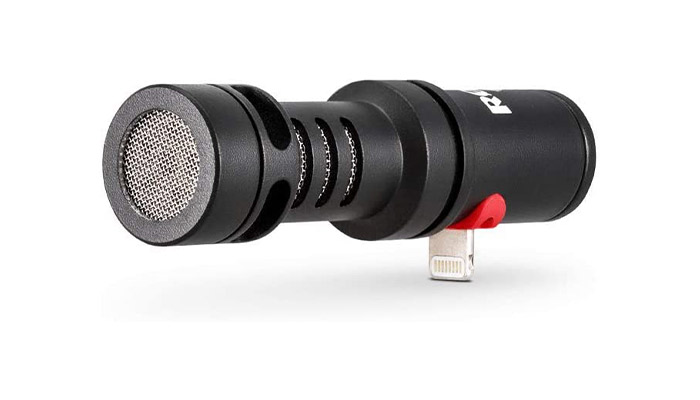
A compact cardioid microphone for iOS mobile devices, this polar pattern helps reduce the surrounding noises to ensure you’re only picking the sound from the front of the mic while blocking noise from the back, like the built-in mic from your iPhone would do. It also comes with a 3.5mm jack for audio monitoring and playback and a windshield for outdoors, all for $80.
If you own an iPhone 6 or below, Rode has an alternative version for mobile devices with 3.5mm input.
Some accessories are not essential to your podcast but can make the recording easier and more professional. If you’re on a budget, you can get creative and build your own DIY stabilizers, tripods, and pop filters.
For indoor use, a tripod stand will keep your iPhone steady, preventing your mic from capturing background noise from movements or bumps. Additionally, if you’re video recording, it will add a more professional look to your video podcast instead of holding the phone in your hands.
The iPhone X or above has a built-in stabilizer that would do fine on slow walk shots. Or you can tweak a standard tripod and transform it into a stabilizer.
Pop filters help to reduce the plosive sounds from natural speaking. Most microphones don’t include a built-in pop filter, so you may consider it when buying a new mic. Pop filters are not expensive, but if money is an issue and time is not, you can build one yourself.
I could go on forever about high-quality podcast headphones, but to be honest, you’re only going to need them for monitoring your recordings. You don’t need studio headphones or anything too expensive to start your show, as your AirPods or any headphones you already have would work great and help you evaluate the audio quality of your podcast. Be aware of the input as you may need an adapter for more recent iPhones.
I’ve already mentioned some apps designed for external microphones that are great for recording, but now I want to focus on the most popular apps that podcasters have been using to record a podcast from their iPhones.
I’m going to start with the more basic apps, just for recording and editing, and then give an overview of the all-in-one iPhone podcasting recording software, which lets you record audio, and also host and distribute your podcast to popular platforms like Apple Podcast and Spotify.
You can find the Voice Memo app on every iPhone to record a podcast and edit your audio file with the built-in microphone, a compatible headset, or an external microphone like the ones already mentioned.
The advantage of using Voice Memo is the iCloud support, which lets you automatically upload your recordings and have them available on all iOS devices in case you run out of battery on your iPhone model and need to use them later.
The editing options are limited to basic tools like trim, replace and resume. Still, it’s a native podcast app and supports external microphones, which is enough to start recording and editing in a different app, like Ferrite.
This free app combines Voice Memo with a multitrack recording studio, allowing you to record a podcast from Ferrite and import audio from your music library, like voice memo recordings. With the editing tools, you can move, crop, add fade in or out, overlap audio, and adjust volume, panning, or mute tracks.
With Ferrite, you can save your finished work through message, iCloud, or Dropbox to have your audio files backed up and safe. You can also upgrade to Ferrite Pro for $29.99 for extra features. It does the job, but it might not be the right app for you if your audio requires extensive audio editing.
GarageBand is a digital audio workstation free for macOS, iPad, and iPhone, marketed for beginners but still delivering professional results. You can create multiple tracks to record voices or add virtual instruments to produce background music for interludes, intros, and outros for your podcast.
You can upload files recorded from other podcast apps like Voice Memos, record directly from the app, edit the audio, and adjust the audio levels. The iOS version might offer fewer audio edit functions, but the multitrack and music production options make it the ideal companion for podcast producers of all levels.
GarageBand seems like the perfect solution for your show. However, you still need to look for a podcast hosting service and distributor.
Here are the all-in-one apps I mentioned earlier, and I want to start with Anchor, one of the most popular apps, which is currently owned by Spotify. It allows you to create, publish, distribute, and monetize your podcast for free.
Anchor’s appeal is its built-in uploading, recording, and editing tools. You can upload an episode previously edited in GarageBand or Ferrite and continue to work on it in Anchor or start from scratch with the recording.
With Anchor, you have a lot of advanced features that make it an optimal solution for podcast creators. You can add transitions and full tracks from Spotify’s library to your episodes and limit the distribution to Anchor’s app and Spotify.
Anchor allows you to record a podcast with up to five multiple remote guests and invite listeners to send voice messages that you can add later to your episodes to discuss.
Other highlights are that it offers free unlimited hosting and analytics, including Spotify’s insights on your listeners.
You can monetize your podcast after getting 50 listeners with subscriptions, a donation button on your Anchor profile, or sponsor-read ads in your episodes. Monetization is only available in the U.S., but they are working to make it available globally.
Last but not least, you can distribute your podcast to Spotify and other streaming services by submitting your RSS feed to the distributor platform.
PodBean is another platform for podcast recording, which also offers an RSS feed and the possibility to live stream. You can submit your podcast to other platforms and monetize through ads, listener support, or by selling premium content.
You can use PodBean for free up to 5 hours of storage space and 100 GB of bandwidth monthly. But if you want access to the monetization tools, video podcasts, or hosting multiple podcasts, you can upgrade your account starting at $14 monthly.
The advantage of PodBean over Anchor is the paid subscription which includes the video podcast, live streaming, and multi podcasts features.
Spreaker, another host and distribution platform, allows you to record and edit your audio files in no time. Similar to PodBean, you can choose to live stream your podcast from anywhere and publish it later as a regular episode.
Spreaker’s free plan is the most limited of the three apps described in the article, only allowing you to upload ten episodes. The lower tier starts at $8 monthly but does not feel like an upgrade, in my opinion. It’s more like a bridge between the free plan and the middle one, where you can auto-upload your episodes to iHeartRadio, Spotify, and Apple Podcasts, monetize through ads, and provides 500 hours of storage for $20 monthly. The collaboration feature is only available with the Publisher plan for $120 monthly.
Now you know all you need to start! I would suggest starting with your iPhone model and Anchor and focusing on creating content. Later, you can add a microphone and upgrade your gear, maybe even switching to PodBean or other podcast hosting platforms if you need more than what Anchor offers.
Good luck, and stay creative!


