JG McQuarrie
Jun 02nd, 2023If you work with sound long enough, you’re going to have to deal with background noise at some point or the other.
Even those with the most specialized equipment and production experience have to deal with unwanted artifacts.
There are many ways noise can end up in your recording, but once it’s in there, there are not many ways to get it out.
It may not be possible to eliminate all of the background noise in your work, but with the right adjustments and a good noise reduction plug-in, you should be able to reduce noise considerably.
To be able to remove background noise from video largely depends on what platform you’re using. In this article, we’ll talk about how to remove background noise in DaVinci Resolve.
Background noise refers to all the extra unintended sounds that creep into your mic while you record. These can be easy to miss during recording but will be obvious when you listen back.
Background noise can come from different sources such as:
There are a handful of ways with which you can reduce noise in DaVinci Resolve. We’ll go through a few below.
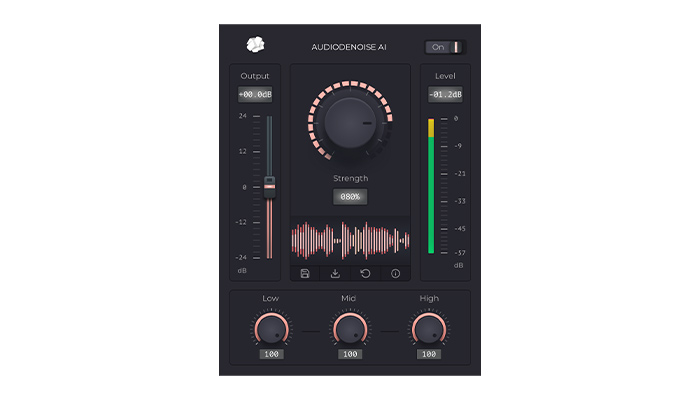
With the CrumplePop suite of AI plug-ins, reducing and removing background noise is a simple task in DaVinci Resolve.
CrumplePop AudioDenoise integrates seamlessly with DaVinci Resolve and can clean up any recording to a professional standard and with a minimum amount of fuss.
It is especially effective on the kinds of background nose that can be encountered every day and even with noisy, outdoor conditions the plug-in is effective at stripping out the unwanted background noise and ensuring your recording is left clean and pristine.
However, it is also effective on other noises that can creep into recordings, such as hiss and hum.
The tool itself is simple to use so even newcomers to the software can gain professional results in next to no time. Just select the part of the audio you want to apply the DeNoise tool to, or select the entire track if the background noise is consistent throughout the recording. Then apply the amount of effect you want to apply.
The central control knob allows you to adjust how much effect is applied to what you have recorded. There are also controls for adjusting the Low, Medium, and High frequencies too, so you can have complete control over your sound.
The CrumplePop AudioDenoise AI plug-in is a simple, powerful and incredibly effective way to remove background noise.
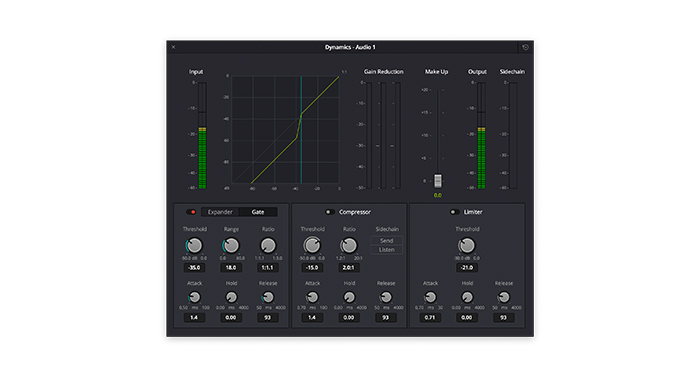
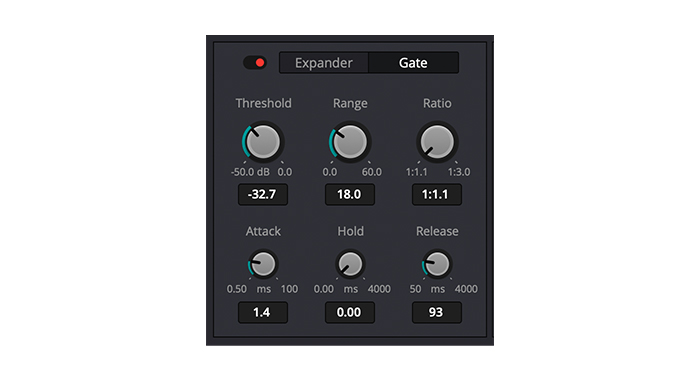
What an Audio Gate does is filter what audio passes through to a channel and how much.
It is a particularly effective tool when it comes to the parts of your recorded audio clips that are silent but contain some background noise. To use an audio gate:
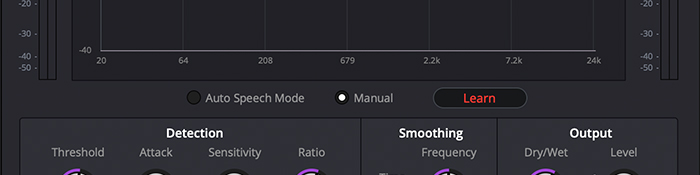
This line is the point where DaVinci Resolve starts to lower the volume of your audio clip to remove noise. It shows you the lowest and highest decibels of your clip when it crosses the audio threshold.
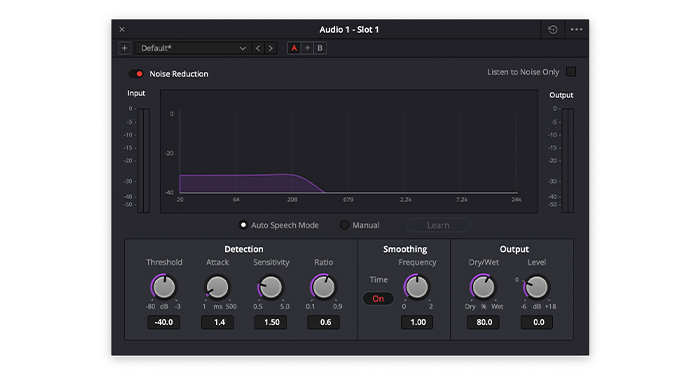
Auto Speech Mode is an easy and quick way to remove unwanted noise. It is best used when your audio clip contains dialogue.
This feature causes an increased sensitivity for speech, reducing some background noise, but it usually causes some frequency distortion.
This can be avoided through the “learn” feature that is available with the manual mode.
To use this feature,
DaVinci Resolve should then locate the noise and reduce the frequency until it is barely noticeable.
The effect can be improved by using the “learn” feature of the manual speech mode. If frequency patterns are properly established and the noise print is learned, then the noise can be better removed in that section, and in other places where similar kinds of noise show up.
These effects can be applied to individual clips as well as tracks. To edit how much of the noise reduction effect is applied, adjust the Dry/Wet knob under the Output section.
Another way to make easy adjustments is through the “Loop” tool. Here you highlight a part of your clip using the range selector.
Then you can click the Loop function to turn it on and then apply your effects as needed.
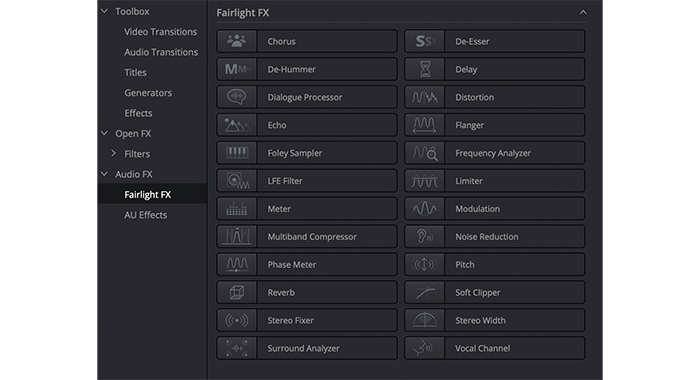
DaVinci Resolve also has other noise reduction tools that are found under the “Edit” page, “Fairlight” page, or “Cut” page.
They contain common plug-ins like:
DaVinci Resolve also allows for the use of third-party plug-ins to remove background noise such as:
It also helps to play around with a variety of features:
For all of the aforementioned settings, the effect is applied to a single clip. For the same effect on multiple clips, you’ll want to create a preset.
Presets are a way to store your noise reduction settings for future use, especially if you expect similar background noise in future projects in DaVinci Resolve. To create a preset, follow these steps:
To use the preset in the future, all you have to do is drag and drop this preset from the drop-down menu to your audio clip or track.
When you have several clips with a similar background noise profile within your timeline, then you can speed up your process by applying your plug-in to the whole track instead of individual clips.
This is done by dragging and dropping the plug-in onto the track header rather than a single clip.
Davinci Resolve plug-ins are fairly simple to install and use – so let’s touch a bit on how to add plug-ins.
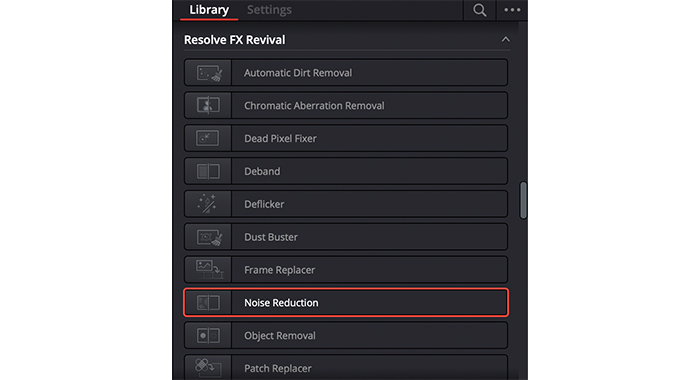
Video noise is a different monster but DaVinci Resolve has a solution for that too. Video noise reduction in DaVinci Resolve is done on the Color page. However, it can also be done on the Edit page as an effect during post-production.
To remove background noise from the video:
No matter how you approach the video noise reduction process, you’re going to encounter two choices: spatial noise reduction and temporal noise reduction. They work on separate parts of your footage and are used either singly or together.
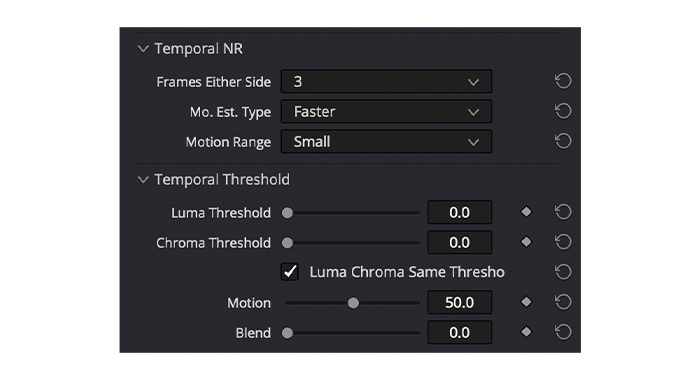
In this method, the frames are isolated and their noise profiles are compared side by side. It is optimal for parts of an image with little or no movement.
It is a little intensive on your system but it renders better than spatial noise reduction. You can adjust the threshold to determine how much temporal noise reduction you want to be done.
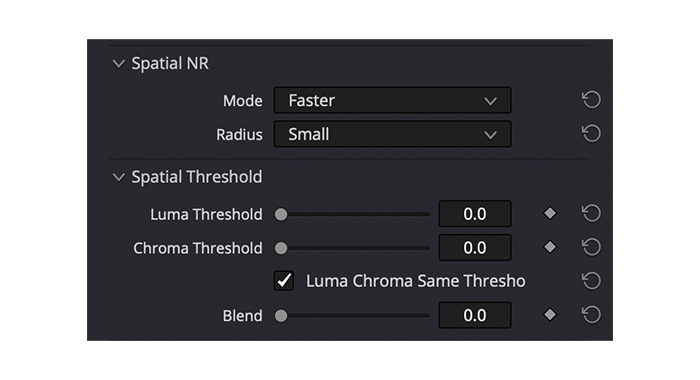
In spatial noise reduction, the pixels of a section of a frame are analyzed. The noisy parts are differentiated from the noiseless parts and then that information is applied to other frames.
There are adjustable Mode and Radius settings that can be used to edit the intensity and threshold of the effect to better eliminate noise.
The best way to remove background sound is to avoid it when you’re recording, and there’s no better way to do this than preparing your room for recording.
You can do this by using acoustic foams and sound-absorbing panels to reduce reverb and low ambient noises.
Using the right recording equipment also goes a long way. However, this does not assure you of noise-free audio.
Unwanted noise is impossible to avoid, it’s just one of the realities of life. No matter how careful you are there can always be the chance of picking some of it up and when it comes, it helps to know how to tackle it.
You may not be able to get out all of the noise, but you can effectively reduce noise in DaVinci Resolve with the right effects, tools and adjustments.


