Graham Efurhievwe
Oct 25th, 2022Editing is tough work, but you can give yourself an advantage with your projects when you use the right editing plugins. If you use Final Cut Pro X, for example, you can enhance your footage by taking the shortcuts and support that Final Cut Pro plugins offer you.
But there are thousands of plugins out there, and finding the right Final Cut Pro plugin for your videos can be tough, so we’ll be putting together a guide below to help you find the top plugins out there.
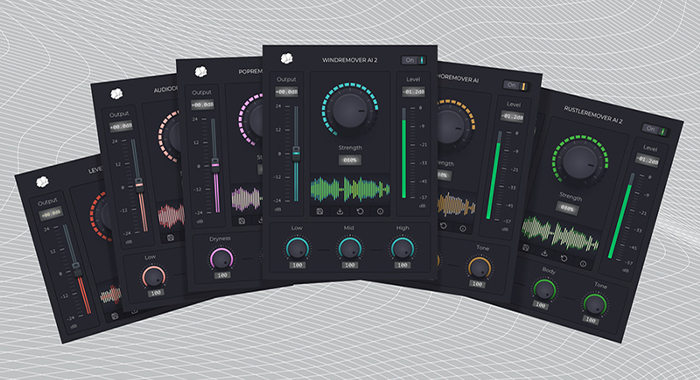
The CrumplePop Audio Suite is a very handy toolbox for all media creators, especially if they use Final Cut Pro X. It contains a complete set of plugins aimed at the most common audio problems that plague video makers, music producers, and podcasters:
CrumplePop’s next-generation tech allows you to repair otherwise unfixable errors in your audio clip, leaving your voice signal intact while intelligently targeting and removing problematic noise.
This suite contains some of the top Final Cut Pro X plugins and has an eye-friendly UI designed with both beginners and professionals in mind.
With simple adjustments to your clip, you can create the audio you want in real-time without having to leave your NLE or DAW.
If you’re a musician, filmmaker, podcaster, or video editor recording audio for video, CrumplePop’s audio suite is the perfect plugin collection to take your sound projects to the next level.

Neat Video is a Final Cut Pro plugin designed to reduce visible noise and grain in videos. Visual noise is no joke and can ruin the quality of your images if it persists.
If you use anything less than professional-level cameras (and even then), your videos are probably going to contain large amounts of noise that can distract viewers.
It appears as fine, moving speckles in certain parts of a video. It can be caused by a lot of things you’ll encounter like low light, high sensor gain, and electronic interference. Aggressive compression of video data can also cause some noise.
Neat Video offers an easy way to filter out the noise from a noisy compound clip in Final Cut Pro X. With a user-friendly interface and a well-designed automation algorithm, you can apply targeted noise reduction with just a few clicks.
You can maintain the beauty, detail, and clarity of the original video, even with footage that may have been otherwise unusable.
Featured in this plugin is an auto-profiling tool that makes it easy to generate noise profiles to work with. You can save these profiles and employ them when you want, or tweak them to further streamline your workflow.
This lets it draw a clear wedge between random noise and details in video data. Sometimes aggressive noise reduction takes away some of the detailing in your videos. Auto-profiling helps you avoid this.

Red Giant Universe is a subscription-based cluster of 89 plugins curated for editing and motion graphics projects. All plugins are GPU-accelerated and cover a wide range of video clip editing and motion graphics.
Plugins include image stylizers, motion graphics, animated elements (including animated titles and animated arrows), transition engines, and many other advanced options for video editors.
With its range and quality of visual effects, Red Giant Universe offers realistic lens flare effects, built-in object tracking, and many more editing tools suited for the large and ever-growing image and video market.
Red Giant Universe runs on most of the NLEs (including Avid Pro Tools) and Motion Graphics programs, including Final Cut Pro X. It can be run on macOS 10.11 at least, or alternatively Windows 10.
You’ll need a quality GPU card to create with this, and Da Vinci Resolve 14 or later. It costs about $30 a month, but you can save a lot more by getting the yearly $200 subscription instead.

FxFactory is a cool plug-in toolbox that lets you browse, install, and purchase effects and plugins from a huge catalog for different NLEs including Final Cut Pro X, Motion, Logic Pro, GarageBand, Adobe Premiere Pro, Adobe After Effects, Adobe Audition, and DaVinci Resolve.
FxFactory Pro contains over 350 plugins all offered on a free 14-day trial. Each comes with a ton of editing features, and you can buy as many tools as you want to handle your transitions, effects, and color adjustments.
You can buy many of these individually, but FxFactory Pro offers them together at a cheaper price. FxFactory is a digital storefront that’s easy to navigate and includes many filters, useful effects, and quick generators for images and footage.
FxFactory Pro appeals to professionals because it lets you create your own plugins from scratch or using templates, and you edit them to your specifications. It also lets you adapt these plugins to your preferred hosts: Final Cut Pro, DaVinci Resolve, or Premiere Pro.

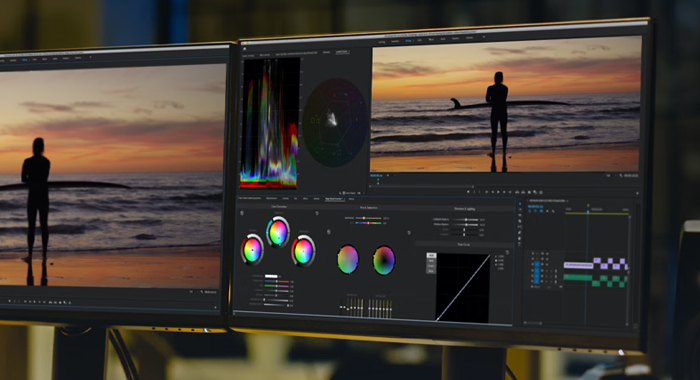
Color grading is cumbersome, so many colorists and directors use LUTs to expedite their process. LUT is short for “look-up table.” This free tool helps filmmakers, editors, and colorists save particular effects as loadable templates.
They are templates that filmmakers and colorists can readily turn to when working on clips or an image.
If, for example, you need to convert some footage from television color format to cinema color format, you can do this easily if you have the cinematic LUT on hand. LUTs also support your NLE by reducing the time and processing it takes for it to render and playback footage after editing.
mLUT is a LUT utility that helps you apply LUTs directly into your Final Cut Pro X workspace. It also gives you a handful of simple controls to help you control and fine-tune the look of the LUT.
A few effects have been added recently so you don’t have to add another plugin when you want a basic edit in your video or image. They’ve also included around 30 template LUTs based on the chroma of popular movies that you can search for and build with whenever you want to create. You can also apply LUTs to log exposed images.
The workflow is fairly straightforward, and you can apply mLUT directly to the video clips or images or via an adjustment layer.
Magic Bullet Suite is a collection of plugins that can clean up noise caused by high ISOs and poor lighting in your video content. There are many plugins that offer this, but Magic Bullet Suite is one of the best at doing this while preserving the fine details of your footage.
It has a beautiful interface that’s friendly to beginners, but Magic Bullet Suite is as professional as they come.
Magic Bullet Suite offers you the cinematic look and the color grading of Hollywood’s best work. You get a variety of customizable presets based on cinematographically pleasing popular movies and shows.
The plugins in this suite include Colorista, Looks, Denoiser II, Film, Mojo, and Cosmo Renoiser 1.0. Its most popular plugin is probably Looks, with which you can edit every single unit of your video clip with LUTs and effects.
You can quickly even out skin tones, wrinkles, and blemishes. Cosmetic cleanup here is very easy and natural.
The other plugins are quite useful too. Denoiser is great for cleaning up grainy recording or light spills, and its new versions, Denoiser II and III are even better at it. Film is used by professionals and consumers alike to mimic the look of popular film stock.
Final Cut Pro users used to have problems running Denoiser as it used to favor Adobe systems’ Premiere Pro more, but that is no longer the case. However, it still takes a lot of time to render noise reduction.
Another drawback is that Magic Bullet Suite is designed quite differently from other color correction tools. It was designed this way to accommodate beginners, but if you’ve had experience with other tools you may be puzzled at first. It also tends to really slow down if you try to run multiple plug-ins simultaneously.
Magic Bullet Suite costs around $800 per license. There are discount versions with less functionality if you’d like to opt for those though. Magic Bullet Suite is a great, good-looking tool that offers a world of built-in effects to both the occasional graders and the professional video editors.

As an audio expert, if you think your sound is too loud, it’s probably too loud for your audience too. If you find yourself constantly having to turn your sound down, perhaps you need a loudness meter.
YouLean Loudness Meter is a free DAW plugin that is designed to help you perfectly gauge the loudness level for your audio clips before you share them for streaming and social media consumption. It can also be used as a standalone app.
YouLean Loudness Meter is an industry favorite for measuring true loudness. Its schematics allow you to properly assess your history and pinpoint problems wherever you may find them. This will ensure you achieve a better mix with more audio control and a better grasp of loudness.
It works on all kinds of audio content including mono and stereo. It has an adjustable mini view that makes it useful for all screen types, whether it has a high dots-per-inch profile or not.
It also comes with multiple TV and film presets with which you can juxtapose your audio. YouLean Loudness Meter is a small simple software, so you don’t have to worry about CPU consumption.
YouLean Loudness Meter is available for free at Youlean.co. YouLean Loudness Meter does its stuff without leaving any imprints on your output sound and is best used for audio finishing.
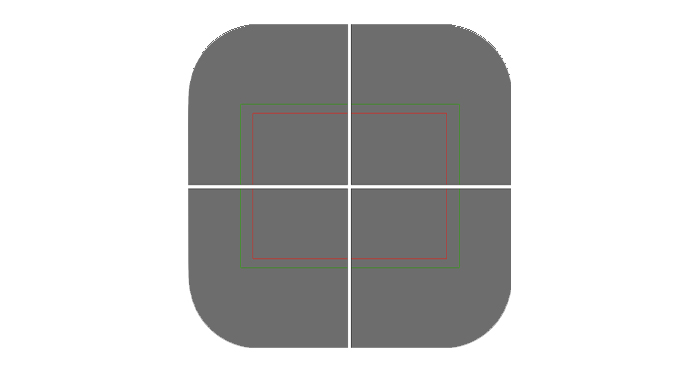
Safe Guides is a 100% free plugin that provides you with options for on-screen grids and guidelines. Safe Guides are used to make sure text and graphics are aligned as intended and appear to the viewer as they do to the editor.
This helps to maintain the viewer’s attention. It generates safe area overlays over your screen that are flexible for graphic designers and editors.
Safe Guides comes with templates for 4:3, 14:9, and 16:9 titles, as well as custom guides, and controls so you can set safe areas according to your preferred display. It also allows for action safe areas, override of EBU/BBC compliance, and a center cross marker for calibration. You can turn on/off individual guides if you want, and choose your own colors for the guides and grids.

Track X is a small but very useful plugin that offers you professional-level tracking that you may otherwise need to pay top dollar to achieve. Track X gives you multiple ways to track objects in your video footage, letting you follow motion as you wish with advanced tracking features.
Final Cut Pro plugins need to be installed in a very specific location.
There are two methods for installing Final Cut Pro X plugins. For both, you need to first search for and download the plugin
No matter what you’re trying to create, you can get a head start on your professional projects with a comprehensive library of Final Cut Pro plugins. All of these Final Cut plugins, whether free or paid, can be found online.
There are a lot of these plugins, so naturally, you may be confused when it’s time to choose. A useful guide is to select the plugins most relevant to your work and get the more obscure ones when you need to expand on your work.
If you aren’t looking into anything hardcore, it would be best to get a plugin that offers as many functions as possible. For example, CrumplePop’s Audio Suite is flexible enough to account for most audio repair needs.
Price also matters, of course. If you’re a beginner still trying to get a feel of your niche, paying a lot of money for plugins seems unwise. You can pay for the ones you need, but try out free plugins for the ones not absolutely necessary. Many of the best plugins offer a free version of their paid software too, so you can check those out first. Happy creating!