Marco Sebastiano Alessi
Aug 16th, 2022Are you ready to record your podcast and level up your content? Or perhaps you’re just starting and looking to produce it independently. The first thing you’ll need is a computer, a microphone, and software to record and edit a podcast.
The program we’ll look into today is an excellent option for independent podcasters, but many experienced creatives use it regularly because it’s simple, intuitive, and free. We’re talking about Audacity, one of the most well-known audio editing software to edit a podcast.
Before we get into how to edit a podcast in Audacity, you’ll need to download Audacity from the official website and install it; it’s available for Windows, macOS, and Linux so that everyone can use it to edit podcasts.
This article will guide you through the entire process of recording and editing a radio show, so by the end of this post, you’ll have all the knowledge you need to get started right away.
The first step is to set up your audio devices. Make sure your system detects your external mic correctly, whether you’re using a USB microphone, one with a 3.5mm jack plug, or an XLR microphone plugged into an audio interface or a mixer. Then, launch Audacity.
At the top of your screen, just below the transport toolbar (where the play, pause, and stop record buttons are), you’ll see the Device Toolbar with four drop-downs. We’re going to select the one next to the microphone where you’ll find all devices that work as a microphone. Choose the one you want to use by clicking on it.
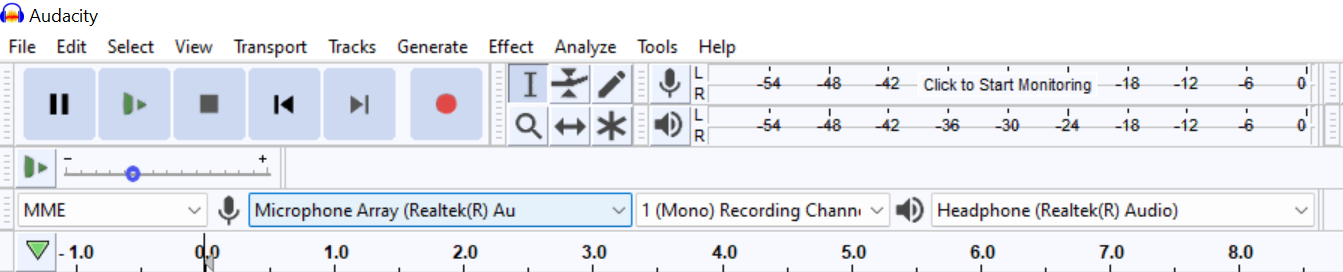
We can select to record in mono or stereo on the dropdown next to the microphone. Most microphones are in mono; unless your podcast needs stereo recording, stick to mono. It’ll make your life easier, and for a podcast, it’s unlikely you’ll need stereo recording.
An audio interface with two channels can sometimes split the microphone’s inputs left and right. If you have one of these interfaces, select mono to avoid having your voice coming from one side only; you can always edit a podcast afterward, but it’s preferable to record in mono from the start.
There’s a third dropdown to select your output device where you can choose your headphones, studio monitors, or your audio interface. Pick yours, and you’re all set for the next step! To avoid issues, connect all your devices before running Audacity.
The next step after setting up your devices is to do some tests.
First, we need to go to the Recording Meter Toolbar, click on it to start monitoring, and speak at the same volume you usually use with your microphone. If you see a green bar moving, your microphone is set up correctly; try to stay in the green zone between -18 and –12db.

If your levels are too low or too high (red zone), we can adjust them to guarantee the best audio quality from our microphone. To do this, we’re going to look for a microphone and speaker icon with a slider: the Mixer Toolbar. The mic slider adjusts the recording level and the speaker’s playback volume. Play around them until it’s loud enough, but it’s not distorting your audio.

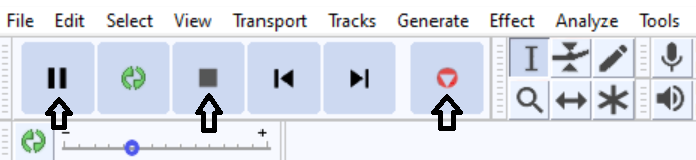
To start recording, hit the red record button on the Transport Toolbar, and you’ll see your recording in a waveform. Listen to it with the play button, and if you like what you hear, you can start recording your episode; if something is off, continue adjusting your levels and devices.
Whenever you need to take a break from recording (to read your script, for example) and continue where you left off, press the red pause button. To completely stop the recording, press the stop button. Hit the record button again when you’re ready to resume recording.
The tool you’ll be using the most is undoubtedly the selection tool. It will allow you to highlight segments of a track by simply clicking and dragging, similar to how you do it on any word processor. Editing podcasts, deleting audio, and adding sound effects are super simple with this tool.
You can also set a playback point to listen to a specific section. Let’s say you’re editing something around minute 23 of a 1-hour podcast; instead of listening from the beginning, click somewhere close to minute 23 so you can hear that portion of the audio right away.
This tool is handy for background music, video editing, and voice-overs. It controls the audio levels within the track.
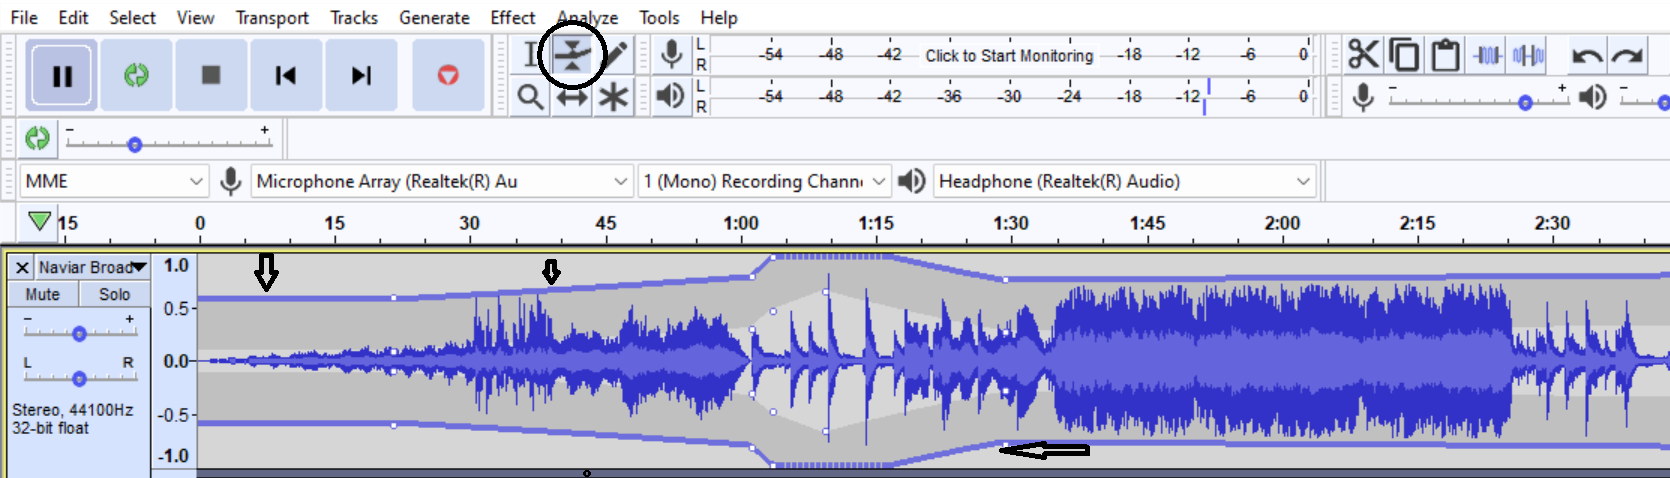

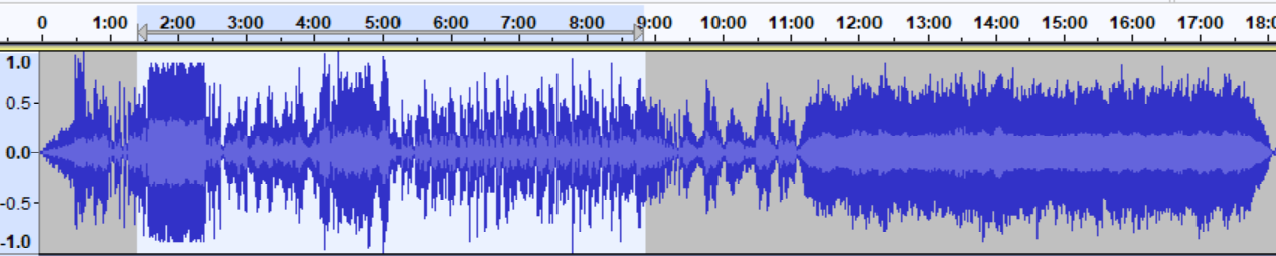
We can zoom in and out of the track with the zoom tool. It comes in handy when you’re listening to something in your audio files that should not be there. By zooming in, you can see where that unwanted noise is coming from in the waveform. It can also help us structure our podcasts, as by zooming in and out we get a better view of the project to ensure the intro and outro music are set to start at the right time.


You already know how to record your voice, which is what you’ll be doing most of the time. But what if you need to import previously recorded tracks? Or an interview you did outdoors or via Zoom? How about those two tracks with royalty-free samples you got for your intro and outro? Or your guest who recorded parts of their interview on a separate track?
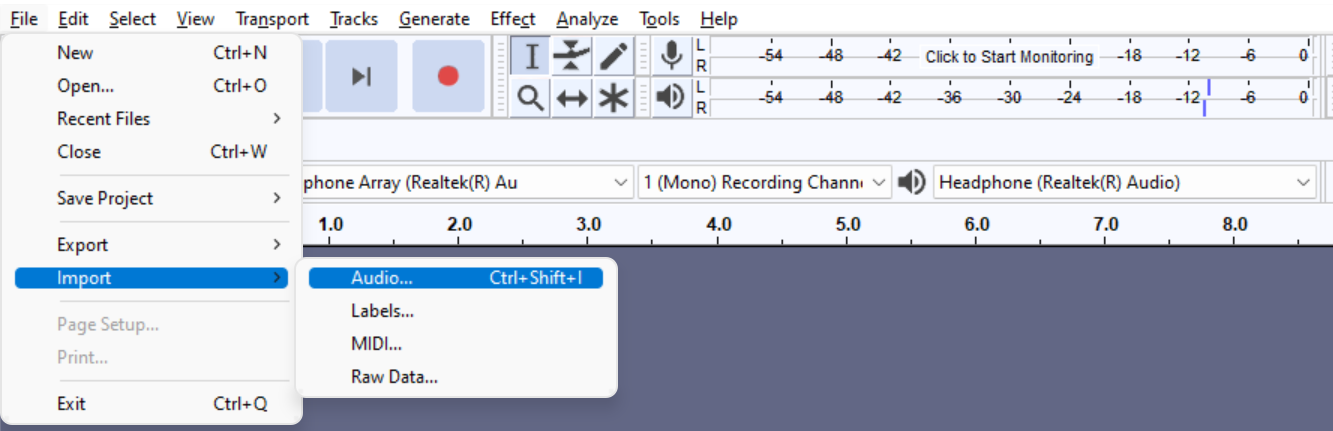
The audio file will show as a new track. Now, you can start editing your tracks to structure your podcast episode. This process also works with sync-locked tracks.
Look at all you’ve learned so far! You can now set your audio devices, make your first recordings, import tracks, and use the essential editing tools. But the fun part is about to start.
Having your podcast recorded and structured isn’t enough. Don’t upload and share it like that. If you listen to it now, I’m sure it doesn’t sound like the podcast you hear online; that’s why we need to edit a podcast before publishing it. We talked a bit about what you can do with the tools, but how do we move tracks or sections?
If you’re using an earlier version of Audacity (before 3.1.0), you have the Time Shift Tool, which allows us to move tracks in Audacity to set it at a specific time by clicking and dragging. If you’re working on version 3.1.0 or above, the Time Shift Tool is gone; by hovering your cursor right above the track, you’ll see the tool change to a hand, and then we can move it.

Click and drag the selected track or section where you need it to start and release. It’s pretty simple!
You can copy, cut, split, and trim sections of your track and move them to give order to the podcast episode. Highlight the area with the selection tool, go over Edit on our menu bar, and select the desired option. Try to learn the hotkeys as this will make your workflow smoother. Once you have all your tracks in order, we can continue with the next steps.
Noise reduction is a fundamental process when recording audio. Sometimes when we record, even in a quiet environment, our microphones can pick up frequencies that cause noise. You will see this in the waveform sections where no one is talking and there’s still something going on. We can get rid of this background noise real quick:
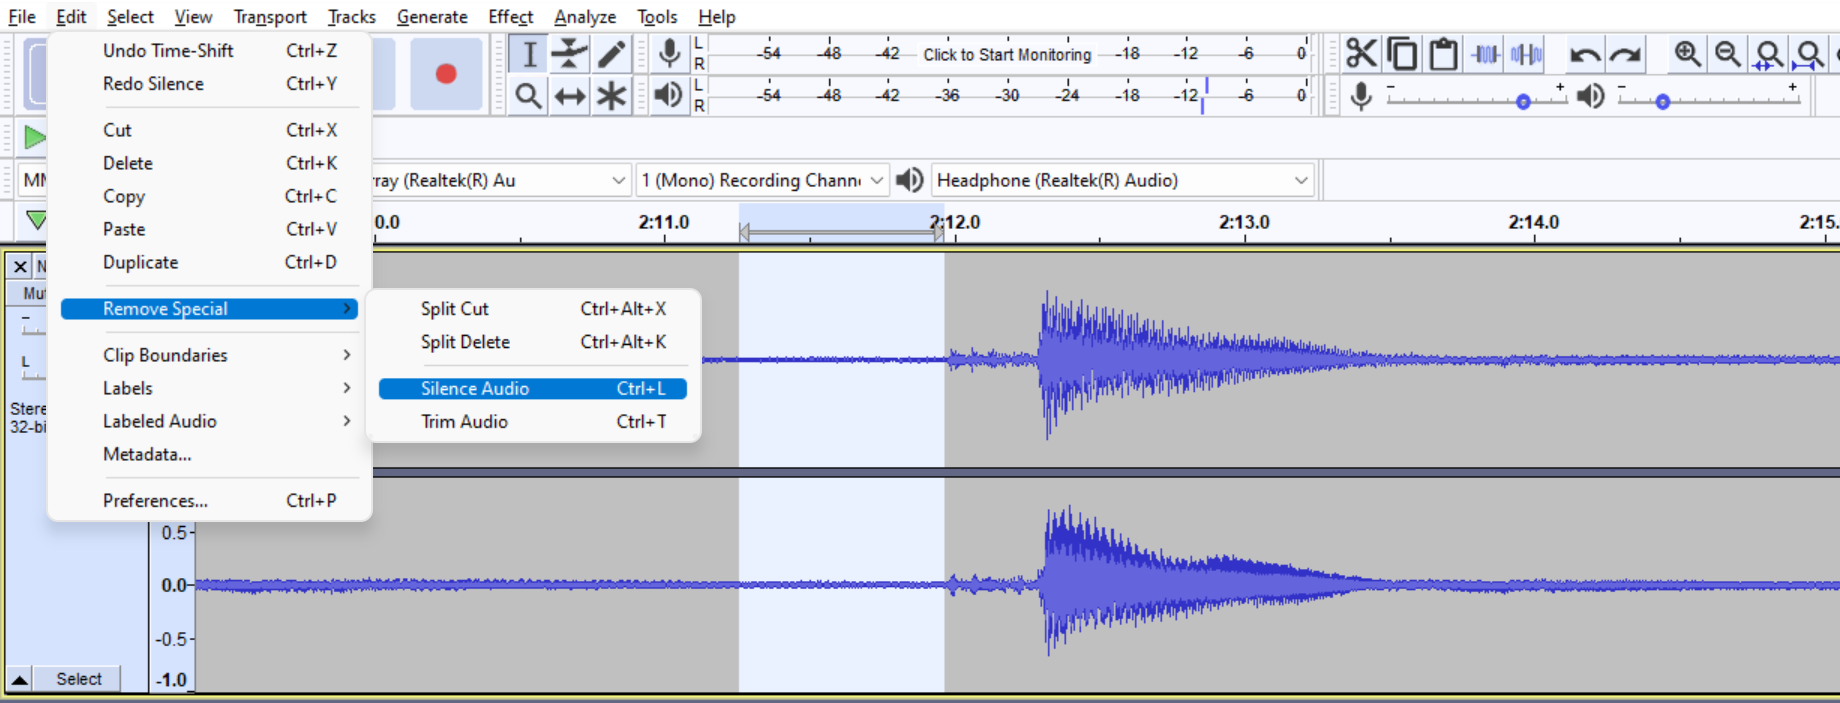
The process of removing pops in Audacity is easy, so you can do this reduction process throughout the episode to remove everything you don’t want in your audio. Remember to use your Zoom Tool to see each section in detail. After some noise reduction, you should have your podcast ready to add some effects.
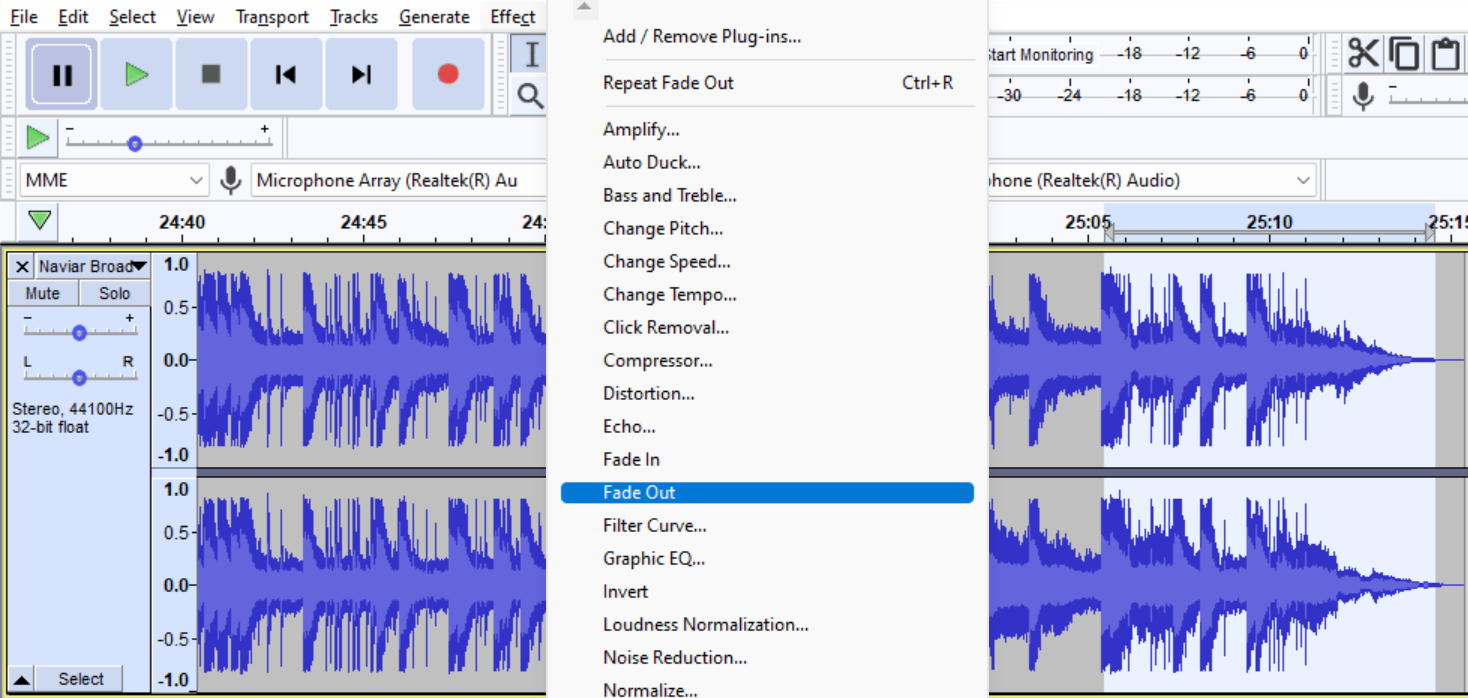
Audacity comes with plenty of effects to edit audio tracks. Some are necessary to achieve the standard sound quality of podcasting, and others are there to add that finishing touch that will make your show stand out. We’ll start with the ones you must use.
Equalization is the number one effect you need to apply. It will add so much richness to your audio, even if your microphone is not professional. By decreasing or boosting frequencies, you can significantly improve the tone of your voice.
Benefits of EQ
To add EQ, follow these steps:
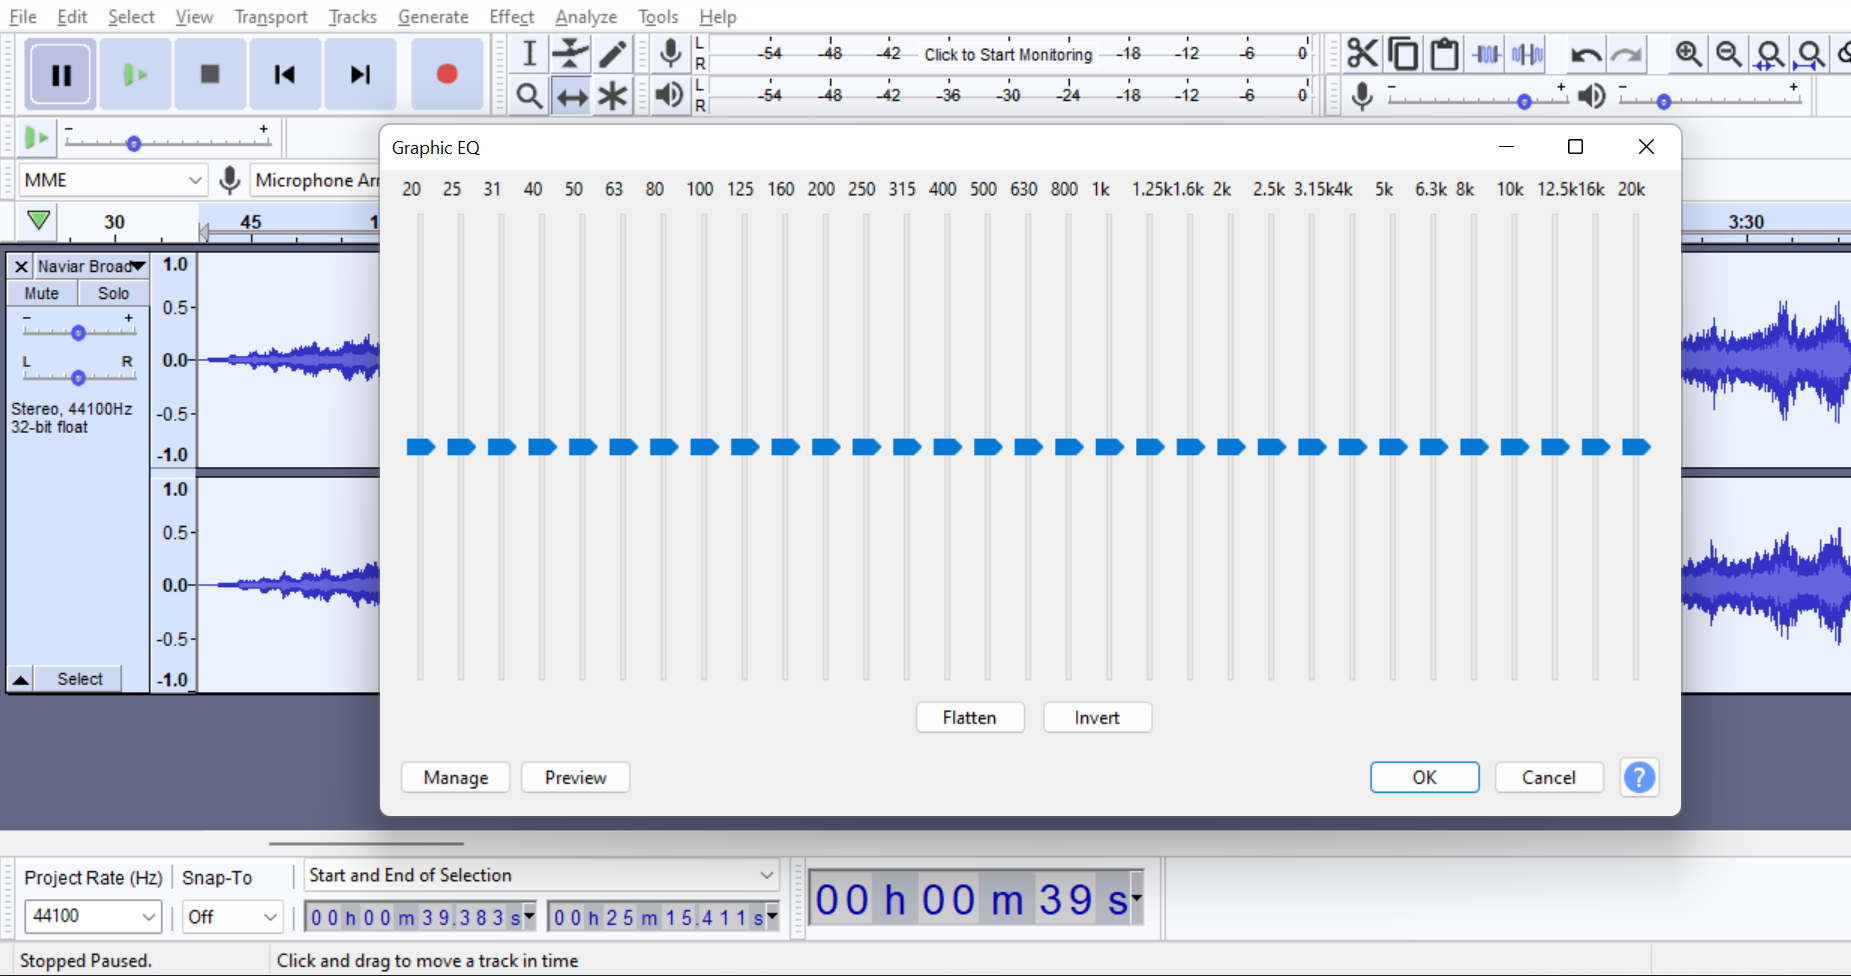
There are no universal settings for EQ, as it depends on many factors. If you’re a beginner, you can start by decreasing the lowest and higher frequencies and then play around with them until you find the sound you need.
To learn more about EQing, check out our principles of equalization post.
Sometimes you see your audio presents peaks in volume, sections where audio is too loud or too low; adding a compressor will change the dynamic range to bring these volumes to the same level without clipping. To add a compressor:
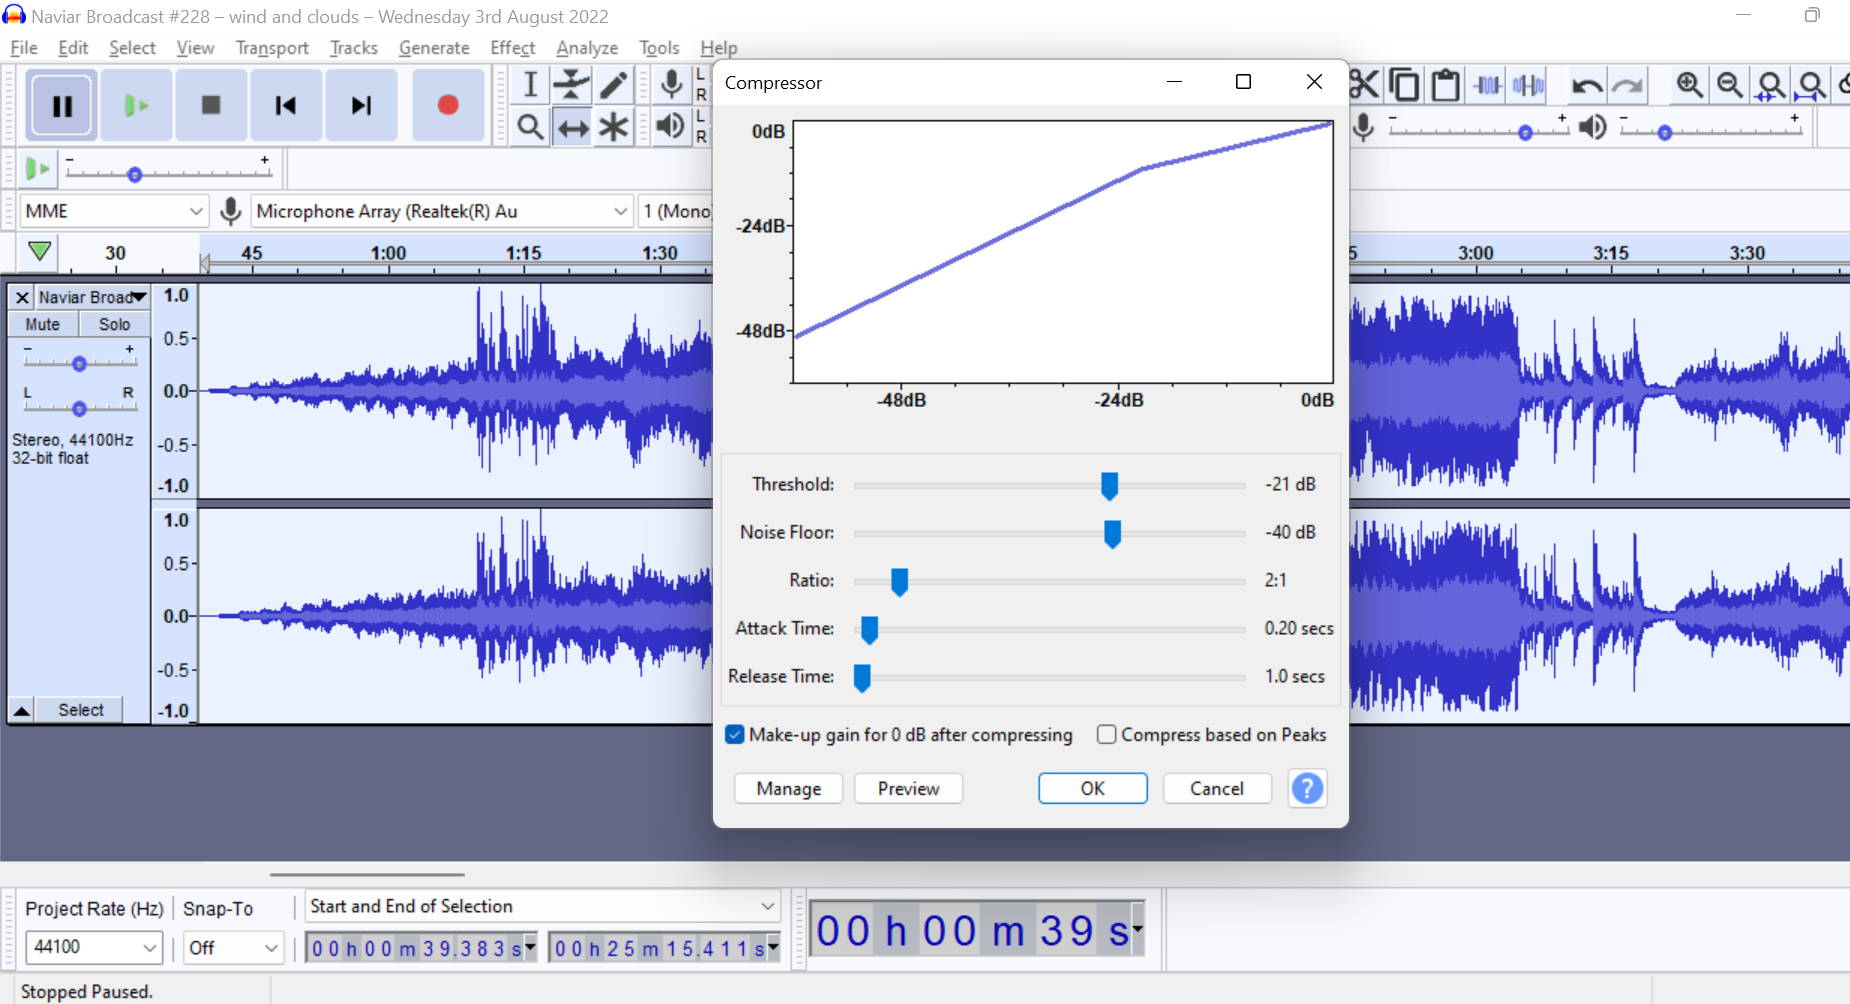
Once you’re familiar with the built-in compressor, make sure you check out Chris’s Dynamic Compressor, a free plugin that’ll do wonders to your audio.
To normalize your audio means to change the overall volume of your audio. In Audacity, we can do two types of normalization:
To normalize your track:
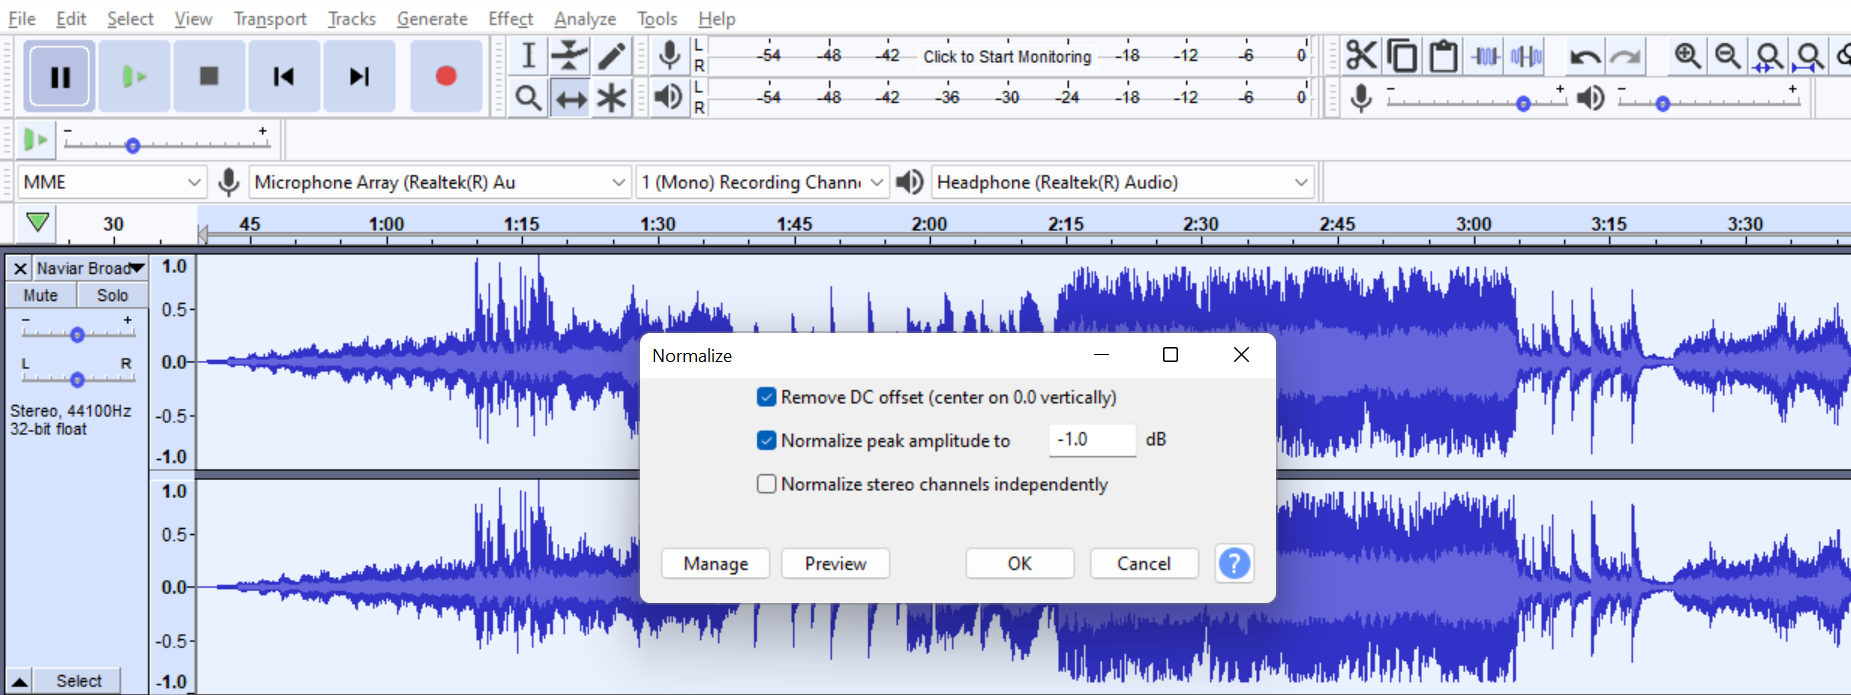
Audacity Loudness Normalization won’t affect your sound in any other way than changing your max volume levels; knowing the targeted audio level will help you set your loudness normalization to reach standard sound quality with your podcast.
Use Amplify to adjust the output volume if your recordings are too loud or too low. Make sure the “Allow clipping” box is not marked if you don’t want distortion on your audio.
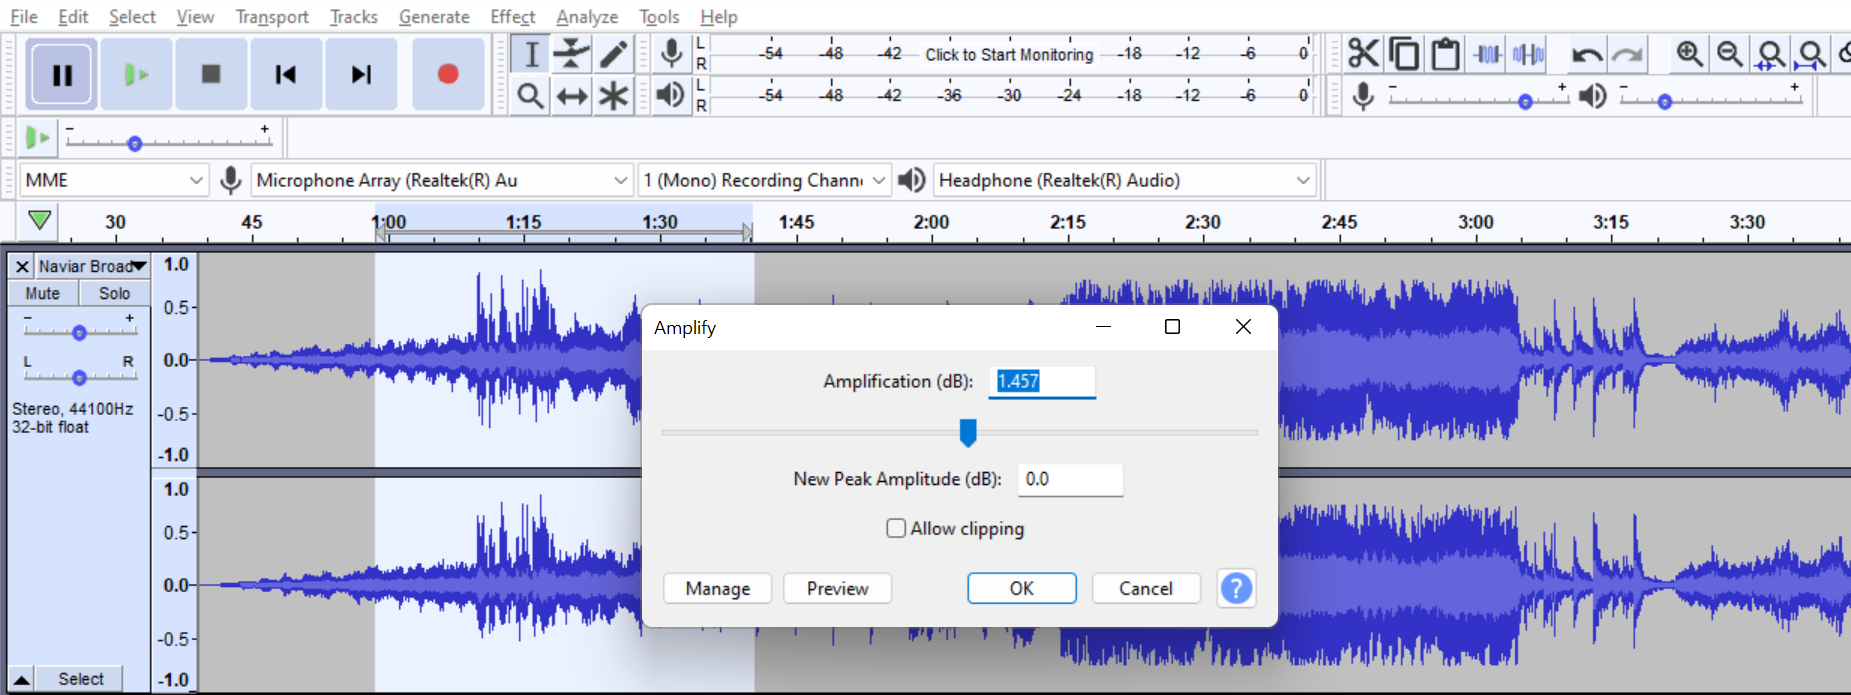
Another way to adjust the volume is using your Envelope Tool directly on the track. If you run into distortion a lot, check out our post on how to fix distorted audio.
Use this setting for your background, intro, and outro music. First, you must move your music track on top of your voice track.
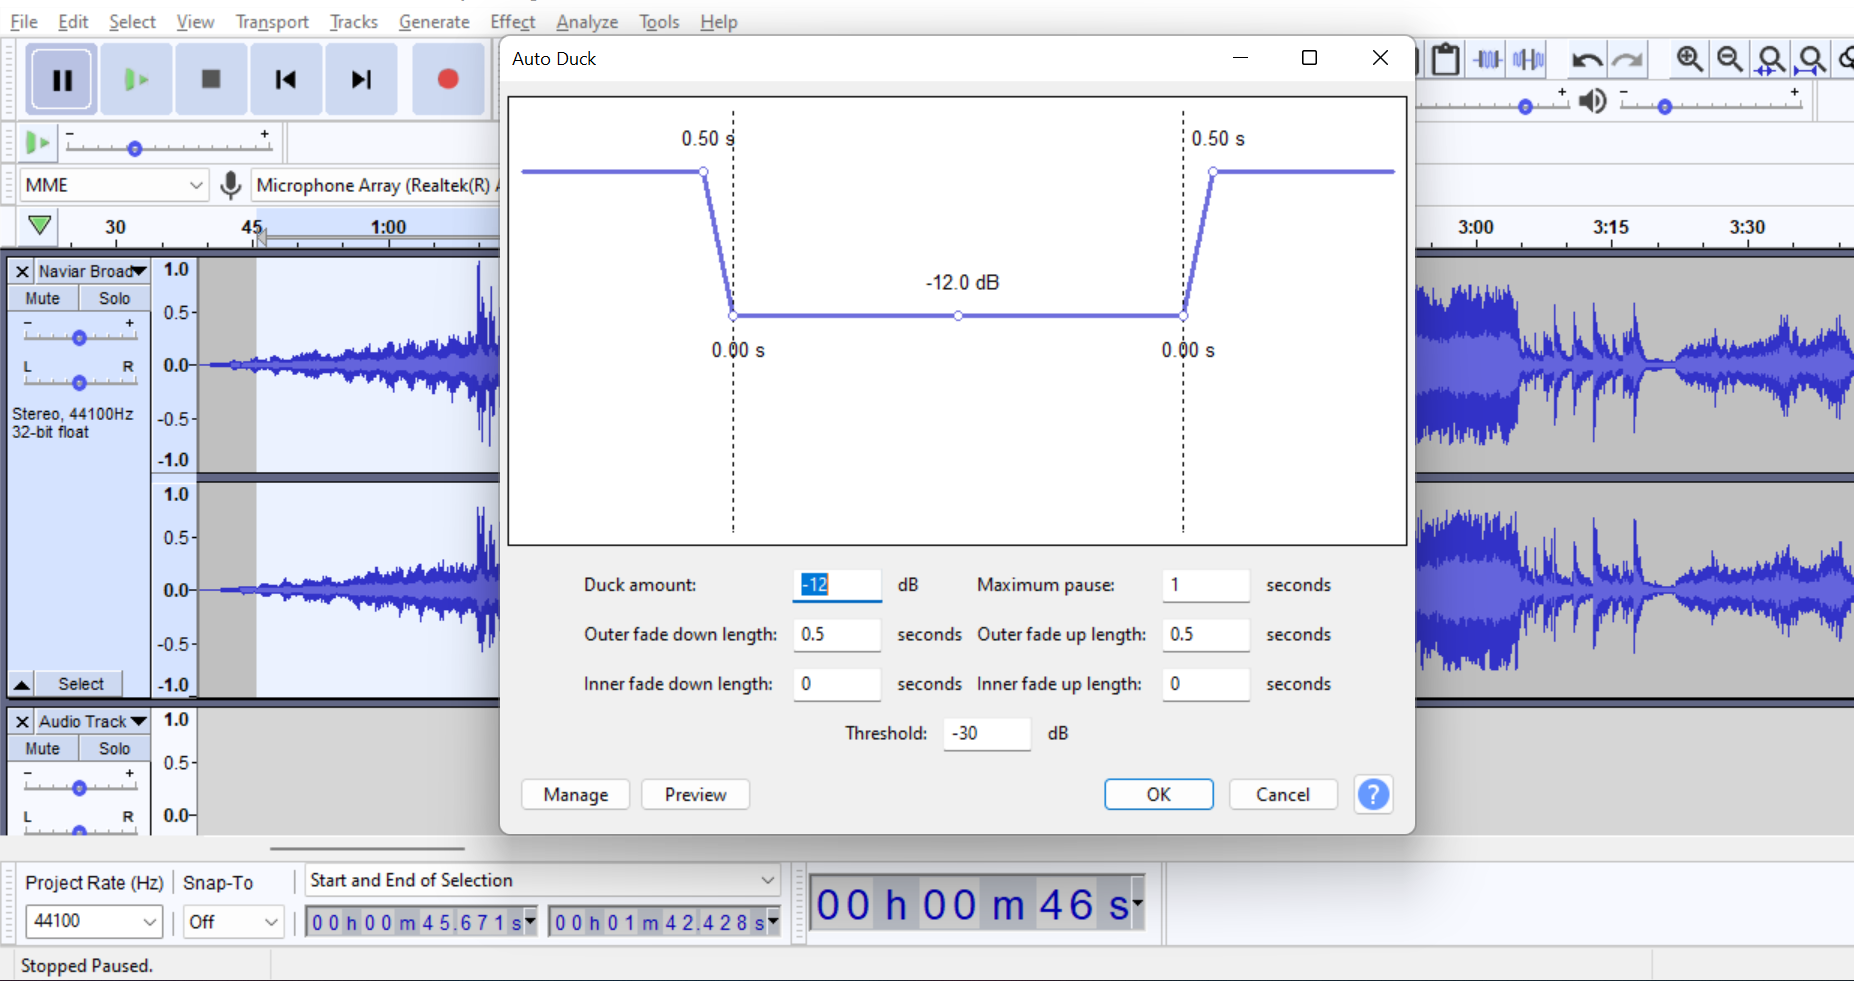
You can also do this by adding fade-in and fade-out effects or with your Envelope Tool, but it’s much easier and time-saving using Auto Duck.
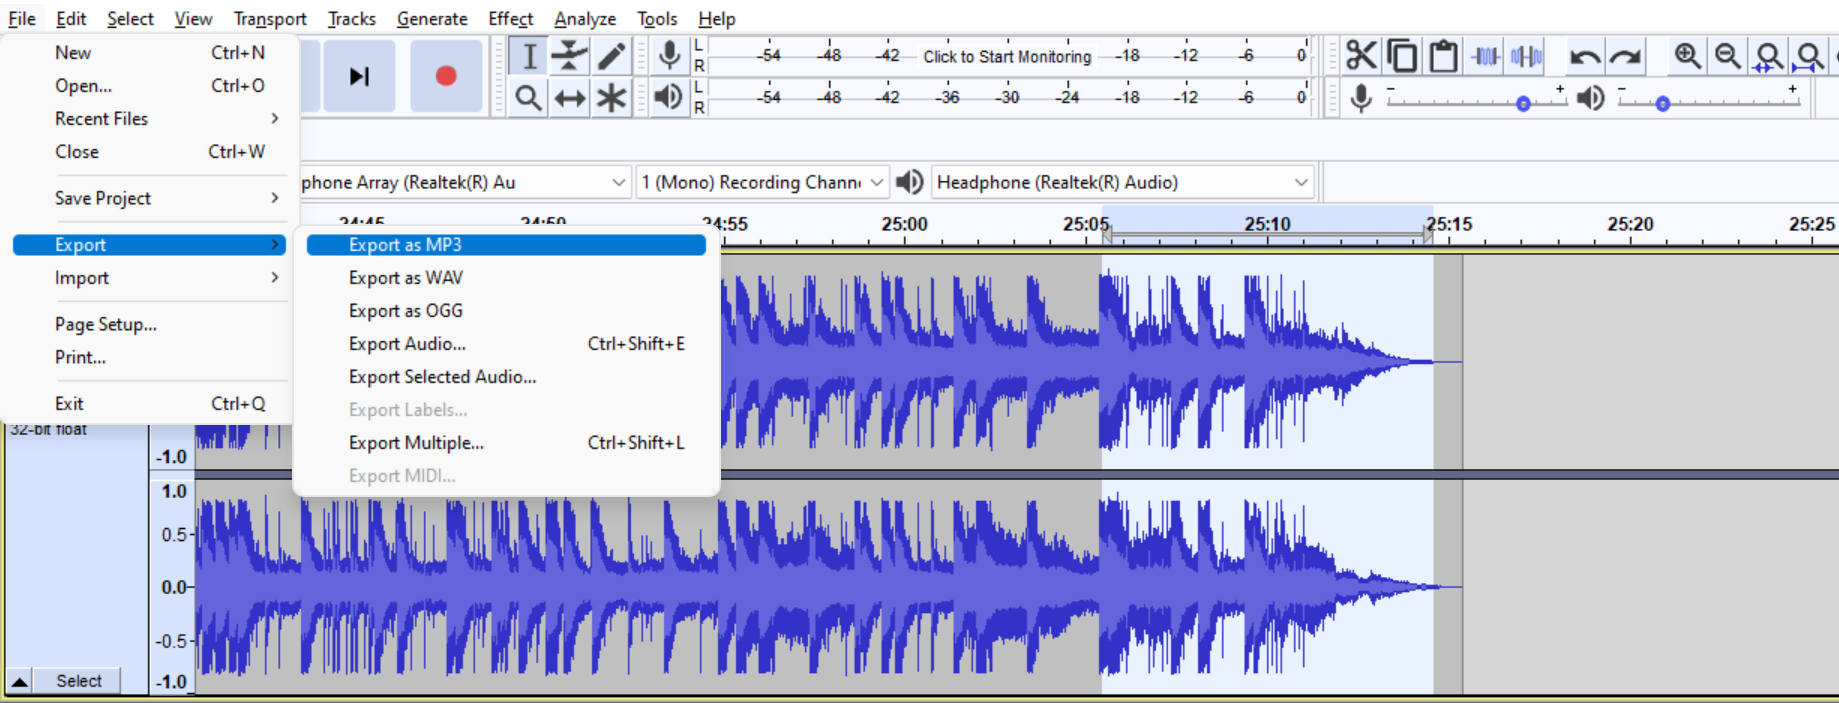
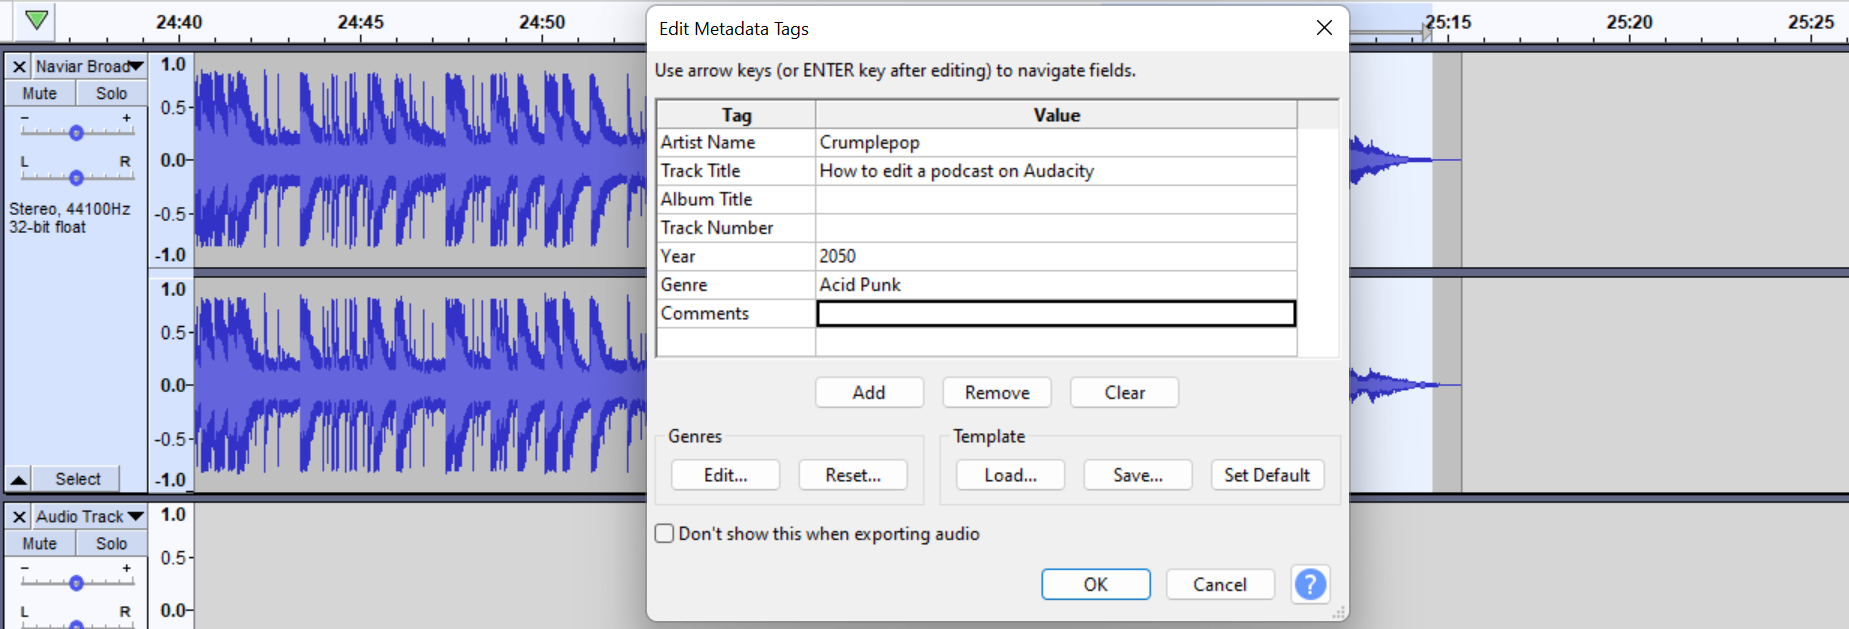
You made it! You just completed your podcast editing and are now ready to share it with the world. There’s just one final step to do it, which is to export it correctly.
Keep this guide for future reference, and stay creative! If you want to know even more about Audacity, then we recommend reading about Audacity Tips and Tricks.


